
For this SOLIDWORKS drawing tutorial, I decided to take the baby swaddle I designed in this tutorial, and show you how I would create the drawing sheet for production. I demonstrate a range of features in this tutorial, including inserting drawing views, adding dimensions to views, inserting a Bill Of Material (BOM), creating a custom column in the BOM, adding Pantone color swatches using the area/hatch fill tool and format line toolbar, the final editing the sheet format.
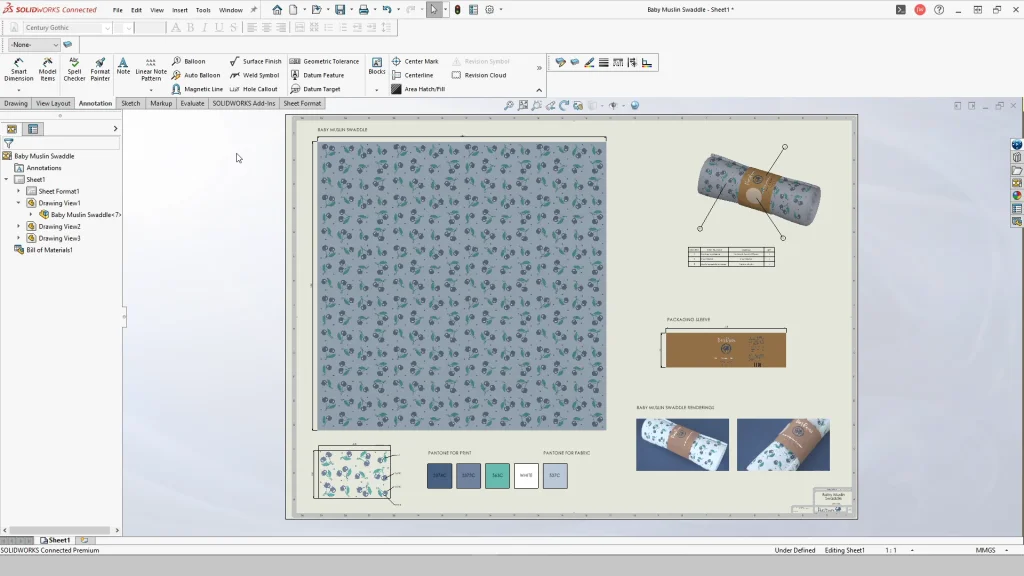
I began with my baby swaddle assembly open and made a ‘drawing from assembly’, using browse. I used one of my own drawing sheet templates that I created for my baby products brand ‘RiverRainn’. Opening this, you’ll see that I have created my own layout suitable for my product, this includes my brand logo on the sheet. I also have some headings inserted with linked properties, for the authors name, drawing title, date, material, units and scale.

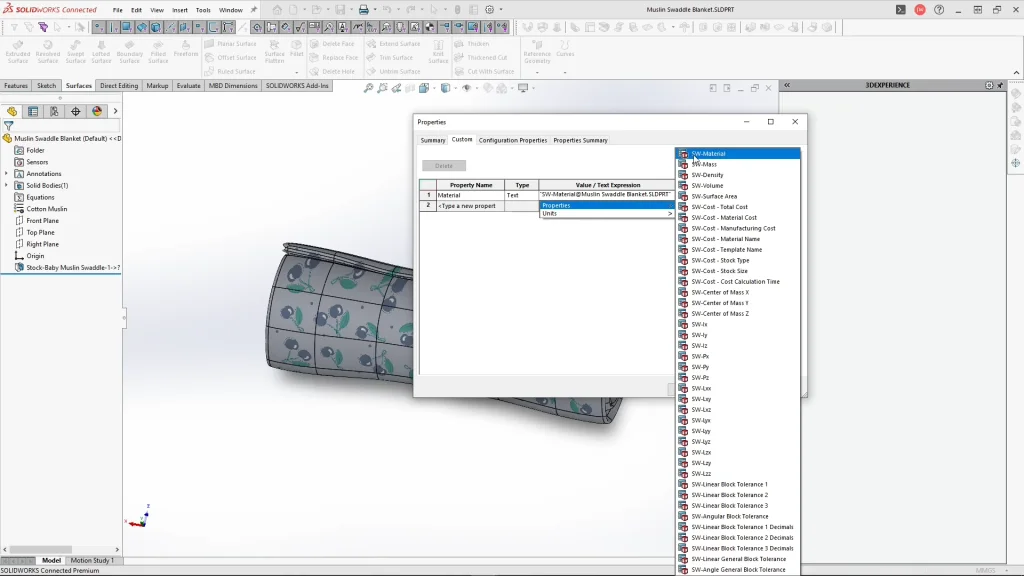
With my baby swaddle assembly drawing view selected, I used insert, tables and bill of materials. I decided to change the ‘C’ column from a ‘description’ column to ‘materials’. To do this you double click the ‘C’ table box and under property name select material, each part’s material will then become visible. Part files need to have materials applied to them for this to work. You also need to create the link for the custom property. For each part, I needed to go to the file properties icon and select’ material’ for property name. Then under the value/text expression column, in the properties drop down menu, select the SW-material link and apply it.
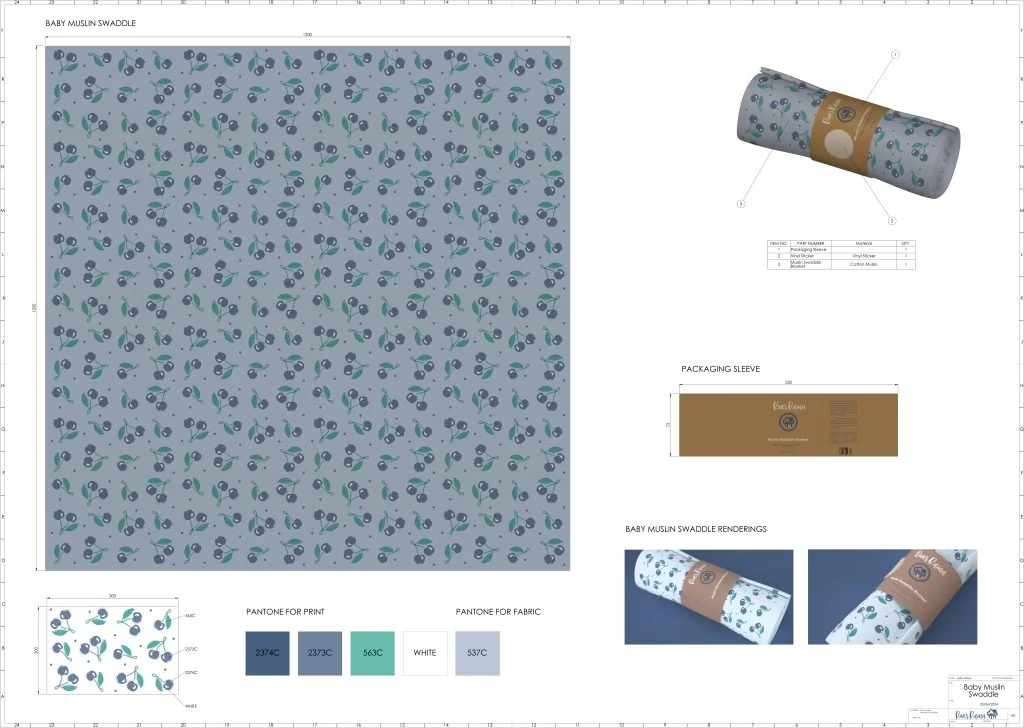
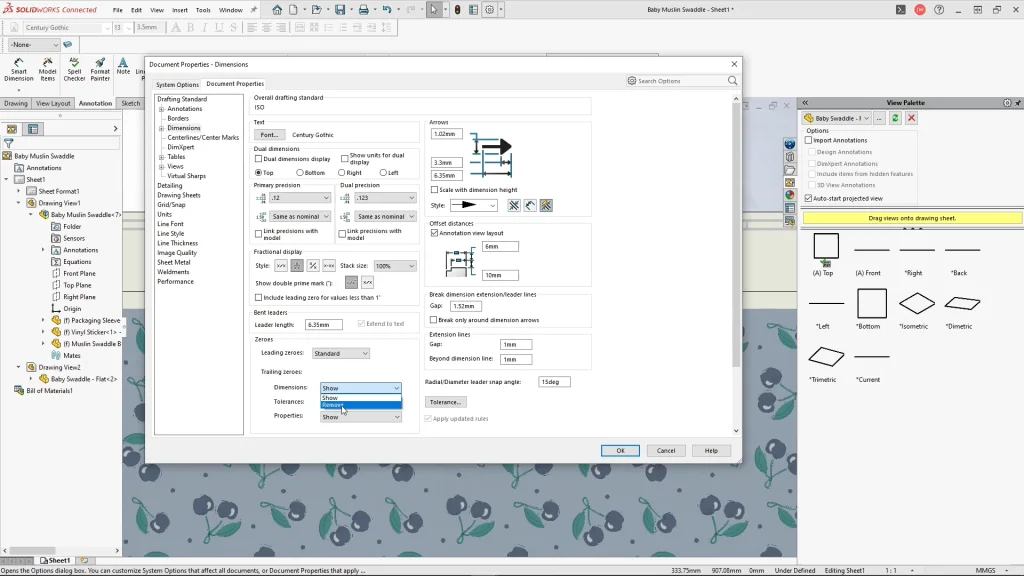
Using smart dimensions, I added dimensions to the height and length of the ‘top view’ of my baby swaddle flat part, and packaging sleeve ‘top view’. If you’re ever creating a drawing and your dimensions are including the extra trailing or unnecessary zeros, you can remove them. Under the settings icon, document properties tab, open the dimensions options, and under the trailing zeros section, drop down the dimensions menu and choose remove. Applying this removes any future trailing zeros from your dimensions.
For this kind of design that requires fabric printing, I added a tile of the pattern which explains to the factory how large to print the pattern. So, using a section/tile of my pattern, I created a PNG file to bring in to my drawing. With insert, picture, I bring in the tile pattern PNG file. The image is then resized to be the same scale as the flat view of the baby swaddle. I couldn’t add dimensions to my image, so instead I sketched a rectangle over the top to input the dimensions for the tile, at 200 by 300mm, which gives the factory clear instructions on how large the print should be, they can just repeat the pattern tile.

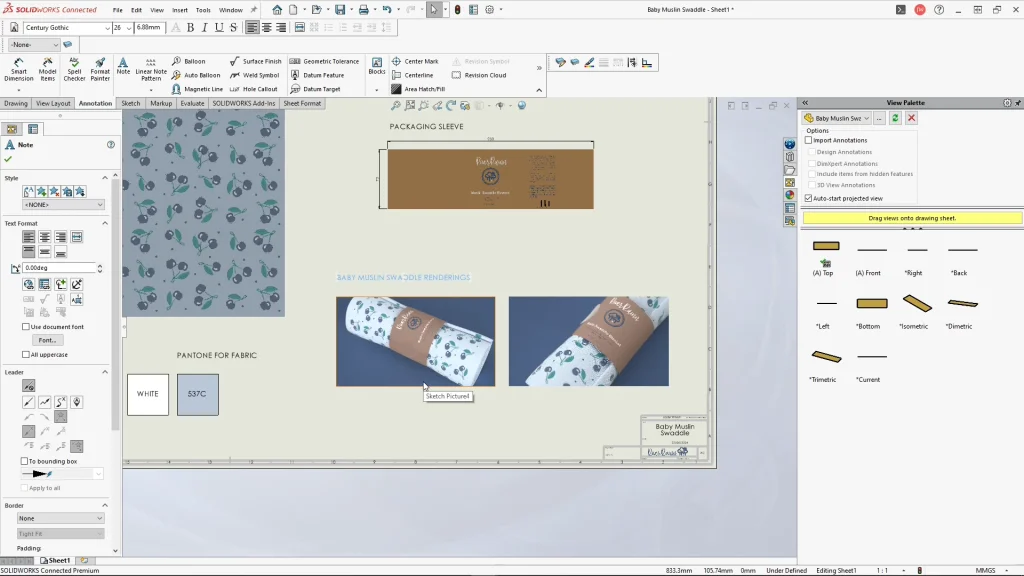
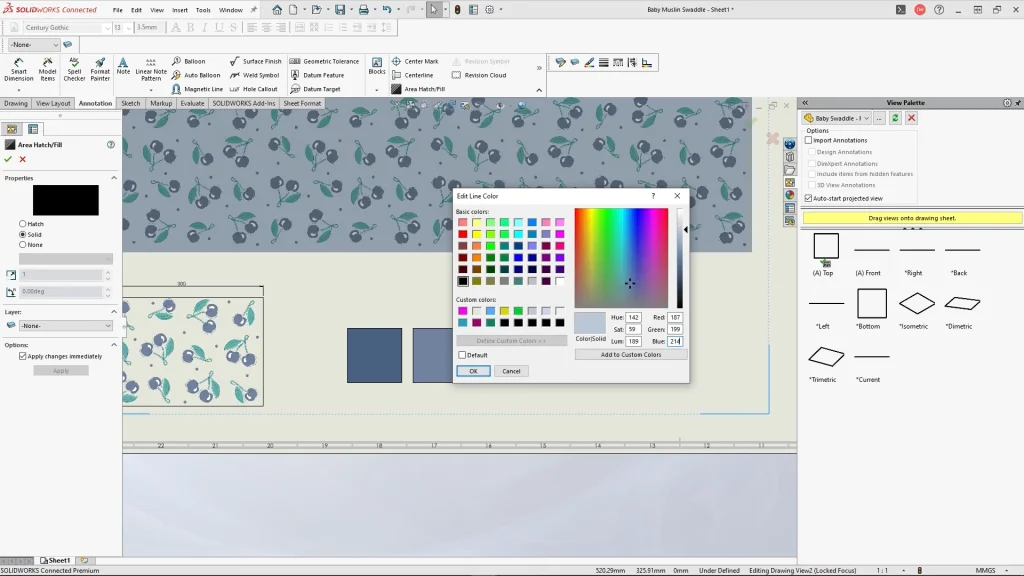
The factory printers need to have the color information, which can be given using Pantones. I sketched 100 by 100mm squares and used the linear sketch pattern to create 5 boxes for each color seen in the design. To fill each box with a color, I selected the chain, and using the area/hatch fill tool, changed the properties to solid and then applied it. The default color is black, but you can change this by selecting the box again. I used the format line toolbar and edit line color to change the fill color. If you don’t have or can’t see this tool bar, you can search for it under the view tab, toolbars and line format.
Pantones can be input here using the RGB values, when applying the box fills with that color. Then using the note tool, I input the Pantone number or name to each box. I also inserted some text headings above the Pantones to explain where the colors belong. However, to be extra clear on where I need colors to be used, I used the note tool to point to each color on the print and label it with the Pantone color. I used the leader arrow without the auto feature so that I could select specific areas/colors of the image. The auto header requires edges or parts to snap to, but because I’m working on an image it wouldn’t work.
Bringing in the packaging label sleeve top view, I attached the height and length dimensions of the label, it wasn’t necessary to add the thickness of the label, because I had given the material information of textured card 250gsm, which translates to 0.25mm. Finally, I decided to add in some renderings of the Baby swaddle I created in SOLIDWORKS Visualize, these renderings gives the factory another perspective of how I want my final product to look, these are much more realistic representations than a drawing view as it shows off the colors, textures and packaging. The fabric print pattern and packaging artwork are sent in a separate vector artwork. Once complete I export my drawing sheet as a PDF file ready to send off.