
For this tutorial I wanted to share a personal project I’m working on. I decided after having my two sons that I wanted to start designing and eventually producing my own baby muslin swaddles and what better way to test them out than rendering my designs with Visualize. With SOLIDWORKS Visualize I can experiment with different decal patterns and designs, different colors and textures, and also the packaging type and brand logo. The rolled-up baby swaddle and the packaging sleeve was modeled using the 3DExperience Platform’s xShape app, it was then exported ready to be opened in Visualize. This tutorial will have a follow-up tutorial, where I will show you how I would prepare my design for manufacturing using a SOLIDWORKS Drawing.
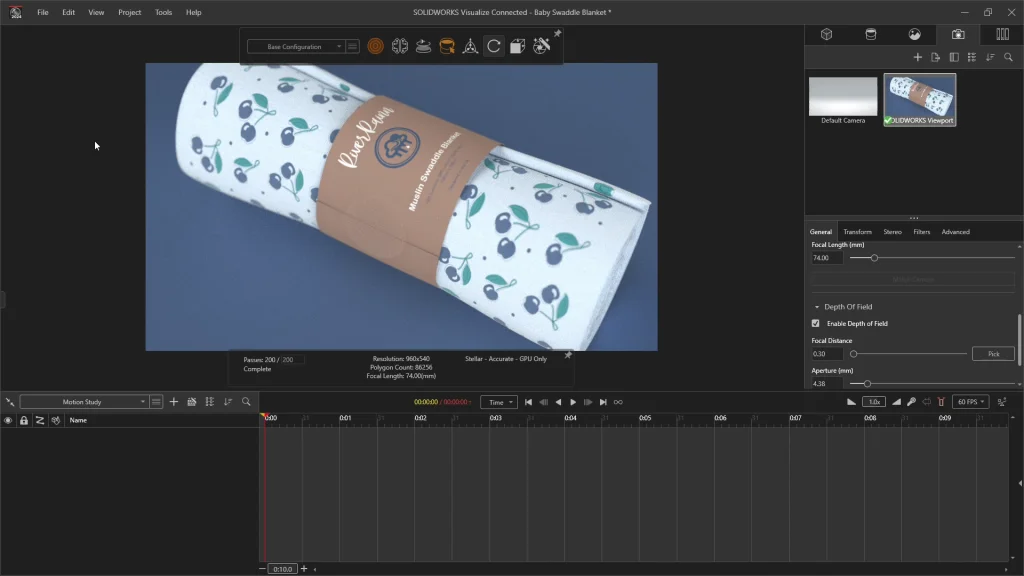
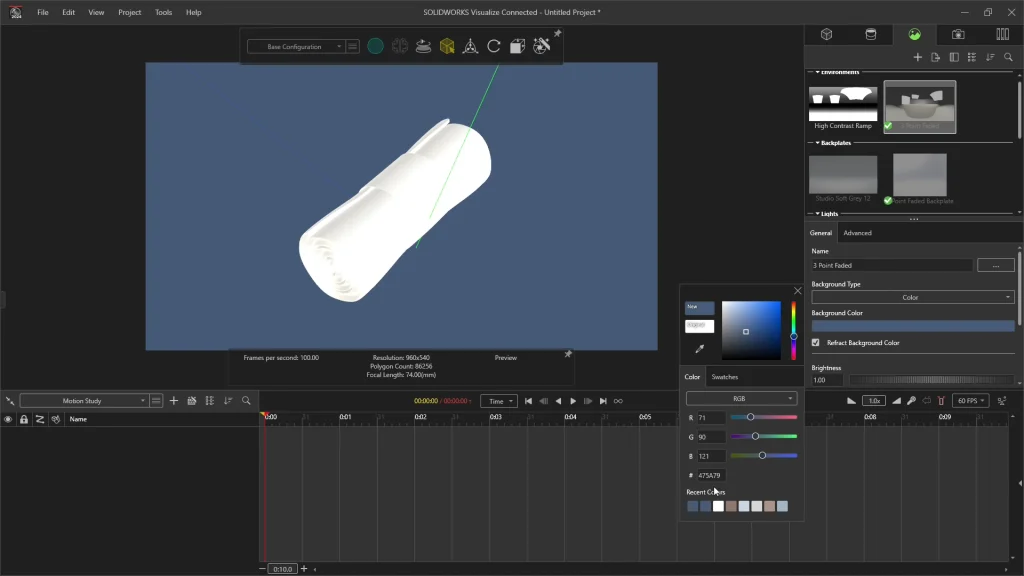
To begin, I imported my model under the model’s tab, before I add any decals or appearances, I like to start with the cameras and environment. Under the cameras tab, I changed the aspect ratio to 16 by 9, this is my preferred ratio for my tutorials, but sometimes I choose the 1 by 1 for social media animations. Moving onto the environment, I hid my backplate so that I the environment becomes visible, and I could change the background type to a color. For this I used a blue as it would complement the blues found in my design.
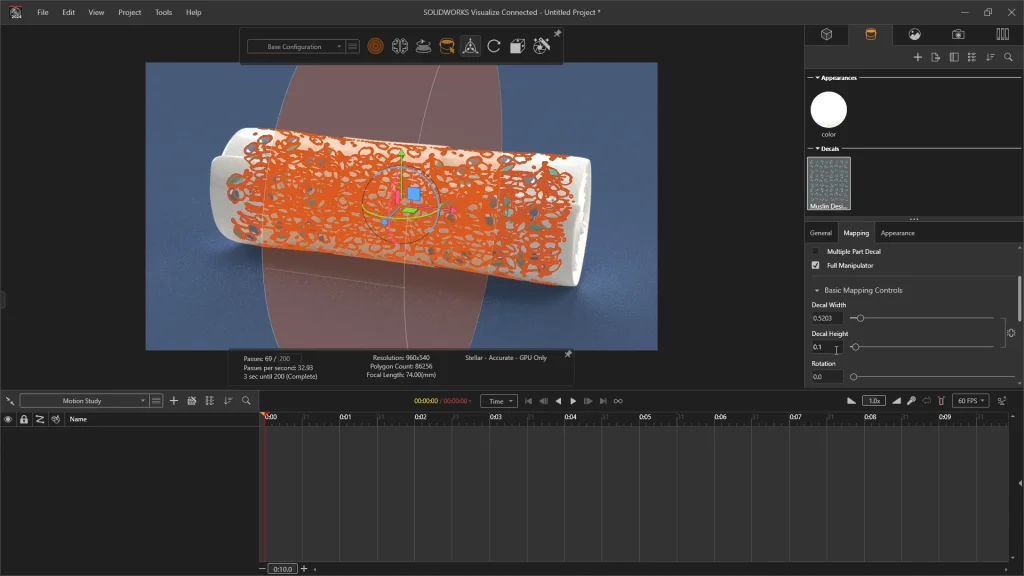
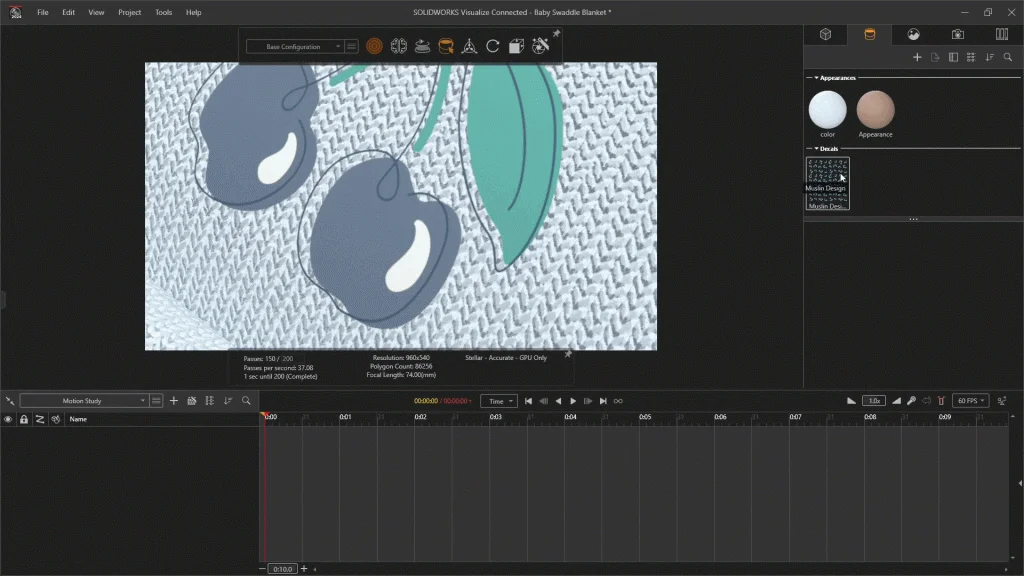
Under the appearance tab, I can right-click and add a new decal, browse and open my baby muslin decal image. My decal image is a PNG file, so the pattern sits onto a clear background, this makes it easier to apply different colors under the decal. From here I could drag and drop the decal onto my model. Because my model is cylindrical in its form, I felt that this would be the best mapping type to choose, when I changed the mapping type to cylindrical, I get a preview in orange. To move this into place, I checked the full manipulator box under the mapping options to give myself more control over moving the decal into place. You can rotate the decal using the manipulator or by typing the angle into the box under the advanced mapping controls.

I needed to uncheck the fixed aspect ratio icon to scale up the decals width until it meets itself around the model. I turned on the accurate render view to see the decal more clearly.
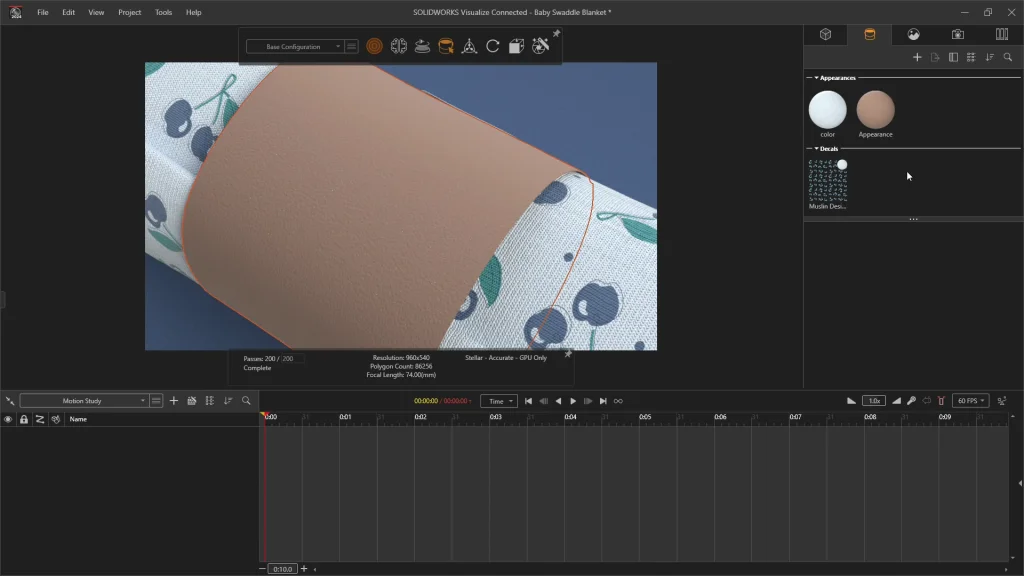
For the appearance of the swaddle, I wanted to achieve a cotton muslin fabric so I used the cloud-based textures, and dragged the fabric, normal texture onto the model, when I dropped the texture, I was prompted to choose what feature to apply it to, so I selected the ‘normal’ box. I resized the texture tile size to 3, the larger the tile number the smaller your texture will appear. For my swaddle color I went with a pale blue to make my decal design stand out. Before I moved onto the packaging sleeve decal, I needed to assign an appearance to the muslin decal, without this, the decal can look more like a sticker or paint than a screen or digitally printed fabric. When assigning an appearance, you want the texture and properties to match, so for this I used the blue fabric appearance which allows you to see the fabric texture through the decal. The only issue I have had with this is if the color of an appearance is very dark it can change the color of your decal, you will see how I deal with this with the packaging sleeve decal. I will note, you can change how the appearance maps onto the decal but for this design it wasn’t necessary.
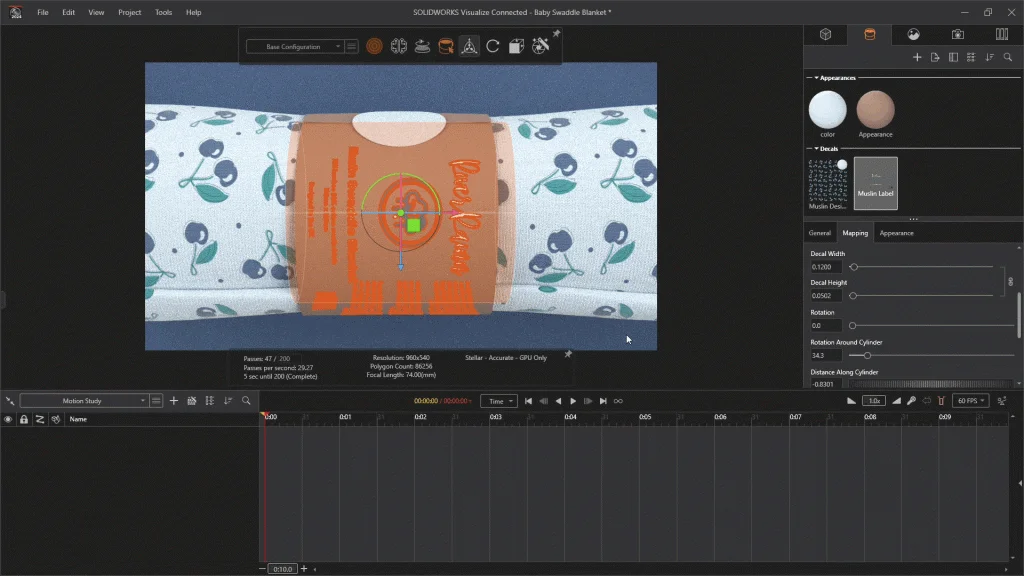
For the packaging sleeve, I added a new plastic appearance and used it to create a textured card appearance. Firstly, I changed the color to a cardboard brown, I amended the roughness to 0.7, and the index of refraction to 1 to remove any sheen that way the card way matte. Finally, I added a cast normal texture which gave the appearance a hammered card texture.
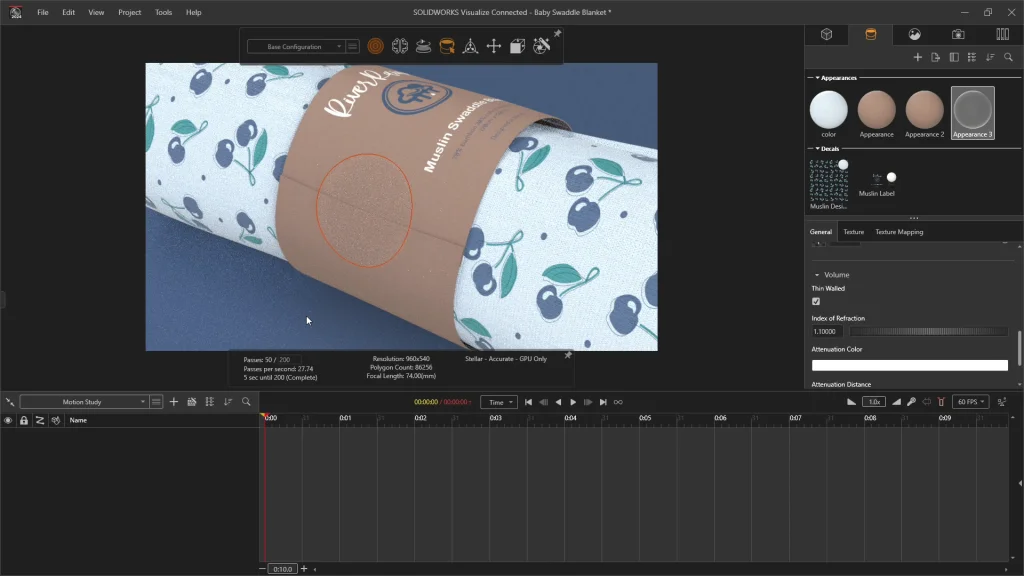
When I added the packaging sleeve decal, I also used cylindrical mapping, this was a much easier model to apply the decal to. When I assigned the current brown card appearance to the decal, you can see below it darkened the decal. To fix this, I duplicated the current card appearance and edited the color to be a very pale grey, this acts as an undercoat for the decal. For some reason my appearance icons color didn’t update but you can see the effect on the decal. Zooming in to my render window, you can see that the new appearance stops the decal from changing its color and you can see the appearance texture through the decal.
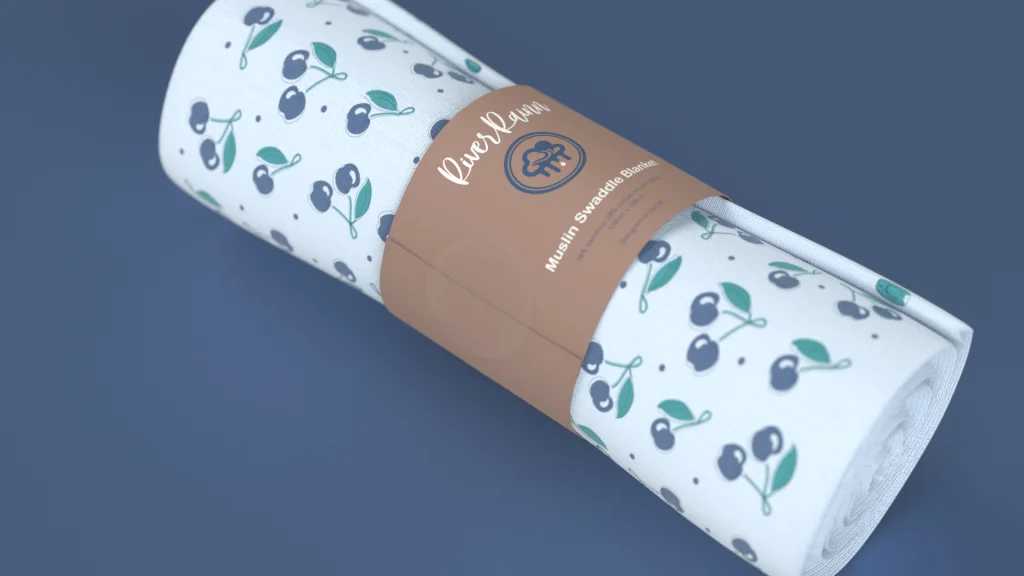
The last appearance I added was for the sticker seal of the packaging sleeve. To make the seal clear, I used a plastic appearance and dragged the translucency to 1, and the transparency to 0.9 so that there was a slight cloudiness to the sticker. This appearance added the final touch to the packaging and enhances the overall details of my rendering, making my product look even more real.
Before I rendered the baby swaddle, I moved the model into a position that best shows off the details of the design. I like to have models like this go slightly off camera too, this is another method of making your renderings more realistic. Lastly, I used depth of field under my camera’s tab, this allows me to pick out details for my camera to focus on and adds a subtle blur around the outer frame of the camera. I rendered my images without the denoiser as I wanted all the textures of the model to be picked up. You can see more renders at the end of the tutorial.