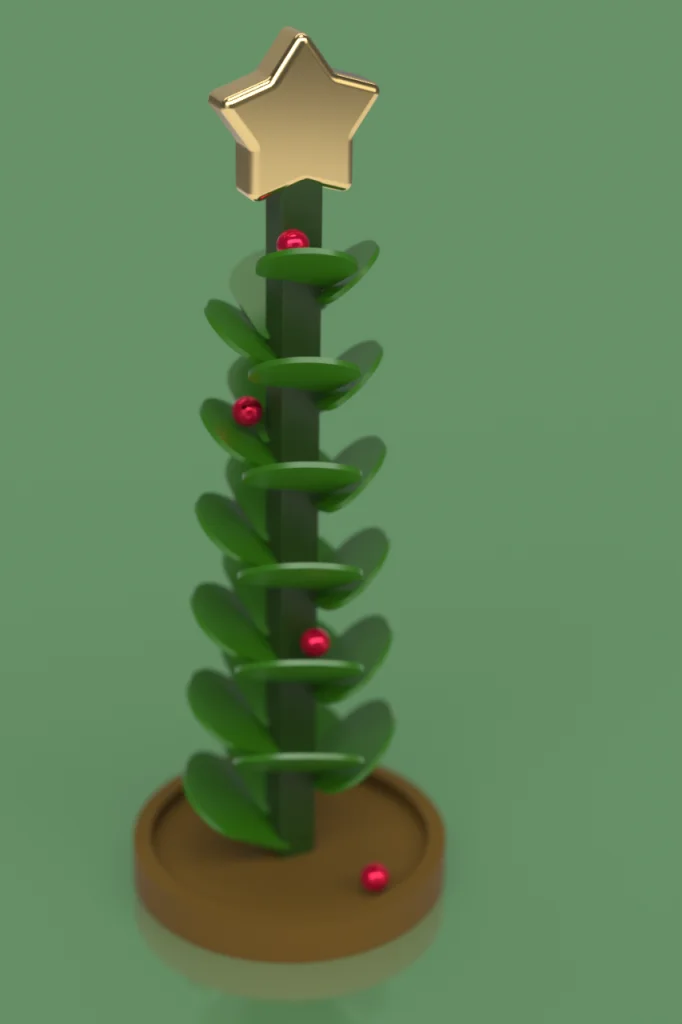
This tutorial was inspired by a recent 3DExperience Challenge. The challenge was to create a model inspired by the Fibonacci sequence in SOLIDWORKS and then render a high-quality 2D image with the help of 3DEXCITE’s xStudio rendering software. You can see my entry rendering below. The submission was our own interpretation of Fibonacci’s influence through either form, function, pattern, or proportions. So, I decided to show you how I modeled this and also how I animated the toy too. The little bell part is available to download here
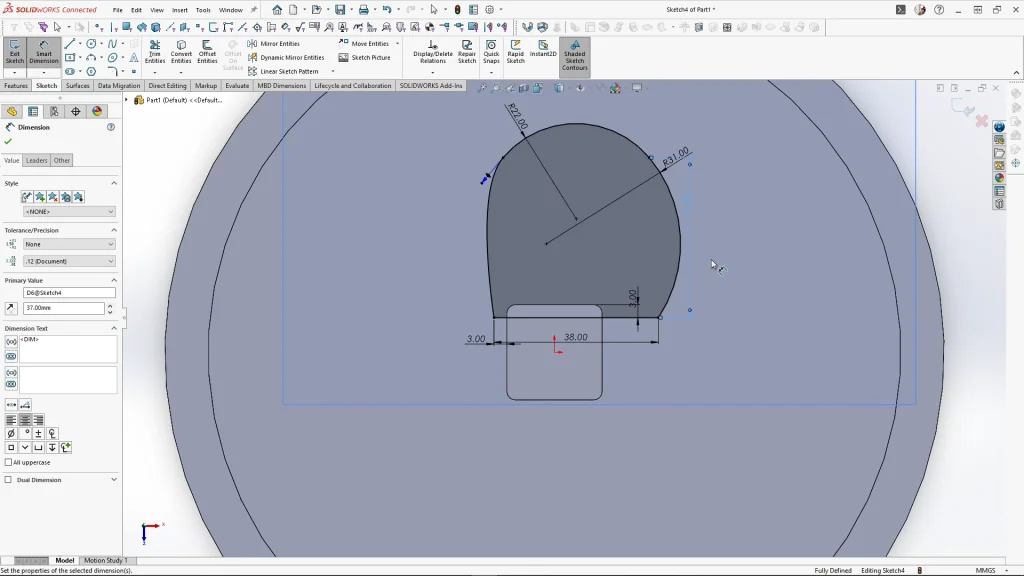
Skipping to the leaf sketch, I have my base part modeled in a SOLIDWOKRS Part file, selecting the top face of the tree post extrusion, I added a new plane 50mm below the face, flipping the offset. The shape of the leaf is very important and must be sketched correctly otherwise, when I start patterning the leaves they will overlap each other. The leaf sketch also needed to overlap the center post as the leaves will slot into the post. Ensure you fully define your sketch and add all of the tangent relations between the two arcs and the spline. The leaf was then extruded by 2mm, unmerged, keeping the bodies separate.
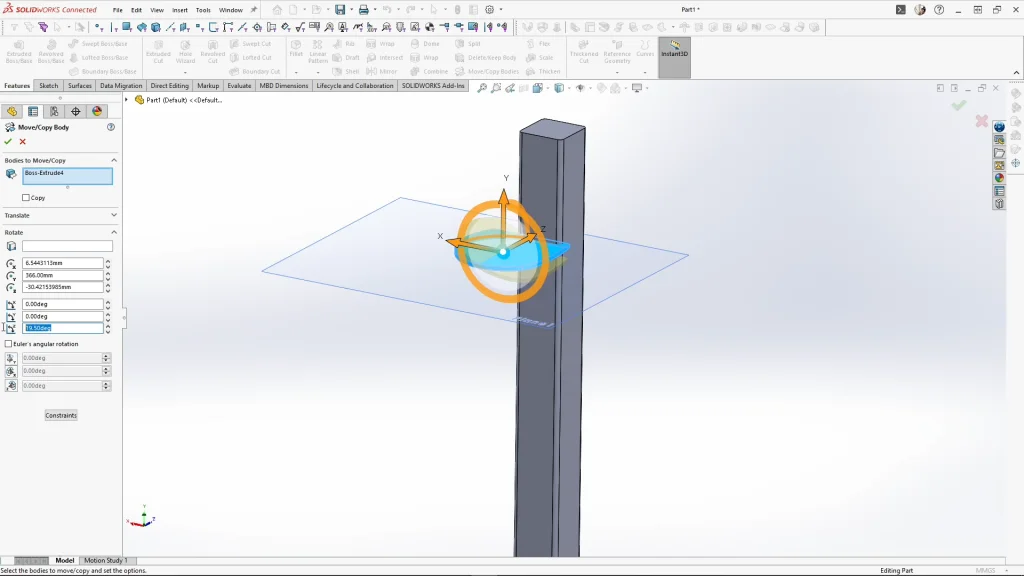
Using move/copy bodies, selecting the leaf body, I ensured that the copy box is unchecked as I only want to move the existing body. Then I rotated the body along the Z-axis by 18 degrees. Then again using move/copy bodies, I rotated the leaf, this time using the straight edge, inputting 35 degrees. It’s actually quite important to rotate the leaf in that order too, otherwise it will be in the wrong position. I softened the leaf appearance with a fillet on each of the sharp corners, I always add my fillets outside of the sketch as they are easier to edit.
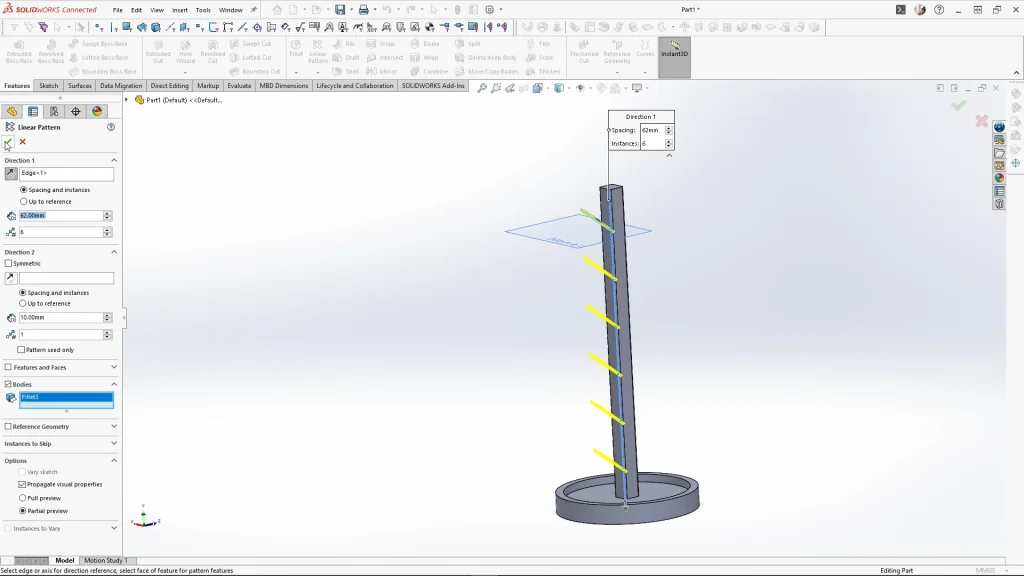
Using the linear pattern feature, I used the tree’s center post for the pattern direction, and used bodies, to select the leaf body to pattern. I applied 6 instances, spaced apart by 62mm.
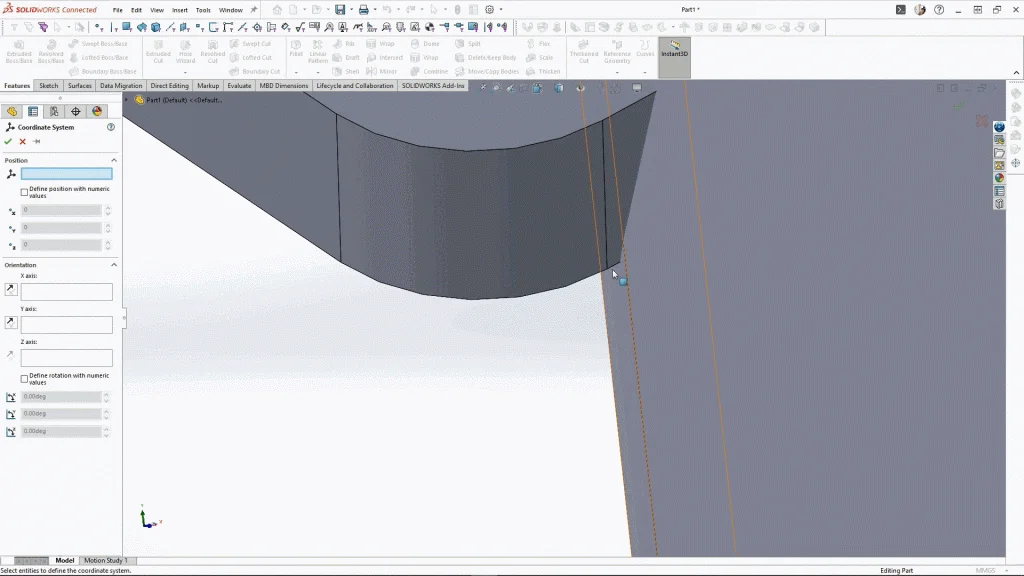
I attempted to use a variable pattern to enlarge the leaves as they go down, but it wouldn’t rotate the leaf, so I decided to try it a different way. So before I scaled up each leaf, I needed to add a coordinate system to each leaf. This will allow me to scale the leaf by a specific point of the leaf. Under reference geometry, I selected coordinate system, and starting with the 2nd leaf down as the first leaf will remain the same size. I could select the corner point of the leaf, and then select edges for the X and Y axis to attach to. Once applied you should see the visible coordinate system. If you can’t see it, you may need to toggle the view on under the view options. I repeated this process for each leaf.
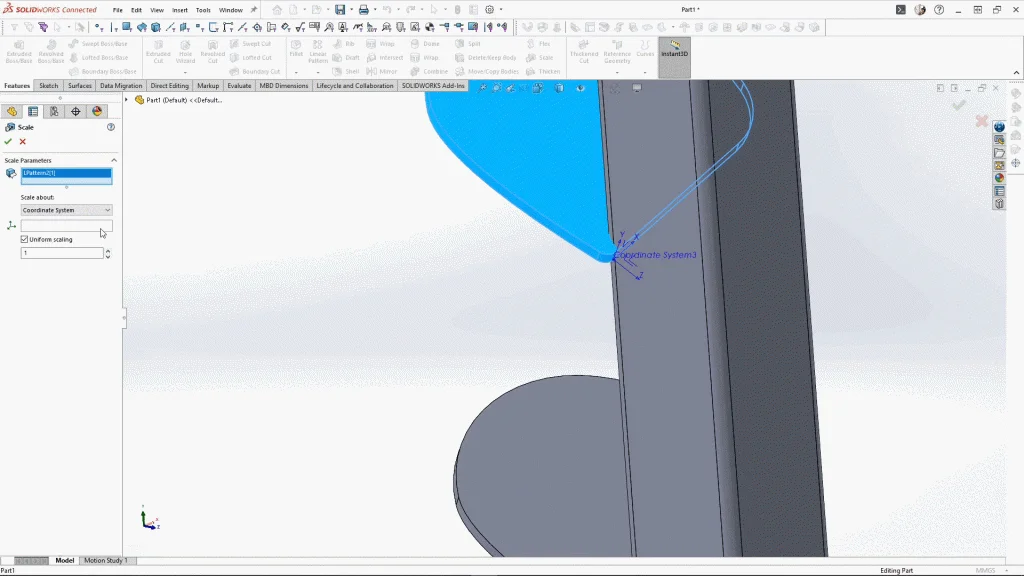
Then using the scale feature, I’m selecting the second leaf down for the scale body, then under scale about I’m changing this drop down to coordinate system. For this, I can select the bodies coordinate system here. However, I’m not using uniform scaling as I want the thickness of the leaf to remain the same throughout. Unchecking uniform scaling, I can input the scale options across each axis. Ignoring the Y axis (thick would thicken the leaf) I input 1.1 in the X axis and Z axis and applied it. This scales the leaf up which is more visible from the top view. I then repeated this feature for each leaf, scaling the leaves up by increments of point 1. Ending the last leaf by 1.5.
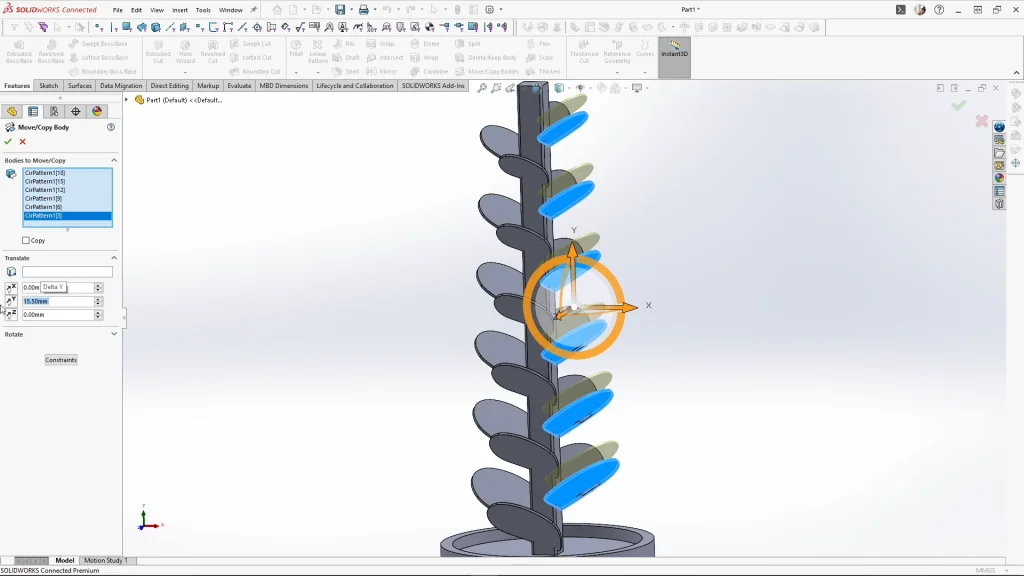
Next, I used the circular pattern to pattern the 6 leaf bodies with 4 instances, with equal spacing at 360 degrees. For the tree run to work, I needed to stagger the leaf heights to allow the bell to roll down the leaves, almost like a spiral staircase. Using move/copy bodies and selecting a column of leaves, ensuring copy is unchecked I moved the column down by 15.5mm. Moving around to the next column of leaves, I’m using move again and selecting the next 6 leaves, I’m moved them down by 31mm, this is the lowest level for the leaves. Then for the last column, I moved the last column of leaves up by 15.5mm.
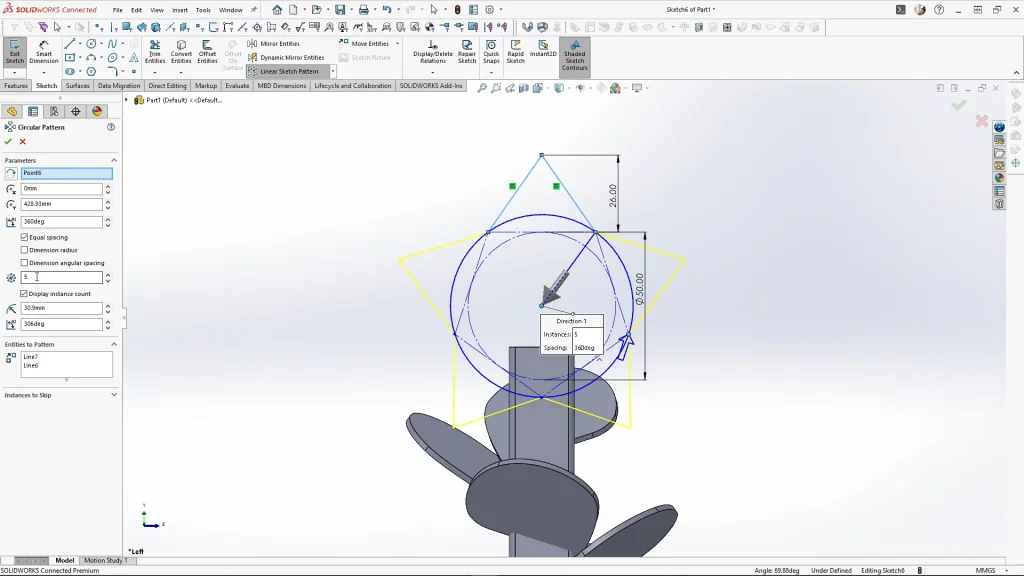
Moving onto the star, sketching onto the right plane, I used the polygon and changed the parameters to 5. I used the pentagon for construction, ensuring I’m center to the post. Then sketching a point on top of the shape, I made the two lines equal to each other and dimensioned the points height to 26mm. I then used circular sketch pattern to pattern the lines from the pentagons center point by 5 instances. This creates a star. I then extruded the star midplane, unmerging the result. I also softened the edges of the star by 5mm, the fillet selection toolbar is useful for making multiple edge selections at once.
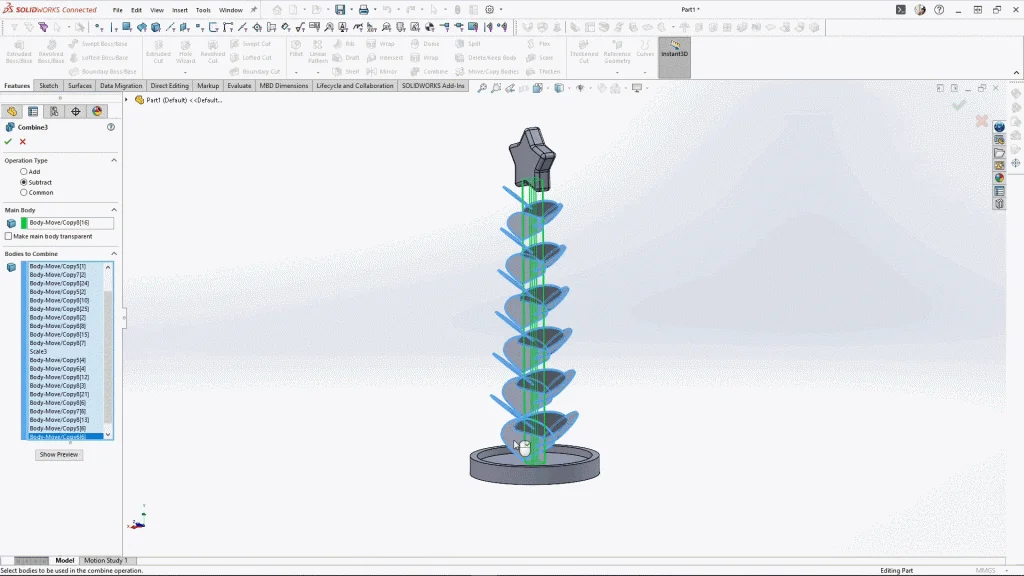
When applied, I needed to add features to make the part look how it should if it was made out of wood. To do this, I used the move/copy body feature to make 1 copy, this time of the post and all of the leaves. Using the combine feature, with operation type on subtract, I selected the star part as the main body, and the post as the body to subtract. This cuts away the post’s body copy away from the star. Then for the second combine feature, I used subtract again, selecting the post part as the main body, and then one of each leaf copy for the bodies to subtract, and applied it. You’ll then be able to see the slots cut into the post like below.
With my model complete, I applied some appearances to make my tree more festive, and brought the tree into an assembly. Dropping in the bell part at the top leaf of the tree, I could create a motion study. In my motion study tab, I had motion analysis selected, and for my study I applied gravity to my study along the Y axis, and applied contacts across both the tree and the bell parts. Under the motion study properties options, I ensured to turn on use precise contacts before I ran the study.
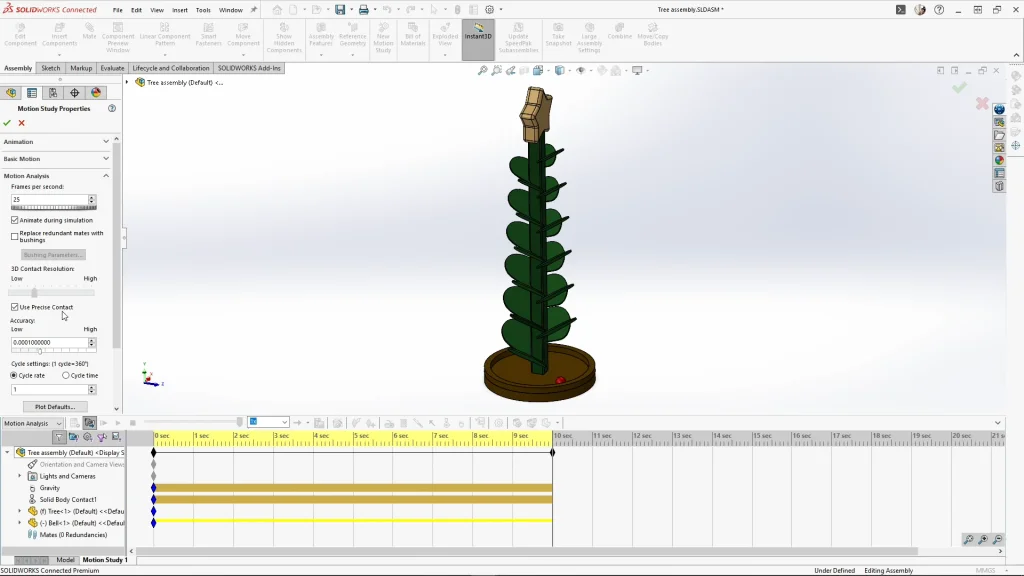
You will see at the result of my motion study at end of the tutorial, it was exported and rendered into SOLIDWORKS Visualize. I did add some extra models including some festive baubles, and added the depth of field to get the focused camera shot of the tree.
