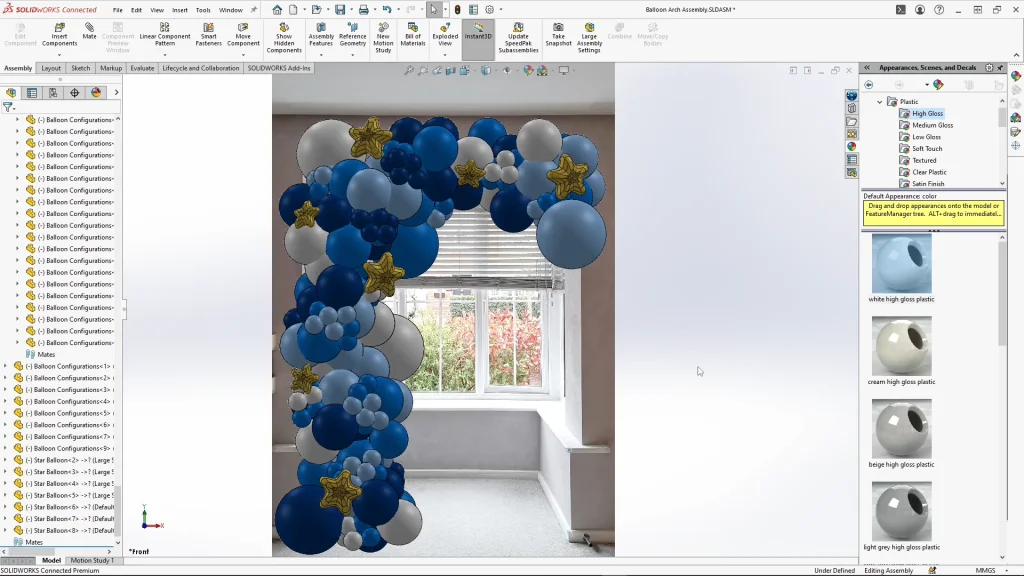

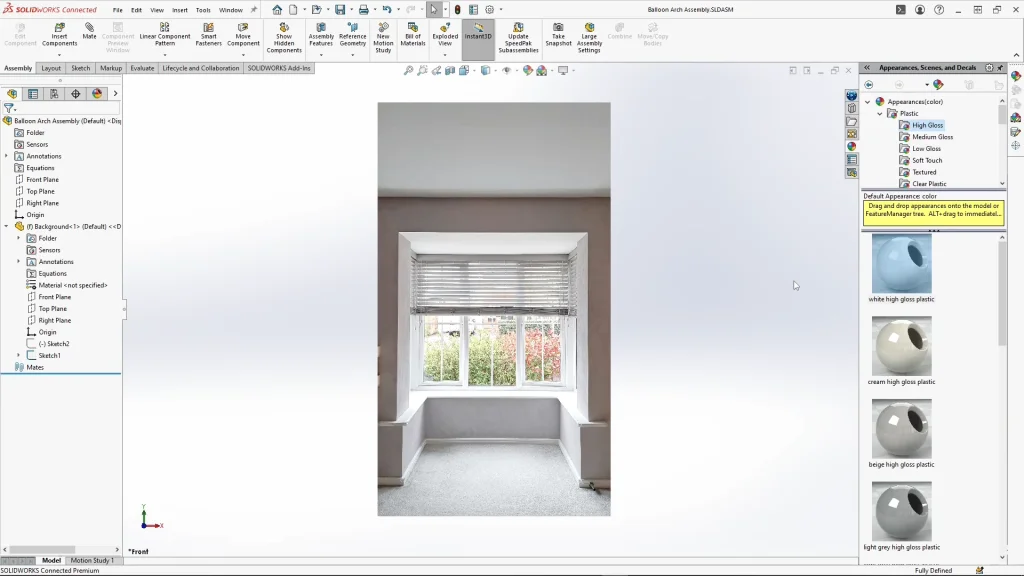
Yes, modeling a balloon arch in SOLIDWORKS for my son’s birthday may be a little extreme for some people, but I am a planner! and it has its uses, so let’s dive in! As a guide for my balloon arch, I used a photograph of the space in my living room where I will be assembling the arch to map out where the balloons will go. The photo has been enlarged to scale to ensure the balloons fit and will help me to determine how many I will need for when I build the real thing. I have my image already within the assembly I will be using to create the arch.
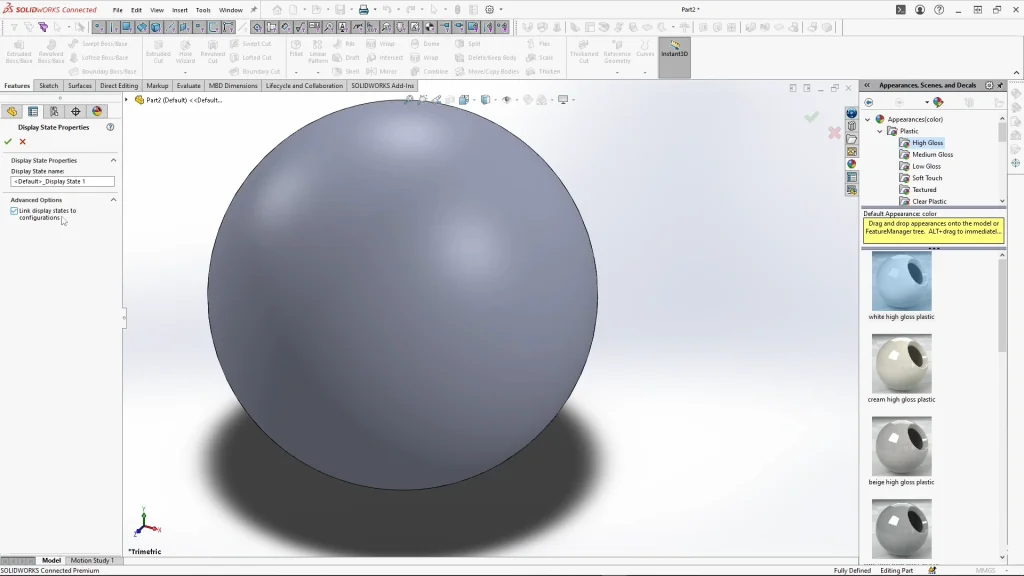
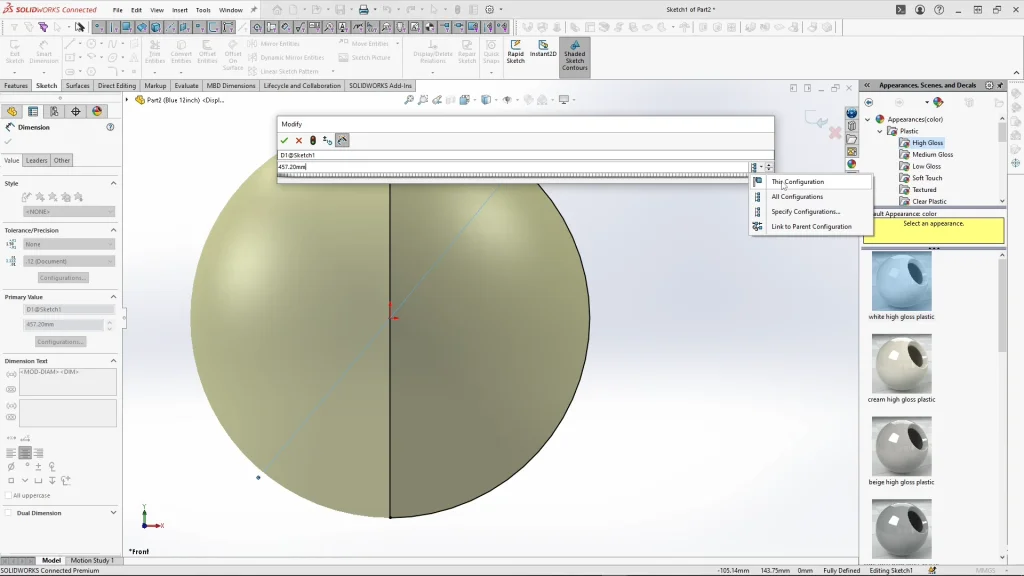
I began in a part, and sketched an 18-inch circle from the axis and halved it for revolving into a sphere, this is the largest balloon size. I don’t need to model the balloon with the tied end as you don’t see this when you create a balloon arch. For some context, you tie together two balloons, which makes it easier to twist together balloons to form clusters. Also, when blowing up the balloons you let some of the air out until the balloon becomes more rounded, so a spherical shape is a good representation.
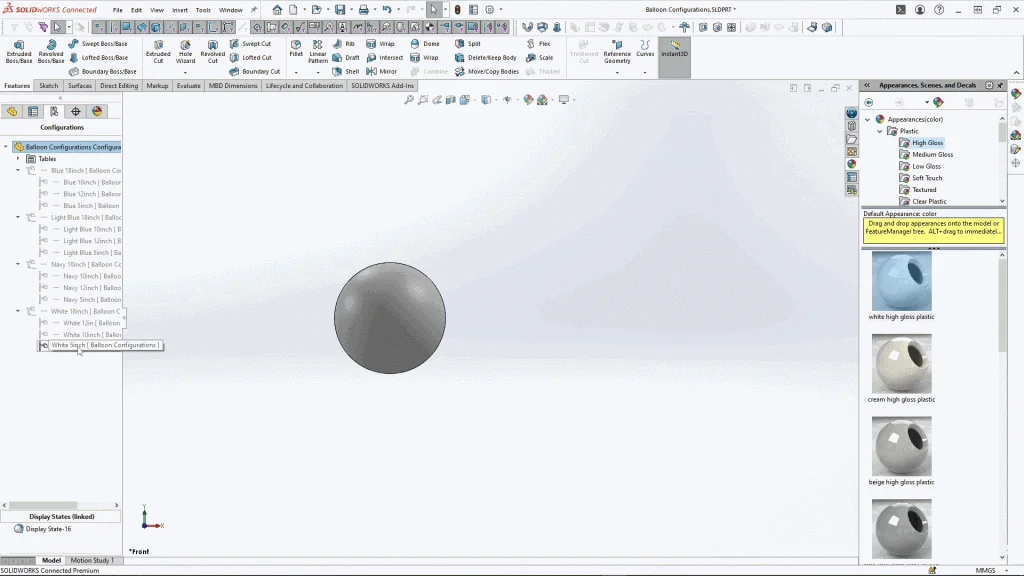
Because I’m creating different balloon colors, I went to my display state properties, and turned on ‘link display states to configurations’. This will allow me to change balloon colors between configurations, and it wouldn’t affect previous configurations.
My first configuration, I applied a blue appearance and renamed it, “Blue 18-inch balloon”. From here, I could then right click onto the configuration and add a derived configuration, I repeated this process for each of the other 3 balloon sizes. When creating other balloon sizes, I edited the revolve sketch, but before I input dimensions, I changed the configuration option dropdown to only apply the change to the current configuration. From here I could input 12-inch into the dimension box and apply it, creating a new derived configuration of the blue balloon.
I repeated the process to create new configurations for light blue, navy and white balloons, each with 3 derived configurations for more balloon sizes. In the end I had 16 different balloons. Something I like to do when I’ve finished is to click back through my configurations and make sure the colors change correctly and the balloon sizes appear to get larger or smaller.
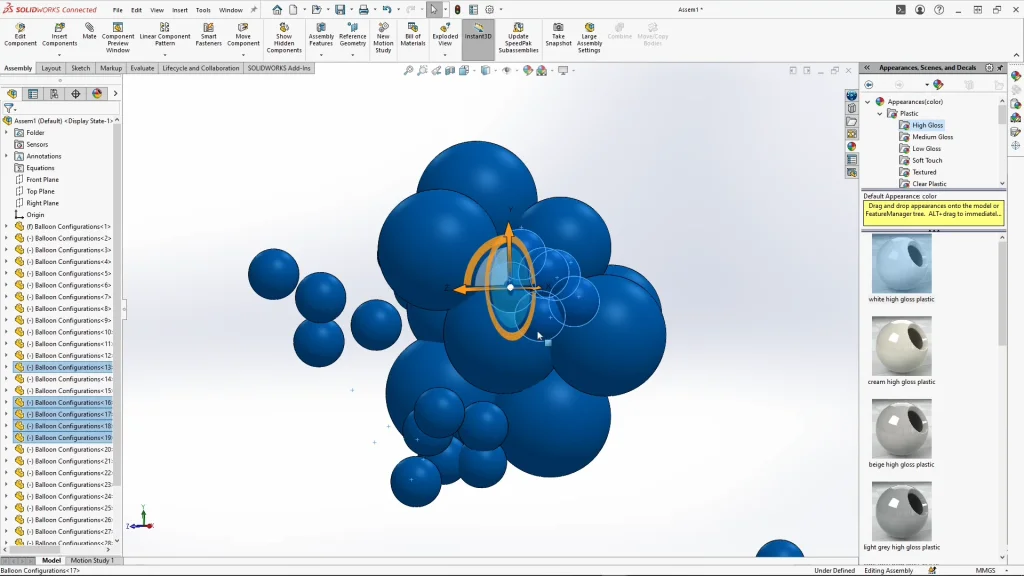
At this stage, I could make an assembly from part. Selecting the pin within insert components to drop in multiples of the part, in this assembly I’m forming a balloon cluster. This is how balloon arches are created, using separate clusters that are tied together. For the cluster, I dropped in the blue 12-inch balloon first in groups of two as this is how the balloons are tied up. Once these are in, I’m able to select a balloon and change their size using the configuration drop down, I didn’t change the colors at this point to keep it simple. There’s no real right or wrong way to do this part, but I try to arrange the balloons into a random cluster where the balloons may cross into each other slightly, with the aim to close-up some of the large gaps. I didn’t place any large balloons into the cluster as they act as feature balloon to the complete arch, so they’re added to the final assembly. When it comes to the smallest 5-inch balloon, I inserted these into small clusters of their own ranging from 5-7 in each grouping, these act as gap covers for the larger spaces seen through the other balloons. When multiple balloons/components are selected, you can select one from the tree holding control and the transform arrows will appear allowing you to move and rotate multiple parts at once, making it much quicker to form the cluster.
The final cluster was brought into my assembly with the image of my living room, I dropped the clusters around the bottom left side, up along the side of the window and along the top, I rotated some as I dropped them in, to make the balloon placements more random. I added in some of the larger 18-inch balloons in areas where I felt I needed to fill and also bulk up some areas, again this part of my tutorial is open to design freedom, it takes a lot of tweaking, moving and rotating balloon clusters until I was happy with the layout. Once I was happy with the layout, I could start selecting the balloons to begin changing the colors. Selecting a balloon, I could change the configuration to another color, ensuring I had selected a balloon of the same size. Checking enter, or the tick to apply the change, the change will apply to all of the same balloons from the assembled cluster. If you wanted to change the colors in a different way, you could drop in balloons individually and change the colors that way, or for a range of differently colored clusters, there are many possibilities here.
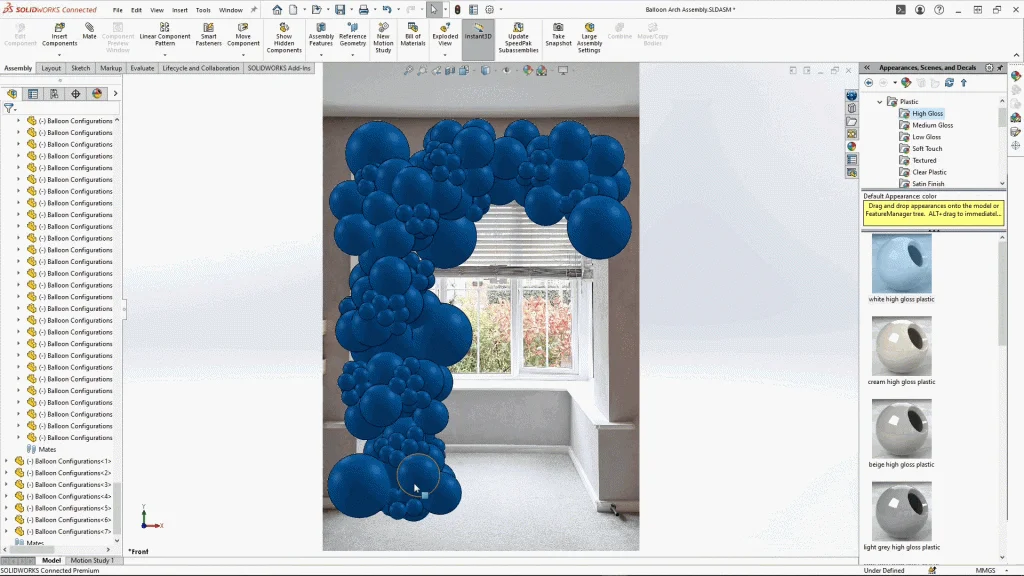
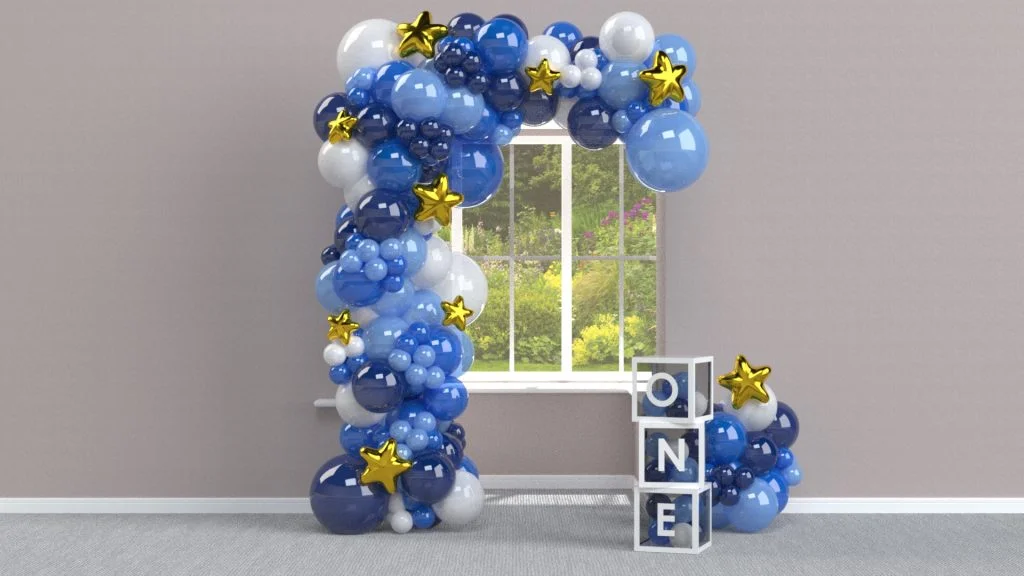
Finalizing the balloon arch, I added some star shaped balloons using a star model I had created from a previous tutorial here modeled in xShape. The party theme will be twinkle little star so this will finish the arch nicely. I used two different sized stars that I placed around the arch, spaced apart and dragged into place against the arch, sometimes rotated to appear more natural.
With everything in place, I saved the assembly. The great thing about this model is that I can use a bill of materials to check how many of each balloon I’ll need to create the final design. It will stop me wasting money, but it will also help when it comes to my son’s birthday and I’m creating his balloon arch, I can use the rendering and model as a reference to duplicate it. You can see below a rendering of my balloon arch which I created in SOLIDWORKS Visualize.