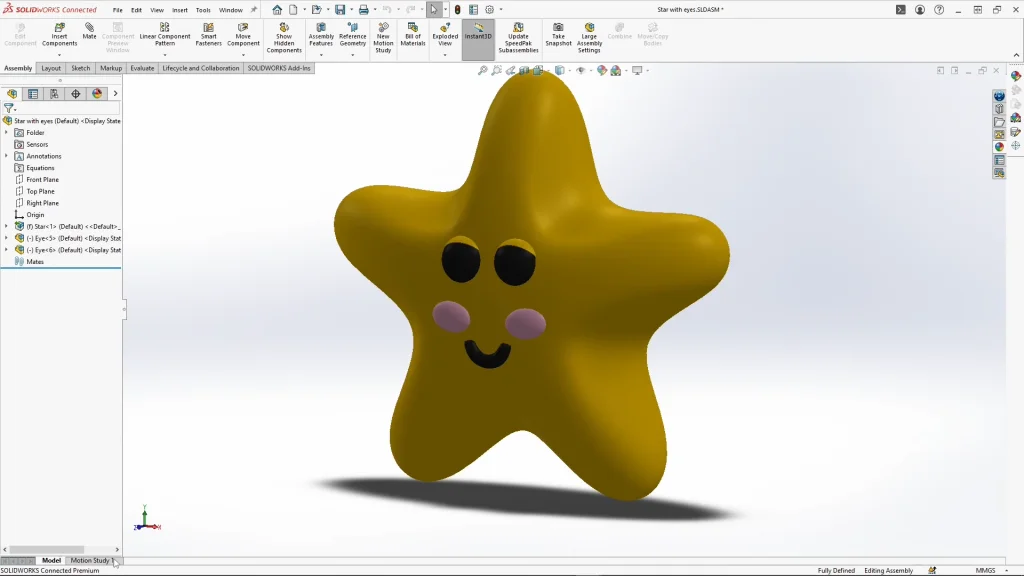
As a Mom of two boys, I have watched my fair share of baby sensory videos on YouTube, and they are super cute. So, I began to wonder how easy it would be to model and animate my very own mini sensory animation video. For part 1 of the tutorial, you will see how I used xShape to model a star, bring it into SOLIDWORKS Connected from the 3DEXPERIENCE Platform, and add moving eyes using a motion study. Stay tuned for part two of this tutorial, where I will be bringing in the star with motion study information into SOLIDWORKS Visualize Connected and will animate it to move around as if it were dancing to a lullaby. You will see at the end of part 2 of the tutorial the final rendered animation that was edited to have lullaby music in the background. You can get access to all of the above-mentioned packages and more under the 3DEXPERIENCE SOLIDWORKS for Makers offer from Solidworks.com.

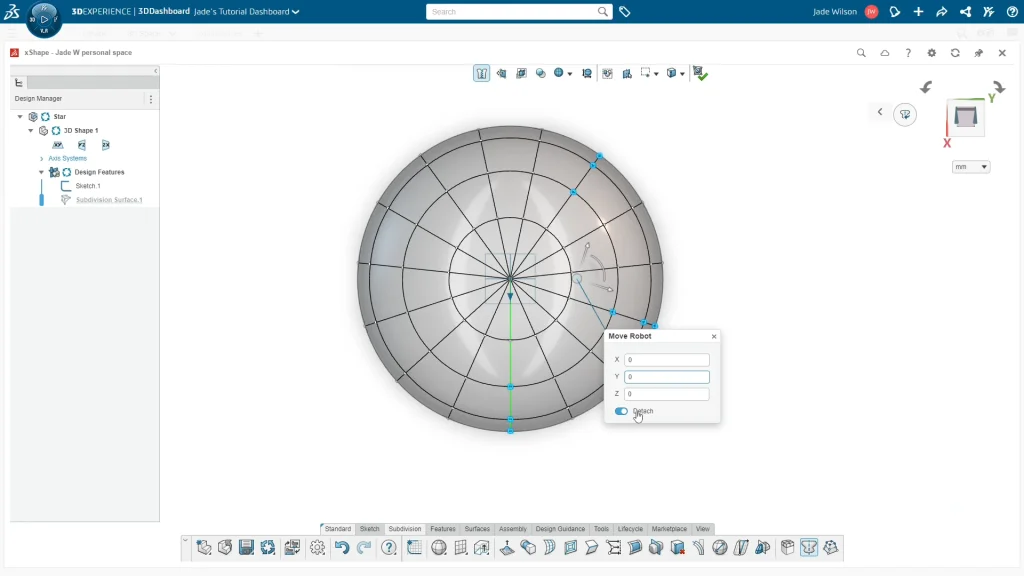
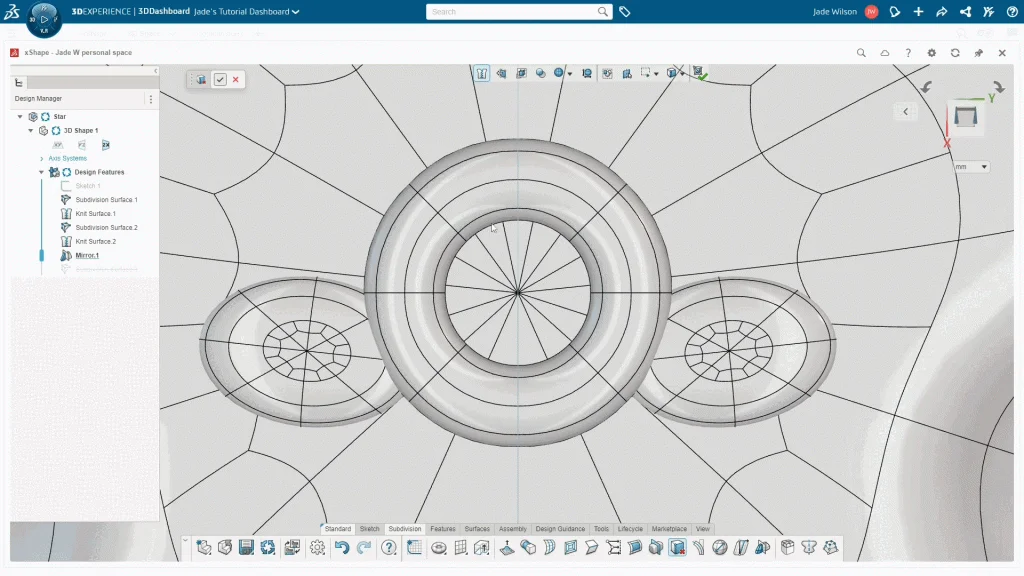
Starting on the platform, I used xShape which you will find in the 3D sculptor role to model the star. To begin, I sketched a circular guide onto the top plane to help me model within this guide sketch. Sub-surface modeling is quite free, so to stay within a certain dimension, using a sketch can be the best way to do this. Under the subdivision tab, I selected the Globe surface for this model as it would be the simplest way to create the star design, I increased the number of vertical loops to 15, its best to do this before scaling as the scale can alter when changing the loop amounts. I also scaled up the overall surface until it reached the guide sketch diameter. At this point, I turned on the symmetry tool to allow me to model one side of the star. When you apply the symmetry feature, you should see a green line across the model from your chosen plane.
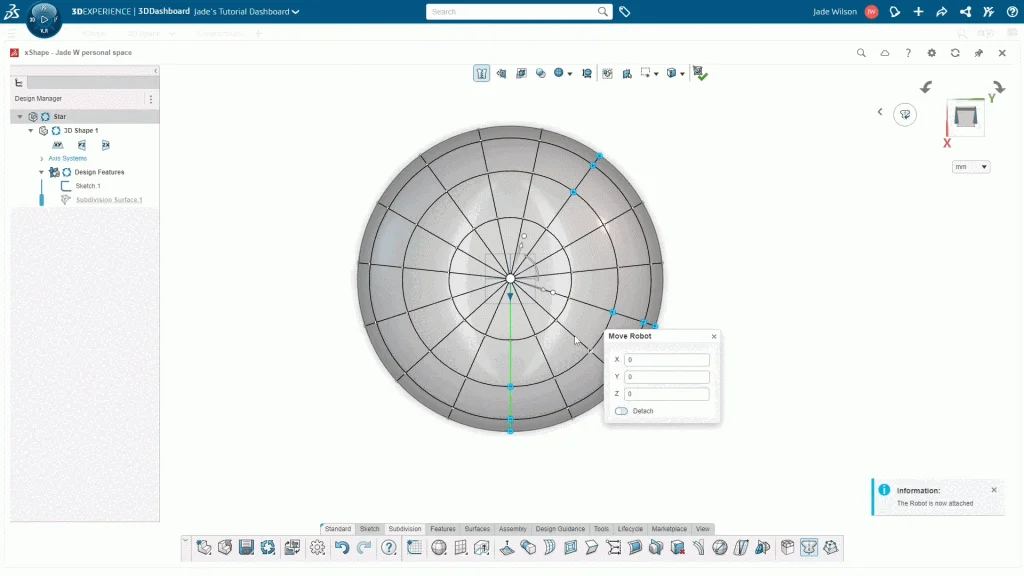
Viewing the globe from the top view, holding shift, I selected all the points seen below. For this selection I needed to move my robot to the center of the surface, to do this, you need to right click here the robot, and go to move, check the detach slider so that it turns blue, and input zero for all the axis boxes. Before I continue, I need to reattach the robot by turning the slider off.
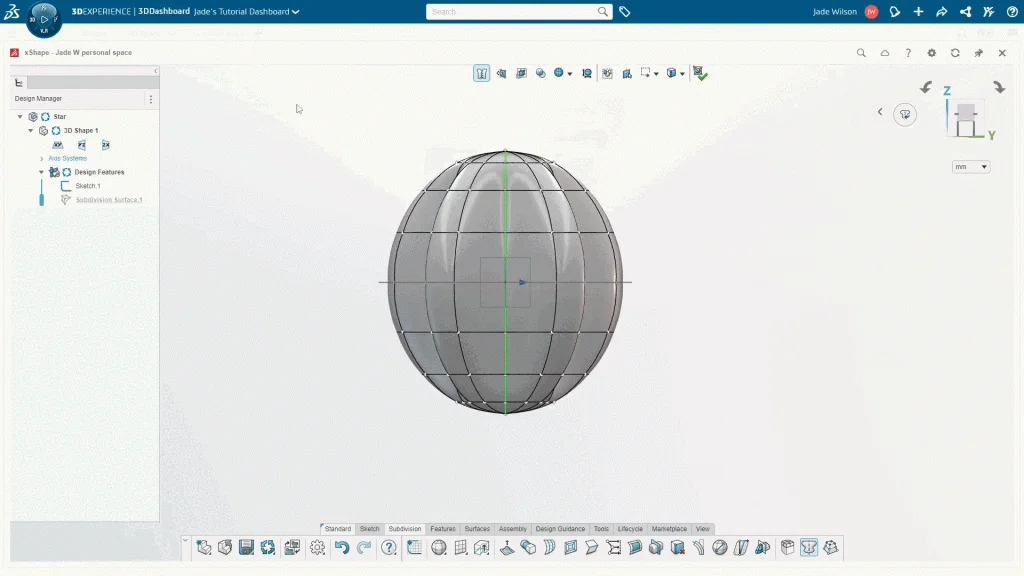
Selecting the two scale control points holding shift and I can scale and drag these points inwards creating a star shape, and you’ll see as I do this, the opposite side of the surface is symmetric. I could have created the star without the symmetry tool and just selected the opposite points on the globe, but I wanted to demonstrate the symmetry feature, as well as the ability to move/detach the robot.
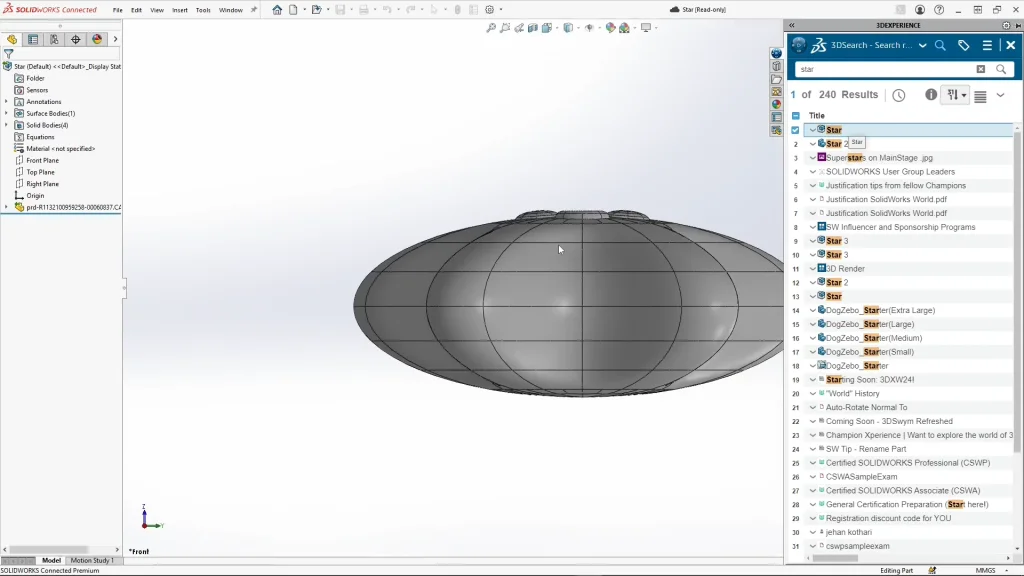
The next thing I needed to do, was to select the whole surface and scale down the height of my star using the z-axis scale point on the robot until I was happy with the star’s proportions. This does not need to be very precise; I just modeled this part by eye. Closing the surface, the star should become a knit surface, this means that it has become a solid body.
To finish the star up in xShape I added some extra face details using more sub-d surfaces, this included some cheeks and a smile. I used the Globe surface for a cheek and scaled it down, I also squashed the surface using a scale point to create an ellipse shape. I positioned the surface to protrude the stars face a little, I didn’t have to be too precise with these details as I can always edit them afterwards. I used the mirror feature under the features tab to mirror the cheek body over to have two cheeks on the star.
The final addition to my model is a little smile, to do this I used the torus subdivision surface. Using the delete faces and loops tool, I removed the top half of the shape, highlighting from left to right. The feature will only fully apply when you check the green tick, if you don’t do this the shape will revert back. This opened the surface on two ends, using the fill tool I closed up one side, I tried to do both, but the shape wasn’t happy trying to close one of the sides, so to override this I used the symmetry feature across the middle plane and the shape closed on both ends.
Saving my part, the model was ready to bring into SOLIDWORKS. Selecting the 3DEXPERIENCE Platform compass, under my roles I can select 3DEXPERIENCE SOLIDWORKS premium, and then SOLIDWORKS Connected. Once SOLIDWORKS opened I could select the 3DEXPERIENCE tab and search for my xShape file, typing in star. With SOLIDWORKS Connected I can drag and drop files straight into SOLIDWORKS. The star, cheek and smile surfaces all come in as separate bodies. I kept the cheeks and smile parts unmerged to make them easier to apply appearances to.
For the eyes of the star, I modeled one eye as a multi-body part with an eyeball and two eyelids, these were then saved as separate bodies and as a new assembly. Within the assembly of the eye, I added some concentric and coincident mates, to fix the eyelids around the eye, and also added some limit angle mates to stop the eyelids from intersecting each other. This mate was just for positioning and was removed for the motion study. Saving the assembly, I began the final assembly with the star and two eye sub-assemblies.
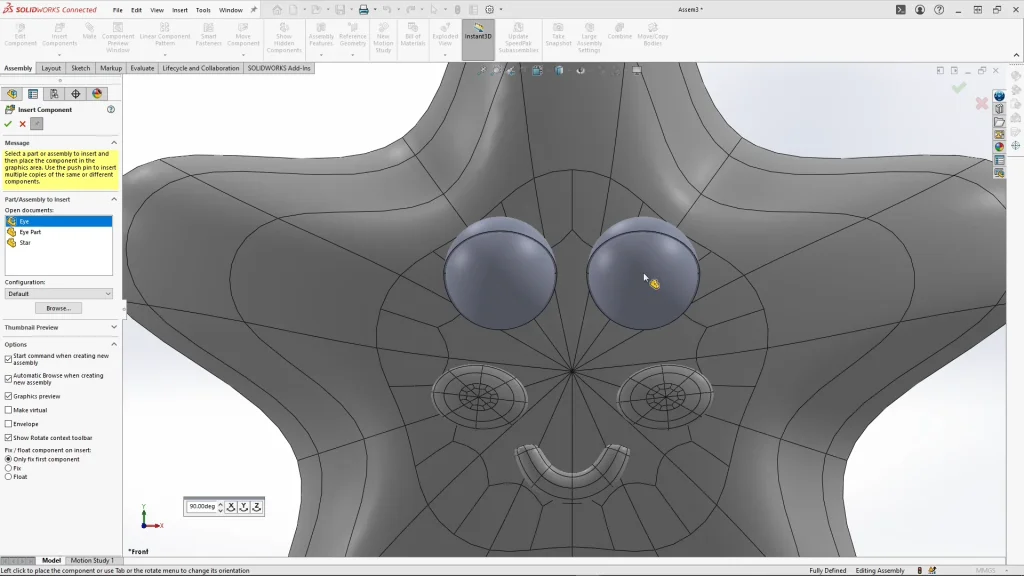
The eyes were dropped near the star, they weren’t mated into place, this wasn’t necessary for the assembly, especially as the motion study type I created was an animation, not motion analysis. Moving onto the motion study part, before I could animate the eyes, it’s important to remember that the eye subassemblies need to be made flexible, otherwise the eyelids will be fixed, you have to do this to for both eyes. Then I also need to delete the limit angle mate.
I used 4 rotary motors for the eyelids, using the temporary axis of the eye parts and eyelids as the axis for rotation. I changed the motion type to oscillating, to create an open and close effect for the eyes. For some reason the motor direction arrow wasn’t appearing for the study, but I could test run the motor to see the direction. For the degree I input 70 degrees, and changed the frequency to 0.25, this allowed the eyelids to open and close every 4 seconds. You can use the graph box to see how the motor will run. A second motor was added to each of the bottom two eyelids, these had the same motor settings, but the motor direction had to go the other way. I could then calculate the full animation.
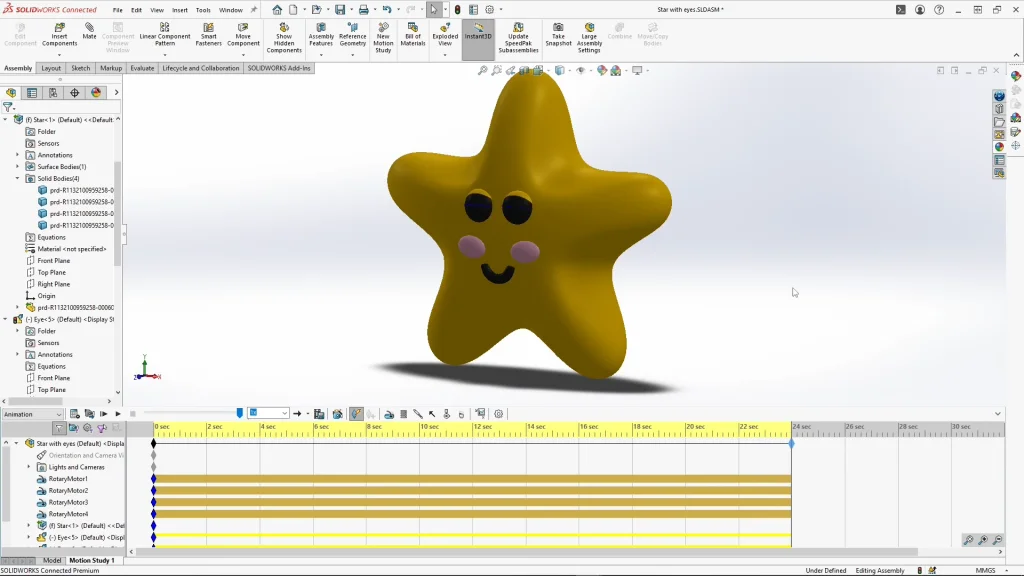
Saving the assembly for now. Look for part 2 of this Baby Sensory Animation Tutorial to see how we can animate this further in SOLIDWORKS Visualize.
