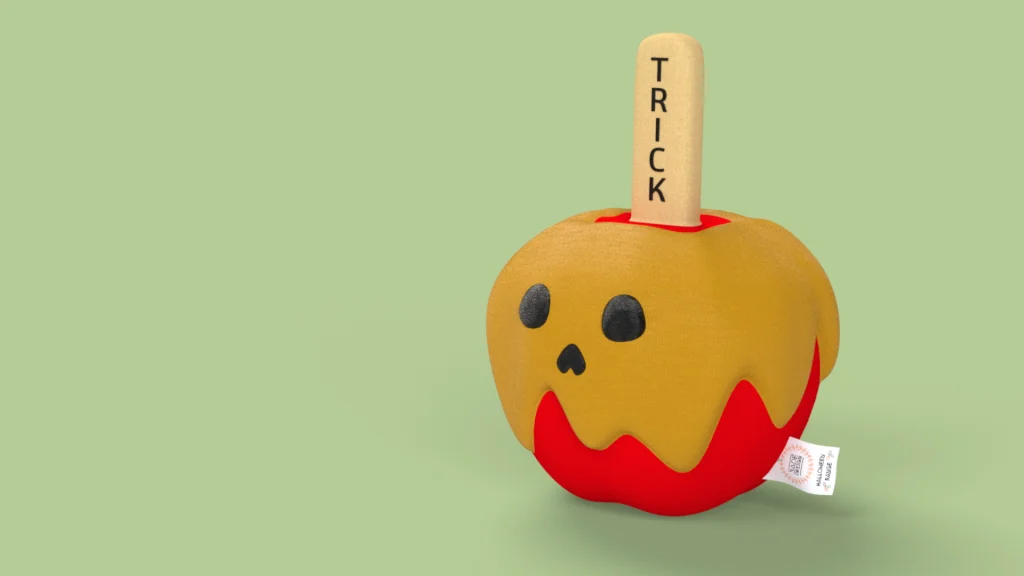
For this fun and spooky themed plush toy which I modeled entirely within the 3DExperience platforms xShape app, found in the 3D Sculptor role. I’m going to break down the steps I took to model, export and render my product. I don’t show you the full modeling steps, but I do go through the xShape Design Manager for the model and I open up some of my sub-d surfaces and features to explain my process.

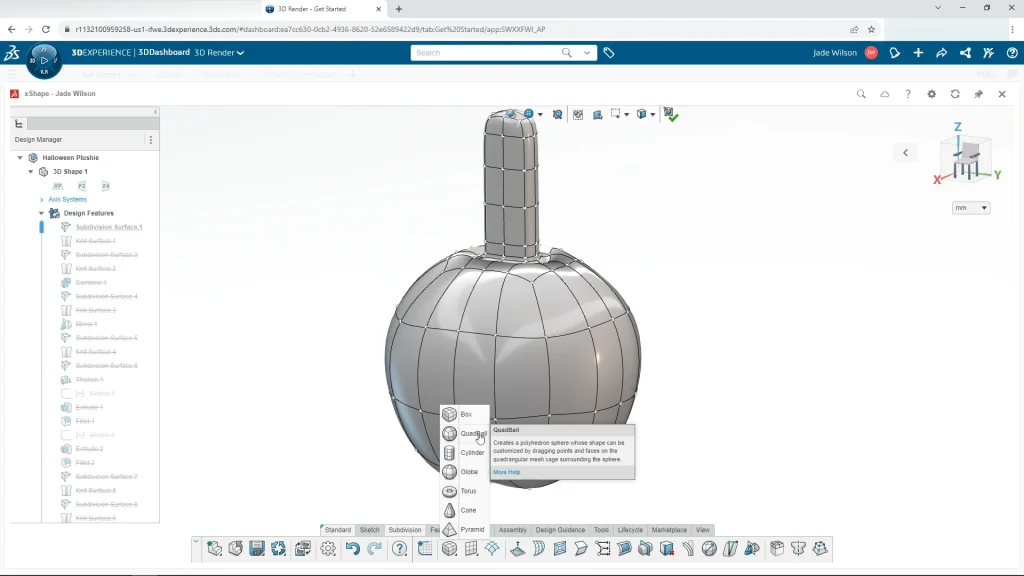
Starting with xShape, you can see the main apple shape with the stick was created with one just one subdivision shape, when I go into the surface to edit, you can see what I started with, this was a QuadBall, chosen for its more structured spherical nature, I knew I could use this to create an apple shape quicker and it would be easier to extrude the stick element of the toffee apple too. When designing in xShape, you really need to start your model with the best primitive shape. This means that you need to have some sort of preconceived idea, and choose the shape based on this. For example, I couldn’t have started my design with the torus! This choice comes with some practice and knowledge of the primitive shapes, so play around with these before starting your design. You don’t want to make it harder than it needs to be.
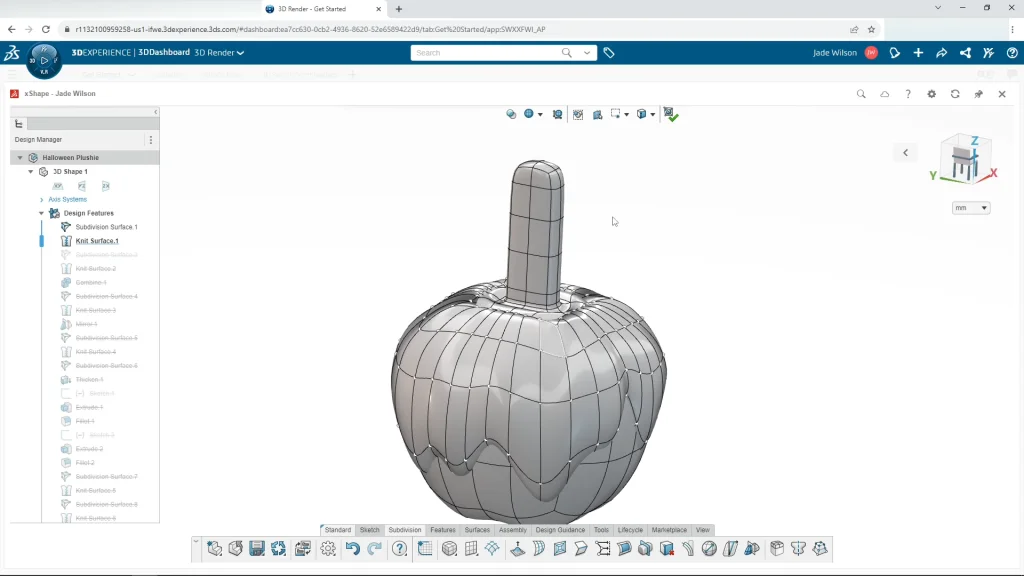
The next step was to create the toffee element of the plush, I did this by copying and pasting the first sub-d surface apple and scaling it up by 10%. I deleted the faces of the stick and filled in the open mesh. I then dragged the top inner loops of the shape into the apple, to give the effect of poured on toffee. To create the poured toffee drips, I needed to insert some more loops onto the shape to make it easier to manipulate and add the more complex drip details. I wanted the apple to look like the toffee part has been stitched on as a separate element or piece of fabric so enlarging it helped with that impression. You’ll see underneath each of my sub-d surfaces there is a knit surface feature, this is an important element of each sub-d component as this creates solid bodies. Having a knit surface allows you to combine parts in xShape, but also, if you export your model and open them within SOLIDWORKS they will come in as solid bodies too.
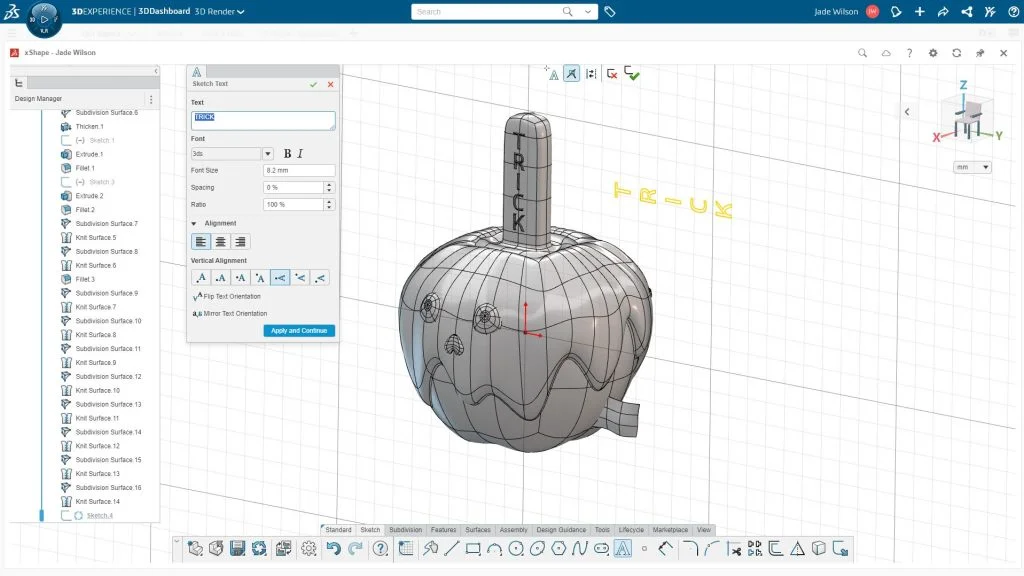
The next element of my design that I want to show you is the text I added, I used xShape’s sketch tab, and the text tool to create the trick or treat extrusions on the apple stick. This was very easy to do, the software is so intuitive, and the tools are easy to navigate. You can play around with the alignment and spacing of the text, the font type, sizing etc, and can drop it in. From there, I used the translate options to rotate and move my text into position before extruding it.
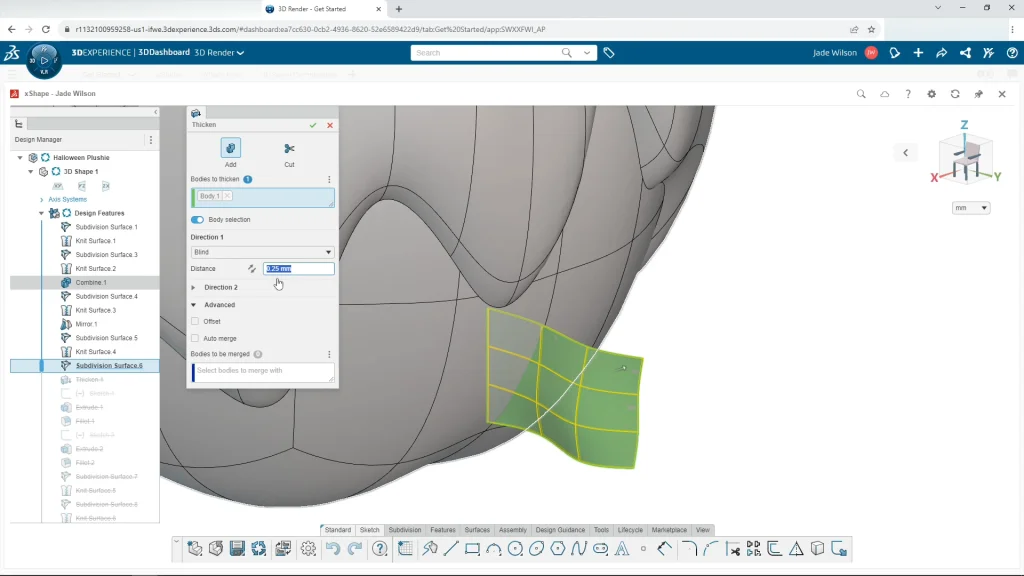
The sew-in label element of my design was again a very quick thing to model, but it really added that realism element to the plush design when rendered. To create this part, I used the subdivision tabs rectangle shape, which is a flat surface that can be manipulated by pulling the points and faces of the mesh to create a flowing shape to mimic a sew in label. I could then thicken the surface as you would do in SOLIDWORKS when dealing with surfaces, to create the label. I kept the label unmerged as I wanted to apply a decal to it in SOLIDWORKS as a complete rectangular shape.
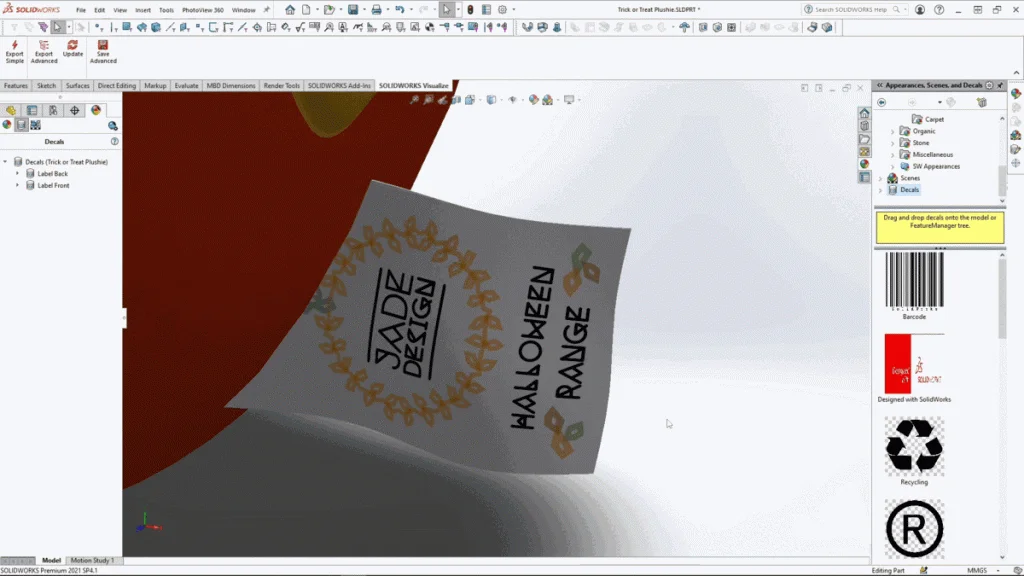
Moving into SOLIDWORKS, I imported the STEP file, which came in with all the separate knit bodies. Apart from the apple and toffee part, I kept everything else as separate bodies to make it easier for me to apply appearances to them in SOLIDWORKS. Otherwise, I would have to reselect all the mesh faces individually, rather than whole solid bodies. Because I had 25 separate unnamed bodies, I popped them into files to make it easier to find parts. I used SOLIDWORKS to apply all of my appearances and decals, I applied back and front decals to the label. Adding custom decals to a design like this just adds to the realism of a product, plus, it’s one of the most fun parts for me. Looking at the back of the label you can see I added a made in xShape slogan, because why not!
To send my model directly into SOLIDWORKS Visualize, I prefer to use the export advanced options found on the Visualize toolbar in SOLIDWORKS, as it exports my model with more detail than export simple. For example, all the solid bodies will export as separate parts rather than one fixed component, this is useful if you want to have the option to move individual bodies while in Visualize, but also for applying appearances in Visualize.
Once I’m in Visualize you’ll see how I use a ‘quick fix’ for decals when they disappear under the appearance added to them. If this has ever happened to your decals after you have added an appearance to them, you can fix it by selecting the decal under the appearance tab, and under general, uncheck and recheck the visible and show decal texture boxes. I take you through some of the appearances I added, and view them in more detail, the fabric appearances of the plushie, specifically the stich effect on the eyes and nose details, were created using a bump texture. I used the ‘brushed normal’ jpeg texture image and increased the depth to 7 to try and make the appearance look more like embroidered thread. I have quite a lot of fun within Visualize when it comes to experimenting with appearances, you can create effects with bump textures that can produce entirely new appearances.
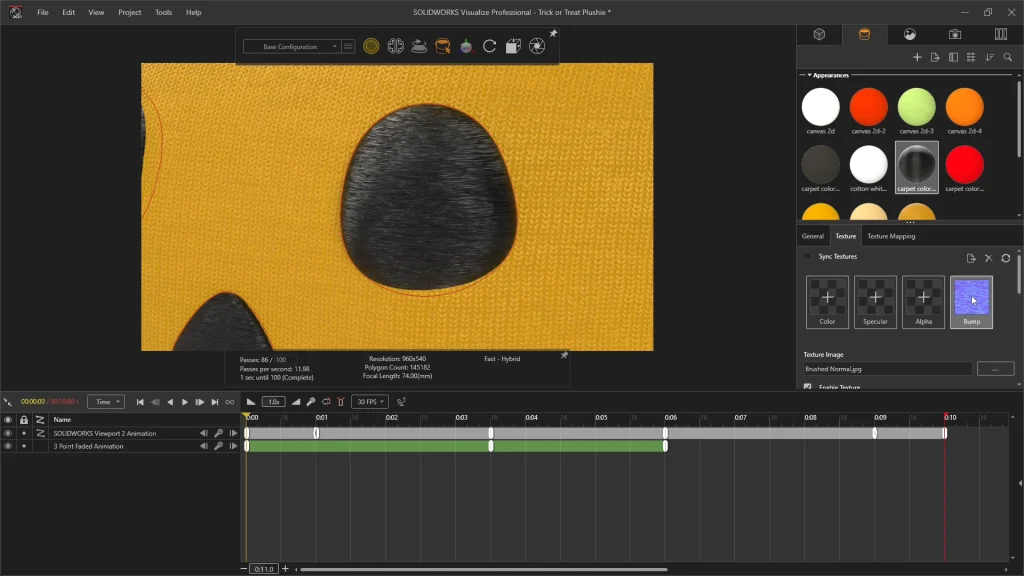
Within Visualize I use keyframes to create an animation which you will see rendered at the end of the tutorial. I really enjoyed creating this toy from start to finish, I keep finding new and exciting ways to use xShape for my design projects, hopefully this inspires others to explore xShape with SOLIDWORKS and Visualize for your own projects!
