
I have designed many cards in SOLIDWORKS before, creating a 3D image to render and print flat onto a card, for this Mother’s Day card, I wanted to try something a little different and create the finished card in SOLIDWORKS. This is a very simple tutorial, and within it I will show you how to insert a DXF file, add custom decals and export the finished card model for rendering within SOLIDWORKS VISUALIZE. If you want to follow the tutorial, the DXF file and decals are available to download here

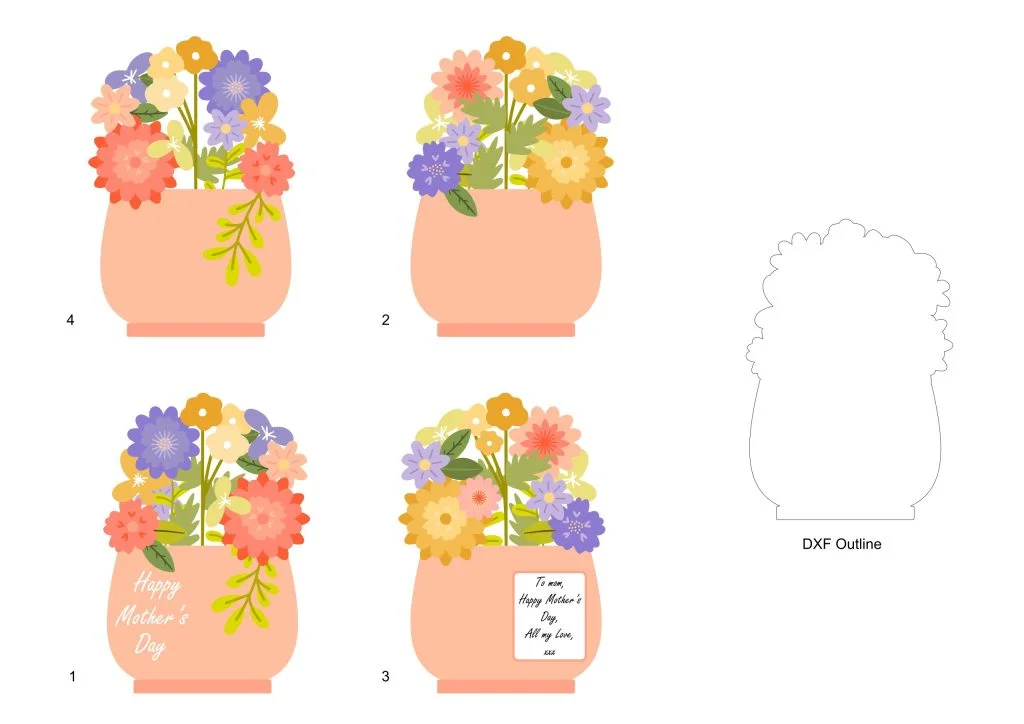
I use DXF files a lot, especially when designing something detailed, or something I have designed in vector software first. When designing vectors, I only need to worry about overall dimensions rather than fully defining every shape. The shape of the card profile was designed in vector software first, and exported in millimeters as a DXF file. Then, while in SOLIDWORKS I can select a plane, insert, DXF/DWG and browse for my custom DXF file and open it up into SOLIDWORKS, you should always double check the import dimensions when importing your DXF files, the DXF file will come in as a sketch. You could fully define your sketch if you wish, but this may be complex, messy and time consuming, instead sometimes I just lock the sketch or leave it under defined, especially for such a simple model which I will only be extruding. I extruded my card piece 1 to 0.5mm which works out at 350gsm in card thickness. I then created a thin cut extrude halfway up the center of the card to act as a slotting feature for standing the 3D card up. I worked on one card part at a time, but use the same model to create both, using save as with similar models can save you so much time.
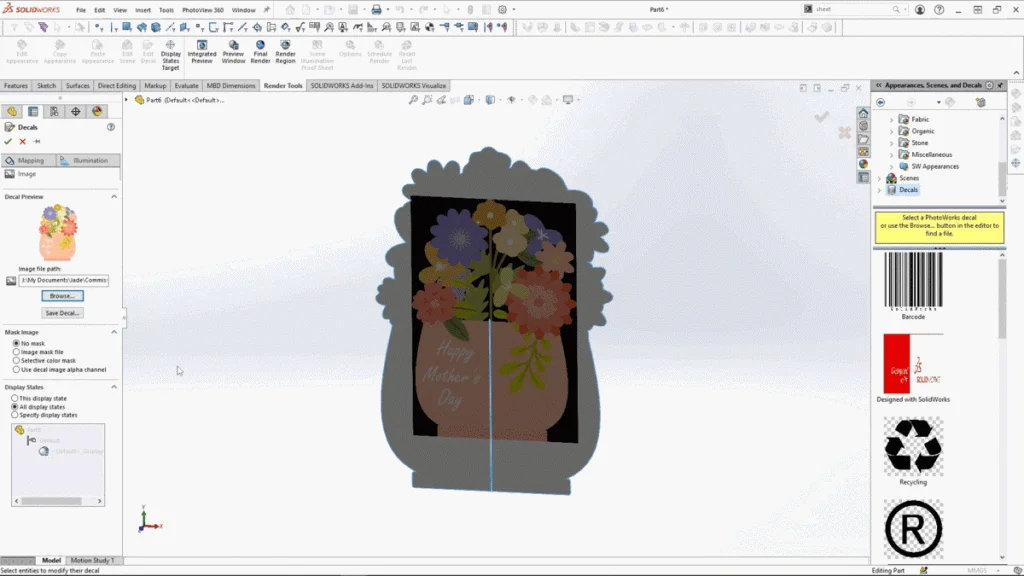
Before I applied my decals, I applied the solid white appearance to the parts body, this appearance is simple, but it was then edited further within SOLIDWORKS VISUALIZE. My decals were exported as PNG files so that the background can be removed, to remove the black mask around the PNG image, select the use decal image alpha channel. PNG files are good to use if you want to apply something like a sticker into SOLIDWORKS as you can see the parts appearance or color around the transparent parts of your image. You can see below when I apply the mask, the black background of the PNG file becomes transparent.
Once decals are applied to both sides of the card, I can save it as Mother’s Day card 1, but keep the part open. The same shape can be edited to create the other slotting card piece. The thin cut extruded slot was flipped to cut away from the top side of the card, and the decals were edited, and images were swapped out for the other decals. his could then be saved as Mother’s Day card 2. The parts were then mated and slotted together within an assembly. Saving the assembly, I could select the SOLIDWORKS VISUALIZE tab and the export advanced option.

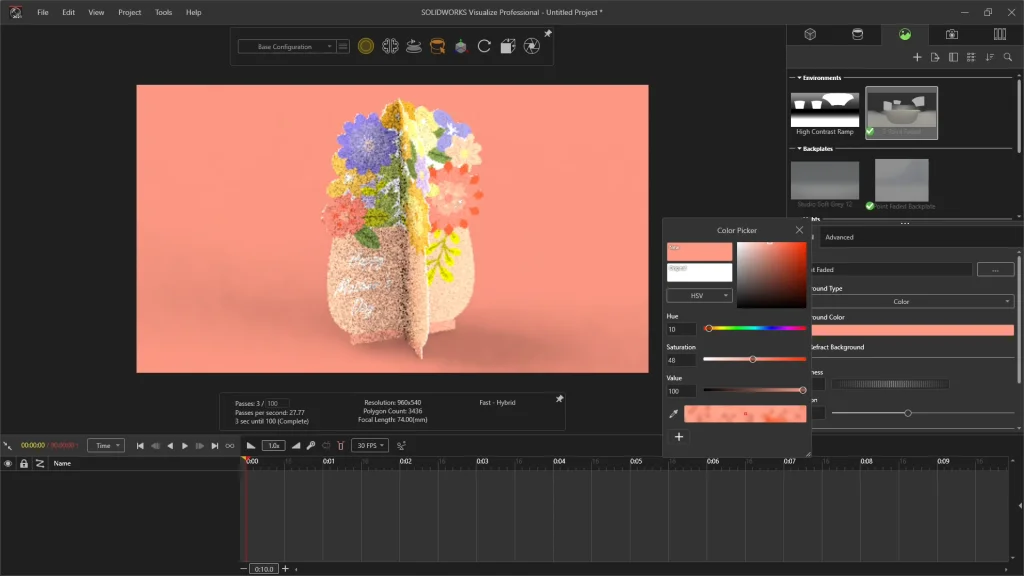
When the model opens in VISUALIZE, I start by resizing the camera aspect ratio to 16 by 9. Under the scenes tab, I like to hide the backplate by selecting it and then unchecking visible. Then under the scenes tab I prefer to change the environment to a color. Selecting into the background color bar, I can select any color from the swatch, or use the color control bars, or even use the picker tool to drag over the model and pick out a color, this can then be edited to a lighter shade, which will complement the colors already in your model.
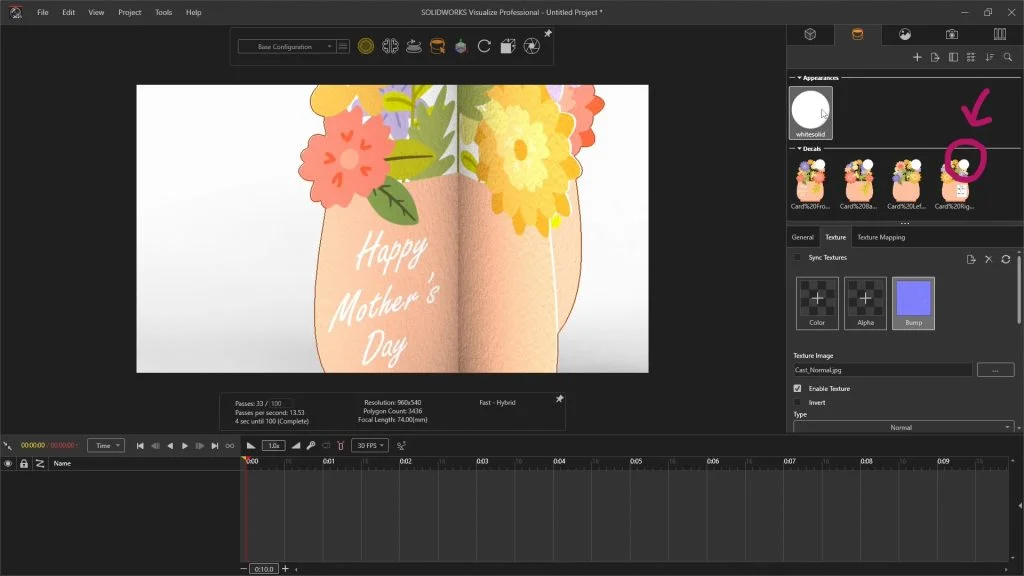
While in VISUALIZE I can edit any of my appearances with a wide range of settings. This can include adding texture, I decided to add a bump texture to the card to give it a card stock appearance, for this effect I used the cast normal texture, the tile was scaled down further to make the texture more realistic. To make the applied card appearance visible through and under the decals surface, you need to assign the appearance to each decal. You can see that an appearance is assigned by the little circle appearance icon attached to the top right corner of the decal thumbnails.
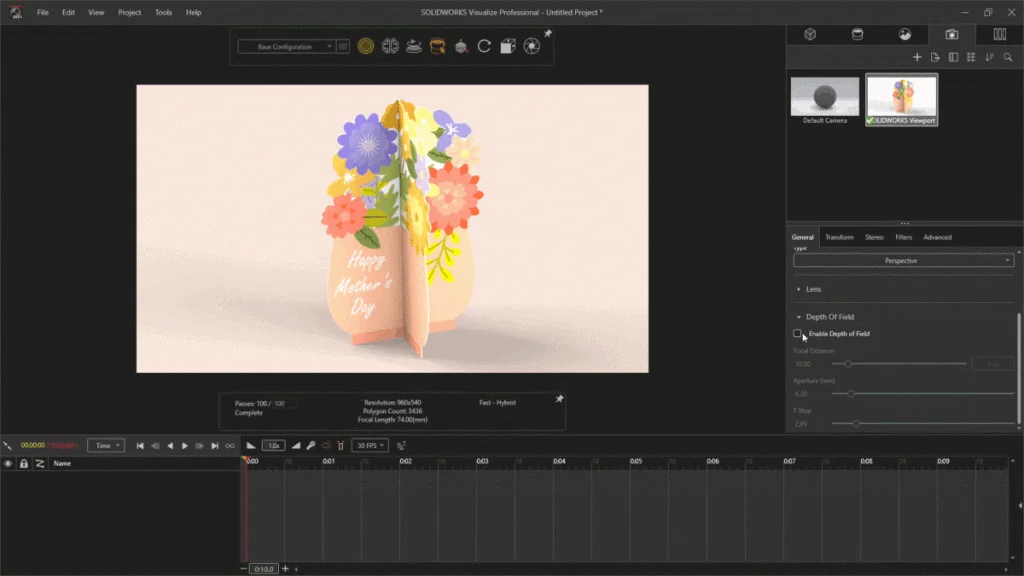
The last thing I like to add to my models is a camera effect, under depth of field, If I enable depth of field and use the picker to select the text on the card as the focal point on my model, it gives the camera focus, and adds a subtle blur to other areas of the card, this all adds to making the final rendering more effective.