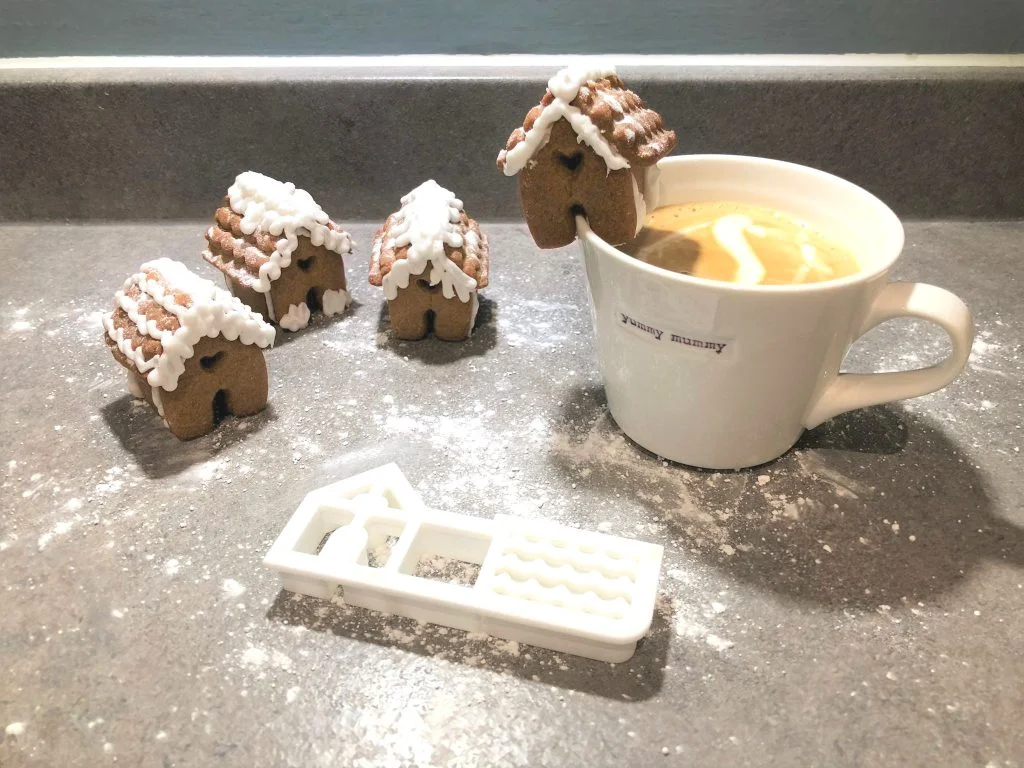
Who doesn’t love festive baking? Well, it may not be for everybody but I’m sure you know somebody who enjoys it, so why not stick around to see how I created this simple one piece cutter to create a mini gingerbread house. For this tutorial I wanted to design one of those mini gingerbread houses that could sit onto the lip of my own coffee cup. This design will fit most cup diameters, but if you plan on adding it to a much larger or smaller cup, it might be a good idea to test it in SOLIDWORKS first. One tip is to cut the doorway slightly larger before baking. If you want to create the same cutter design as me, you will need to download the DXF file here, I have also provided my original gingerbread house model for download if you would like to use or edit this to design your own styled house. If you create your own design, like me, you will need to move the original gingerbread the side wall and roof panel to be facing the same way as the front of the house, this just makes it easier to create the DXF file as one, but also speeds up the modelling process of the cutter. All of my house panels were lined up to have a gap of 2mm between them, they were then exported as a single file DXF.
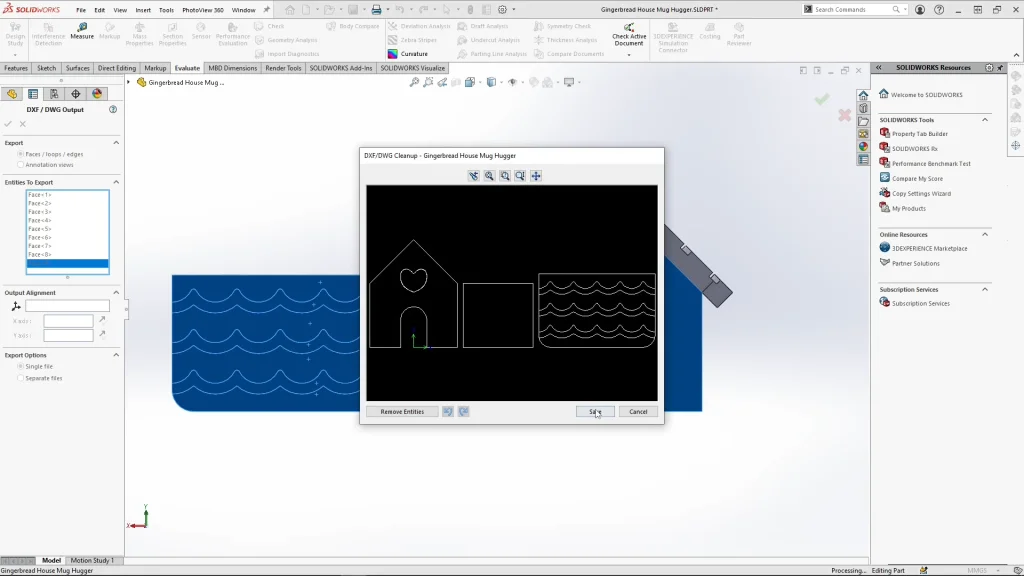
In a new part, I can bring in the DXF file and under import options, I can keep the DXF sketch as a reference sketch so it can not be changed. This removes the need to fully define the sketch, I already know the dimensions as defined in the original house model. I then use the DXF as a guide sketch to create the outline of the cutter, for this part I used a combination of convert entities and convert silhouette. Thin feature was used to create most of the model.
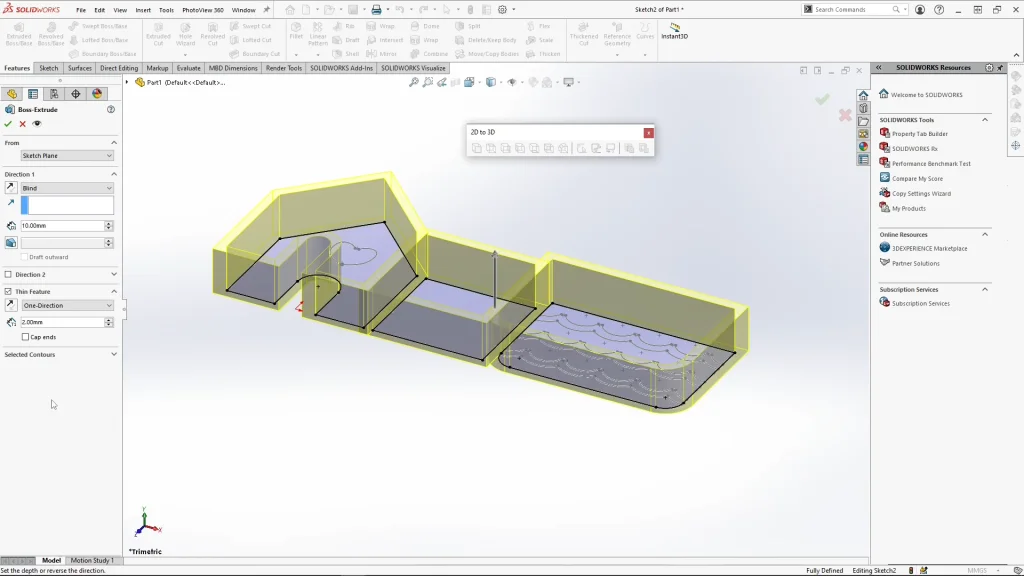
The heart cut away was extruded as a solid shape rather than a cut outline due to its size but also thinking ahead I didn’t want to have to pull dough out of it after each cut! Supports were added to the heart and were extruded to 4mm so that they wouldn’t get in the way of the cutter. (I did on occasion while baking my gingerbread house roll out the dough too thickly, and so was left with indents in the dough from the supports but these could be smoothed out before baking) You may want to use slightly smaller thicknesses for your cutter 3D print, but I like to play it safe and go slightly thicker, they do still work, and it gives you more stability and accuracy in the cutter.

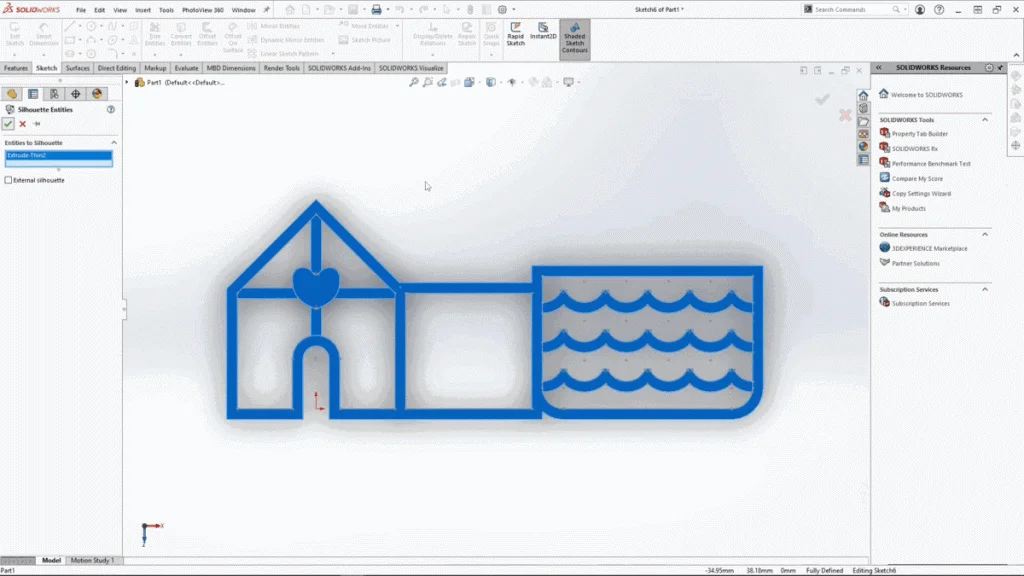
Finally to add more stability and a larger area to hold and press the cutter, under the convert entities drop down I used convert silhouette, ensuring external silhouette is unticked the tool converted all the edges of the face quickly. This sketch was then converted to a construction sketch, and offset inwards, and outwards to create a top extrusion. Due to offset angles a sketch error flagged up but as I mentioned in the tutorial it was detrimental to the design so I just ignored it, I know SOLDIWORKS sin! Once I had my final cutter model, I could save it as an STL file ready for 3D printing, I used 3DPrintUK for my prints, but a desktop printer could work for this too.
One tip when using your 3D printed cutters is to flour them before each cut, this keeps them dry and stops the dough getting stuck. I loved this mini project, I really enjoy baking and I especially enjoy eating gingerbread. For my house, I used a gingerbread dough, but I have seen sugar cookie dough used too, just ensure you use a strong icing for joining up your pieces together, I used a simple royal icing, which is just egg whites and icing sugar. Have fun!