Documentation is always an asset for any of the company or industry. Documenting the right data always ensures the task or job, whatever assigned by the superiors in an industry. Whatever the design we do, at the end of the day company [manufacturer] needs 2D detailed drawings. Those drawings must be more reliable and ease of process for any person who works for it. In this blog, let see how SOLIDWORKS Drawing tools are efficient in detail and easy to handle for the CAD users.
We are just going to focus on 3 simple and powerful tools in SOLIDWORKS Drawings.
1. Auto Arrange Dimensions
Creating Dimensions is a more important task for the designers so that communication takes place among the manufacturers. Placement of Dimensions must be neat, precise and eye-catching to ensure error less manufacturing.
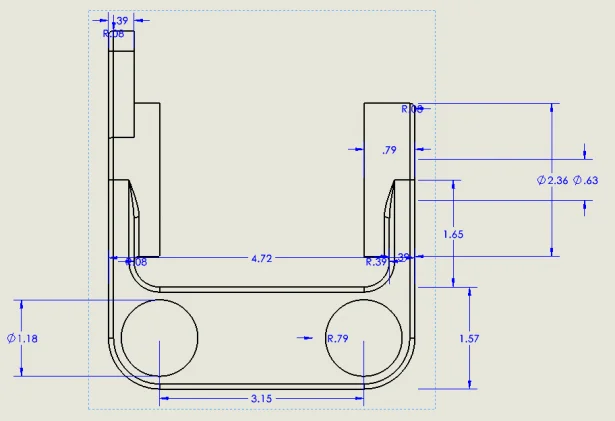
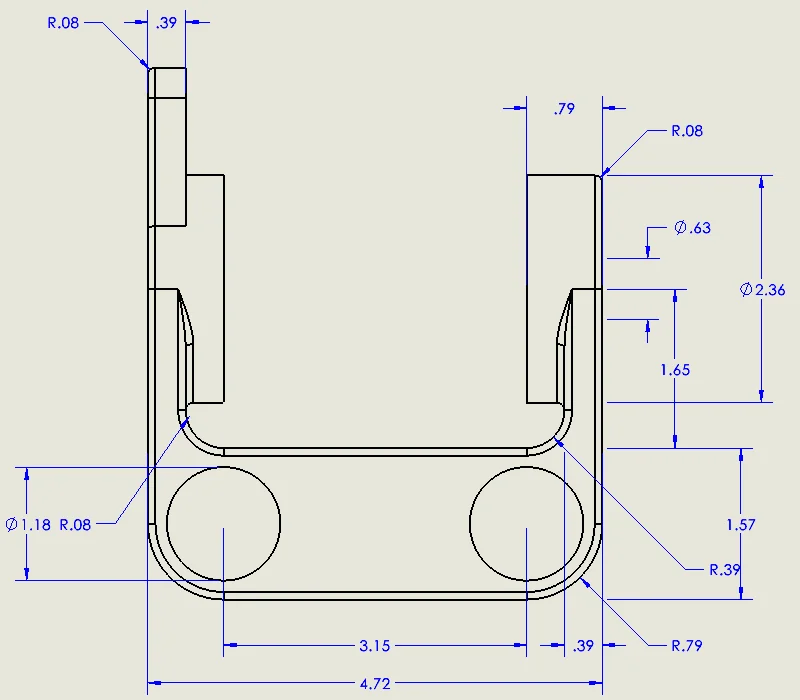
In SOLIDWORKS Drawing, we have a fantastic tool called AUTO ARRANGE DIMENSIONS that enables the user to place the dimensions spaced, aligned, centered, adjusted and staggered if necessary.
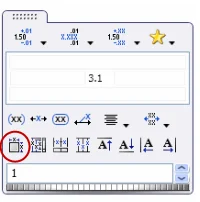
This can be done by Window select the required dimensions-> Pause the mouse for a few seconds-> Icon will appear-> Select the first one “Auto Space”-> Dimensions selected will be equally spaced. Further needed, we can adjust and stagger.
Before
After
2. Breaking Lines
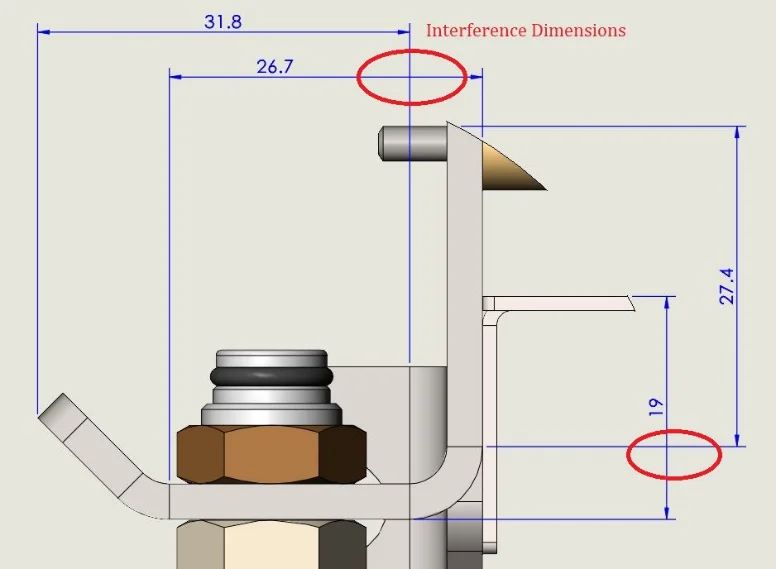
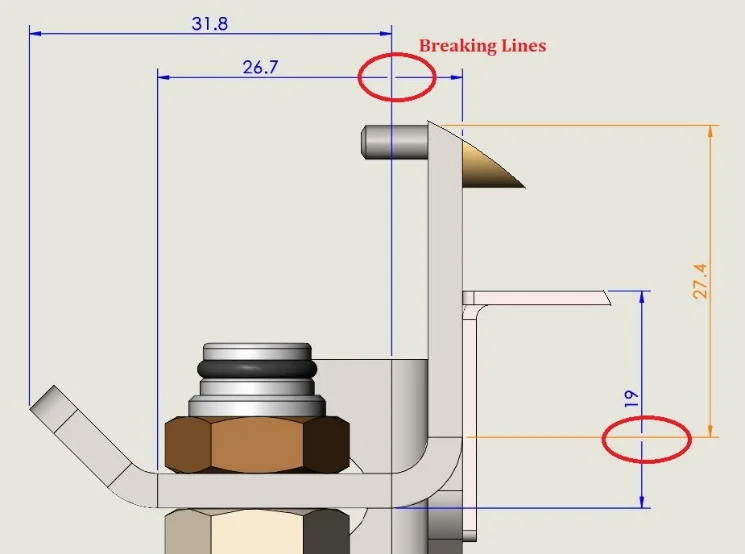
In detail drawing, we use to face dimension interference of one another. This means overlaying dimensions are caused frustration for users to a position in the right place. In SOLIDWORKS, powerful tool “BREAKING LINES” enables the users to avoid overlaying dimensions while detailing.
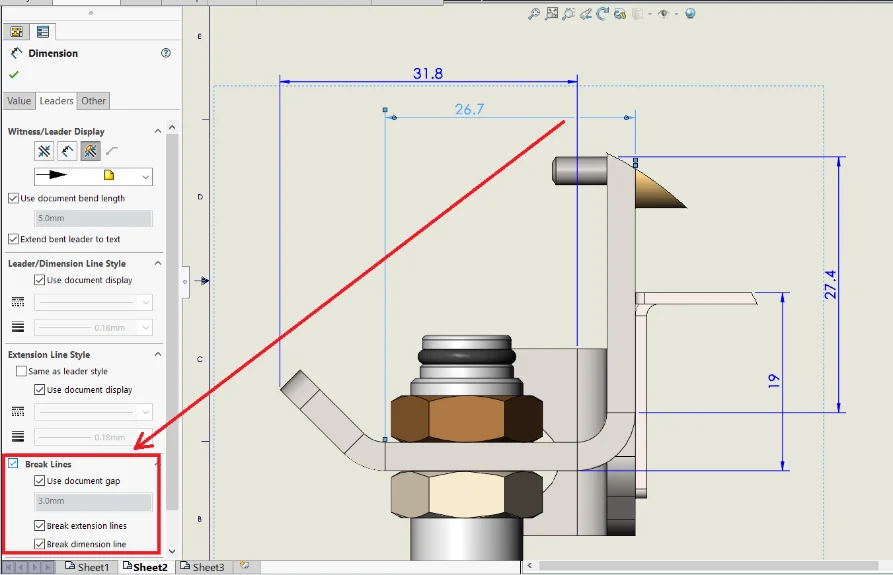
Choose the dimension which cause overlaying-> Go to Property Manager-> Leaders-> Scroll Down the bar-> Breaking Lines-> Enable it. Chosen Dimension line will get a break and makes it free from interference.
Before
After
3. Flag Note Bank
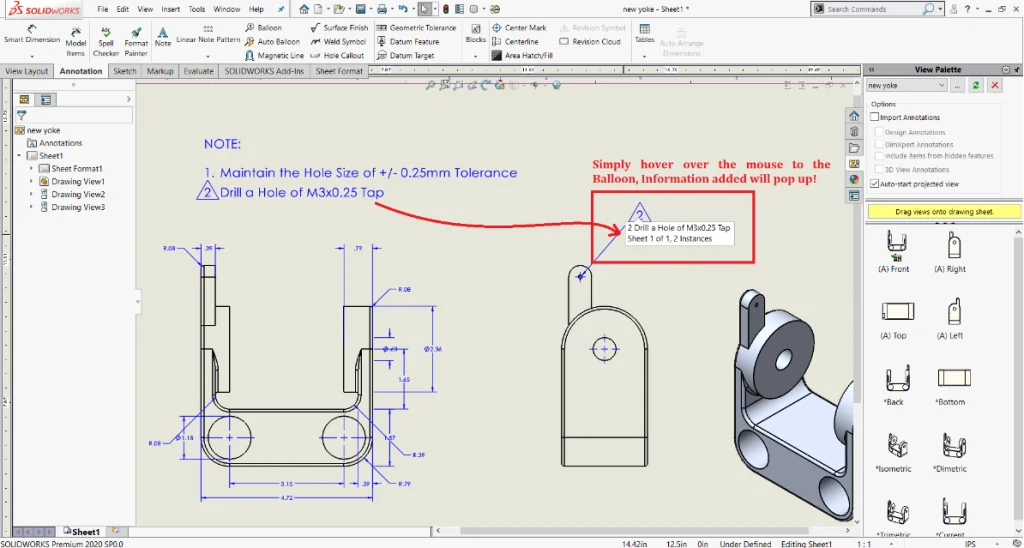
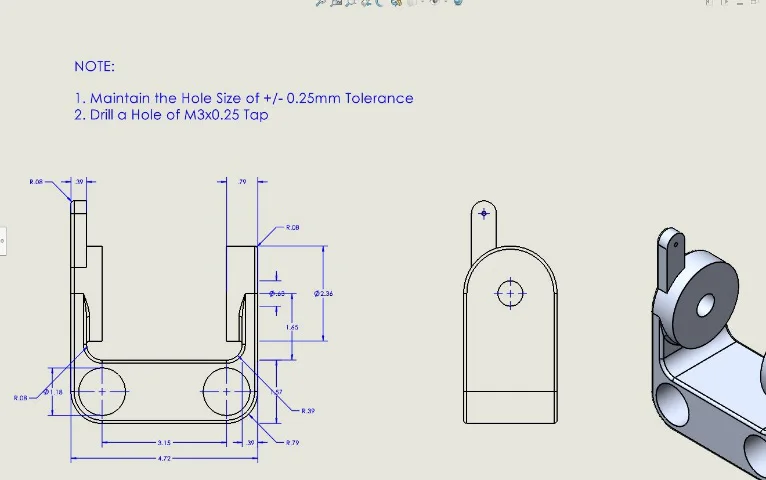
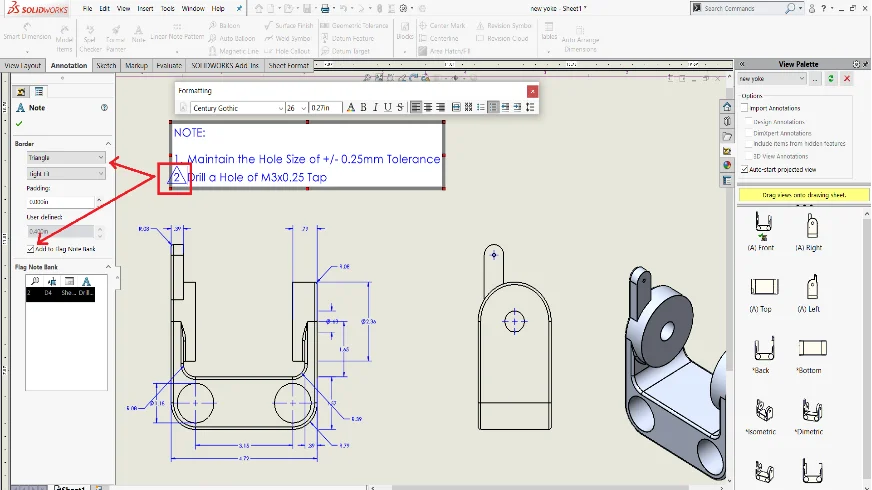
In Drawing, we usually create Notes to convey the design information. Information may be referenced as highlighted colors or patterns. In SOLIDWORKS, we have a productive tool “Flag Note Bank” which is used to reference the information easy and convenient method.
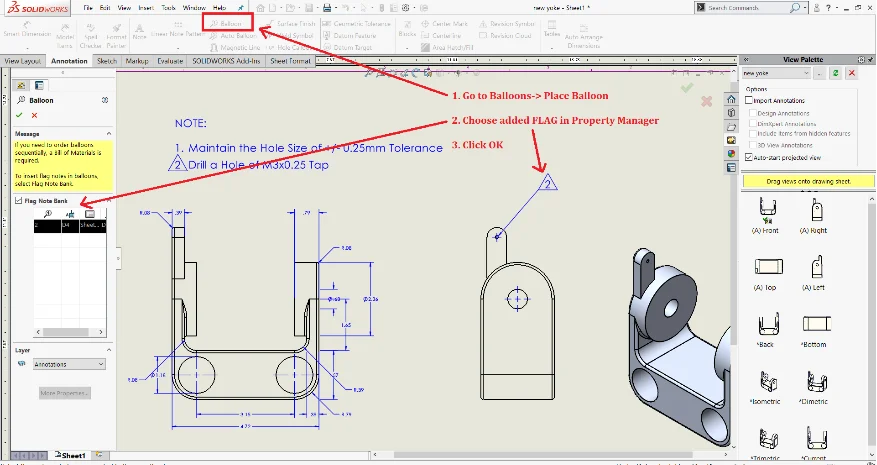
First Simply add a Notes in corner of the sheet-> Number for the Note and to add a FLAG to that Note-> Double click the Number-> Property Manager-> Choose the Type of FLAG-> Add to FLAG->Enable Check Box-> Flag has been added-> Tools-> Balloon-> Place where would you like to reference the NOTE-> Once the Balloon placed-> Hover the mouse to the Balloon-> INFORMATION HIGHLIGHTS.
Hence, no specialized colors, patterns, borders are added. Simply used FLAG NOTE BANK and conveyed/ referenced the INFORMATION.

SUMMARY
Create/ generate an effective and productive detail drawing and help the manufacturer to understand very quick, easy and ensure the critical information using eye-catching tools in SOLIDWORKS Drawings. Thank you for your valuable time. I hope this blog helps in improving your productivity, reduce in time and increase in quality. Catch you next. Thank you!
