
Working with massive and complex assemblies? Are your load times getting out of hand? In R2025x FD03, we released the functionality to selectively open sections of your assemblies in SOLIDWORKS by using Filters on the 3DEXPERIENCE platform. We call this selective loading or partial open capability.
A lot of you have been talking and asking about it. In this blog, I will expand on this functionality and how you can use filters to improve your design workflow.
A filter is a rule set that isolates parts of your product structure. You decide the rules, through Selection, Attribute, Configuration, or Volume, and save it as an object, known as an Advanced Filter. Open the Filter in SOLIDWORKS, modify the parts, and save it back to the 3DEXPERIENCE platform. The changes will be reflected in the top-level assembly without compromising the overall product structure. You can also use and reuse the same Filter for reviews, BOM checks, and other downstream tasks.
How It Works
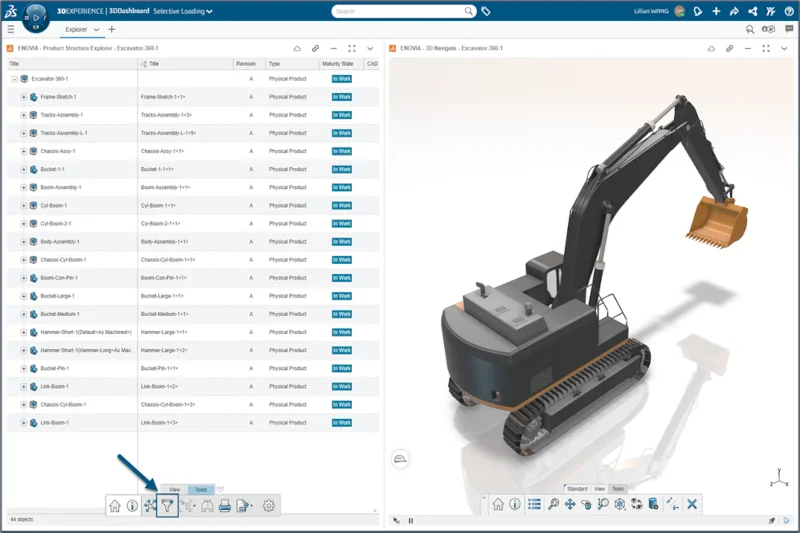
- On the 3DEXPERIENCE platform, search for and open your assembly in Product Explorer. You can also access Product Structure Explorer within the MySession panel of SOLIDWORKS.
- Select Filter from the Tools tab on the Action Bar.
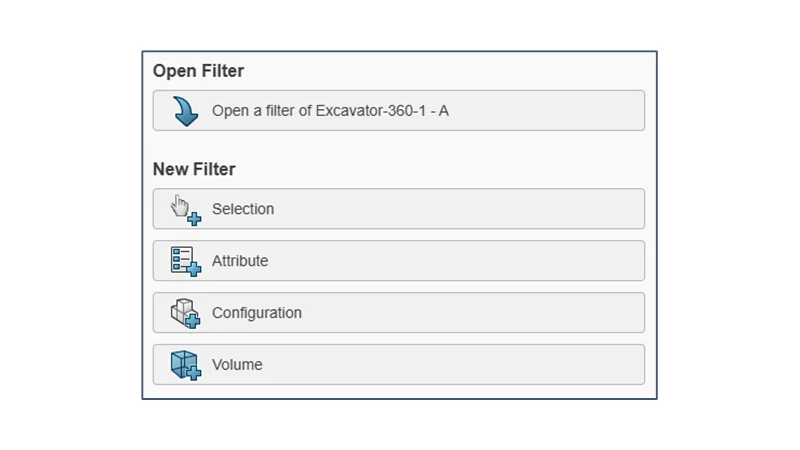
- Choose what you want to filter by:
- Selection – keep and/or remove sub-assemblies or parts based on what you manually select
- Attributes – select the object type, name, maturity or other PLM properties
- Configuration – choose defined product configurations (I’ll dive deeper on this option soon).
- Volume – define the region around your part of interest using a bounding box, bounding sphere, or proximity range
Tip #1: Remember that you can combine multiple criteria to create a single Filter.
Tip #2: Use the Relations application to visualize parent-child relationships. Choose the start and end levels to filter from.
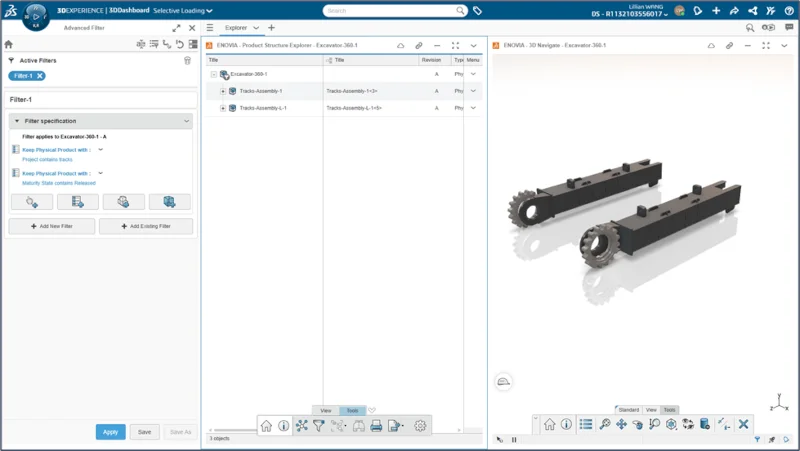
- Click Apply to see the updated filtered structure and 3D viewer.
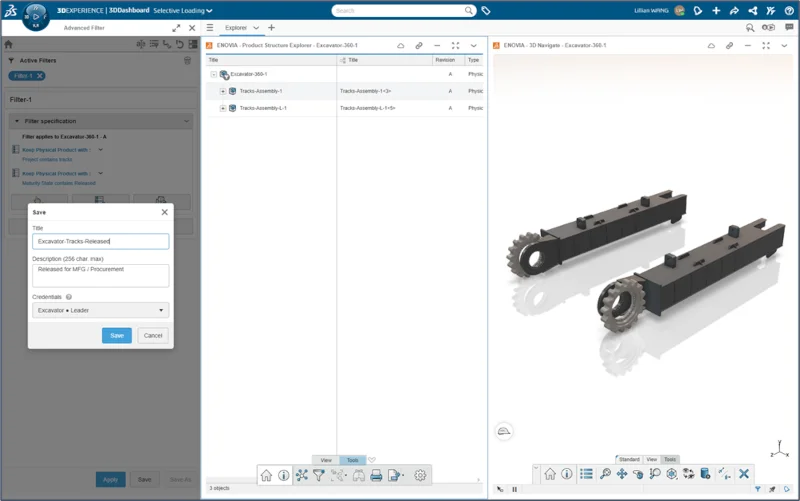
- To reuse this filter, click Save, name your Advanced Filter, and choose the Collaborative Space to save it in.
Tip: Use consistent filter names so you and others can easily find it, such as Area-Discipline-Purpose (e.g., Boom-Hydraulic-Fitment).
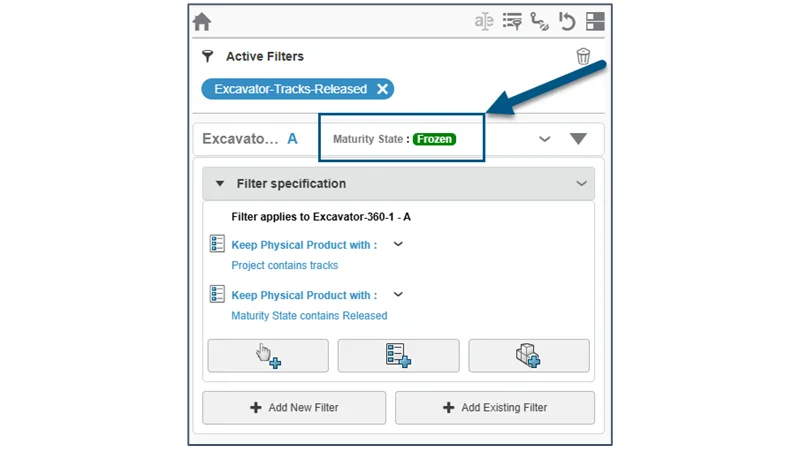
- Change the Advanced Filter’s maturity state to make it visible to your team.
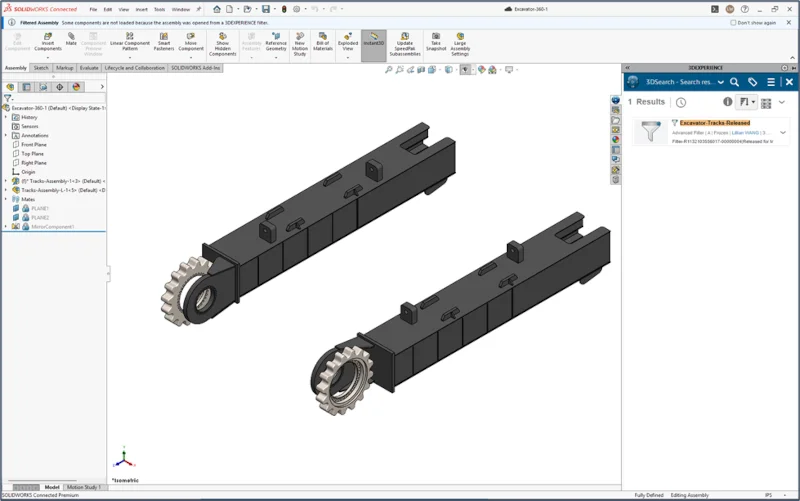
- Search for the Advanced Filter in the MySession panel in SOLIDWORKS. Simply drag and drop to open! You’ll see a filtered icon on the top-level assembly and a Filtered Assembly message.

- Edit as usual, then Save.
Make Attributes Work for You: Share Once and Reuse Everywhere
Now that you know how to create and open Filters in SOLIDWORKS, here are some ways you can leverage them to improve your workflows.
First, create and define attributes that would suit your needs for Filters. PLM Attributes are the secret sauce – invest a few extra minutes upfront and you’ll save hours later. These attributes could include Weight, Project, Discipline, Material, Vendor, etc. See this blog if you need a refresher on how to create and map these attributes.
Then, create a set of commonly used filters for your needs. Remember to standardize the naming of Filters and store them in appropriate Collaborative Spaces for your team. Also, be sure to include descriptions like “Excludes fasteners & purchased parts. Includes steel frame members” to communicate the scope of the filter.
Some example uses for Filtering with Attributes:
- Quickly edit components made from a specific material
Example Attributes: Material = Aluminum & Maturity State = In Work
- Search for components ready for purchase from a specific supplier and create a BOM
Example Attributes: Vendor = ACME & Maturity = Released
- Work on components from a specific sub-system
Example Attributes: Discipline = Electrical & Project = Excavator-360
- Review components that may be missing crucial information
Example Attributes: Weight = Empty & Maturity = Frozen
Note, you can combine these filters with the Volume criteria to isolate a specific region.
As a designer working on the same product as your peers but on different systems, you can open just your portion without having to load the entire assembly, and avoid stepping on each other. For example, on an excavator:
- Filter 1, Boom- Hydraulics – Create a Volume around the boom, add an Attribute: Discipline = Hydraulics. Lock and edit cylinders, hoses, manifolds, then save.
- Filter 2, Tracks- Undercarriage – Create a Volume around the tracks and undercarriage. Lock and edit sprocket, idlers, and track frames, then Save.
Work in parallel, save to the 3DEXPERIENCE platform, and see each other’s updates.
As an engineering manager, answer “what’s done?” in seconds. For a given project or product, filter by released maturity state. This filter will also update when components are moved to the Released state.
Now, Filters aren’t just for engineering – they can also accelerate purchasing, manufacturing, and service teams. Procurement teams can use Filters to pull a clean list of buy-parts ready for PO with specific suppliers. Manufacturing teams can filter by material or process to stage NC programming or fixtures.
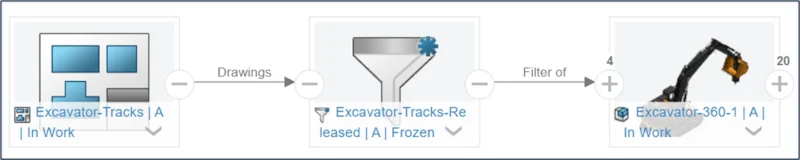
Create Drawings Directly from Advanced Filters
Not only can you open a select portion of your assembly in SOLIDWORKS, but you can also create drawings that will be associated with that Filter. Simply open your saved Filter in SOLIDWORKS and create a new drawing like you typically would. This is particularly useful for creating BOMs, cut lists, or part lists for specific needs. Create quick high-level sheets for design reviews, inspection, or service documentation without loading the whole assembly.
The possibilities are endless with Advanced Filters on the 3DEXPERIENCE platform. Open only the parts you care about, reduce load times, and collaborate more efficiently with your team. No more wrestling with the entire assembly just to make a simple change!
To learn more about recent updates, see my last blog here.
Did you know that 3DEXPERIENCE SOLIDWORKS is now available through our online store? Discover what it can do for you.