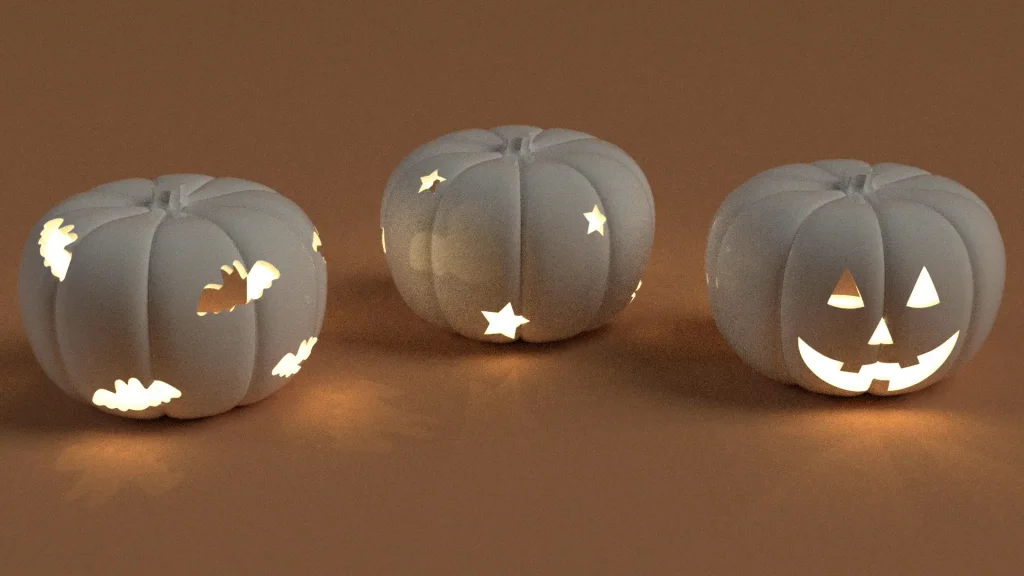
For this tutorial, I wanted to use some of my ceramics knowledge to design a make a Pumpkin shaped tealight holder. To do this, I’ve split my tutorial into two parts. Part 1 will demonstrate how to design and model stamps for 3D printing, for this you will need to download the DXF file here, this also includes a pumpkin model. The pumpkin will be used to demonstrate how I will design the 2-part plaster mold for press-molding the clay into. For part 2 of the tutorial, I will show you the result of the 3D printed stamps, and demonstrate how I made a mold of a pumpkin, press-molded it in clay, cut out the shapes using the stamps as cutting guides and how to ‘pit’ fire the clay pumpkins at home in a garden furnace bin. I will add a list of tools and materials at the end of this blog if you would like to try and recreate this project yourself. I would note not all the materials are necessary to buy, you can use a variety of makeshift tools for ceramics, these are tools I have from my own ceramics practice.
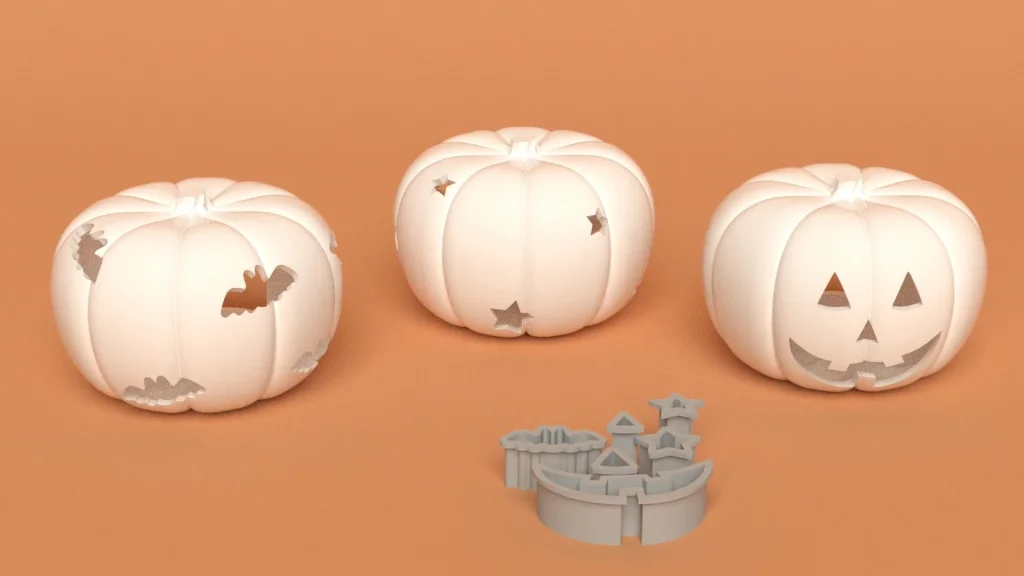
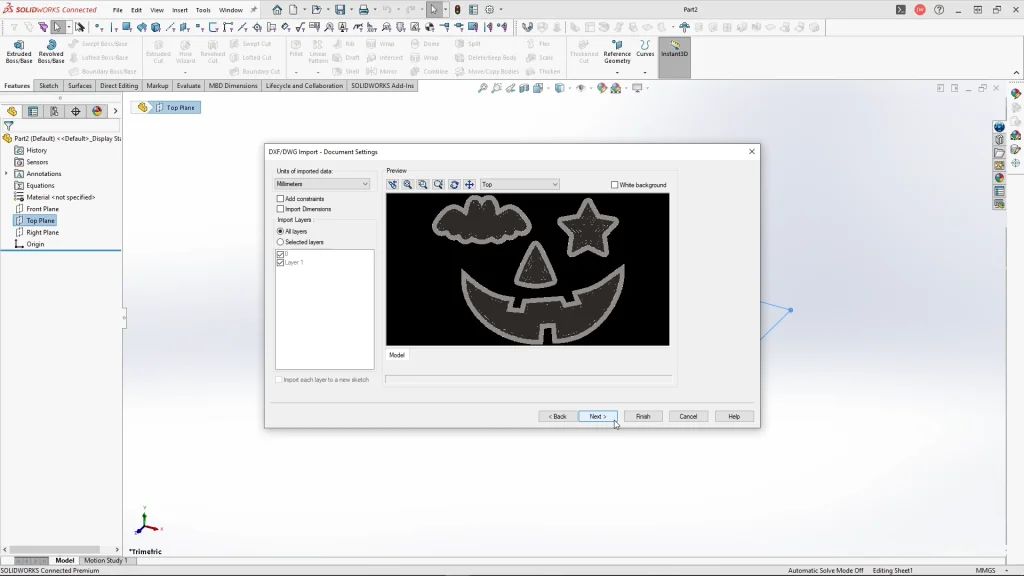
Starting with the stamps, I designed 6 stamps, a bat, 2 different sized stars, a jack-o’-lantern mouth, and 2 different sized triangles to use as Jack-o’-lantern eyes and nose. Within a new part, I selected the top plane, the insert tab and DXF. Browsing and opening the stamps DXF file, within the import options I needed to uncheck the import as reference box and select next. Here, I double checked that the units were on mm and selected finish. The stamps were designed in mm, so they should import in the same units. The DXF will come in as a sketch, I could extrude the stamps using selected contours. I placed a smaller triangle and star inside the larger shapes to create two stamp sizes.
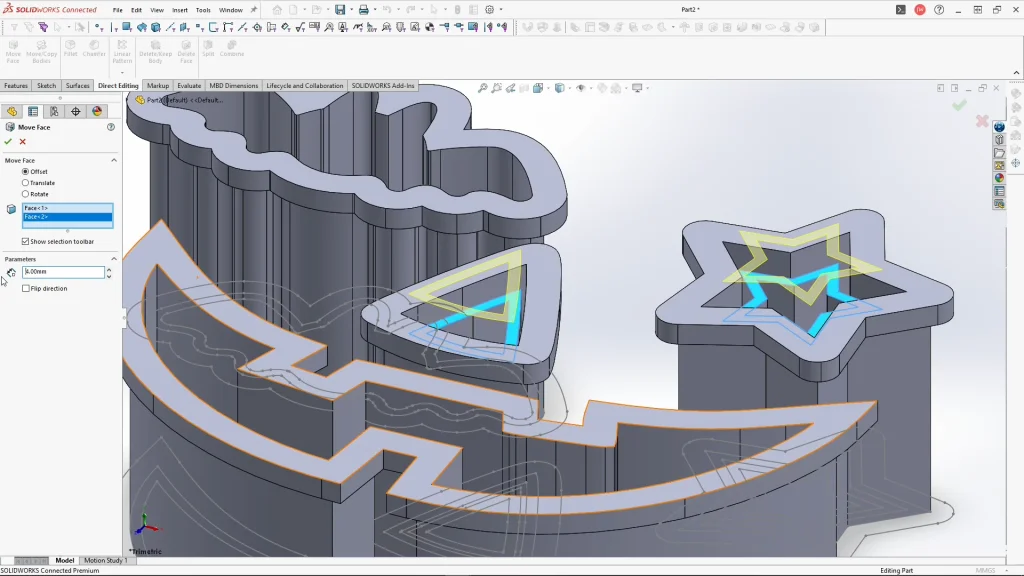
Selecting the top face of the extrusion and sketch, I added a lip to the stamps to give myself more surface area to hold the stamps, while strengthening them. I also kept them open at the top to allow my to remove any stuck clay easily. The stamps will be used as imprint stamps on the molded pumpkins, to help guide my cut holes, in ceramics this is known as piercing. For the inner stamps, I used the direct editing tab, and selecting the top faces of the smaller stamps, I’m offset their face by 4mm, then I could add a lip to these stamps too.
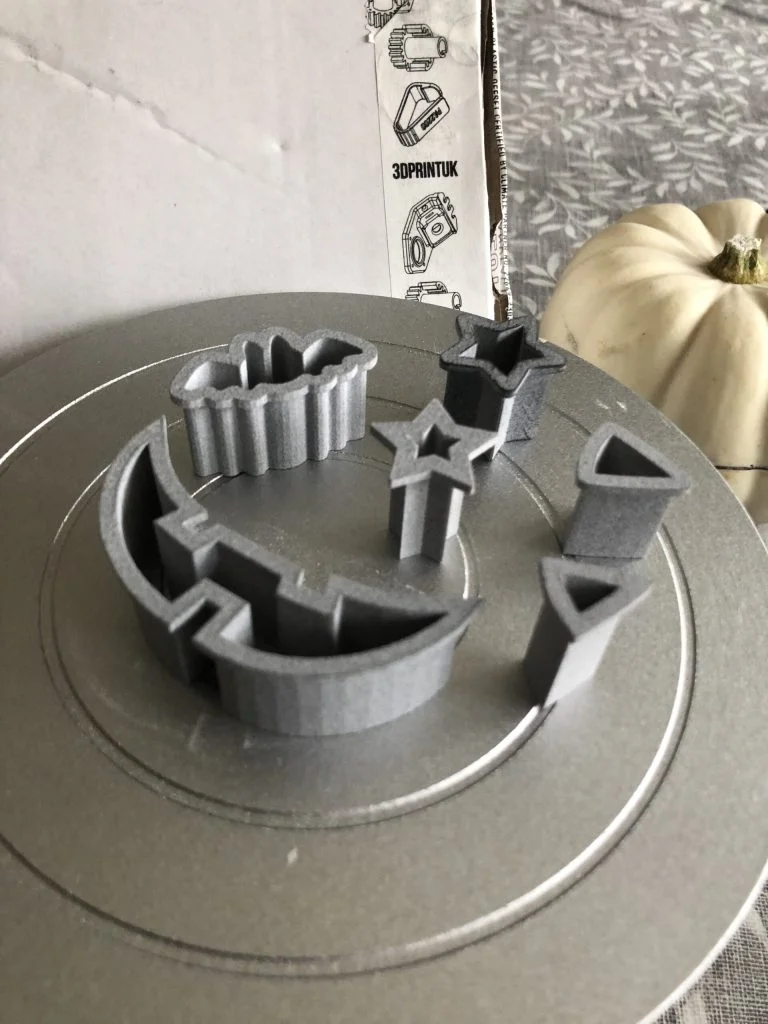
This leaves me with the 6 different clay stamps. I saved my file as an STL file ready for 3D printing, I also saved all of the stamps individually as STL files and ordered my stamps from 3DPRINTUK, in MJF Nylon PA12.
Moving onto the mold model, I opened my pumpkin model part. Selecting the top plane, I added a new plane off the top plane and a midpoint of the pumpkin model for the second reference. Sketching onto my new plane, I sketched a circle from the center of the axis and pumpkin, and extruded it to create the base of the mold, ensuring I unmerged the result. Sketching onto this top face of the mold base I created a sketch for extruding some mold natches. Natches, like interlocking pegs are used to line up mold parts, and stop the parts sliding off each other.
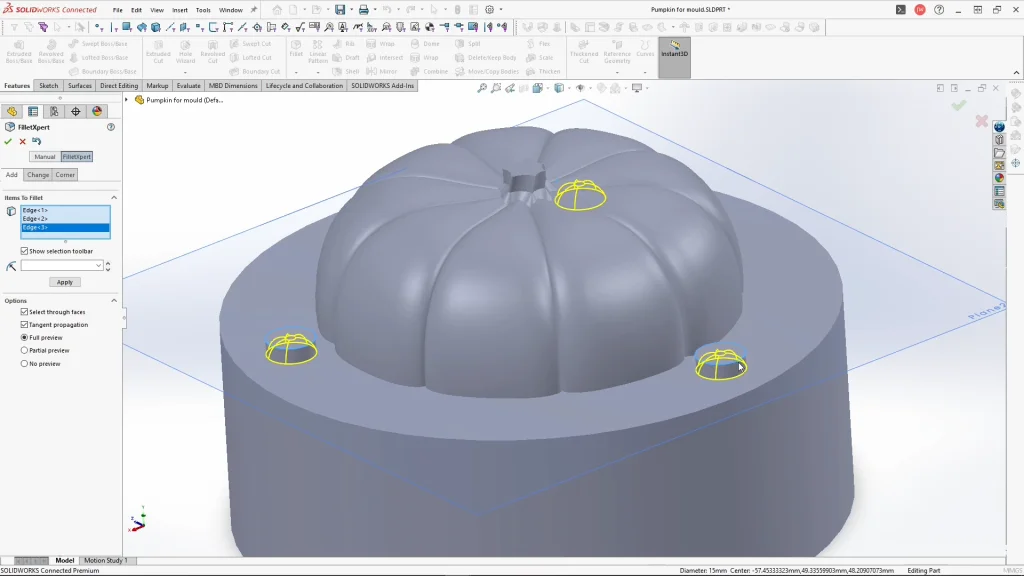
Sketching onto the top face of the mold, I converted the entities and extruded to top side of the mold, again unmerged. Its important to keep all the bodies separate from the pumpkin body. I used move/copy bodies to create a copy of the base mold solid body, I can change the copy number to one, but keep the mold part in place, you may get a warning because the part has not been moved, but this can be ignored. I can then use this copy for a combine feature. Selecting combine, I’m selecting the top part for the main body, and one of the base copies for the body to subtract. Ensuring operation type is on subtract, I can apply it. This cuts the natches out of the top mold part.
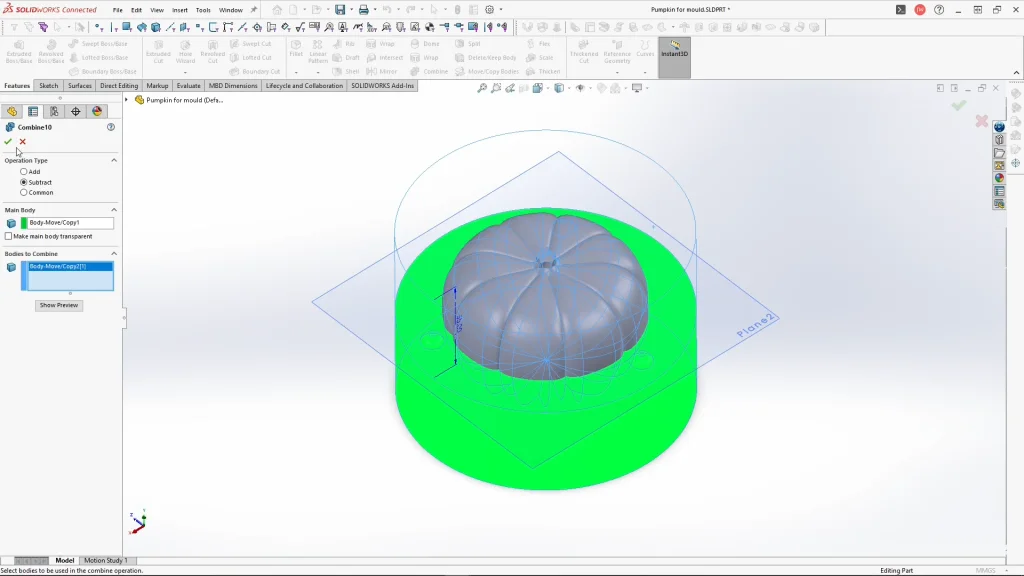
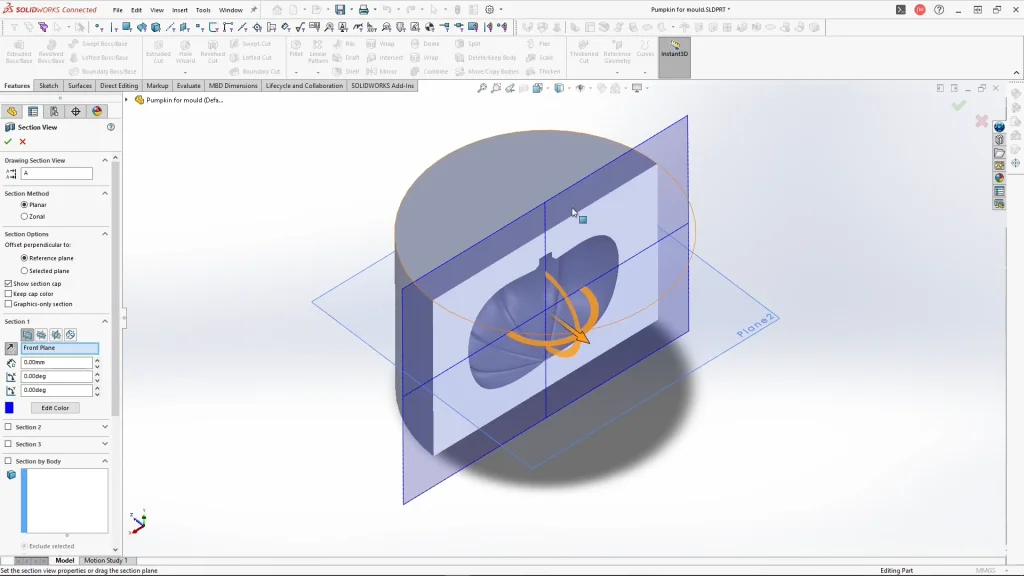
With the base mold hidden, I used move/copy bodies again, and created two copies of the pumpkin body. Using the combine feature again, I used subtract to remove a pumpkin copy from the top mold body and repeated the process for the base mold part. This leaves me with a mold cavity shaped like the pumpkin which you can see more clearly with the section view on.
For some finishing touches, I like to add some mold details, this includes adding a chamfer on the top edge of the top mold part, and the bottom of the base mold part. I do this to my own plaster molds to make it easier for me lift them of the worktop, it gives you the more leverage for getting your fingers under the mold, while also avoiding the mold chipping along the sharper edges. Finally, I added a filleted cut extrude on the outside of the mold, this is necessary for round molds as it helps you to line up the mold from the outside.
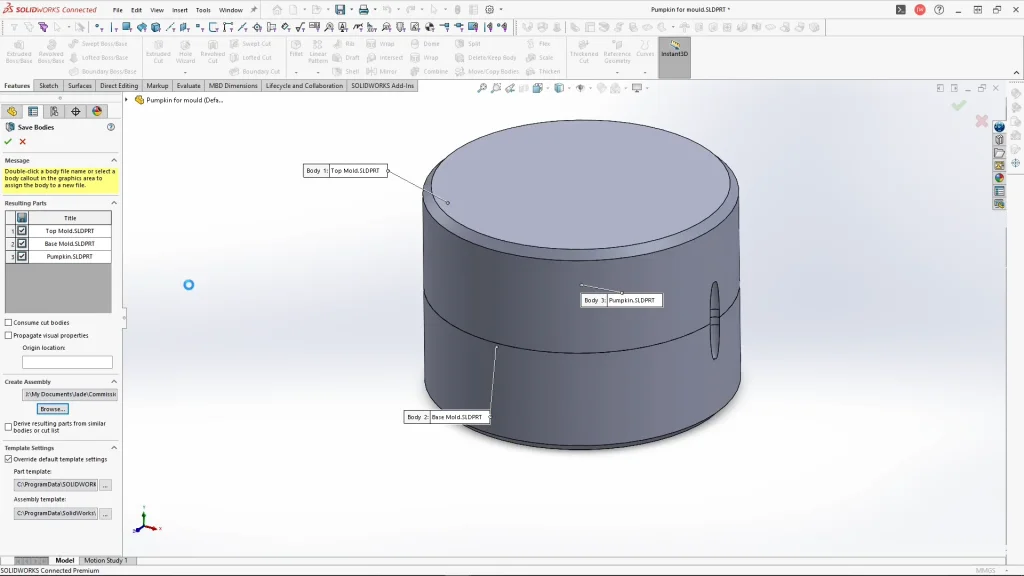
I renamed my parts, and used save bodies to create an assembly of the mold. Within the assembly I created an exploded view of my mold to create the animation you will see at the end of the tutorial which was rendered with SOLIDWORKS Visualize. Keep your eyes peeled for Part 2 to see how I put all of this to use.
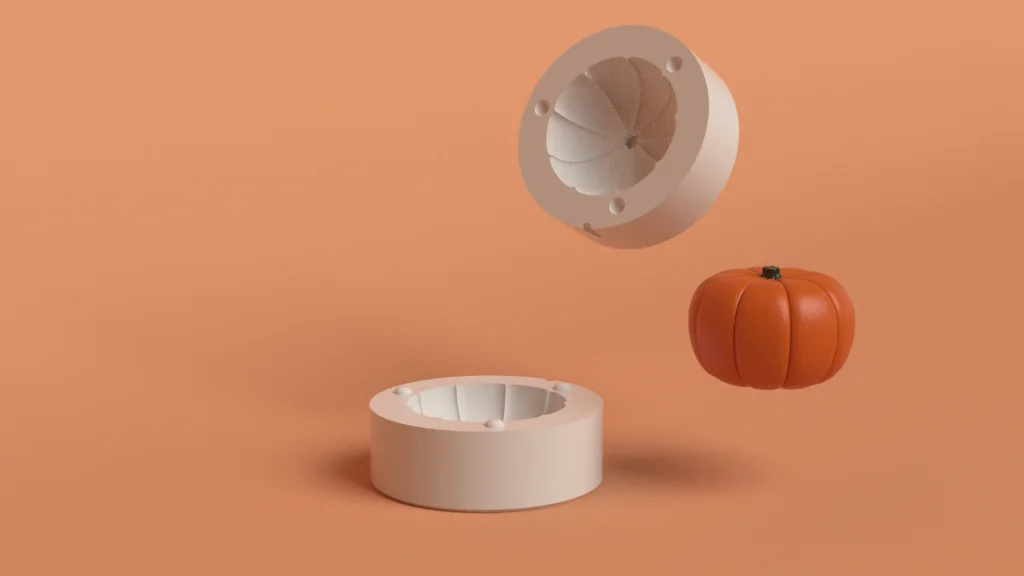
Below is a list of materials I used for Part 2 of this tutorial.
Materials & Tools List for Mold
- 12cm in Diameter Pumpkin
- Black Flexible Plaster Mixing Bowl
- Modelling Clay 1150 3kg
- Soft Soap 500ml
- Metal Steel Kidney 13cm X 0.038cm
- Potters Plaster 10kg
- Roll of thick Acetate
- Mold Elastic Bands
- Scales
- Water Jug
- Round Baking Tin 18-20cm (with removable base)
Materials for Modelling
- 3D Printed Stamps
- Banding Wheel
- Scalpel
- Potters Tools
- Sponges
- Rolling Pin
- White Raku Clay 1kg
- Terracotta Body T.S Flax Paper Clay 5kg
Materials List for Firing
- 90 Litre Galvanized incinerator bin
- Kindling
- Straw
- Sawdust
- Wire
- Newspaper
- Banana skins
- Orange skins
- Foil
- Salt
