
For this SOLIDWORKS tutorial I designed this wooden toy clock, if you want to follow along, the assembly for this tutorial is available to download here. You can watch the result of the animation from the beginning through the end of this tutorial.

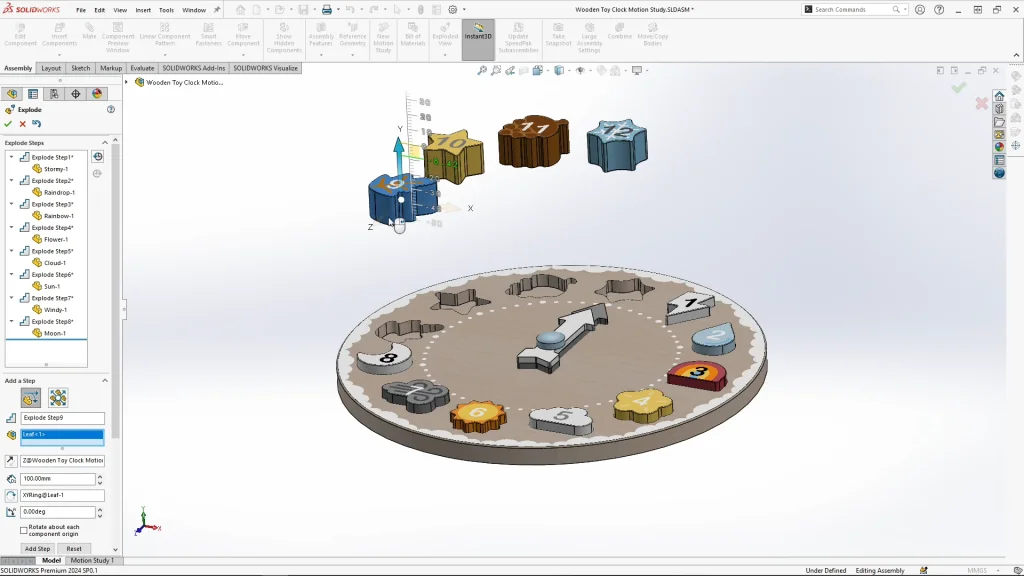
I began my assembly by lifting all of the number blocks out of the clock by 100mm, ready to create an exploded view. With this I selected each shape starting with number 1, and drag them down with the arrow to select the Y-axis for the move direction and then input 100mm to sit the block back into the base part. I repeated this one at a time, in numerical order until all of the shapes were sitting back inside of the clocks base part.
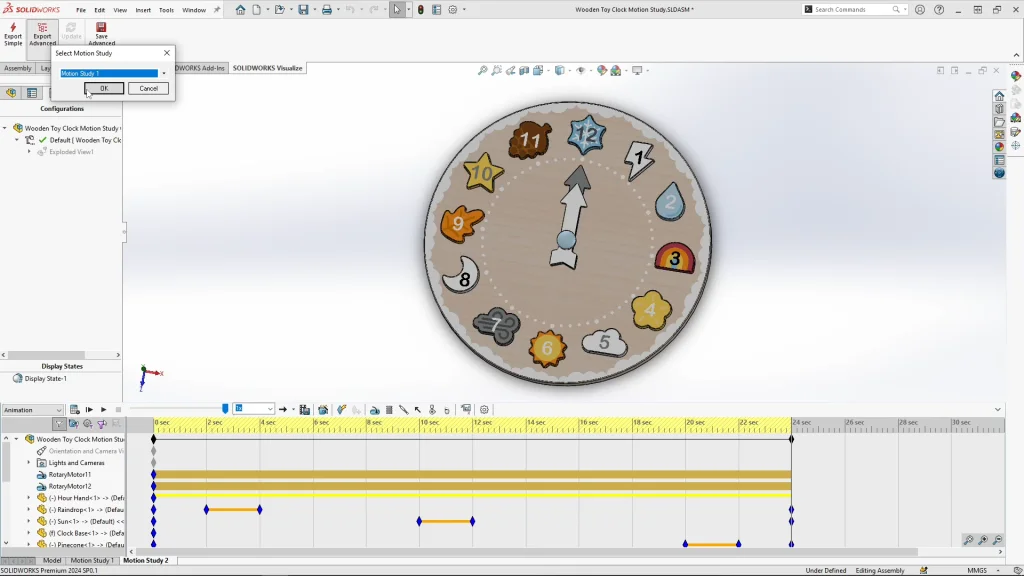
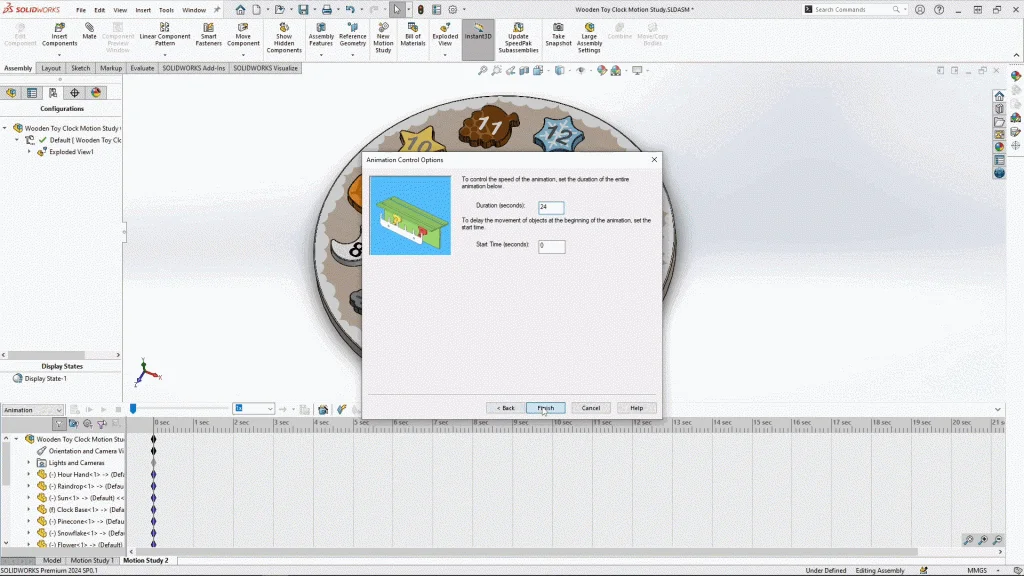
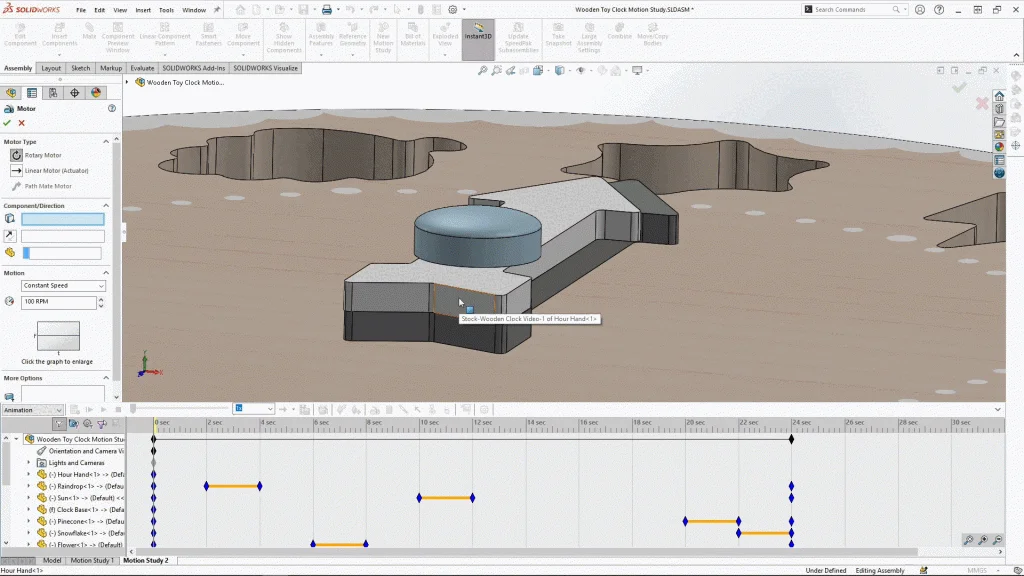
Moving onto the motion study, my study type was on animation, from here I could select the animation wizard icon, and using the explode option I can input the duration of the animation, which in this case is 24 seconds, with a start time of zero seconds, then select finish. You should see animation keys appear in the study.
To rotate the clock hands, I used motors. To ensure the hand turned from the center of the clock, I used the circular cut face of the hands that were attached to the clock pin. When you cant see the face you want to select, I would suggest right clicking and using the select other feature, every right click onto a face removes it, you can do this until the face you or entity you need becomes visible.
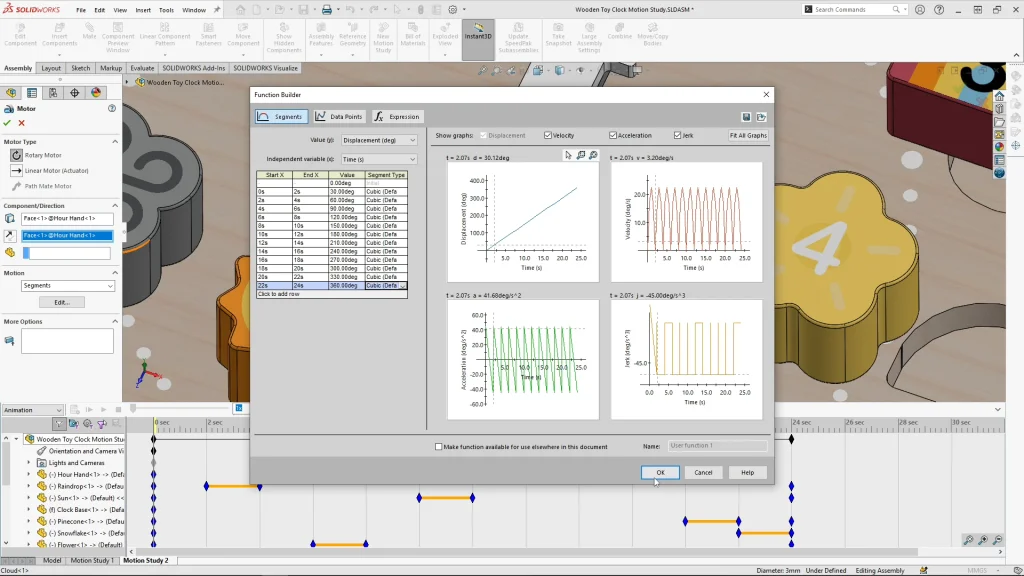
Starting with the hours hand, with the rotate direction selected and of course running clockwise, under the motion drop down menu, I selected segments, when the function builder opens, I can see all of the segment graphs that track the displacement and speed over time. I needed to ensure that I had ‘Value Y’ on displacement which is the number of degrees, and the ‘Independent variable X’ on Time in seconds. For the table, I added my first row and began the motor at zero seconds, then the length of time at two seconds. This time difference dictates the the amount of time it will take to rotate the input degrees, for the hours hand, I needed the hand to move from 12 o’clock to 1, so I divided 360 degrees by 12, and times it by 1 to get 30 degrees. Between zero and 2 seconds, the hour hands motor would turn 30 degrees and point towards the number 1 block. Adding another row, I only had to change the end time to the next 2 seconds which would be 4 seconds. For the value or degree, I needed to go up by another increment of 30 degrees, and add 30 degrees to the previous segment and input 60 degrees which turns the hand to the number two block. I repeated this for each row up to 24 seconds, continuing to increase the degrees by 30 at a time until I reached 360 degrees and the hand has completed a full turn around the clock. Once applied the motor will appear in the animation timeline.
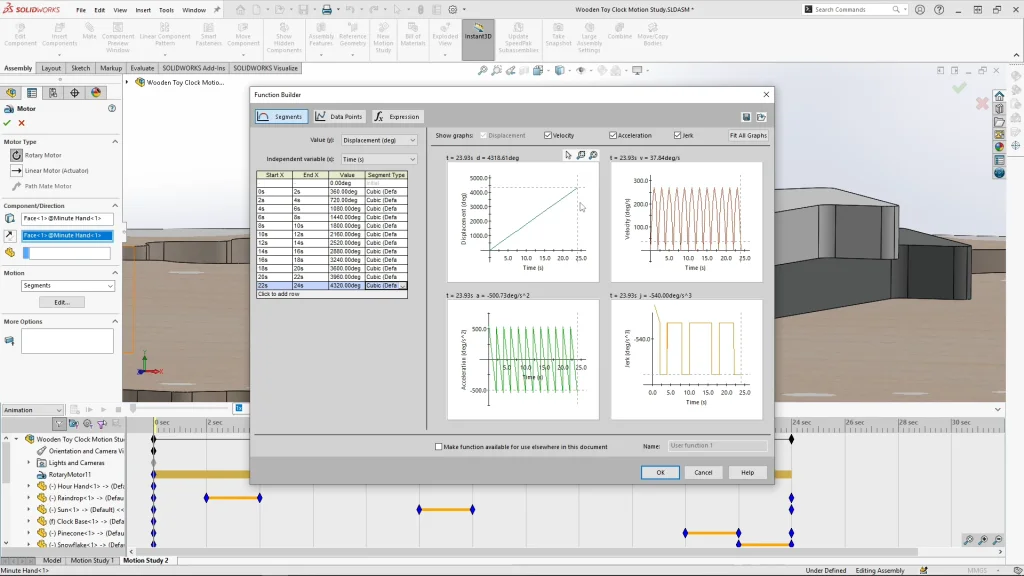
The minute hands motor is a little different, I am still working with a rotary motor with displacement in degrees across time, but the minutes hand will be moving quicker, and in increments of 360 degrees at a time, so that every two seconds it will have done a full clock rotation. For example, starting at zero seconds to run at the same time as the hour hand, the motor should turn for 2 seconds by 360 degrees. Then for the next row, between 2 and 4 seconds I needed to add another turn of 360 degrees and input 720 degrees. And so on for the next rows up until 22 to 24 seconds, ending at 4320 degrees. You can see on the displacement and time graph on the right side of the image below that the graph moves in a diagonal line, with no dips, just consistent movement over time. Applying these settings, I could select the calculate icon to run the study.
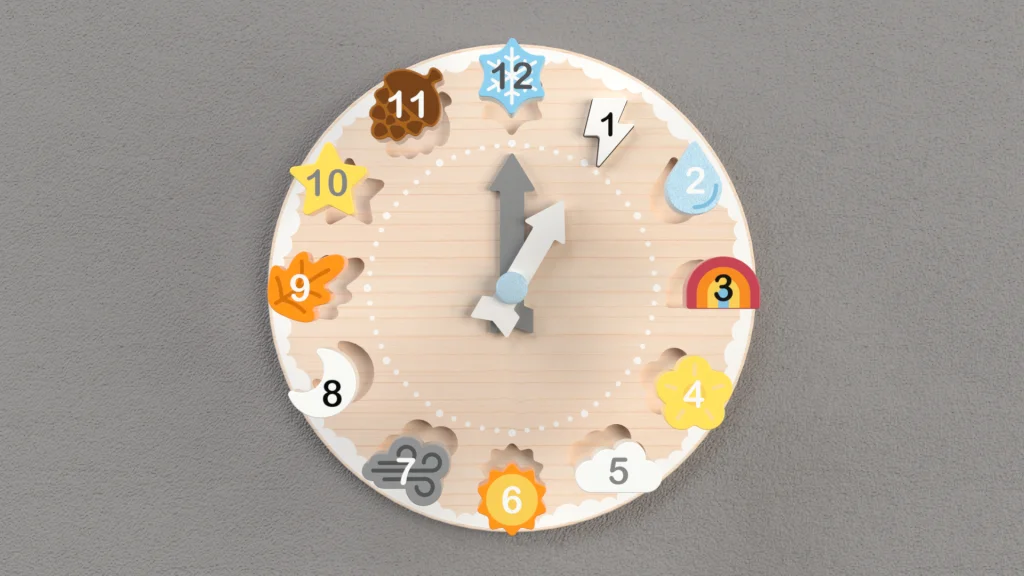
Once my study has run, I am free to play it back. Watching it back, you will see as the clock hands hit each hour, the corresponding number block slots into its space. This is due to the timing of the exploded view, there are 12 blocks, so I made the explode animation 24 seconds giving each block 2 seconds to move back into the base part. That is why I timed my hour and minute hands to move in 2 second increments, matching them up as it goes. With my study complete, I used the SOLIDWORKS visualize tab, export advanced and selected my motion study from the drop down list.