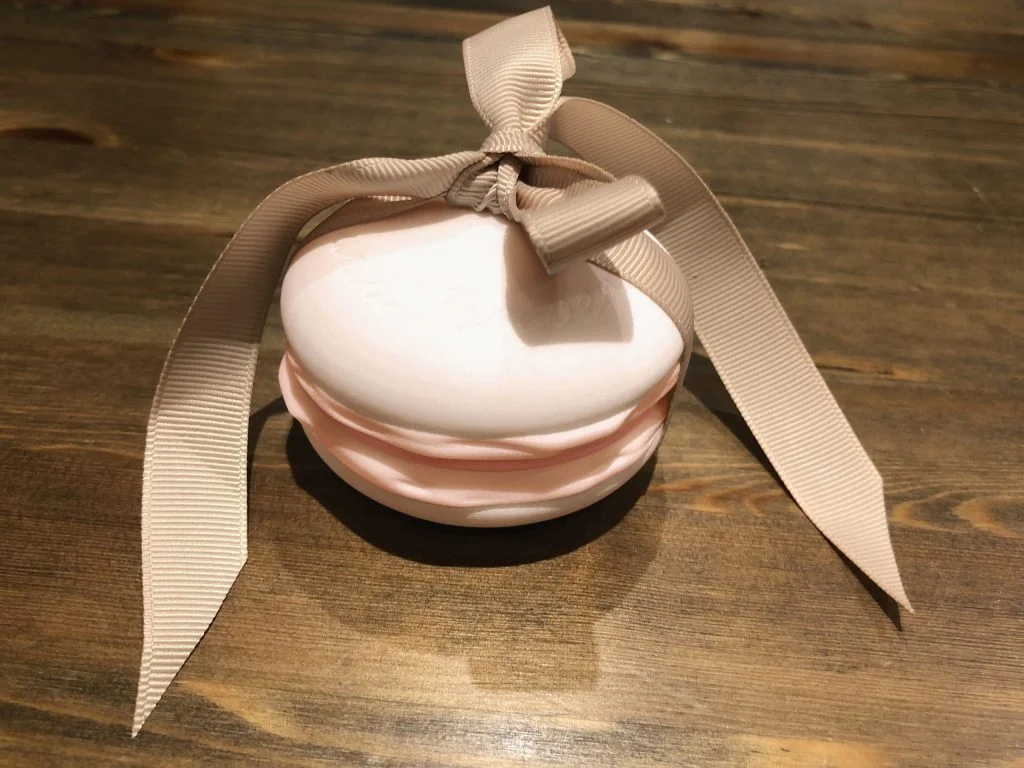

This tutorial was inspired by mine and my husband’s love of Paris, and of course macarons! So, I decided to use the 3DEXPERIENCE platform’s xShape app to design and model a macaron. The model was then exported as a STEP file and imported into SOLIDWORKS for further editing. If you want to follow the tutorial and see how I added the custom lettering with a DXF file, you can download it here.
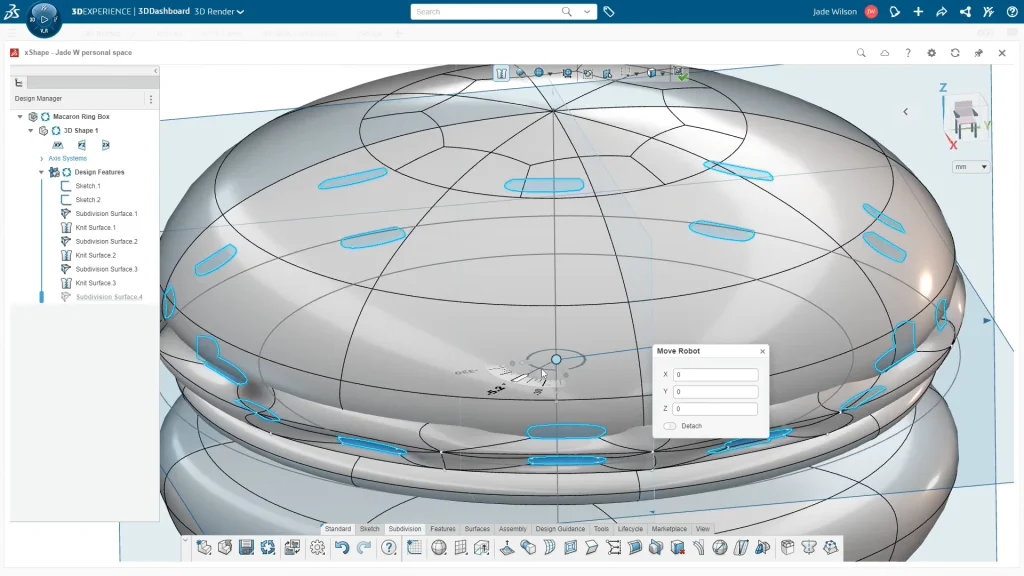
Starting on the platform, I created some guide sketches to help me model to a specified size. In xShape you can’t be exact with dimensioning models, but you can use sketches or images to model to. I had a 50mm inner circle which is the space I needed inside the box for the ring cushion, then an outer maximum diameter of the box at 68mm. Then I added a vertical line sketch to guide the height of the box to a maximum of 45mm. I began modeling the mid body of the macaron first, this part is where I needed to add a split line in the macaron, and where the two halves will join together. I used the globe subdivision surface for this and scaled it up smaller than my outer guide. For some of the modeling, I used the symmetry tool to ensure it was even across the XY axis.

The next surface I created was the top part of the macaron, again using the globe surface, I scaled it up a touch smaller than my guide, but larger than the macaron’s middle part. I used the delete faces tool to remove the bottom half of the shape, and then the fill tool to close the shape up again to create this shape. I had to scale down the height of the surface to fit under my height guide sketch, while also leaving a little space between the new shape and the middle shape ready to create the macaron edges. I tweaked my surface to look like a squished dome, which is slightly boxier. Once done, I could use copy and paste, to copy the macaron top and create the base part. I used flip axis to flip over my copied surface, then move it below the middle surface ready to edit. I flattened the base of the macaron part a little using delete faces and the fill tool to be able to sit onto a surface with less movement. Plus, I ensured the surface is sitting onto the bottom point of the height guide sketch.

For the macaron edges, I used another globe surface, scaling up to the outer circle guide sketch, I also increased the number of loops in the shape to make it easier to add more details to the shape. I used the subdivide face tool to split different faces around the surface. I did this in two parts so that faces would remain separate from each other and create smaller inner faces. Selecting the smaller inner faces created by the feature, I scaled them down from the canter of the macaron to create dimples. I also twisted the faces a little before editing more of the faces, pulling inwards and outwards, twisting faces or moving them around to create an irregular surface. The surface needed to look like the rougher surface of a macaron, but I had to be careful not to intersect faces or create thin edges otherwise it may not have knit into a body. Again, I used the copy and paste feature to copy the surface and pull it below the middle part and rotate it around so that the copy feature isn’t as obvious. Once I was happy with my model, I exported my model as a STEP file to open into SOLIDWORKS.
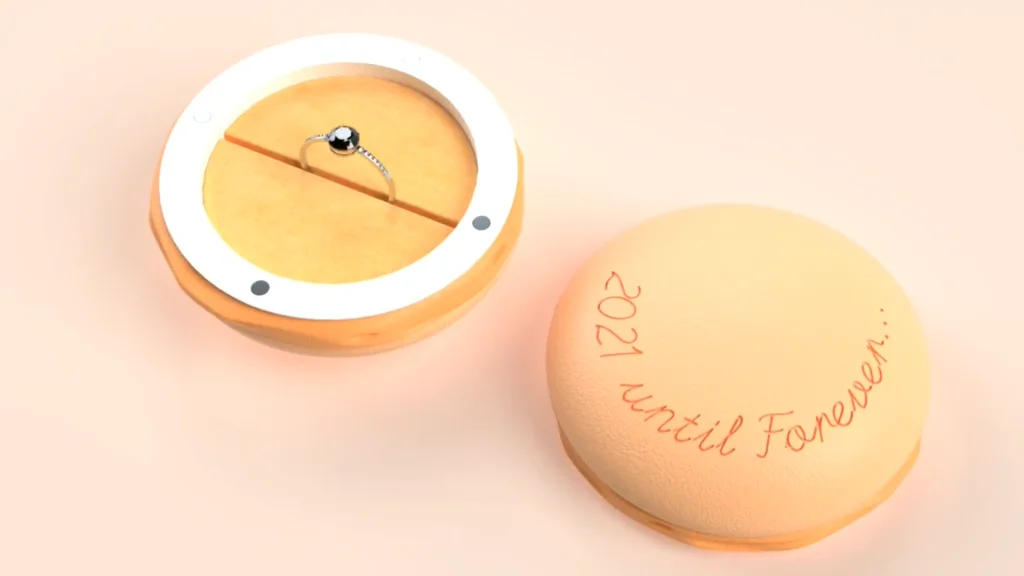
Moving into SOLIDWORKS, I’ve provided the Macaron STEP file here in case you don’t have access to xShape and want to follow the tutorial. Bringing in the STEP file, I began by combining all the solid bodies of the macaron into one body. The next step was to create a cavity within the macaron for a velvet ring cushion, but also space for my engagement ring. Using the section view across the front plane, I can see the cavity I’ve created, and soften the inner edge with a fillet.
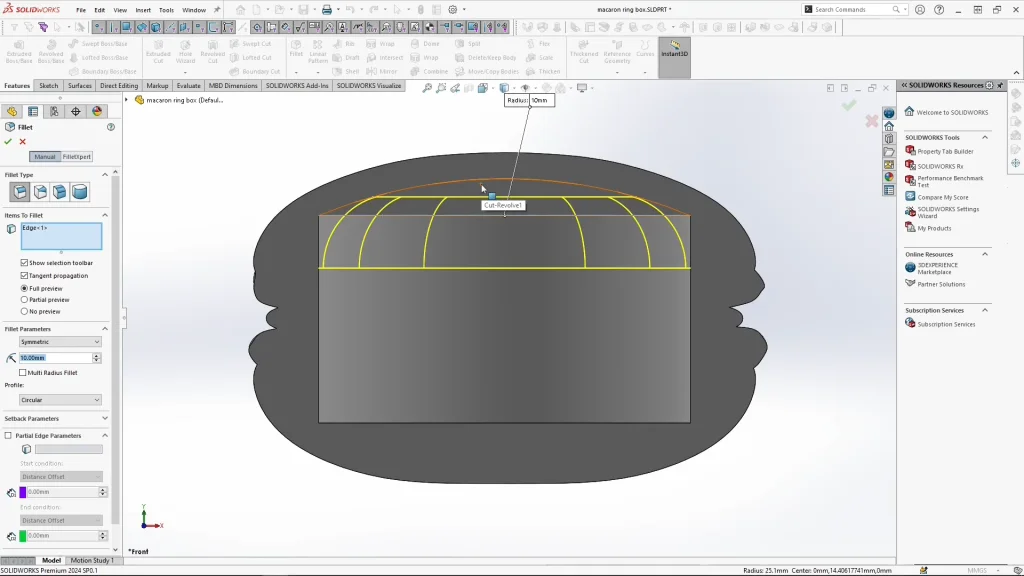
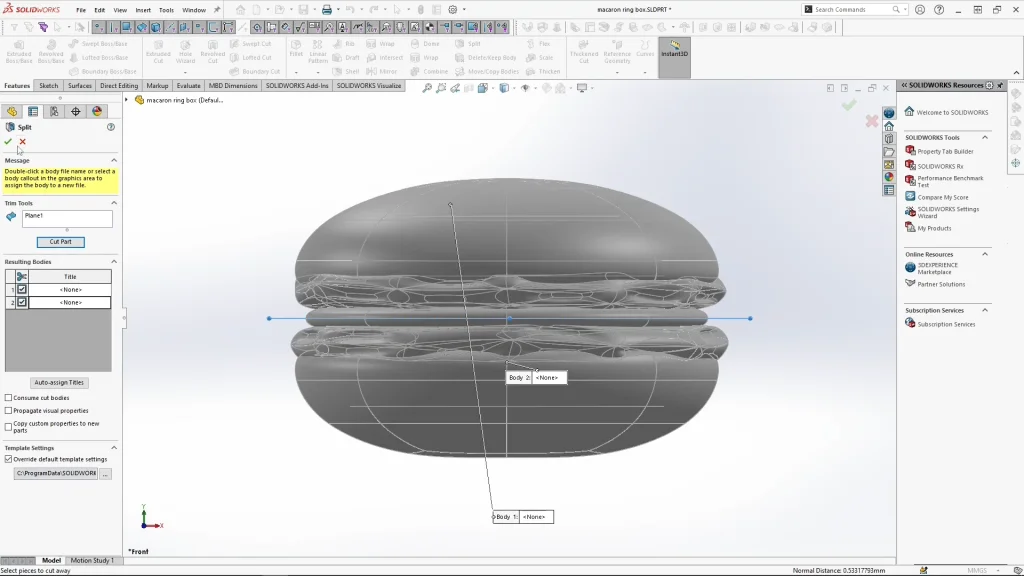
To split the macaron into two parts I added a new plane off the top plane and used a point on the macaron to place it center to the part. With my new plane applied and selected I could use the split feature to create two macaron halves.
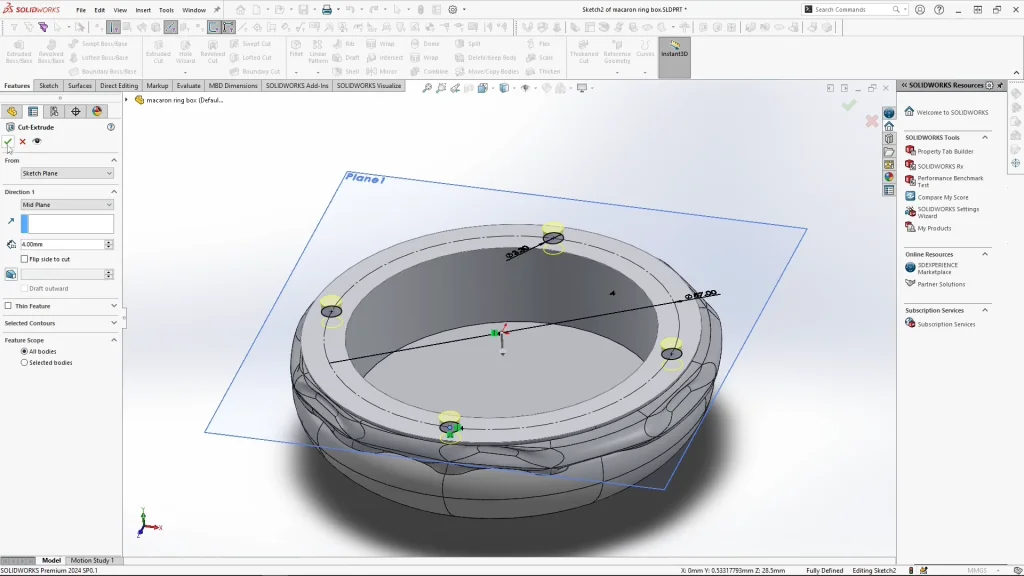
I added 4 circular cut extrusions on the inner split face of the macaron, cutting into both halves to create spaces for small magnets, these will be glued into the 3D print part. I sketched these 0.3mm larger just to account for any slight warping during the printing.
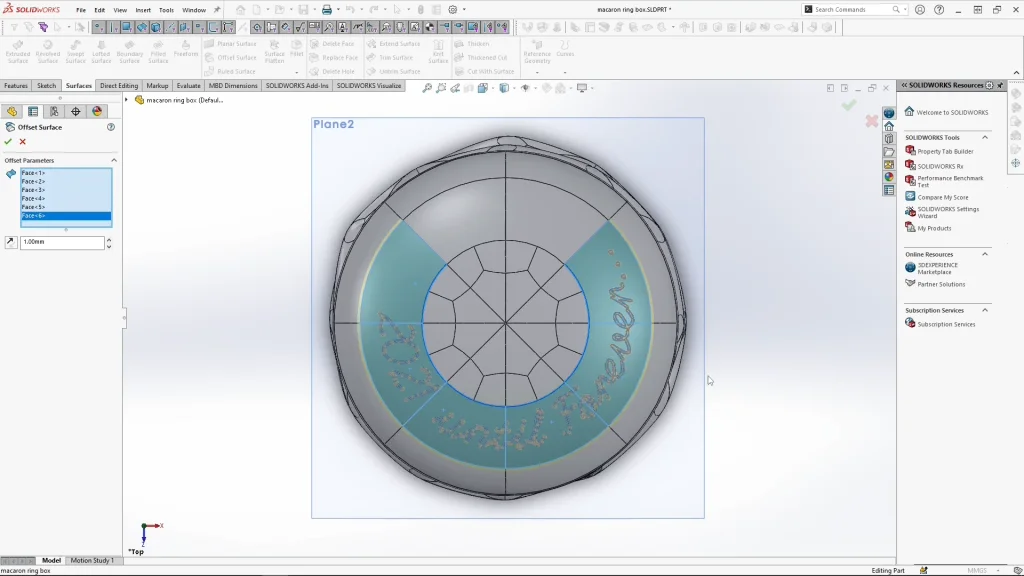
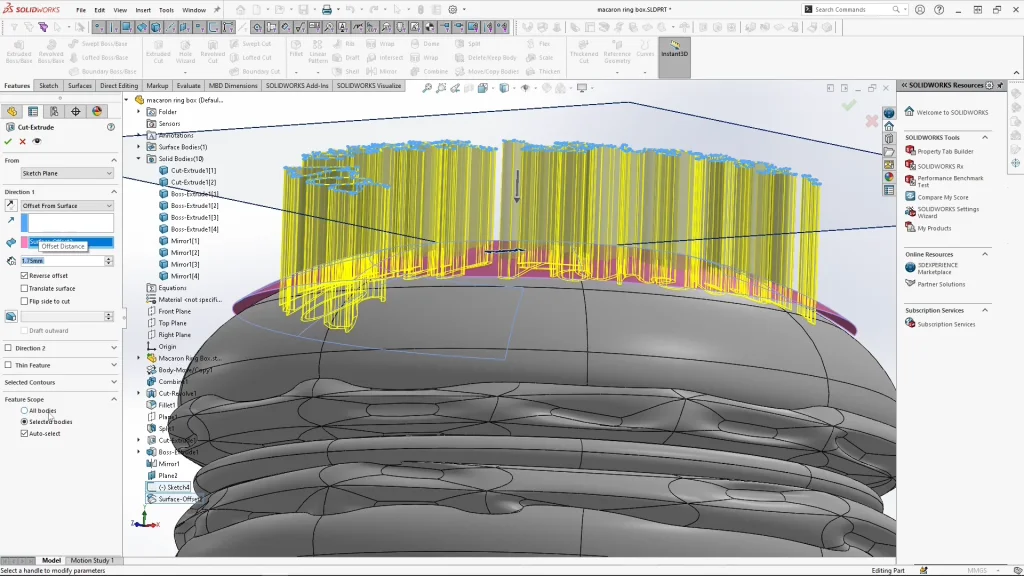
For the engraved text, I added another new plane above the top of my macaron to bring in my DXF file. With my new plane selected I could insert my DXF file, because of my model type I can’t wrap my sketch onto the surface. So, closing the sketch, I used the surface features and offset surface. With my offset dimension on 1mm and selecting all the faces that the DXF sketch covers viewing my model from the top, I could create the new surface, and use this for an offset from surface cut extrude.
With extrude cut, I had my sketch selected, and used ‘offset from surface’, using the new surface I created, I could reverse the cut extrude offset to engrave the text sketch.
Once my parts were complete, I used ‘save bodies as new part’ to save the top and bottom parts of the box as separate STL files to 3D print. My parts were printed by 3DPrintUK in an SLS Nylon. I plan on hand painting my macaron box, but for now I edited the photos, you can see the result below.
