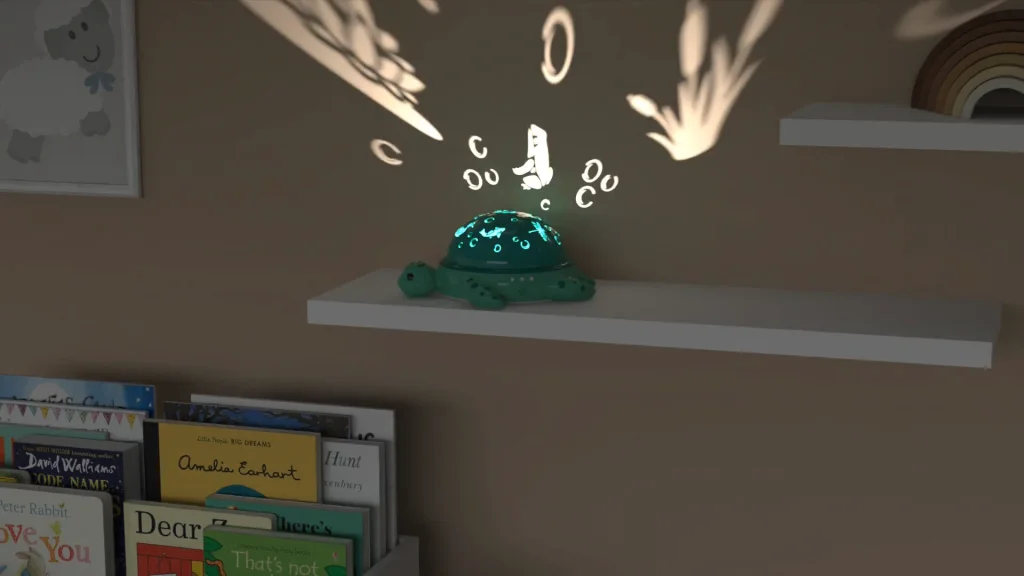
This tutorial is inspired by my newborn son River. I wanted to design something I would love to be able to buy and pop into his bedroom. So, I designed this river themed turtle projector with river themed wildlife and water symbols cut out of the turtle’s shell. I used this as a vessel to showcase animating light colors and environments, and animating parts within the model to create the moving projector.
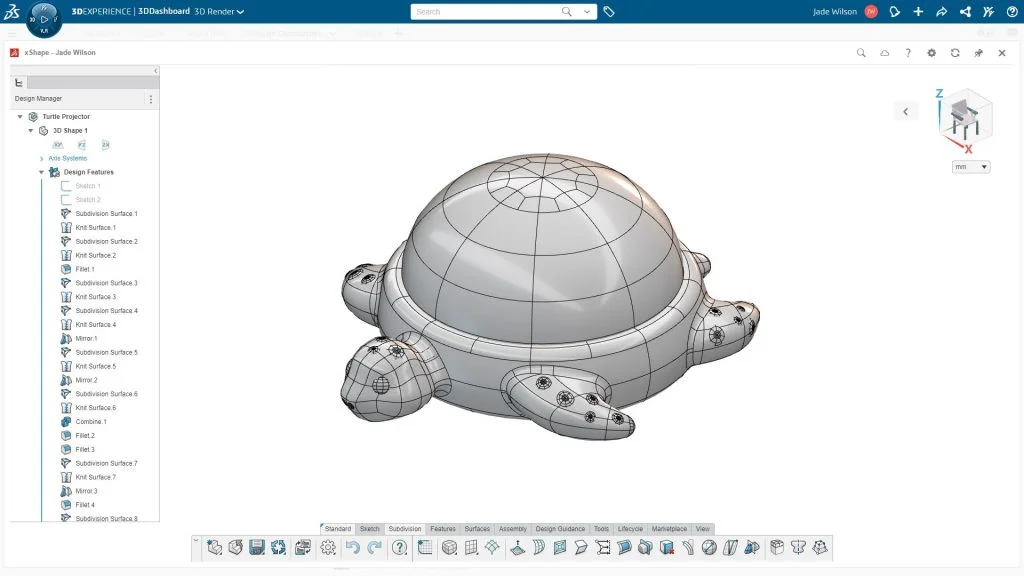
I designed and modeled the whole projector on the 3DEXPERIENCE platform that contains the xShape app, which you can find within the 3D sculptor role. I then exported my model as a STEP file to open in SOLIDWORKS and apply my appearances and cut out the projector details, I could then export my model again into SOLIDWORKS Visualize.
Within Visualize, I’ll start by talking about my layout, I have my camera aspect ratio on 16 by 9, this is what I would typically use for my renderings and tutorial videos. I also positioned my design within a child’s room layout I created for a previous tutorial, but with this one I duplicated a shelf component to sit my projector onto. I used the add model feature to add a plane model to create a ceiling for the lights to project onto it, but also to achieve more accurate lighting effects to the scene. Creating environments relevant to your models can really amplify your render, something I always try to use within my renderings are decals, having decals in the background or applied to a model that requires those additional details can add those finishing touches to really elevate and add realism to your renderings.

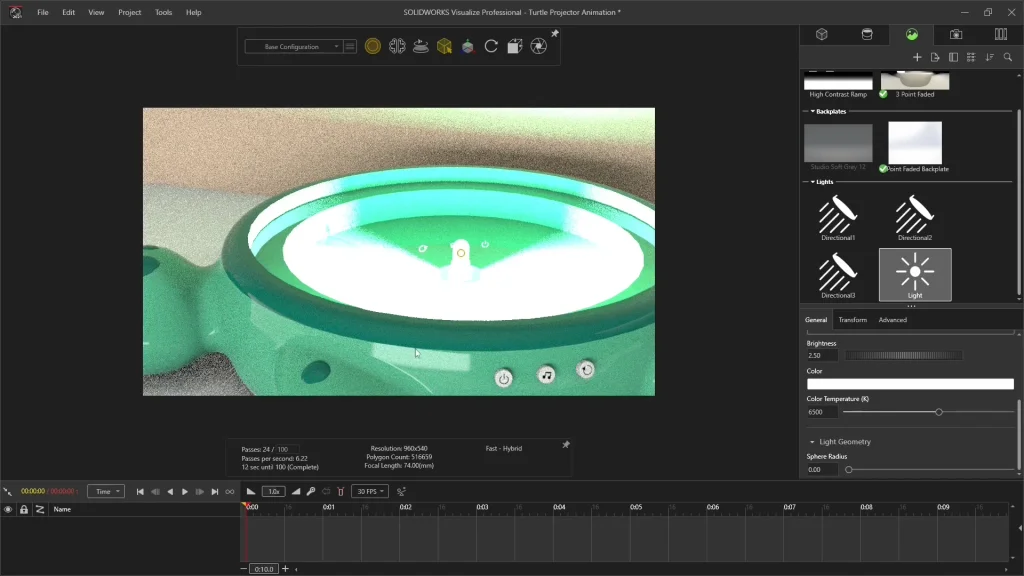
The first thing I applied in the tutorial was a new light, viewing my projector with the turtle shell hidden to see my LED light however, the LED appearance emission values would not be powerful enough to project through the turtle’s shell. To add a light source, under the scenes tab I could right click into the lights section, and select, new light, pick position. You’ll see the arrow turns into a plus icon to pinpoint where you want to drop the light. I positioned the light onto the LED. I changed the light type to a point light, which illuminates from all directions, in a spherical form. I tweaked the brightness of my light and the lights sphere radius to 0.001 making it a small as possible to sit within my LED. I used the transform options to ensure the light was center to my LED light and that it sat at the top of the light to ensure it shone accurately. When I brought my turtle shell component back into view, I could instantly see the effect it has created the light was now powerful enough to project up and onto the ceiling which is just what I wanted for my rendering.
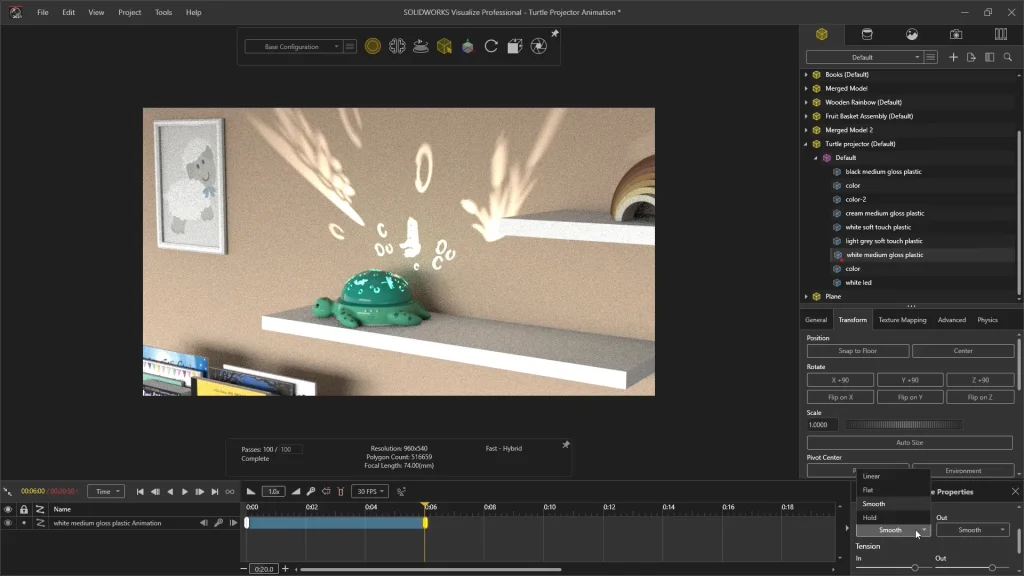
Moving onto the animation, I began with an animation length of around 20 seconds, this would be a typical teaser video for my tutorials. The first element I animated was the turtle shell, this part needed to turn around in position. To add this into my animation, I added a keyframe to the turtle shell part at zero seconds, then at 6 seconds I added a second keyframe. These were in place so that I could hold the shell still for the first 6 seconds, you can control movement between keyframes using the keyframe properties options which you can see below. For my second keyframe I could change the transition ‘In’ to the keyframe to ‘Hold’ and repeat for my first keyframe on the transition ‘Out’. I like to control the movement of my parts from the very beginning of an animation, even if they’re going to remain still.
The next keyframe I placed was at 10 seconds, using the transform options I selected the rotate 90 degrees on the Y axis option, so that between 6 and 10 seconds the projector turned 90 degrees, I could see the movement in my render window. I repeated this at 14 seconds, 18 seconds, then at 20 seconds, then rotated it a final time to bring it back to its starting position. The ability to simply drag keyframes up and down the timeline afterwards to increase or decrease the time it takes for the shell part to rotate was super useful, it allowed me to slow down the last rotation of the projector and come to a standstill which was quite effective for my final animation.

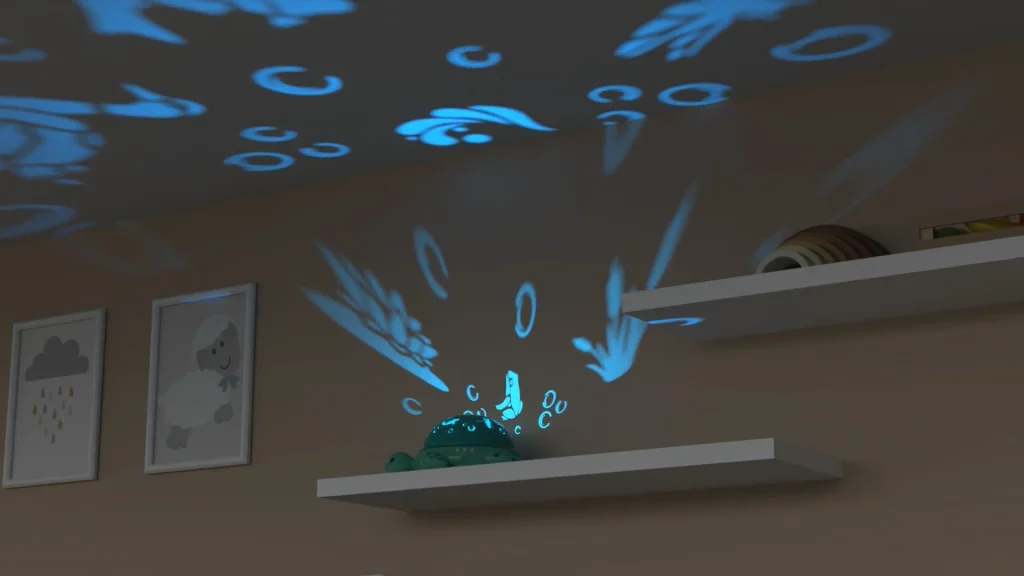
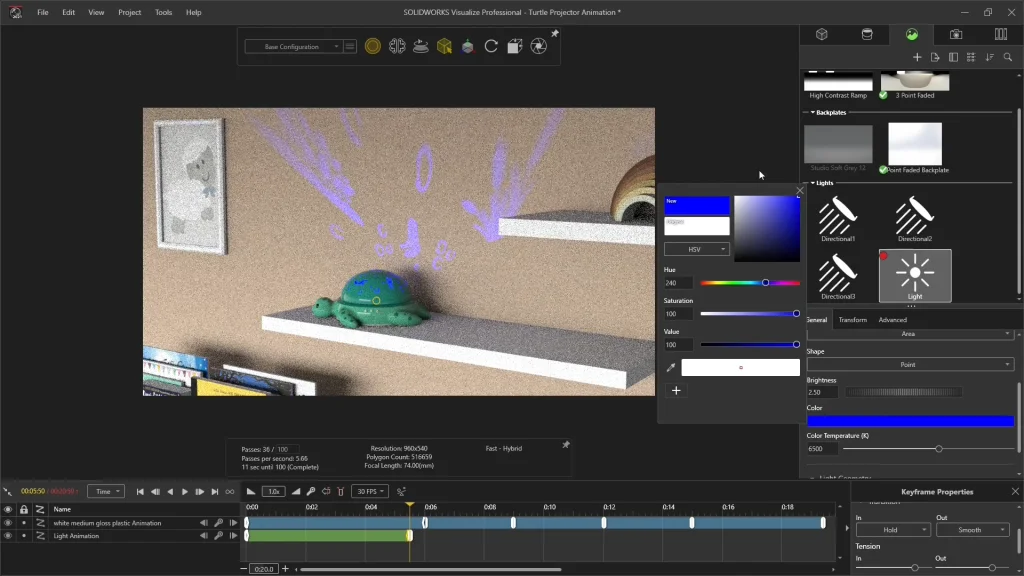
The brightness and color of the lights can also be animated! For the first 5 and a half seconds of the animation I turned the brightness of the light to zero, so that it would switch on at full power as it started to turn. With my projector being water and nature themed I really wanted to play around with some earthy colors. To do this I added a keyframe to my point light and changed the color to a bold blue, then a few seconds later I changed the same light to a lighter shade of blue. I repeated the process for a few more frames a few seconds apart. I selected colors along the spectrum, rather than selecting randomly, moving through the colors in this way, makes my color changes smoother and creates a natural progression., rather than going from a red to green which would create a brownish light in-between! I had my keyframe transitions between each set to smooth ‘in and out’ which allowed the light change to be subtle and gradual.
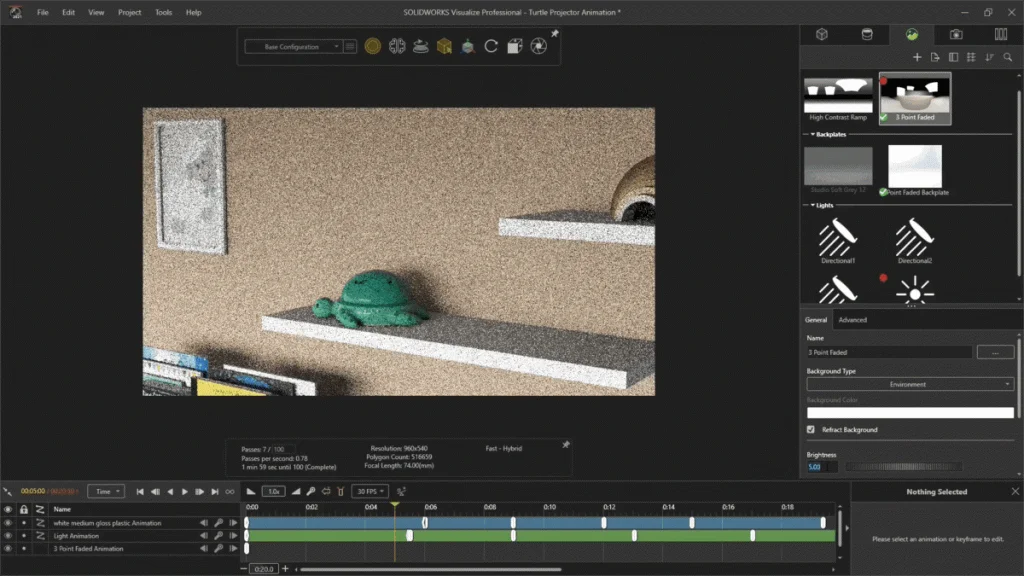
My next step for my animation was to look at the scene. Thinking of my final animation, I wanted the environment brightness to go from light to dark, as if I had turned a light off in the bedroom, to make the projector images bolder against the other objects in the room. To do this I added a keyframe to my environment at zero seconds at a brightness of 5, then at 5 seconds edit the brightness to .75. I didn’t want my scene to become pitch black, as I still wanted to be able to see some of the model details.
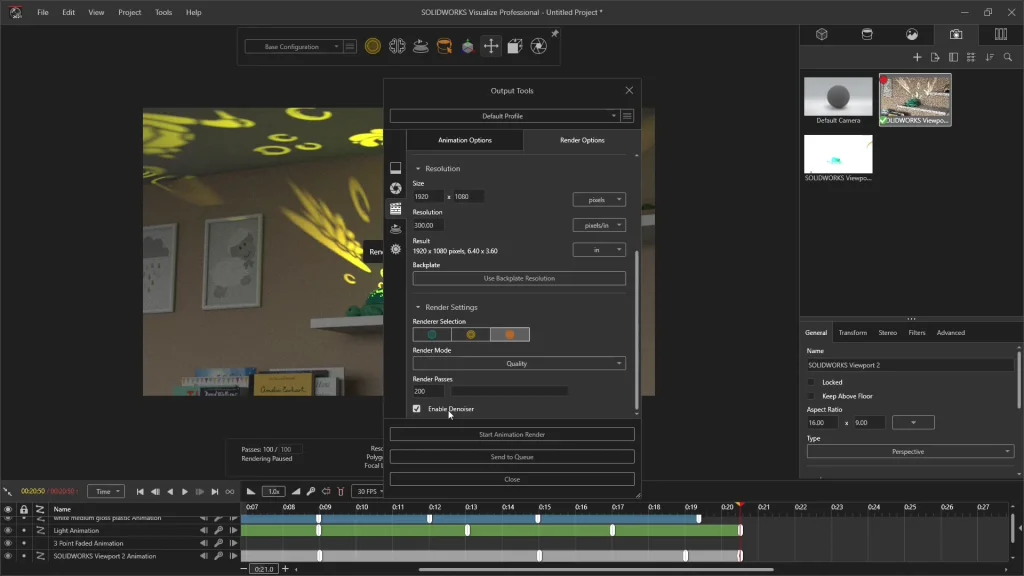
When it comes time to render, I ensure my render type is on animation and create movie is checked, which will combine all the individual rendered frames into an mp4 file. I like to change the number of frames per second to 45, because this creates a smoother video. At 45 frames a second, I had 922 individual renderings for my animation. Next, I look at my render quality, for this project which is quite detailed and includes moving lights, I went with a high-quality render, and increased my render passes per frame to 200, this made a huge difference to the final quality. I also kept ‘enable denoiser’ checked which can help keep your renderings sharp and help to speed up rendering times.
Below is the final rendered animation.

