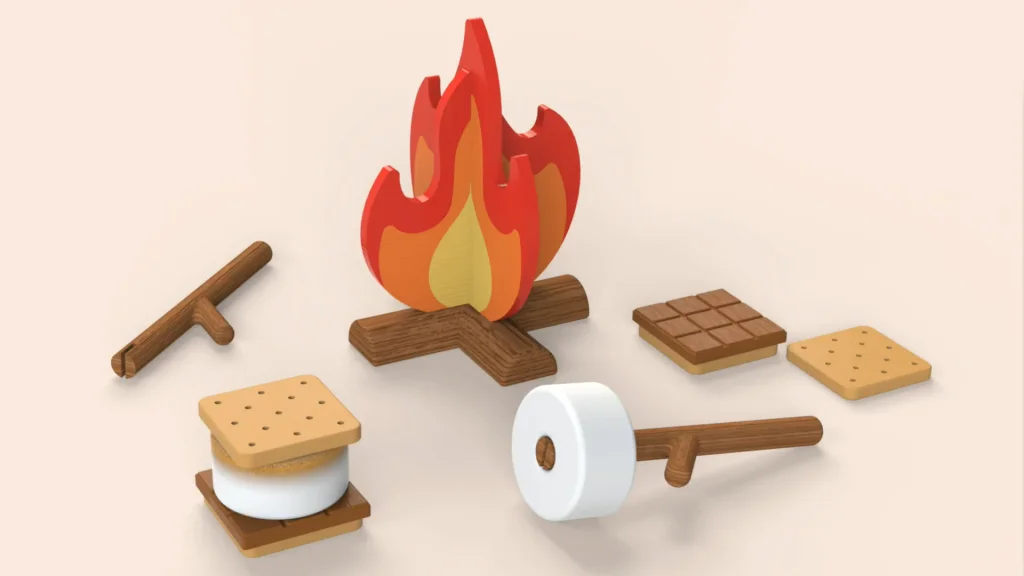

For this tutorial, I designed a s’mores themed wooden toy. In this tutorial I will feature some of the tools I used to create the 3 parts of the s’more; the cracker, chocolate bar and marshmallow. At the end of the tutorial, you’ll see a snippet of SOLIDWORKS Visualize where I used keyframes and the decals opacity to give the illusion that the marshmallow is being toasted by the fire. Below, I marked out the 6 tools I featured in the tutorial.
Featured Tool 1 – Fill Pattern
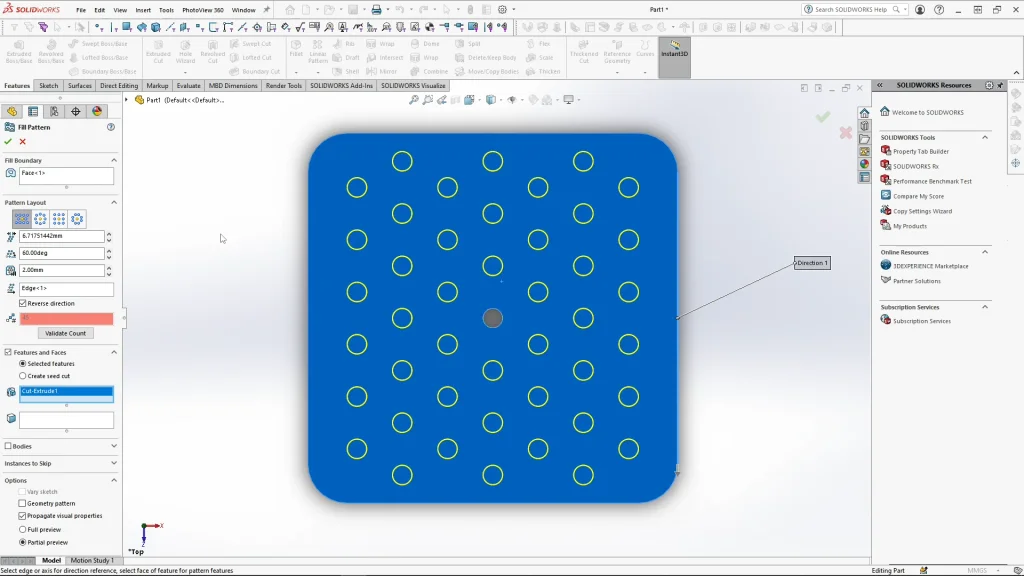
Starting with the cracker part, the design is very simple, but I thought it would be nice to use it to show the Fill Pattern. For the holes pattern of the cracker, it can be created with some linear patterns, but the fill pattern can be much more simple to create, and can be used to fill a more complex face shape. I then need to create a feature, such as a boss or cut extrude. I create a small circular cut extrusion, through all, into the top face of the cracker. I can then select the fill pattern feature which you can find under the linear pattern drop down menu. The first thing SOLIDWORKS asks for, is to select the fill boundary, for this I selected the top face of the cracker. Next, I need to choose the pattern type. I used perforation, but there are a few to choose from. I then have to select the feature I want to pattern, once the cut extrusion is selected, a preview like below should appear, this will help you see the pattern you’re creating when changing dimensions. You can choose how far away from each other the instances are, and the angle between instances. The final option is for the margins, which is how close to the edge the pattern will go.
Featured Tool 2 – Linear Pattern
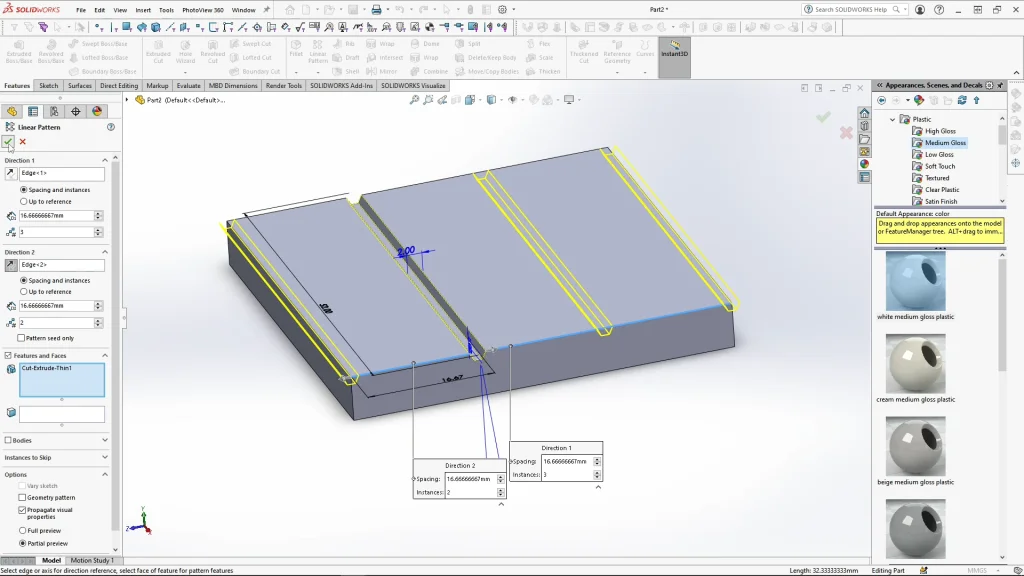
For the chocolate bar part, I used a single cut extrude thin feature and the linear and circular pattern features to form the chocolate bar segments, I included a draft cut within the thin feature to make the chocolate bar segments look chamfered around each segment. Using linear pattern under direction 1, I selected the direction for the feature using the edge of the parts extruded body, then the cut extrude thin feature for the features/faces to pattern. I input the length of the part, 50mm and divided it by 3 to create the spacing, then input 3 instances. For direction 2, select this edge, and input 50 divided by 3 again with 2 instances. You can see the preview of the linear pattern below.
Featured Tool 3 – Circular Pattern
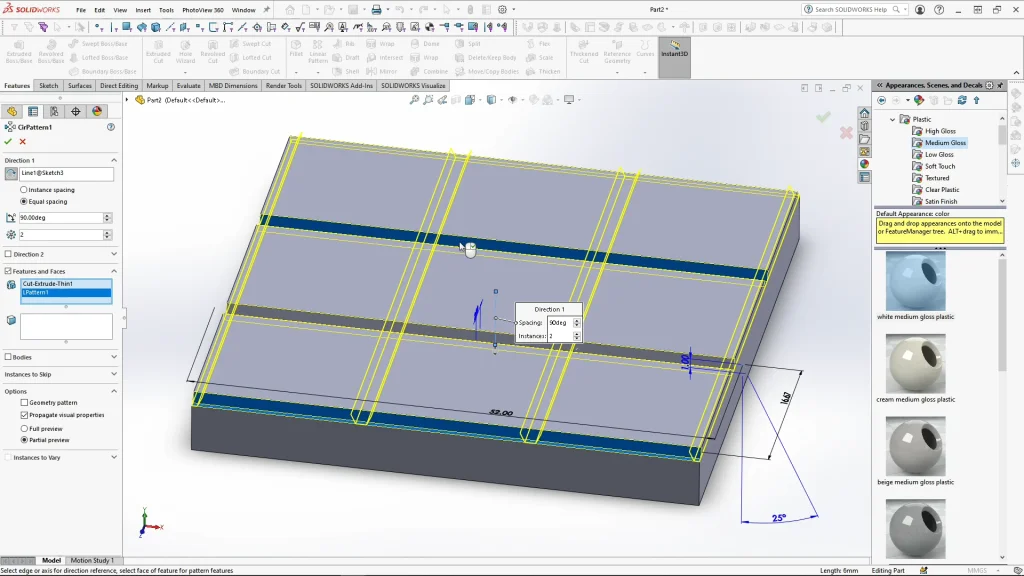
For the circular pattern I create an axis sketch. Sketching onto the front plane, which was center to the square extrusion of the part, I sketch a vertical line center to the part. Using circular pattern, I can select my line for the patterns axis, and for features to pattern, I selected the cut extrude thin feature, and the linear pattern feature. For the pattern I had the direction angle on 90 degrees with equal spacing, and 2 instances. When I apply it, it creates the chocolate bar segments.
Featured Tool 4 – Smart Fillets
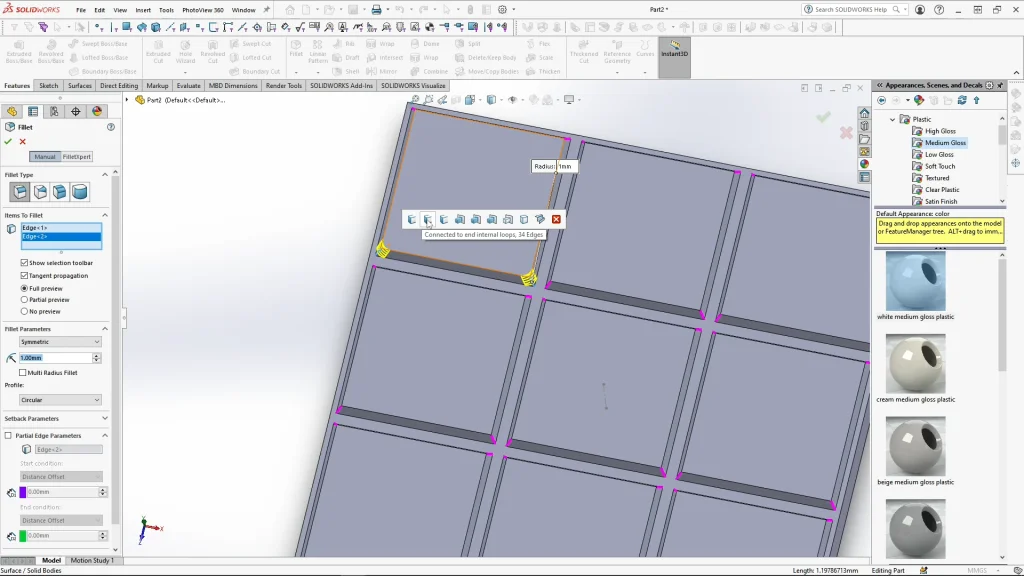
For the fillets on the chocolate bar, I used the smart fillet options to select multiple edges at once. To do this, I chose one of the edges I needed to fillet on the chocolate bar segment, and the fillet icon. When I choose the next similar edge, the smart fillet options appear, for this fillet I used the ‘connected to end internal loops’ option, to select all the other similar edges, you can see below that the preview of the selected edges highlights in purple as you hover over the smart filet options. This saved me so much time, not having to select all 34 edges individually.
Featured Tool 5 – Label Decal
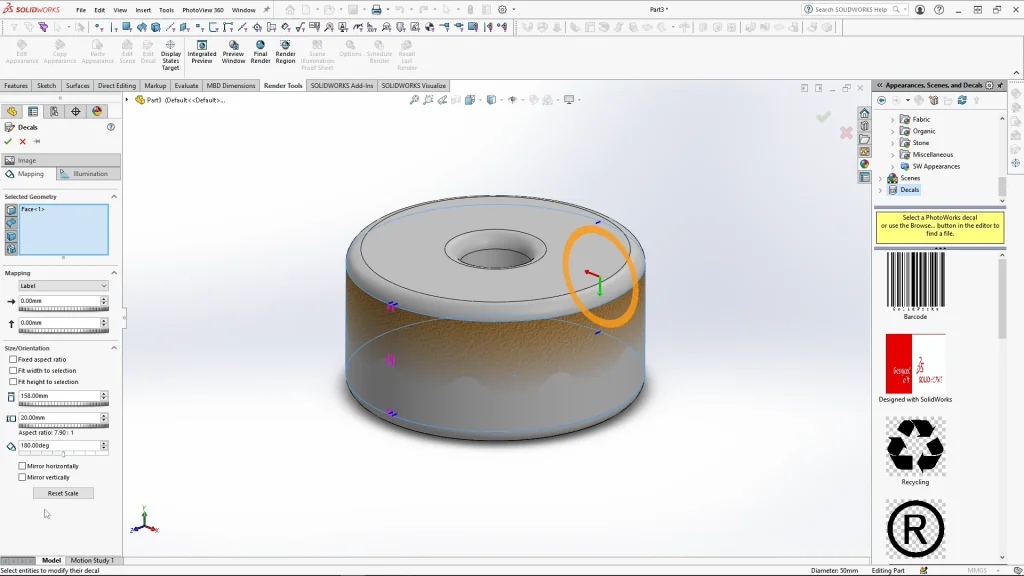
Moving onto the marshmallow part, I demonstrate applying a decal as a label. This is a very basic part, but once the part was modeled I applied an appearance before the decal. Selecting the cylindrical face of the part and edit decal, I open my toasted marshmallow side PNG file. The first thing I do, is change the masking type to ‘use decal image alpha channel’ which removes the black background of the PNG file. Once I’ve done that, I can move onto the mapping, changing the mapping type to label in the drop down, I can apply my decal almost like adding a label on a tin can. I need to resize my decal, so I unticked fixed aspect ratio first to edit the width and height of my decal to fit the face and wrap the decal around until it meets, and there are no gaps.
Featured Tool 6 – Keyframes
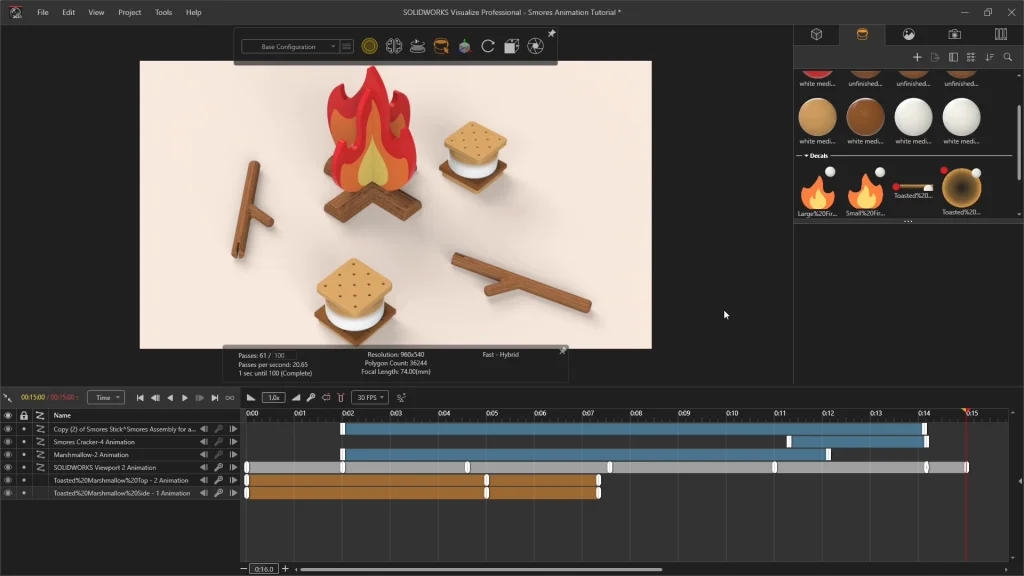
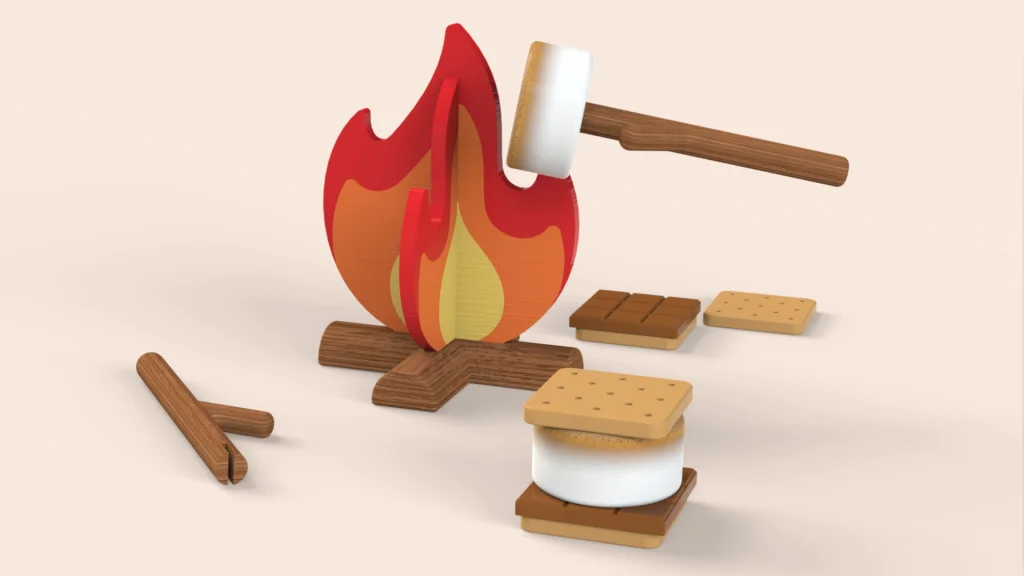
I used an exploded view to create all the movements for a motion study animation, the exploded view I created was 15 steps and was added to a motion study. To create a more simplified animation I deleted some of the keyframes to have less staggered movements and also for the marshmallow to pause near the fire before moving again. If you don’t already know, SOLIDWORKS has an option to export your motion studies directly into SOLIDWORKS Visualize. You can see the animation I rendered within the tutorial.
So, how did I achieve the marshmallow toasting on the fire effect in my animation? Well, it’s very simple, with my motion study imported into Visualize, I can select the each decal of the moving marshmallow part, right click, and add a keyframe to the start of the animation. Then, moving my time bar to when the marshmallow goes up to the fire at around 5 seconds, I add another keyframe to each decal at this time point. Then with the decals selected, while still at 5 seconds, I can drag up the decal options, and make the opacity of each decal zero. Dragging my time bar back to the start of the animation, I can reselect my decals and make sure that both start with their opacity on zero, making the marshmallow start the animation white, without any toasty decals. Then moving my time bar to just after 7 seconds before the marshmallow moves away from the fire, I can change the opacity of the decals back to 1, which will automatically add a new keyframe for the decals. And that’s it! I can then drag my time bar back and forth to see the transformation. I hope you find some of these features or tips useful for your own projects, I’m off to enjoy some s’mores!