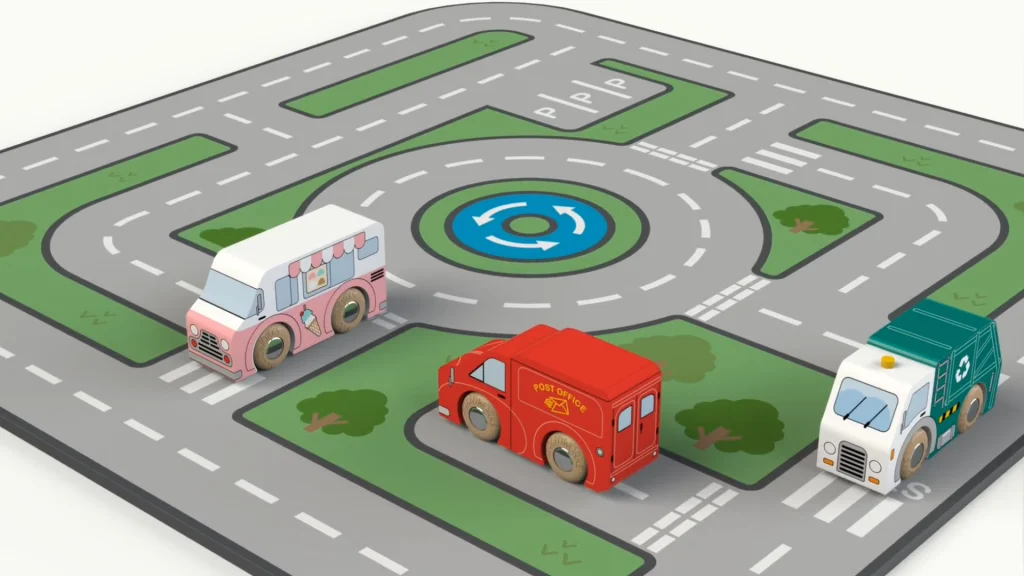
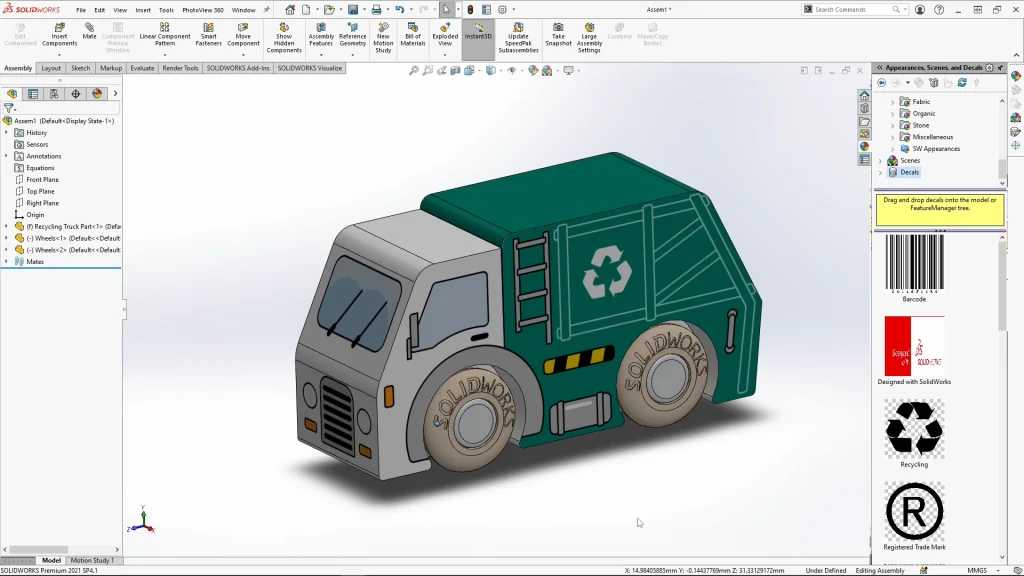
As a Toy Designer, SOLIDWORKS couldn’t be more useful for bringing my ideas and designs to life! For this tutorial, I wanted to show you how I could design a wooden toy vehicle within SOLIDWORKS and export a DXF file from a part to create and fill with my own custom decal within a vector software. Then be able to bring that decal back into SOLIDWORKS and apply it to my model. Not only that, but I can animate my designs using SOLIDWORKS motion analysis and render the whole thing with SOLIDWORKS Visualize. For the tutorial, we will be focusing on the recycling truck, all the files needed for the tutorial are available to download here

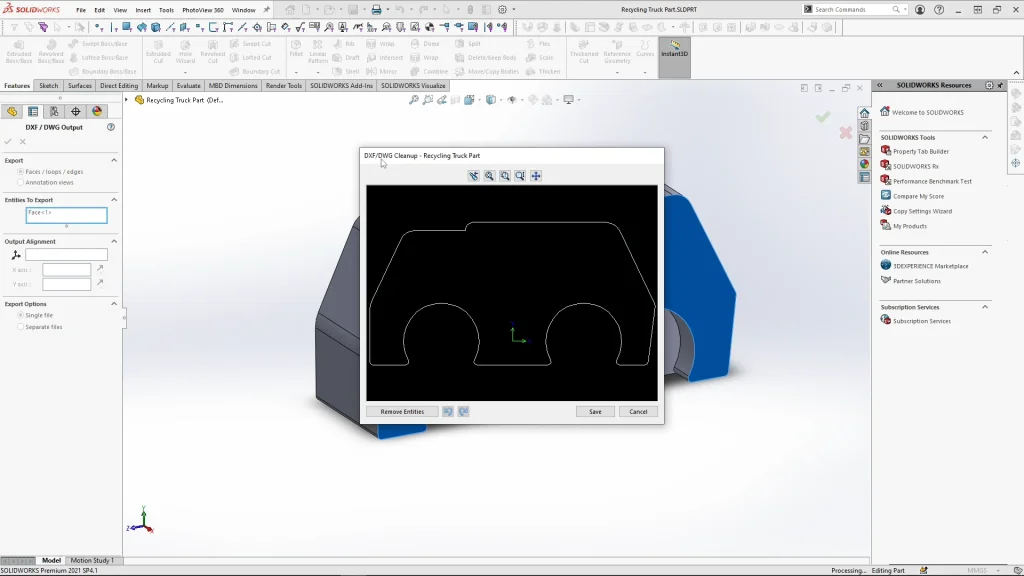
Starting with the vehicle shape, I extrude the recycling truck body, and cut wheel arches into the body, mirroring the feature on each side. One thing to note, when I design anything like this, I never include my fillets within the sketch, they are always applied as individual features, it’s much easier to edit or remove the fillets this way. Once I have my vehicle shape, I can select the side face of my vehicle, save as and change the file type to DXF. When the DXF output options open, under export, I ensure I have faces, loops and edges checked. A preview of the DXF will appear if I’m happy with the selection I can hit save. From this point, I move into a vector software, where I can import the DXF file as a vector sketch and fill the sketch with my decal artwork. The best thing about working this way, is that I know that my decal will fit my part model exactly when I apply it in SOLIDWORKS. For the front and back decals of the vehicle, I could use simple rectangular sketches based on the dimensions of my vehicle to create the decals to fit.
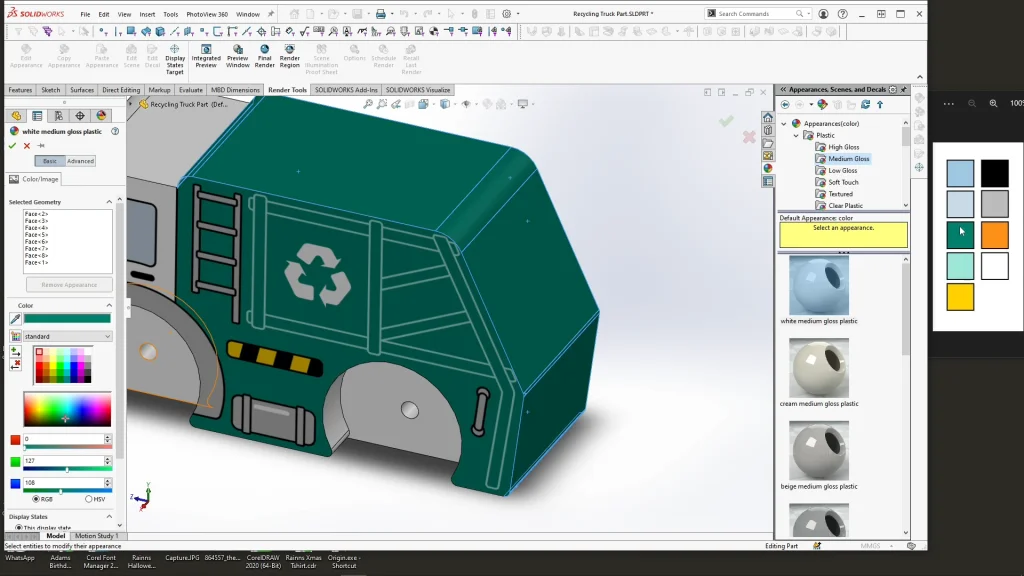
One thing I wanted to show in this tutorial was how I use a colour image swatch to colour select and match appearances to my decals. While in SOLIDWORKS, I opened the recycling truck color swatch jpeg to the side of the SOLIDWORKS window, (again this is also in the download file above). With the swatch visible, I can take the color picker tool and pick from the green swatch created in the vector software which is the same color used to create my decal. You can see below how well it matches my appearance color to the decal below. If I try to take the color from the decal within SOLIDWORKS, you will see in the tutorial that the color is not picked up well, so I always use a color swatch created from the same properties as my decals.
Once all three decals are applied, I can make an assembly from part and add some wheels! The wheels would normally be a 3-part file at least, consisting of the axle and two wheels. But for the ease of the tutorial and my motion study I designed them as one whole part. I applied concentric mate, ensuring lock rotation is unchecked to the wheel axles and the holes in the truck. Then to center them within the truck, I used advanced mates, and the width mate. I used two opposite faces of the wheels, then the two opposite wheel arch cut faces to center the axles within the truck. At this point, you can drag the wheels while the truck part is fixed to see them rotate within the vehicle.
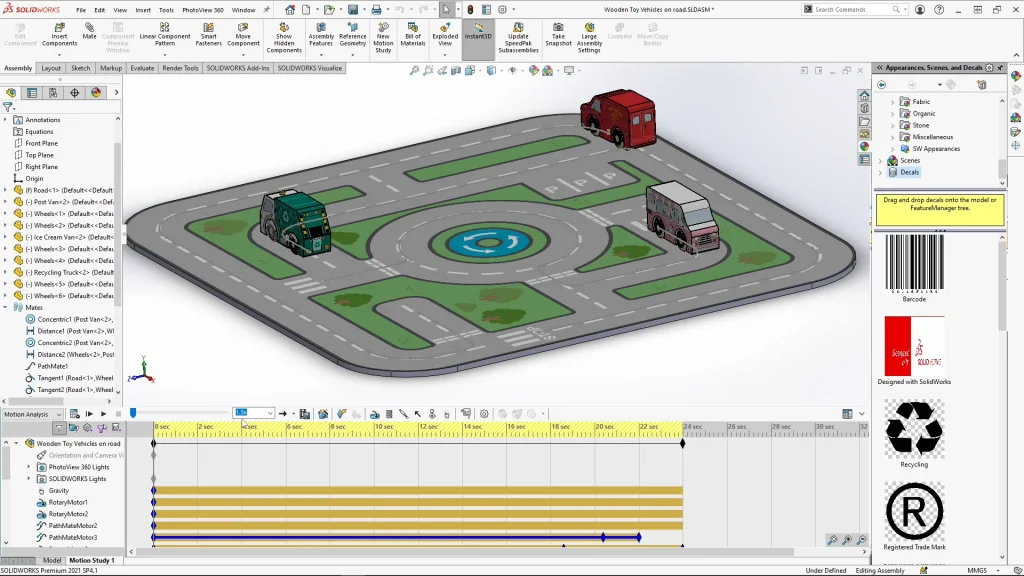
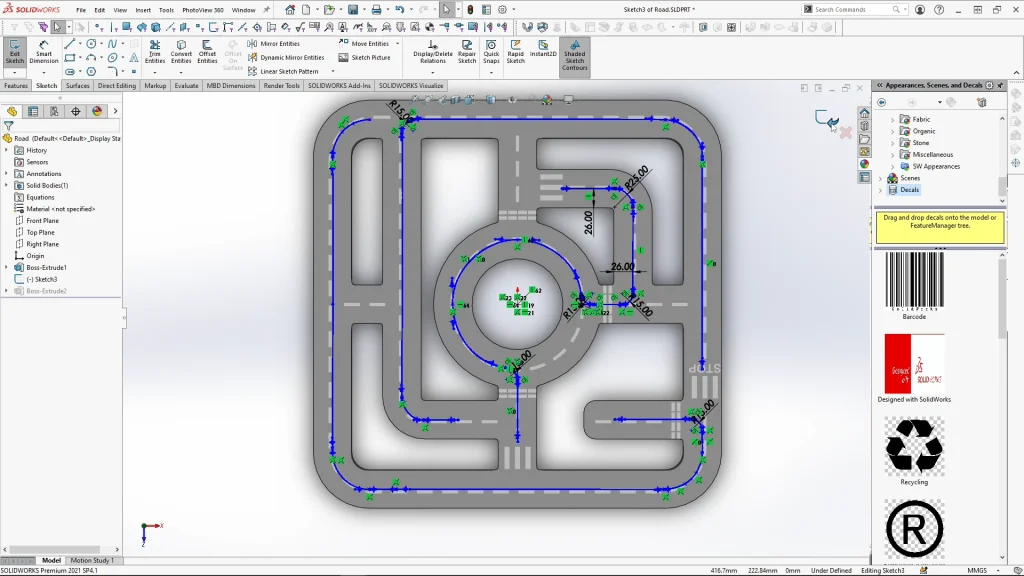
With the recycling truck finished, I take you through a little snippet of how I used a SOLIDWORKS assembly and some mates to create the motion study for the final animation you see at the end of the tutorial video. When you see the full assembly, you can see the road base I designed for the cars to go on. Under the parts tree, you’ll see that I assembled each vehicle within the assembly, this is easier than working with sub-assemblies within an assembly. Each vehicle also has a path mate attached to it, for it to follow in the motion study. Looking at the road part. The sketch used to create the path sketches are traced, originally, they were created with lines and arcs, but these were made into construction sketches, and traced over with a whole spline. The spline works so much better than any other sketch when creating a path as it is continuous, so points do not interfere, and when the spline is selected as a path, the whole line highlights without having to use the selection manager.
Looking at the motion study, I used a motion analysis, and had gravity applied. Rotary motors were added to each set of wheels to give the appearance of them moving. The reason for this is because if the part is following or being driven by the path motor, the wheels won’t move. To add path motors, you need the vehicles to have path mates, each vehicle is attached to its path with a little guideline sketch, this is mated onto the path almost like a Scalextric car on its track. You can set the speed of the path motors and decrease or stop them at different points of the animation. For my path mates, the path constraint is on free, but the pitch/yaw control, which is the direction of the part to the path, has follow path along the vehicles x-axis is checked. Roll control is on free because the wheels of the vehicles have all been attached to the road part with tangent mates, so the vehicles will stay up right. My final study was exported into SOLIDWORKS Visualize to be rendered into an animation, you can see this at the end of the tutorial.
