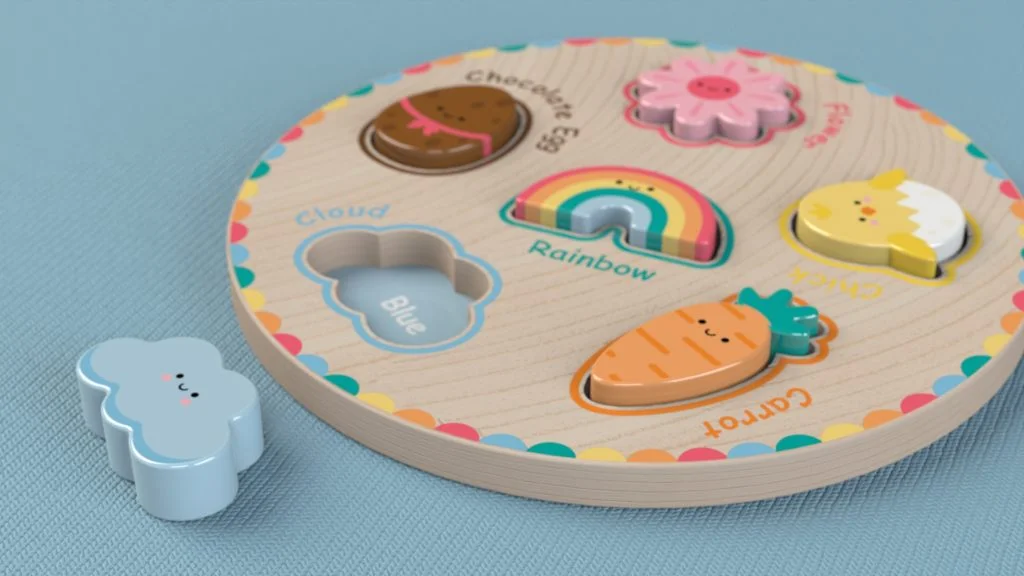

In this tutorial I take you through the steps I take within SOLIDWORKS Visualize to create more professional renderings. This includes editing backgrounds, appearances and decals, camera settings and model placement. You can see below a side-by-side rendering of my wooden toy puzzle before and after I edited my model within Visualize. Without the edits you can see how flat and lifeless the top rendering is, the 3D element of the toy is almost lost and there is no real texture or finish to the toy. The rendering below it is definitely more life-like, but not fully realistic to some. I have developed a rendering style that have an element of realism but with a playful and colorful quality. To follow this tutorial, you can download the model here

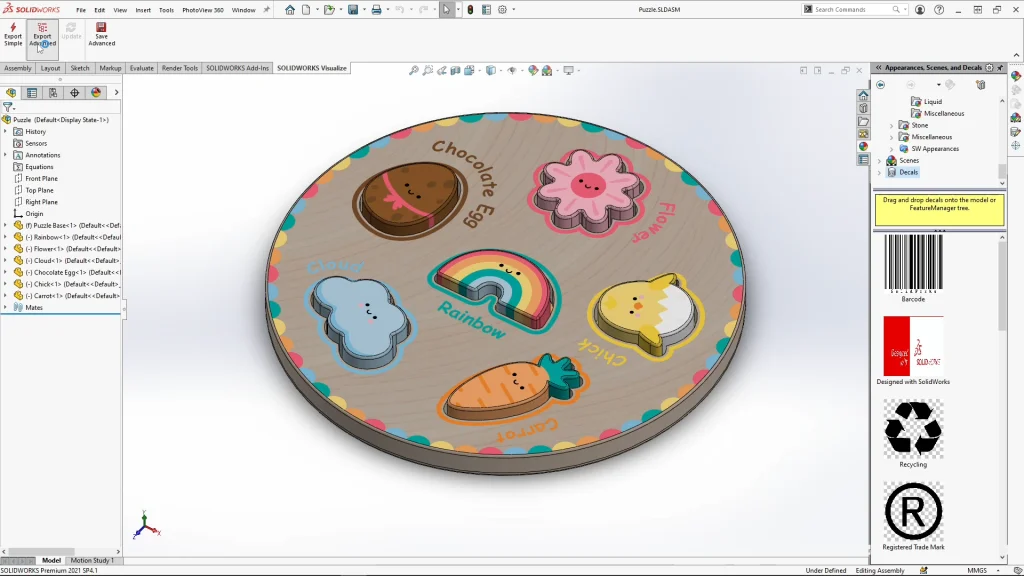
The export advanced option under the SOLIDWORKS Visualize tab within SOLIDWORKS is what I use to send out my model information for rendering it. I use this option over export simple when I have an assembly of multiple parts, or for a motion study animation. By using export advanced, it gives me the ability to move individual parts of the exported assembly while inside of Visualize. Before I export a model, I ensure I have applied any appearances or decals I want, the appearances don’t need to be the final as these can be edited or changed in Visualize, you can also apply decals within Visualize, but I find it easier to do this in SOLIDWORKS.
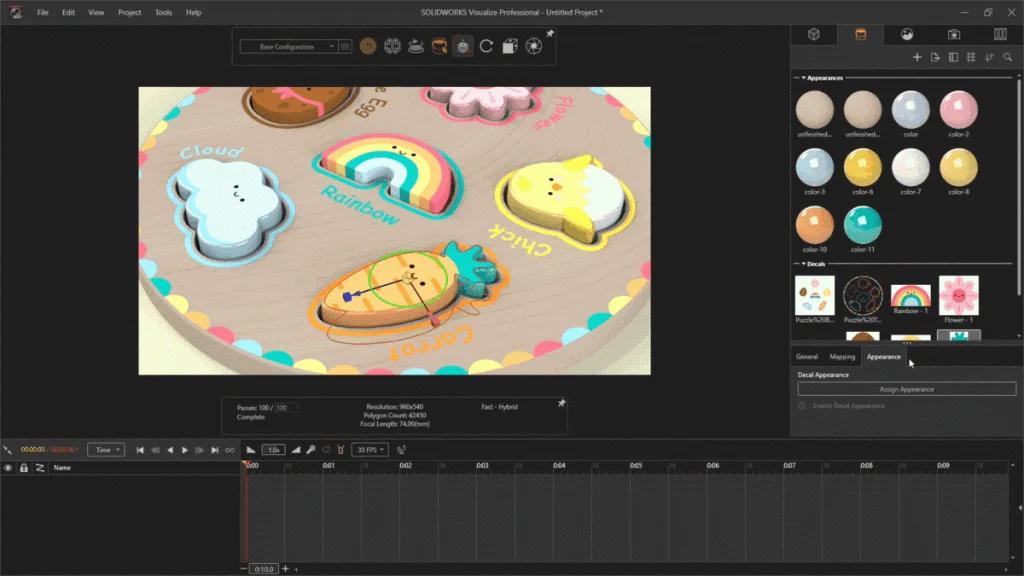
Decals in any model can improve details, add realism and are essential for most of the toys I design, but how do I improve the appearance of them in Visualize? When you look at the first render again, you can see the imported decals are very flat, to amend this, I use the appearances tab, scroll down to the decals and starting with the carrot decal, I can select and assign an appearance, I always use a white appearance for my decals, as any other colour would tint the decal image and change its overall colour. A white appearance works best, it is usually best to apply the same type of appearance as applied to the rest of the part but again in its lightest form.
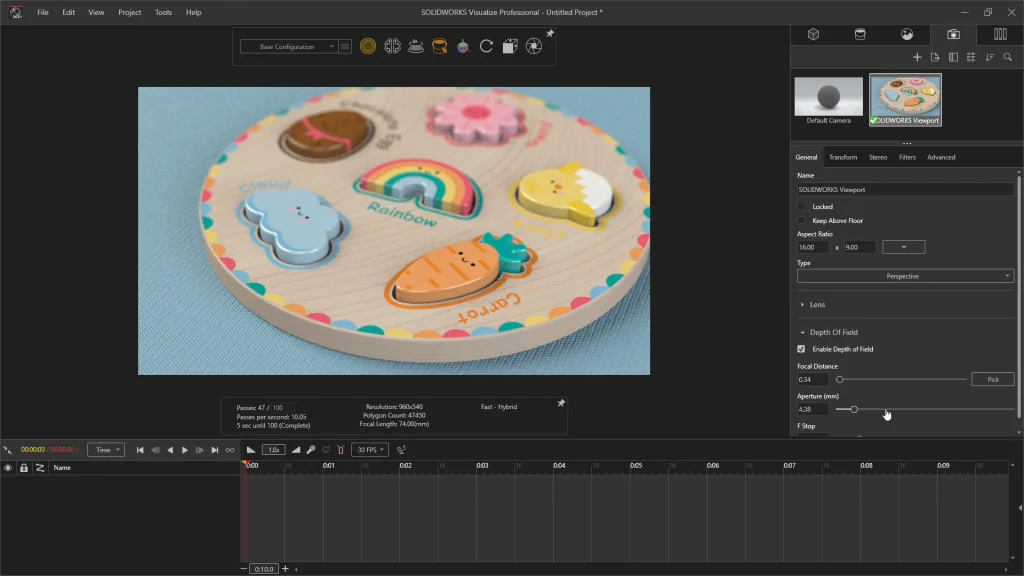
Under the camera tab you will find a range of camera effects, a simple but very effective way of adding a more photorealistic image is by checking the enable depth of field box. Once selected you need to use the pick option to select a target on your model for the camera to focus on. When I do this, the background of the model and background goes out of focus creating a more realistic image. If you move your model within the render region after applying the depth of field, you will need to reselect your focal point. You can increase or decrease the aperture to control how much of the image is in focus using the settings.
As I mentioned above, when you use the export advanced it gives me the ability to move individual parts of the exported assembly while inside of Visualize. Under the models tab, I can drop down the puzzle tree to reveal the model parts, and select individual parts to move, in this case I selected the cloud to move. I can then use the transform position XYZ options to move the shape out of the puzzle and place it onto the floor next to the puzzle base. It’s often a nicer rendering to show how a toy might work rather than it being a completely finished puzzle.

E