

In this tutorial I wanted to demonstrate how I take my custom designed decals and apply them to parts using 3 mapping options; Label, Projection and Cylindrical. I decided to create a simple wooden toy grocery set to apply the decals to. Using these 3 mapping types, I can apply the decals to the grocery parts in different ways to achieve varied affects. To follow the tutorial and try out the decal application for yourself feel free to download the parts and decals file here. Decals can be a very important tool, as a toy designer I can illustrate my designs clearly to the factories who manufacture the toys, but also for rendering a realistic representation of the toy to potential buyers before it is produced.
One thing to note is that all of my custom decals are saved as PNG files, if you have seen previous tutorials of mine, I prefer to use PNG files over Jpegs as I can easily remove the background of a PNG using Mask image. I simply need to check, use decal image alpha channel like this to remove the background and this will reveal any applied appearance on a model. If you haven’t used or created your own decals before, only transparent parts of a vector drawing will become invisible using this kind of mask.
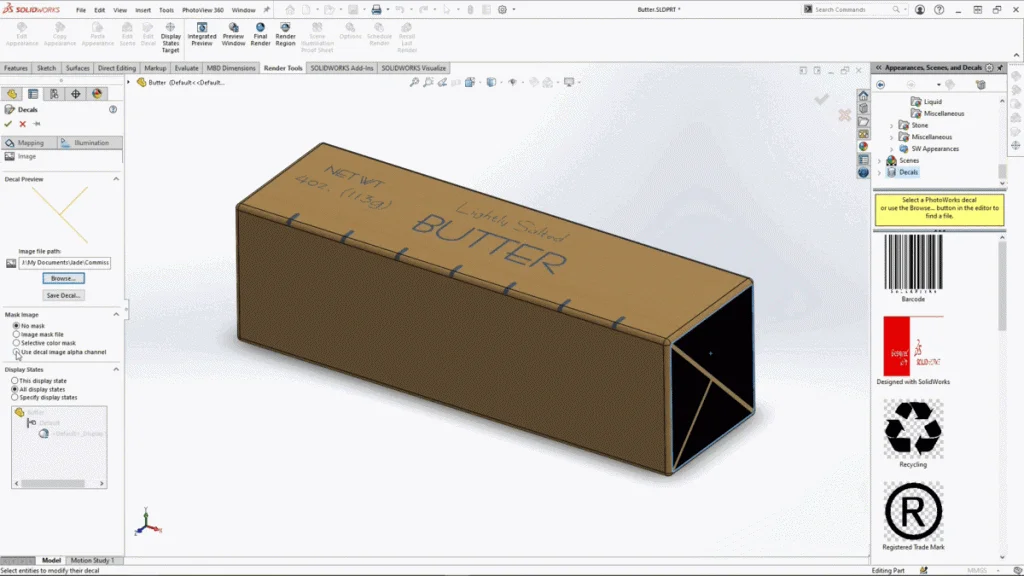
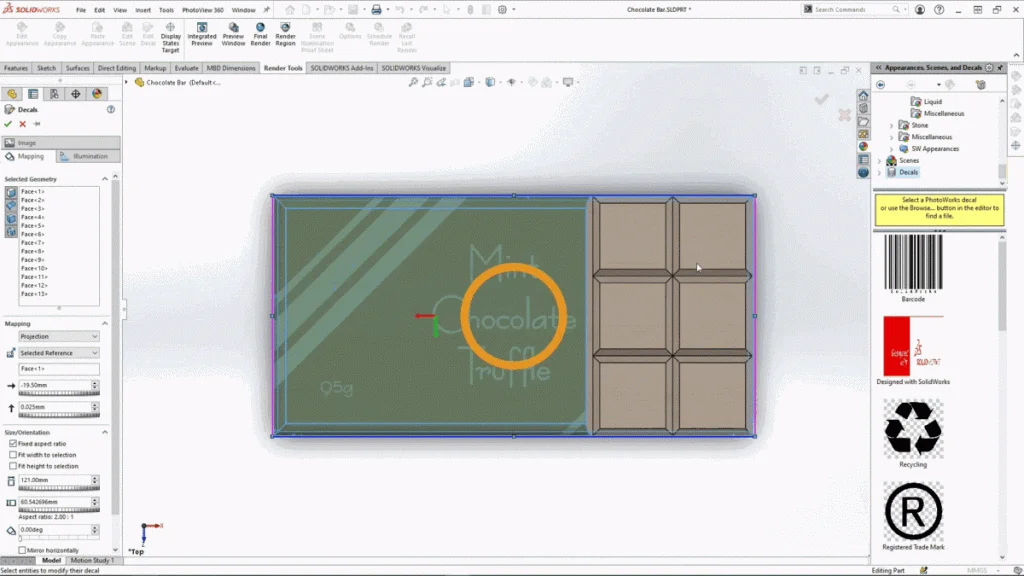
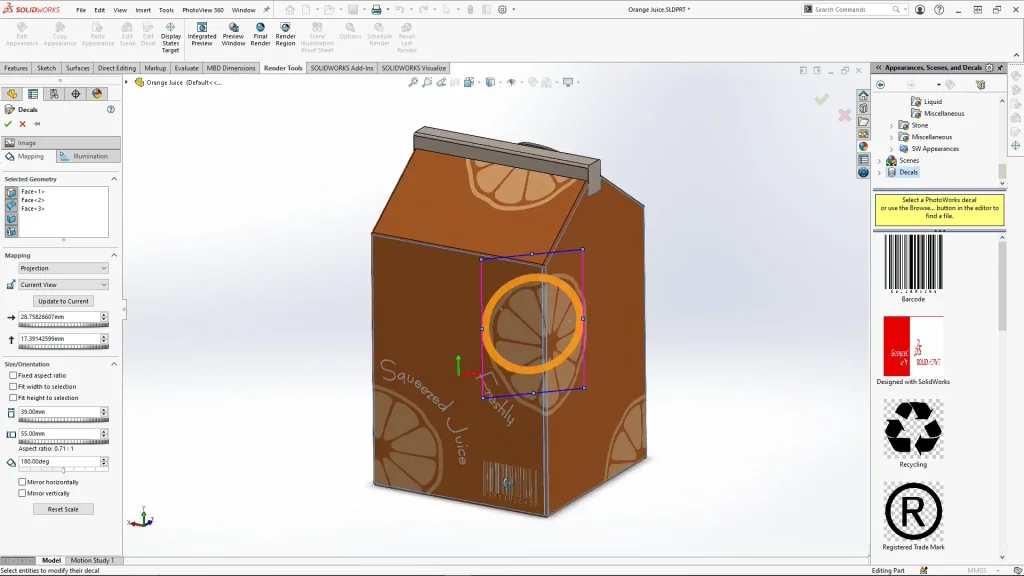
Looking at projection mapping first, this mapping time is perfect for placing an image onto multiple faces, these faces do not have to be linear or attached to each other, but the decal will project onto the part based on your current view. The decal will project from that view all the way through the model and on to any other selected faces. It is often useful for me to use projection mapping, especially when I want to cover several faces with a decal, or I want to mirror a decal through to another side of a part like the butter ends decal, this can help speed up the decal application. I used this mapping type to apply decals to the butter, the chocolate bar, and the carton of orange juice. For the chocolate bar I took the below design and viewing from the top view of the chocolate bar I used projection and selected all the faces of the chocolate bar wrapper.

By using projection, the decal could be ‘wrapped’ around all of the selected faces, the decal applied based upon the projected view which was from the top. You can see the finished effect below. The decal was enlarged so that it hung over the edges of the part to ensure that it would cover all the faces properly.
Another example of the projection mapping was used for the orange juice. For this part I selected multiple faces of the carton but viewed the part from the angle I wanted to place the orange decal. The difference with this decal was that I had to untick fixed aspect ratio and distort the decal to reshape the orange onto the carton until it looked right.
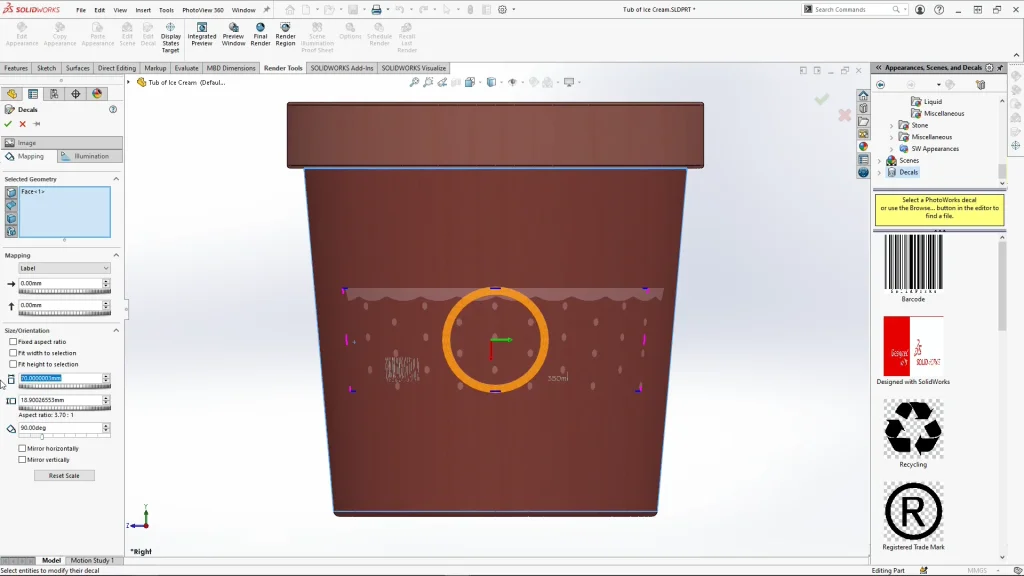
Next, I used label mapping for the ice cream part, I see the label mapping option as the applying a decal like a sticker. For the main decal, I used a flattened face of the ice cream tub to design the decal artwork to fit the face. Thinking of this decal as a sticker I unticked fixed aspect ratio and overlapped the label until the ice cream tubs strawberry pattern joined up. The lid decal was also applied with label mapping, you should note that label mapping can apply a decal and it will bend around edges and faces without stretching or shrinking.
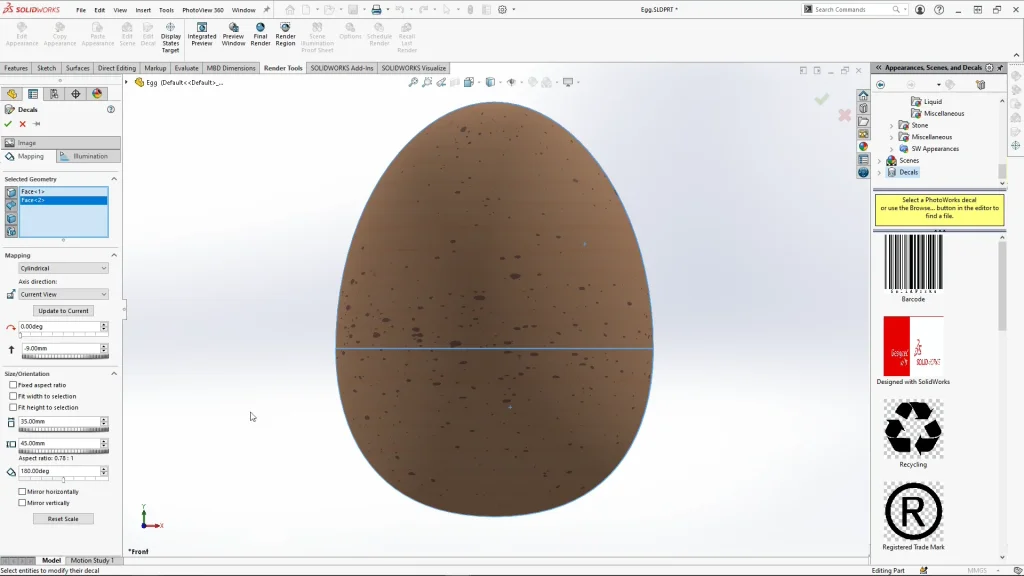
Finally, I used cylindrical mapping to apply the eggs decal. Cylindrical mapping can apply to any cylindrical, cones and lofts. This was the best mapping option for this parts shape, I could uncheck the fixed aspect ratio option and resize the decal until I am happy with the placement of the ratio of the egg decal. Adding this decal allowed me to add the ‘speckled’ pattern seen on hens’ eggs making them more realistic.
As you can see in this assembly of the finished set, I have some extra groceries that ‘ve have already added some custom decals to, these parts and the final assembly are all available within the file download. I exported the finished assembly into SOLIDWORKS VISUALIZE to create this rendering.
