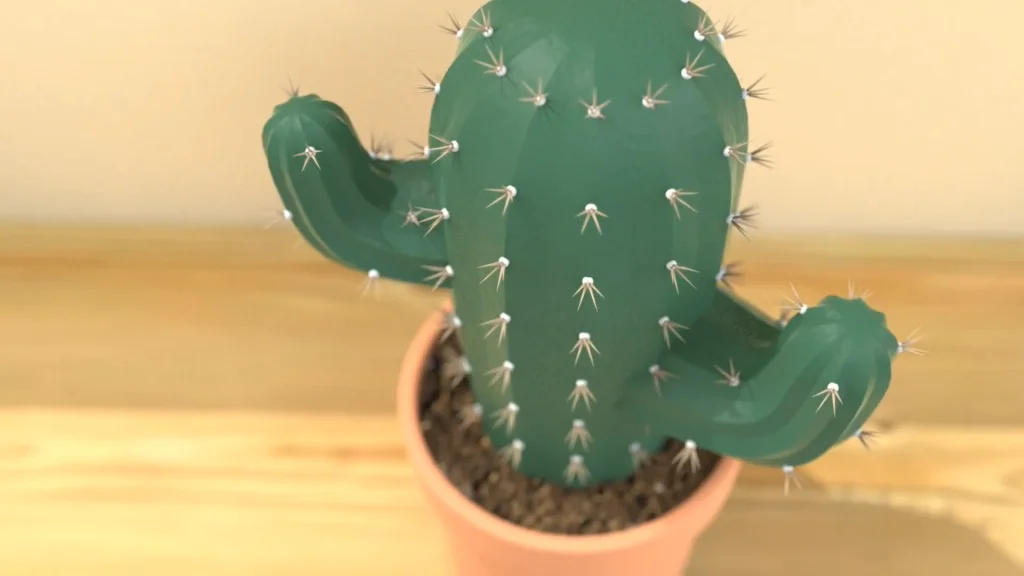
I decided to model a cactus as they have always fascinated me, and they are the only plants I own or can keep alive! So, what am I going to showcase? for this tutorial I will demonstrate the use of the loft feature using the normal to profile constraints. I will also show you how to use component patterns within an assembly to add the spike component onto the cactus. You will need to download the cactus pot and cactus spike parts here
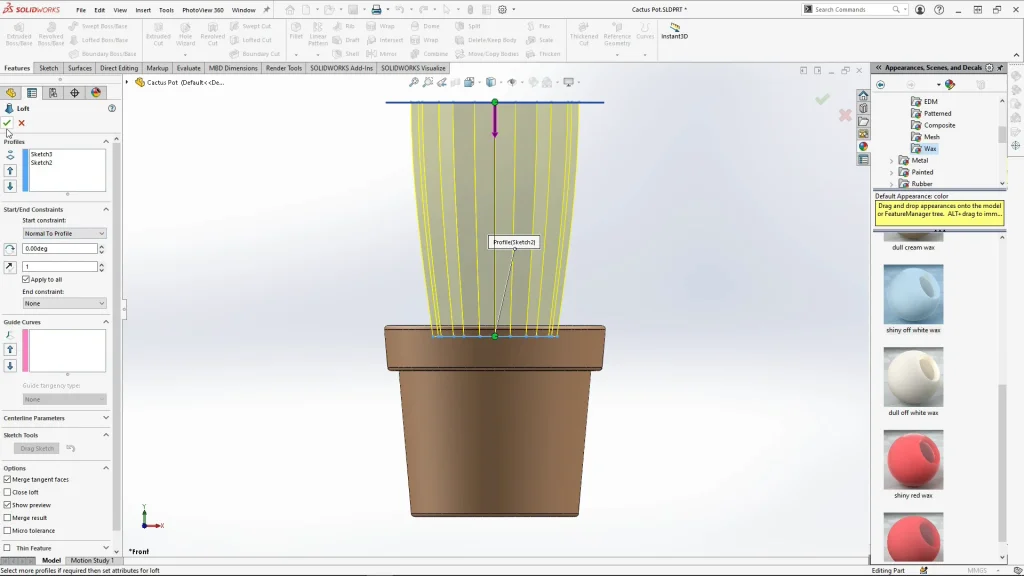
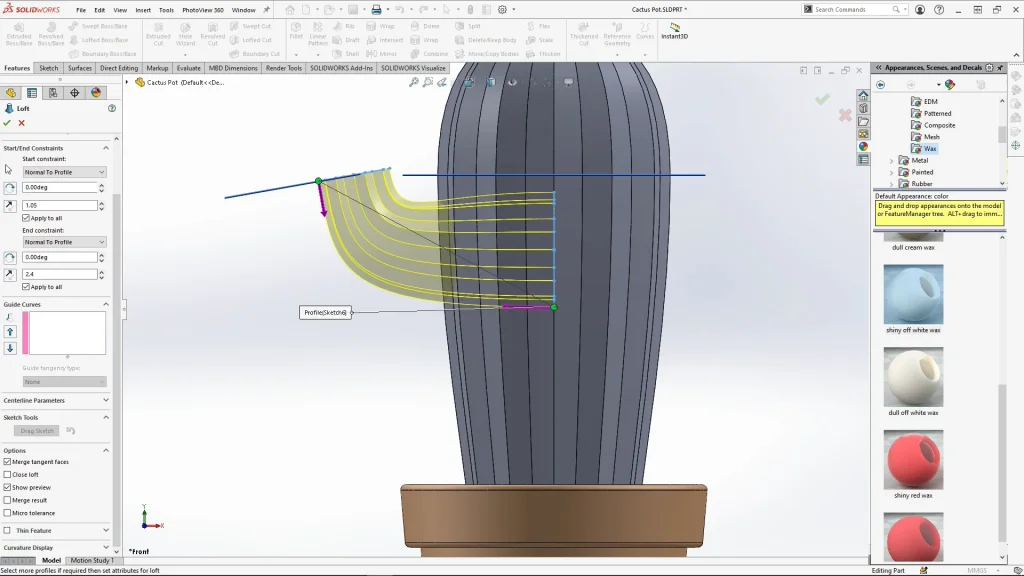
A polygon and circular sketch pattern were used to sketch out the profiles of the cactus loft feature. I created a larger cactus profile above the first and then took the loft feature, when I select the profiles, they loft straight to each other. To get that rounder more organic cactus shape, you need to select start and end constraints and select the start constraint drop down, for this option I chose normal to profile. This creates the curve on the loft all the way around. If I had wanted to, I could increase the direction number to increase to curve to the next profile, but in this case, I kept the direction number at 1.
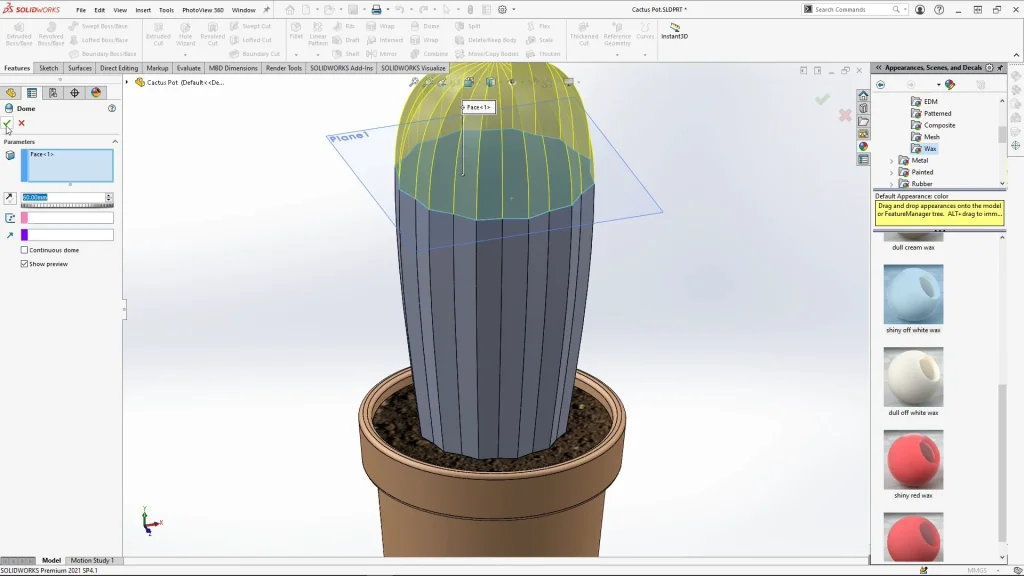
To create the top of the cactus I used a very simple trick, the dome feature! Selecting the top face of the lofted body and the dome feature, I had to untick continuous dome because of the shape of the lofted face, I increased the height of the dome until it formed a recognizable cactus head. The dome feature can be a very powerful tool to create more body onto complex profiles like this.
Continuing with this way of creating the cactus form, I used similar processes to create the cactus arms. With the arms, when lofting sketch profiles I again used start and end constraints chose normal to profile for both the start constraints and the end constraints to create the bend in the arm. The bend of the arm could be manipulated again using the direction number. The second arm was created using move/copy bodies and was scaled up larger to scale 1:2, it was then also rotated around the temporary axis of the plant pot.
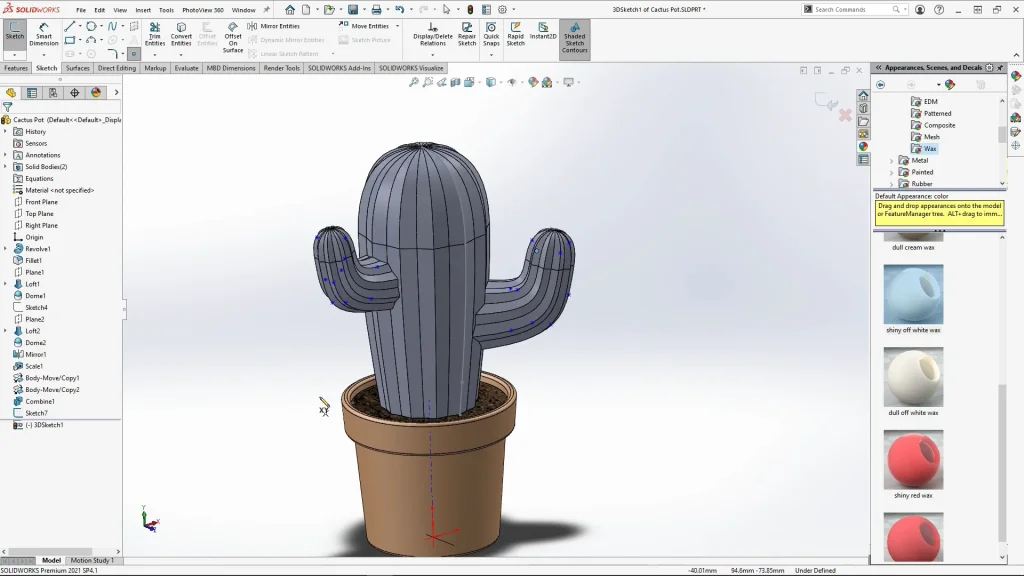
The next step was to create some guide sketches in preparation for placing the cactus spikes within the assembly. I added a converted edge sketch along one of the cacti edges and added a point in preparation for adding a cactus spike for patterning. I also used the 3d sketch to add points onto the arms of the cactus, spacing them apart proportionately to where I wanted to add spikes. Once I was happy with the placement of all my guides I saved the part and inserted it into an assembly.
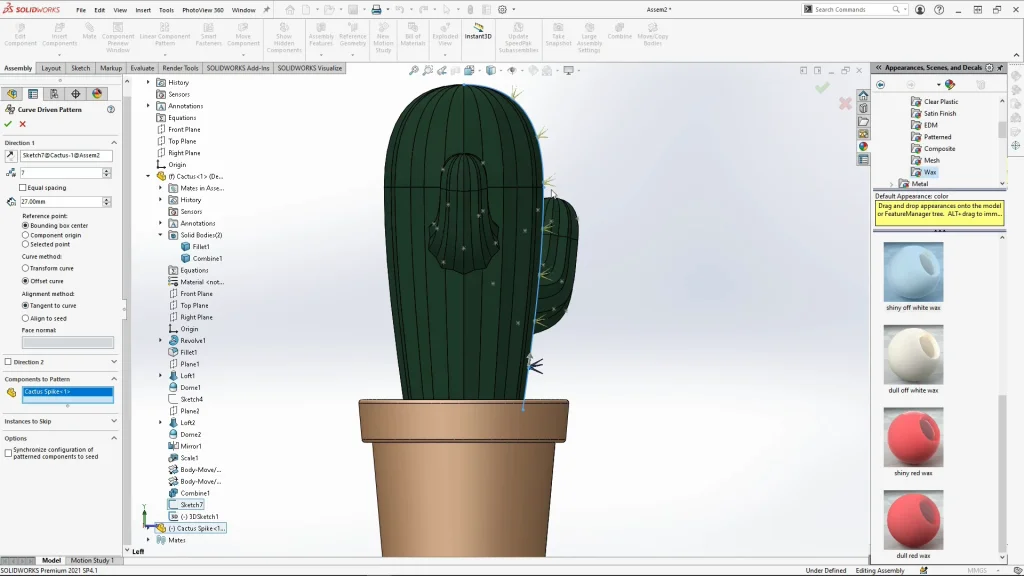
Once in the assembly, I could insert a spike part into the assembly and mate in coincident onto the first guide point I added onto the curve. The spike part has a point sketch within the revolve of the part to assist in the mating process within the assembly. The spike could then be patterned using the linear component pattern drop down, I selected curve driven component pattern. For the pattern direction, I used the guide sketch from the cactus part and I added 7 instances along the curve at 27mm apart. To have the spikes run tangent along the curve to look like a cactus, I ensured I had the settings on reference point with bounding box center selected, the curve method had offset curve selected and the alignment had tangent to curve selected. This allowed me to place all the spikes almost perpendicular to the curve.
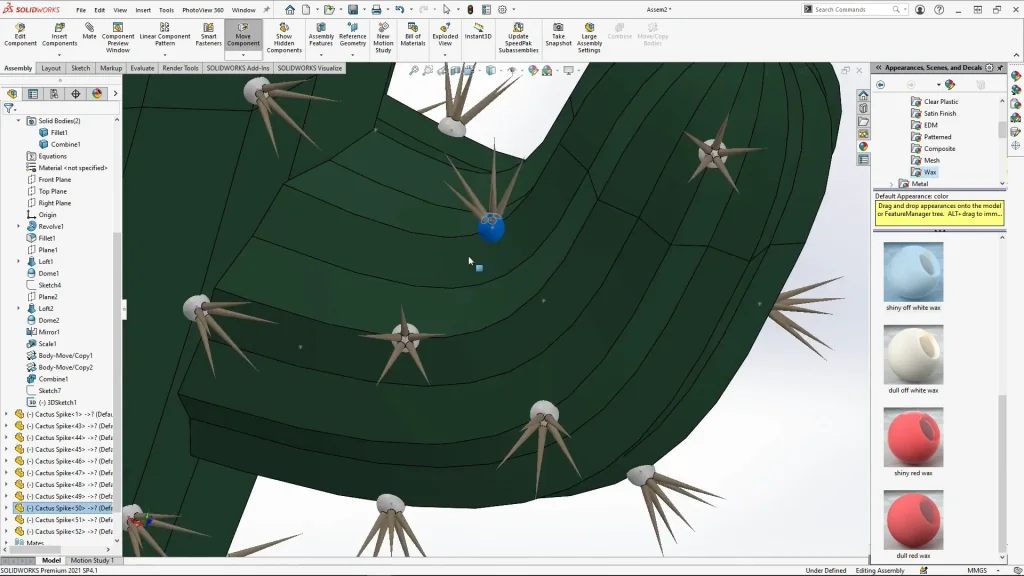
The next pattern feature I used was the circular component pattern feature, for this I used the plant pots temporary axis and selected all 7 of the patterned spikes to pattern, in the tutorial I patterned by 6 instances, but for my renderings I created 12 so that the spikes would be on all 12 outer edges. The final step was to drop in duplicates of the spike part to attach onto each individual point from the 3d sketch. From here I could mate the spikes onto each point with a coincident mate, this mate did not fully define the spike, it just holds it by an anchor point so that I could then manually drag the spikes into a position that looked right. Once happy with the positioning of the spikes I could fix all the parts into place if preferred.
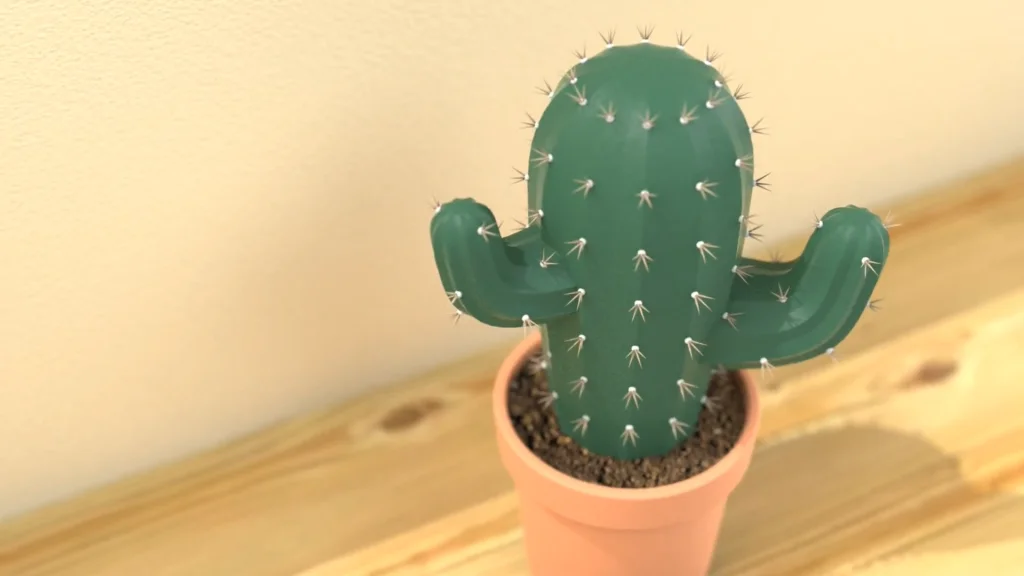
My final cactus modelled was rendered with SOLIDWORKS Visualize. I enabled depth of field within the camera settings for this rendering to focus on parts of the cactus and blur out the background. I also added an orange peel bump texture to the cactus appearance to mimic the skin of the cactus and added a box and complex wall model to add a shelf and wall background too so that I could place the pot onto the shelf, up against the wall backdrop.
