This is part 2 of a 2-part 3D Sculptor tutorial to create a Giraffe teddy, if you want to follow on and create this model, you will need to have completed part 1 first. Across both tutorials see how I used the cone and cylinder shapes to create a Giraffe teddy. As mentioned in part 1, most of the modelling for the Giraffe is very rough and freehand, in that I wasn’t too not worried about the overall scale or size of the teddy. So, as you follow the tutorial you can copy where I place a sub-division surface and then watch how I manipulate it into place. Your model does not have to be perfect, and you can always go back into each shape you create and edit it as you go along.
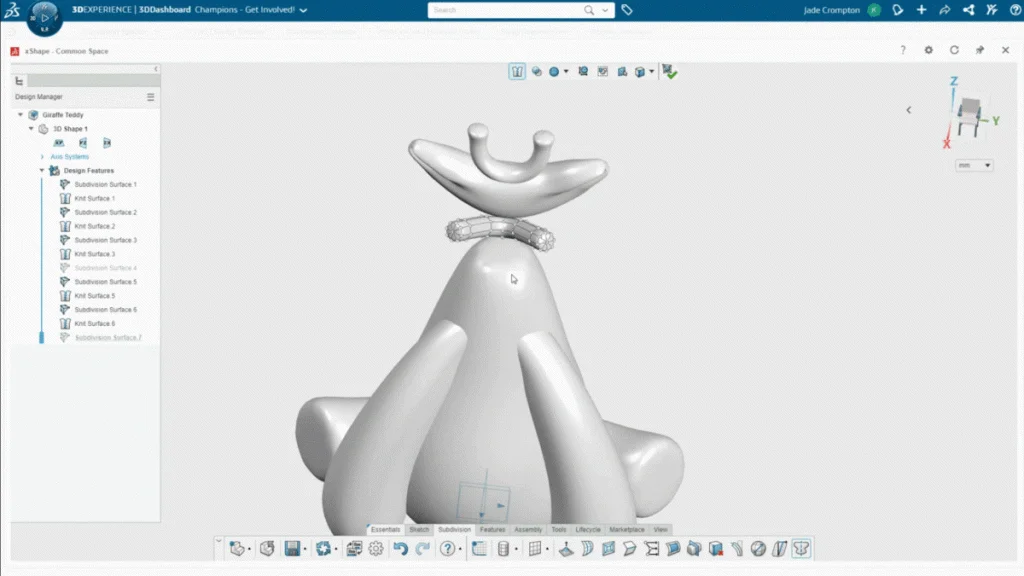
In part 2 I model the Giraffe horns (ossicones), the ears, eyes, and tail. The horns, ears and eyes were all created using the symmetry tool. As mentioned in part 1 of the tutorial, 3D Sculptor is currently missing a mirror feature. So, until this is added, you can use the symmetry tool. There is a way of using the symmetry tool and then deleting the faces in the center of a part to create two separate bodies. But in my case, it didn’t matter if the parts were still joint together as they were hidden within the Giraffe body. It is important to remember that when you have ‘mirrored over’ a shape you need to keep the symmetry tool on, so that as you change one side of a shape, the other side stays symmetric. When creating the symmetric surfaces, I found it easier to do when the other Giraffe bodies were hidden, so that I could ensure I had created a neat symmetry join. You will find that the symmetric shapes do look strange with surfaces hidden, but when all surfaces are visible you shouldn’t see that the surfaces are connected.
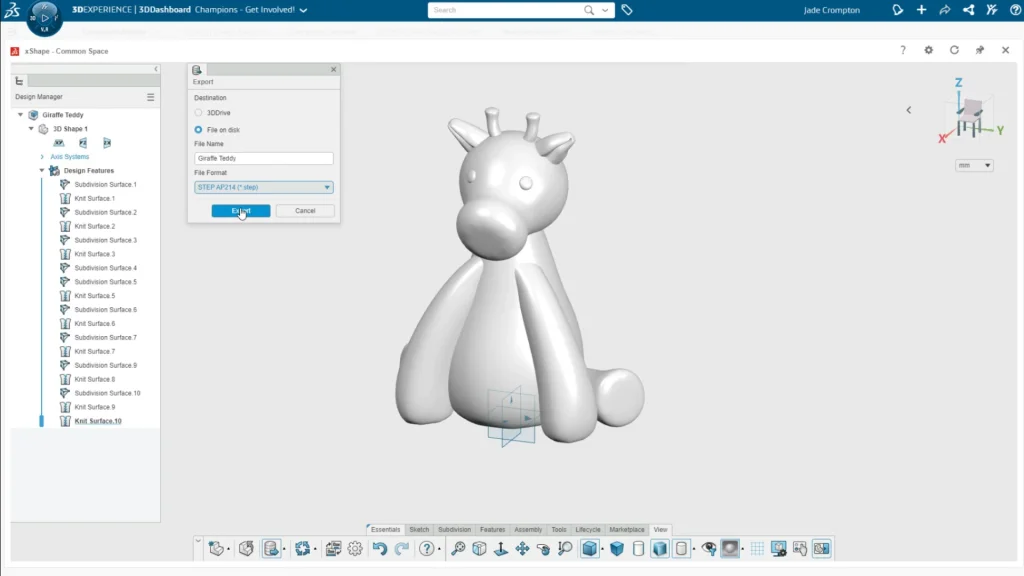
Before the finished model can be exported for editing in SOLIDWORKS, all individual sub-division surfaces must be knit. If they aren’t knit, they will come into SOLIDWORKS as surfaces rather than solid bodies. All surfaces should knit automatically as you close them, however if you happen to delete a knit feature by accident it is very easy to knit the surface, by right clicking on the sub-division surface and selecting the knit icon.
With all shapes knit, save the model, then go to the export settings and choose the export destination to file on disk so that it saves to your computer, then change the file type to STEP.
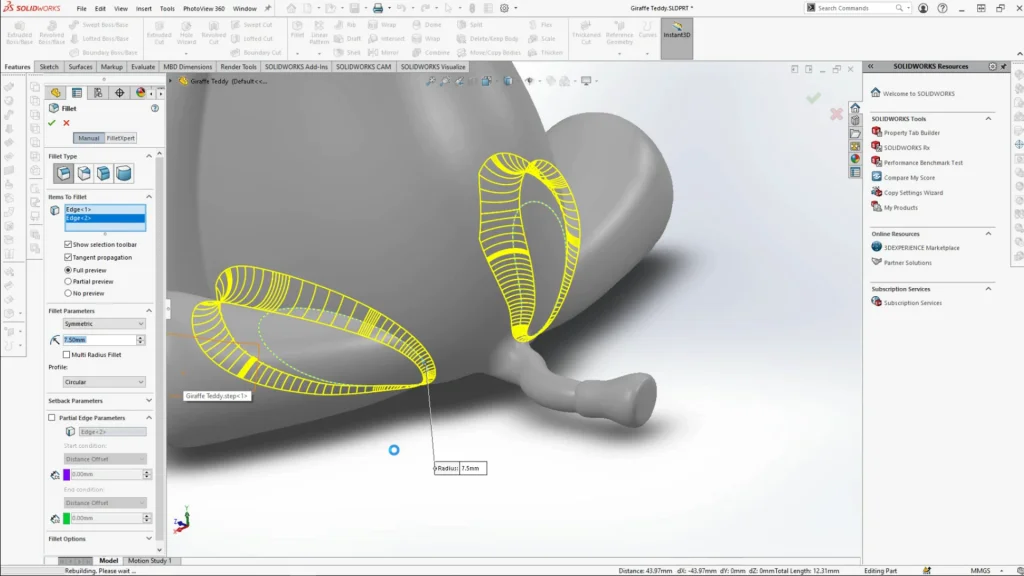
Once the model is saved it can be opened into SOLIDWORKS, from here you will be able to see all the separate sub-division shapes as individual solid bodies. For this design I combined all the solid bodies into one using the combine tool. Once combined I was then able to use the fillet tool to soften all the joins of the Giraffe body parts which helped with improving the ‘teddy look’. The possibilities are endless with the integration of the two modelling platforms, so feel free to experiment more with editing the teddy in SOLIDWORKS.
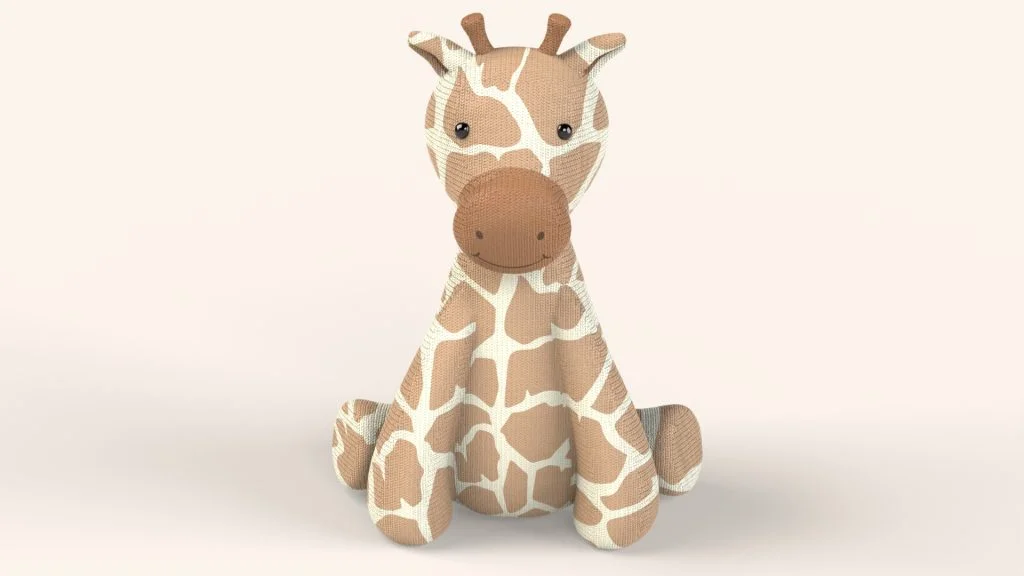
I went one step further with the Giraffe teddy and added Giraffe print decals and fabric appearances to my final part and rendered the model with SOLIDWORKS Visualize, adding yet another platform to the design process to achieve the below rendering. A design like this would have taken me so much longer to create solely in SOLIDWORKS as I am not a professional with surfacing and I struggle to create such organic shapes in SOLIDWORKS. However, using 3D Sculptor, I achieved the model within a couple of hours with ease. I am excited to see what else I can create with this platform.