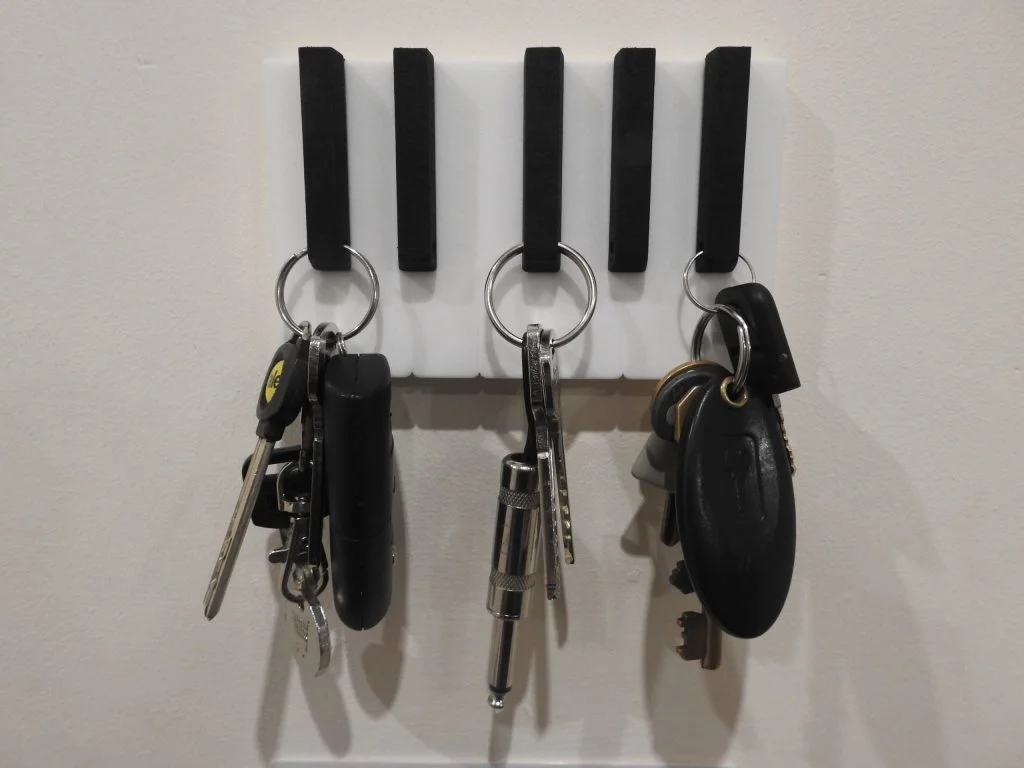

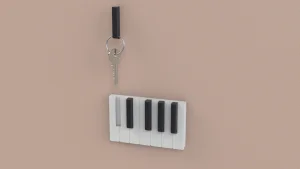
The idea for this tutorial came from looking at a keyring holder I have at home, mine is designed as a guitar amp and the keyrings are guitar jack plugs that plug into he amp. It is something that catches the eye of family and friends when they visit, so I decided to design my own version of a keyring holder and base the design around a piano and the black keys as the keyring attachments.
In part 1 of the two-part SOLIDWORKS tutorial see how the main bodies of the piano and black piano keyrings modelled. In part 2, we will finish the model by adding tolerances to help ease the removal of keys from the piano, add holes to attach the piano onto the wall and save the bodies as separate parts then STL files for 3D printing. I use multibody parts to create most designs, it was best used for this sort of model as it involved patterning keys and combining them with each other to ensure exact fits. The piano keys have been designed to a slightly smaller scale to an actual piano and shortened for easier use.
Linear pattern is used to pattern the white piano keys, the first three are 18mm wide and the next 4 are 19mm wide, linear sketch pattern was used twice to create the keys sketch and it was then extruded as a whole solid body. I didn’t trim the entities in-between each key as they could’ve been used for the split tool which is used later in the tutorial. I instead used the joining points of the keys filleted edges to work out where to split each key. You could also add more piano keys using the linear pattern tool in the sketch.

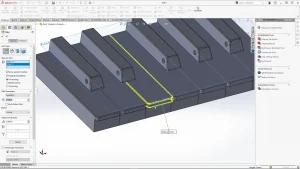
When I moved onto the black keys, it involved a simple extruded shape that was designed to slide into the piano from the top and not fall out. I realized that the real-life shape of black keys aren’t as simple as they appear. They are filleted along the front edges, but the fillet dimensions are irregular. To best mimic these details I used the fillet tool with set-back parameters. These settings can create a smooth transition of varied fillet radii along the edge of a part. You select a vertex along your selected edge and assign a radius with either the same or different setback distances for each selected edge. This allowed me to select vertices on the key to apply a larger 2.2mm fillet around the selected vertices of the key, and the rest of the edges were 0.5mm this rounded off the edges of the key as shown below.
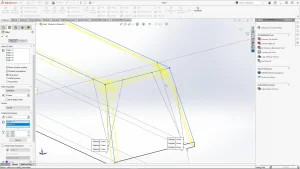
Next, I added a swept cut hole into the end of the keyring, this allows you to slot your keys onto. I used a 23mm keyring loop, you may have a slightly larger or smaller keyring loop, you can amend the cut to account for this, but it should work for most keyring loops. I needed 5 black keys to complete my section of a piano, before I pattern a solid body, I ensure I’ve applied all the design features to the body, that way I don’t have to do it to each body separately. As you will already know, you can not apply a feature such as a fillet to multiple bodies at once. The black keys are spaced apart at 2 different dimensions, so to pattern these quickly I decided to use a sketch driven pattern rather than linear. I created a sketch with points and added smart dimensions between each to space apart each black keys. I then chose sketch driven pattern with the sketch highlighted and used the vertex point on the corner of the black key as the reference point for the origin of the pattern.
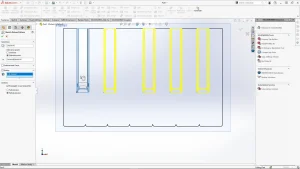
This created 5 copies of the key as I started the pattern on top of the original key, the extra key was kept and copies of the other 4 black keys were made so that I could use the combine tool to subtract the black key copies away from the piano solid body.
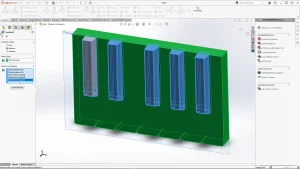
Finally, before ending part 1 of the tutorial I added some last minute features to the piano keys, firstly I cut away a recess into the end of the keys. Then I used the split tool to separate the piano body into 7 separate white keys so that I could fillet each of the edges to better define the separate keys. The white keys were then combined back together to form one solid body. The part is then ready to be prepared for 3D printing. So look out for part 2, as previously mentioned part 2 will include adding tolerances to help ease the removal of keys from the piano, adding holes to attach the piano onto the wall and saving the bodies as separate parts then STL files for 3D printing them.