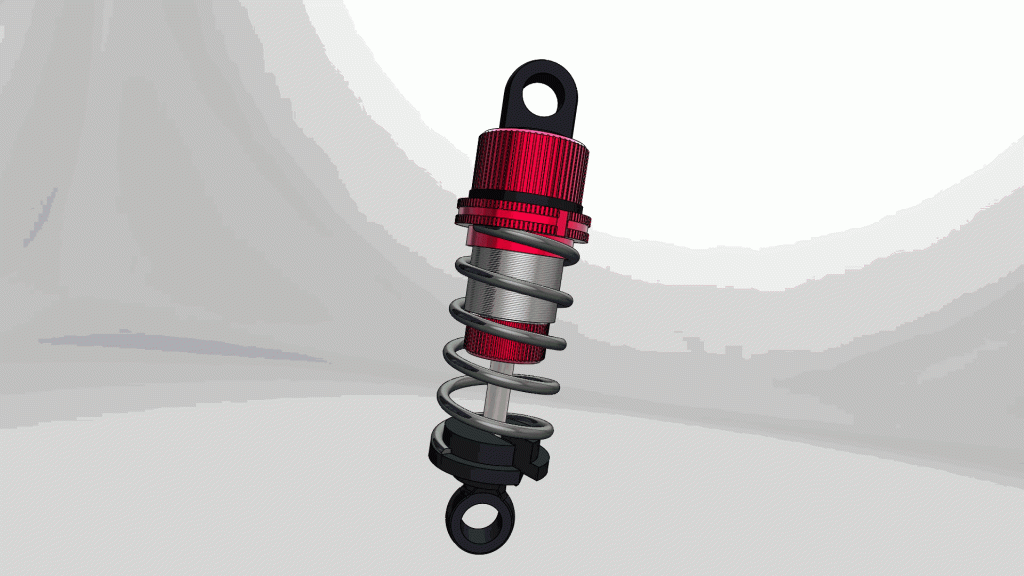
“That looks ok, but can we see the spring compress?” It is the dreaded question that so many SOLIDWORKS animation users find themselves on the receiving end of. Creating in-context geometry modifications is not always the easiest task in an animation. A spring compressing or decompressing is the quintessential example of this. I have seen a multitude of different ways of creating this type of animation. Some of them I have found too complicated, some of them too slow. Recently however, I tried a variation of some other techniques I have used in the past. I’ve found this technique easy to create, quite stable, quick to solve and realistic looking! It has become my preferred method for creating fast, in-context spring animations like this one I’ve saved as a .gif:
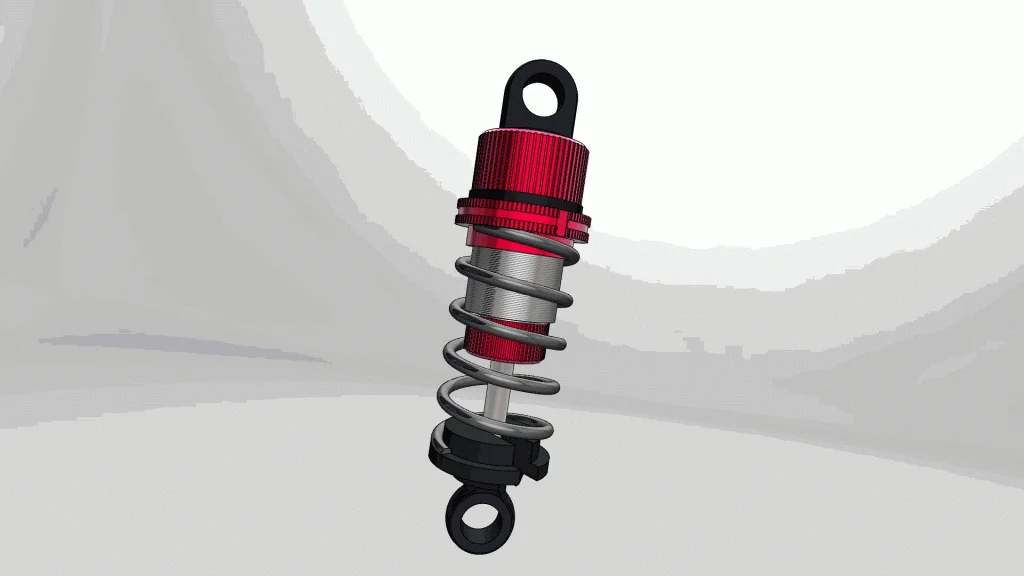
The goal of all spring compression techniques is the same: sandwich a component in between two other components, and find a way to make the spring look like it is being compressed between them. This usually ends up being an in-context cut, mated rotating subsections, or adjusted helix parameters to make it look like it is compressing. However, there’s an old surfacing trick that has always been one of my favorite bits of SOLIDWORKS magic. The other day it occurred to me that it might also be applied nicely to solve this spring compression debacle. Here’s how my method goes:
1. Prep: Start with all of the components assembled which will contain your spring. In my case, I have this shock assembly (shown below) from a model I created of my radio controlled drift car. I have assigned a Width mate set to “Free” on these components to allow movement in and out to its limits. This is probably not necessary for the spring animation, but it is convenient for working with the model.
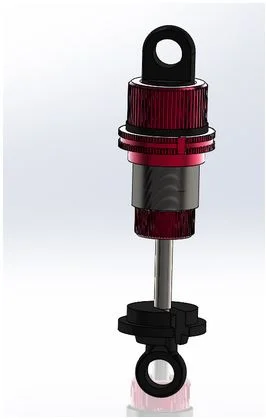
2. Create the Spring Part in the Assembly: Add a new component by using “Insert New Part.” This will be the spring component. Place the component on a convenient plane for orientation purposes. I chose the bottom face of my lower spring retainer. At this point I close the sketch that is auto-generated without creating any sketch geometry.
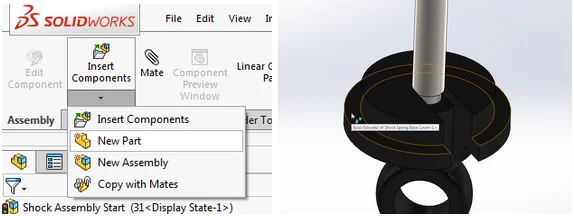
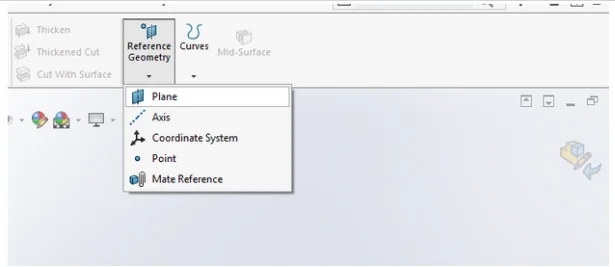
3. Create the Bounds: Now, I have a new part in the assembly that I am editing. From here, I create 2 new planes that each reference the top and bottom components. This is done by simply selecting “Plane” from Reference Geometry and using each mounting face as a coincident reference. Remember, these planes now exist in the new part.
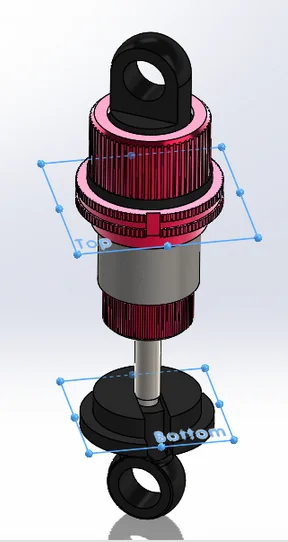
4. Create the Diameter: While I’m here, I create a sketch on the bottom plane I have just created. Make this sketch aligned on center, and dimension to the center diameter of the spring. Or, if you’re feeling efficient, just use Offset Entities on one of the edges available in the assembly. Just be mindful of your external references throughout this process.
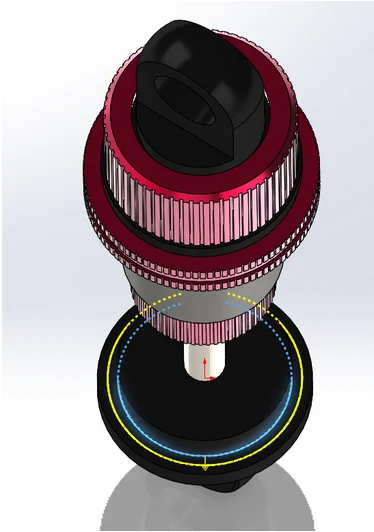
5. Build the Spring Shape: Now we’ve got enough info to build the spring. I open this new part in its own window for convenience. I exit “Edit Part” mode from the confirmation corner, then rename the part and open it from the tree. Here’s what that leaves us with:
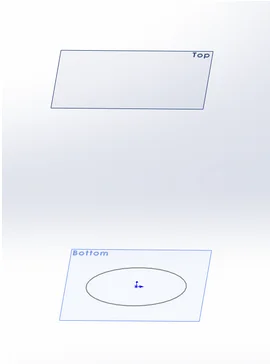
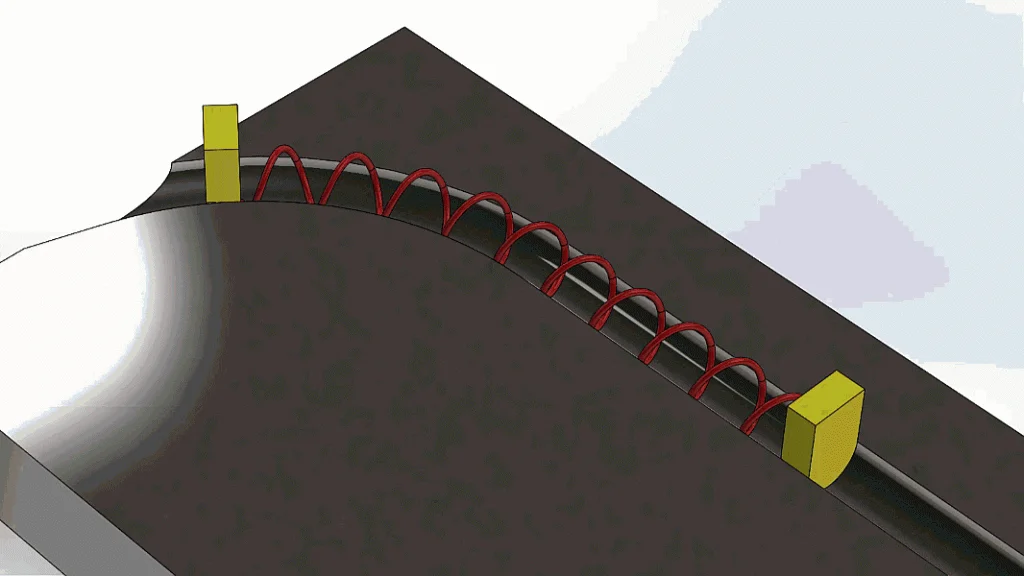
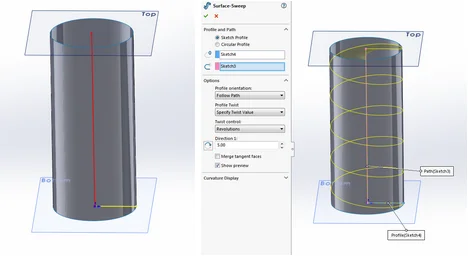
We now have a convenient (and shifting) set of references for the height of the spring. Here’s where that old surfacing trick comes in to create a self-adjusting helix. To do this, I’ll take the spring diameter sketch and extrude it with a Surface Extrude. This allows me to use an “Up to Surface” end condition and extrude up to my top plane. That leaves us with a cylinder however, and we need a helix. The helix is created by exploiting an option of the sweep. I create two linear sketches as shown. Each sketch is tied to the cylindrical surface with auto-relations. Now the Surface Sweep is ready to do the rest for us. Sweep the yellow line along the red one and choose “Specify Twist Value” from the options. Enter the number of coils. Now for the magic, select Tools> Sketch Tools> Intersection Curve (or use search commands) and select the two surfaces and exit sketch. At this point, you are free to hide or delete the two surfaces. I use “Delete/Keep Bodies” to delete mine. Now we have a conveniently adjustable curve that is locked to our adjustable boundary!
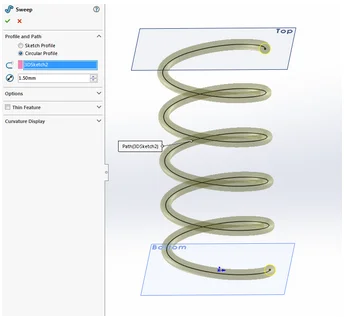
6. Create the Wire Diameter: The rest is a piece of cake. Move back to the Features tab and use the standard Sweep command to create the wire diameter. Remember that newer versions of SOLIDWORKS only require a path sketch for circular cross section geometry.
7. Trim the Ends: I then use Cut with Surface from the Surfacing tab to trim off the remainder using the existing planes. Just select Cut with Surface, select the plane, and make sure you’re cutting in the right direction before accepting. Repeat for the opposite end.
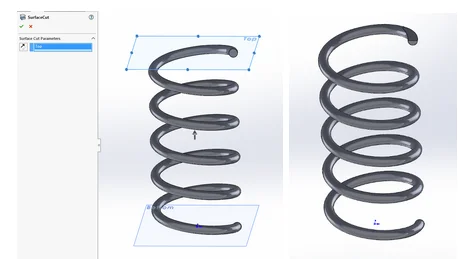
We now have a spring that has been created within a set of boundaries that move with the necessary components. We also have spring geometry that is locked to, and trimmed by, that boundary. The rest is as easy as returning to the assembly and adding a mate to drive the distance. I then chose to animate the mate by using the mate controller and imported that motion into the motion study using the animation wizard.
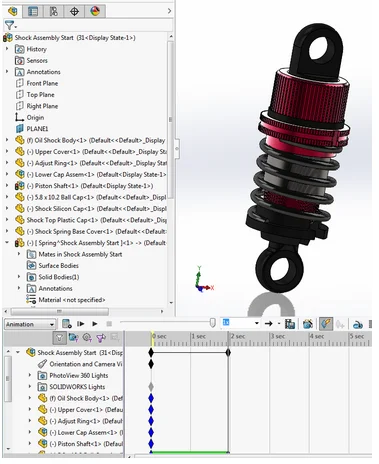
The process sounds complicated on paper but I tested the idea on a whim. In less than 5 mins (I’m not exaggerating, I looked at the clock) I went from my spring-less shock model to a finished spring compression animation. I’ve had great success with the process and I hope you do as well! What do you think? Did I over-complicate the setup? Leave a comment below with what methods you have used to animate springs! I’ll leave you with one of my favorite benefits of using this method. It’s flexible (in every sense of the word)! With just a slight tweak, this method can even be adapted to animate more complex spring compression scenarios as you can see in the .gif below!
