Hello to all,
Welcome to the new edition of the SOLIDWORKS® Support Monthly News! This monthly news blog is co-authored by members of the SOLIDWORKS® Technical Support teams worldwide. Here is the list of topics covered in this month’s Blog :
-
Updating selected actor in the Composer™ Document instead of whole assembly
-
Restoring SOLIDWORKS Manage from Backups
-
SOLIDWORKS® Visualize 2023: Improvements in Auto-Paint functionality
-
Quick Tip: How much Liquid a container can hold?
1. Updating selected actor in the Composer™ Document instead of whole assembly
– By Prajakta LIMBASARKAR
We know about Update Composer Document feature. It lets you apply the changes in CAD files to the corresponding Composer™ file. That means you can work on your design and the marketing content in the Composer™ simultaneously. With any changes in the model design, this feature lets you update the changes in the Composer™ file at any point of time.
Technically, Composer™ opens each part in the SOLIDWORKS® in the background and check the updates in the model. Any changes, addition or deletion are updated in the Composer™.
In this blog we will see another method to update a document. You an update a selected actors individually, instead of going in long updating procedure of the complete assembly. This has an advantage of saving time by triggering update to only required actors.
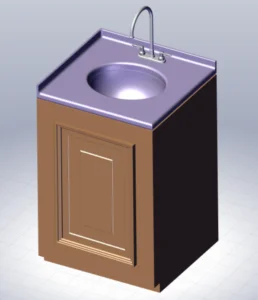
Consider the Vanity assembly:
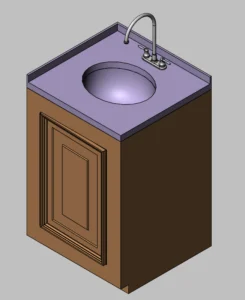
Design change and revision is crucial event of Designing process. In this example, consider the design change in the Ctrtop component. Let us add fillets in the countertop component “Crttop”. The following image shows the component before and after the changes in SOLIDWORKS.

To update the part:
- Select the part in graphics area
- Go to main menu, Geometry
- The Update command is now enabled.
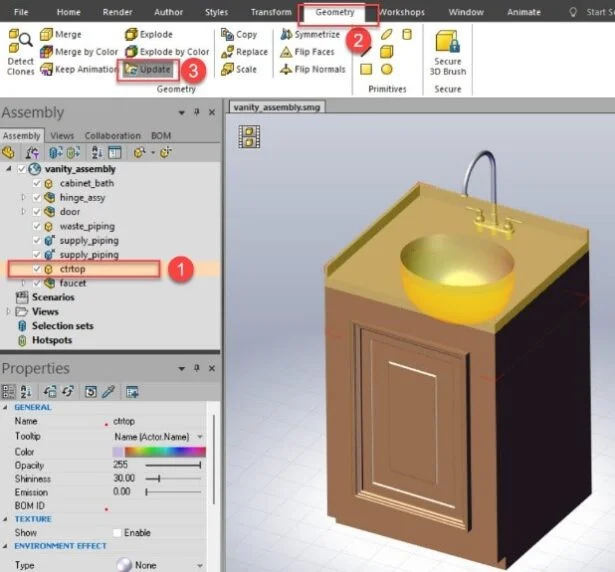
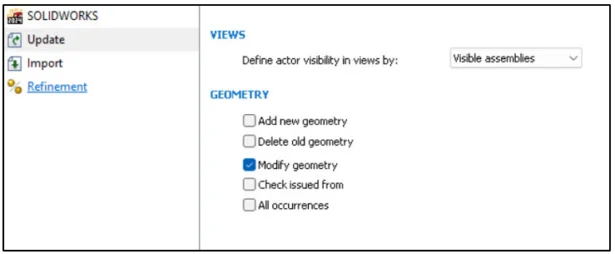
- Select the part file. In the Update geometry options, you will also find Add, delete, modify, check issue from and All occurrences option. In our case, we select Modify Geometry.
- Click Update. The Actor is successfully updated.
2. Restoring SOLIDWORKS® Manage from Backups
– By Rohit MAGAR
Restoring a database is a critical operation, often necessitated by various scenarios like accidental data deletion, malware or ransomware attacks, and hardware failures. In all these scenarios, having a robust backup strategy and tested recovery procedures is crucial to ensure minimal downtime and data loss. Restoring the database requires access to SQL through Microsoft SQL Server Management Studio (SSMS) and the credentials that will allow us to restore a database from backup. To understand the process of SOLIDWORKS® Manage backup please refer blog: http://blogs.solidworks.com/tech/2023/01/solidworks-support-monthly-news-january-2023.html
There are two main components in SOLIDWORKS® Manage to be restored:
- SOLIDWORKS Manage Database restore:
- Ensure that the backup file is intact and not corrupted. This may involve running checksum or validation tools
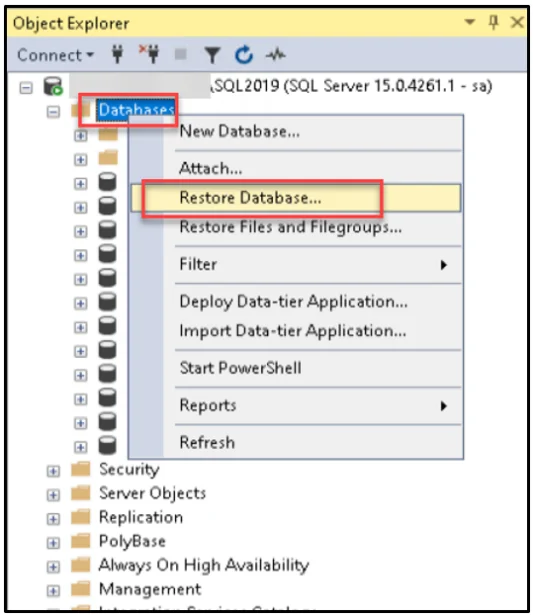
- Use Microsoft SQL Server Management Studio to initiate the restore process. This usually involves specifying the location of the backup file and the target database. Right-click the Databases node in Object Explorer and select Restore Database
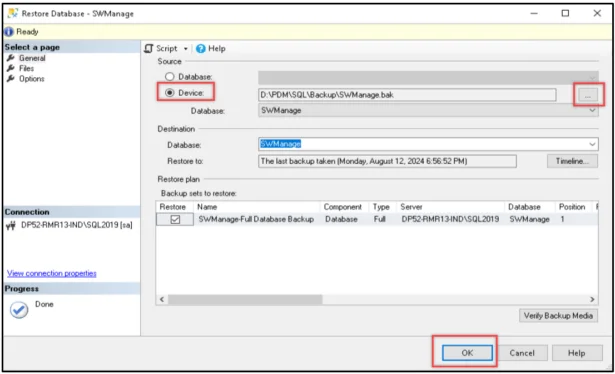
- Select Device: and then select the ellipses (…) to locate your backup file.
- Select Addand navigate to where your .bak file is located. Select the .bak file and then select OK.
- Select OK to close the Select backup devices dialog box.
- Select OK to restore the backup of your database.
- Restoring the file server
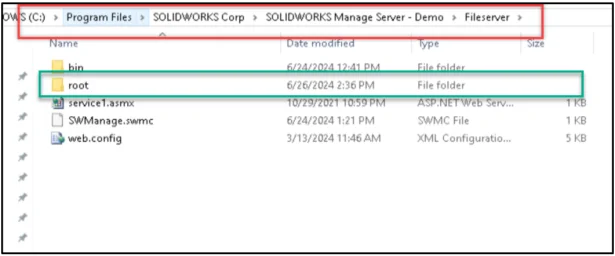
- Copy and Paste fileserver folder:
Restoring the file server is generally straightforward if you know its location. Typically, it can be found in a directory like: “C:Program FilesSOLIDWORKS CorpSOLIDWORKS Manage Server.” Copy the backup directory into the new fileserver folder.
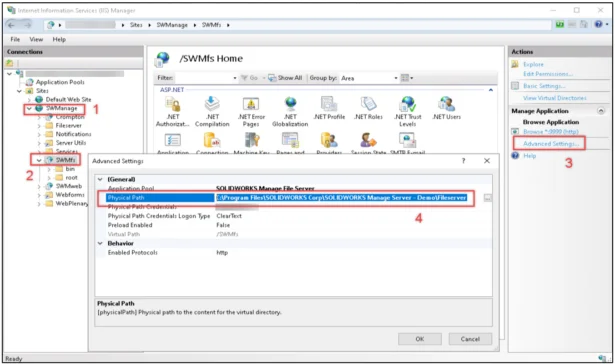
If you’re unsure whether the default directory was used, you can verify this using Microsoft Internet information Services (IIS).
To do this, open the IIS Manager on the server. In the Connections panel on the left, locate the website that hosts your Manage file server, usually named SWManage unless it has been renamed.
Expand this node to find a sub-node named SWMfs. Select it, then click on “Advanced Settings” on the right side of the window. Alternatively, you can right-click and choose “Advanced Settings” from the SWManage > Manage Website > Advance Settings…
2. Creating Configuration File
If the SQL server name/ Database Name/SNL Server name has changed, it is important to create a new SWMC connection file. To create this file, browse to the installed location for the SOLIDWORKS Manage Server > Navigate into the Server Utils folder > run the ‘Configuration File Wizard’ (swm.configwizard.exe). A recommendation is to use the ‘Test Connection’ feature to make sure that all information is correct.
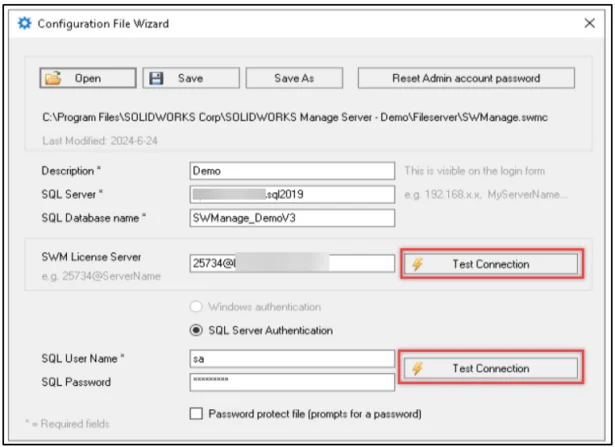
After confirming that the settings are correct, use the ‘Save’ or ‘Save As’ functions to save the .SWMC file. When you start SOLIDWORKS Manage and expand the ‘Options’, you will be able to add or select the .SWMC file or add multiple paths to different .SWMC files.
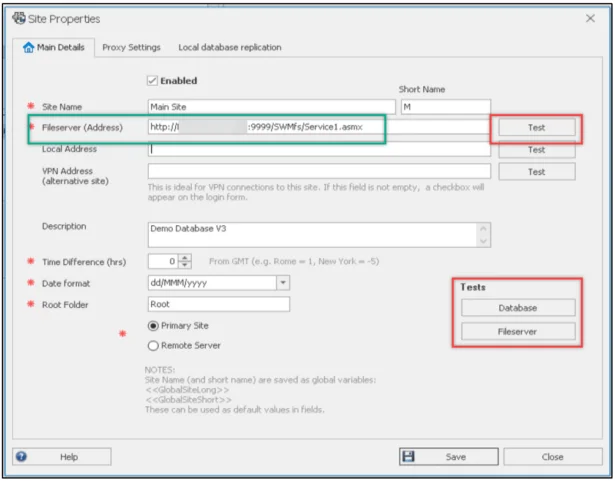
3. Update Site Settings:
Test the connection to the Fileserver as follow:
-
-
- Run the SOLIDWORKS® Manage client.
- Go to Options > Administration Options > Sites.
- Edit the site by clicking on the pencil icon.
- Test the connection by clicking the Fileserver button.
- If you see the message ‘The request failed with HTTP status 404: Not Found’, this means that the address of the Internet Information Services (IIS) application (‘Error’) for restoring SOLIDWORKS® Manage does not exist in the SWManage IIS website.
- Recreate the IIS application in the correct website at the same level as the SWMfs application and assign Modify permissions for the IIS_IUSRS and IUS’ groups for the application.
- Specify the correct Address. For example: ‘:9999/SWMfs/service1.asmx’
- Perform the test again. Once the right string connection is set, you see the Success message.
-
By following the steps detailed in this blog, you can ensure a successful restoration of your database or file server. Adhering to these procedures reduces the risk of data loss and maintains system integrity. Additionally, these steps enable administrators to create a test environment for testing or investigation purposes, rather than making changes directly to the production environment.
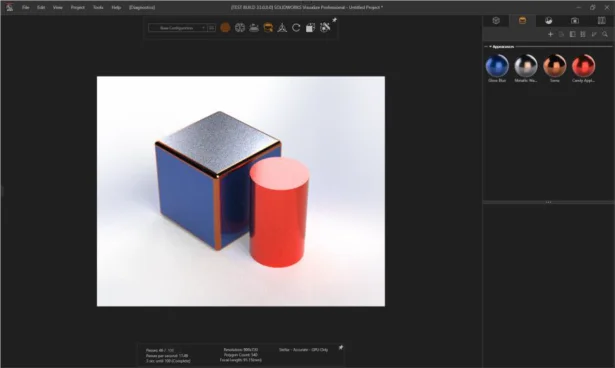
3. SOLIDWORKS® Visualize 2023: Improvements in Auto-Paint functionality
– By Daniela KOLOSZKO
In SOLIDWORKS® 2022, the imported part name (as in the child leaf node in SOLIDWORKS® Visualize tree to which an appearance is attached) was used as KEY for Auto-Paint in 2022.
In SOLIDWORKS 2023, we changed how part naming and grouping works for SOLIDWORKS imported models in order to simplify the import part grouping selection choices and provide users with a tree in Visualize that more closely resembles the feature manager tree in SOLIDWORKS.
When this change was made, we also had to make the imported appearance name be the KEY when Auto-Paint storage is created.
Thus, what happens in version 2023 (and later) is that if you do NOT import Appearances, then there is no imported KEY to use to make the Auto-paint mappings, and you end up with no appearances on the model. Nothing is imported and nothing is Auto-Painted.
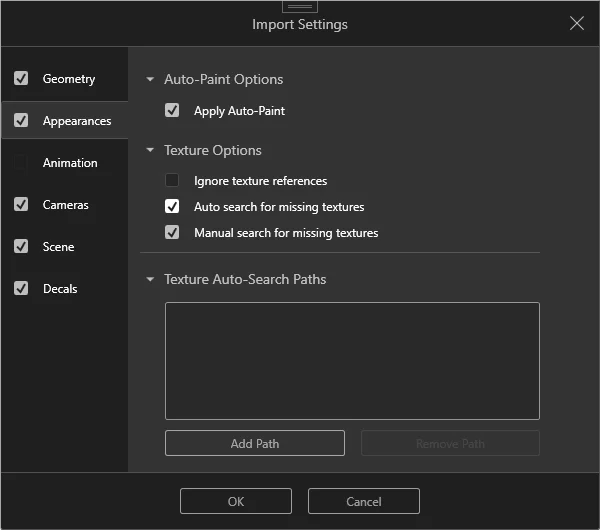
To address this and make it less confusing since Auto-Paint is really more related to importing of Appearances, we have done the following improvements:
- The option to Apply Auto-Paint is moved out of the Geometry tab, into the Appearances tab:
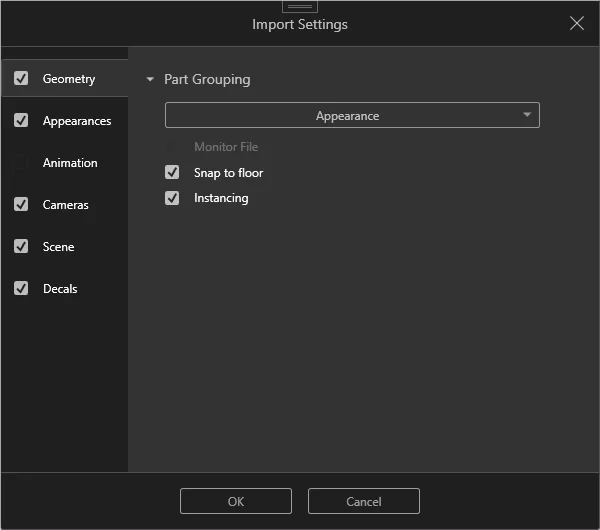
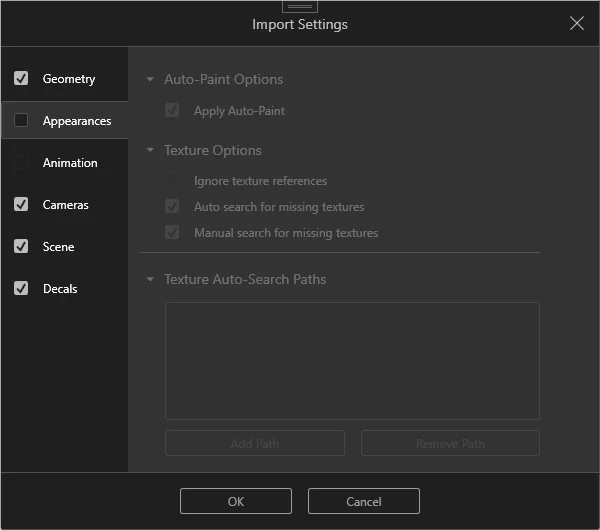
- If Appearances are unchecked, then “Apply Auto-Paint” is disabled along with all other controls on the Appearances tab.
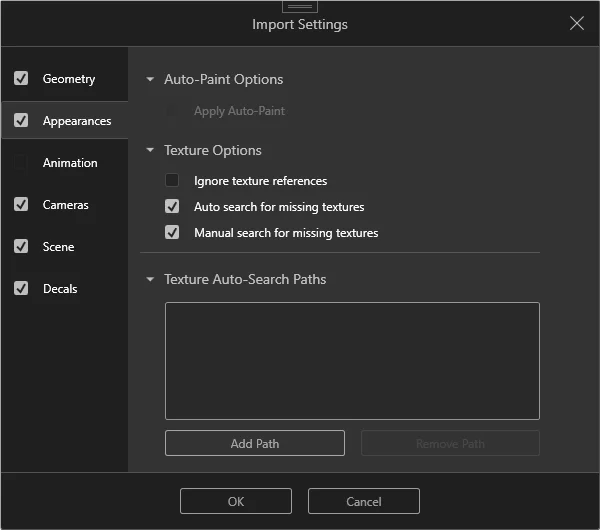
- If there is no Auto-Paint data, then Apply Auto-Paint is disabled even if Appearances is checked. This is essentially the same as before:
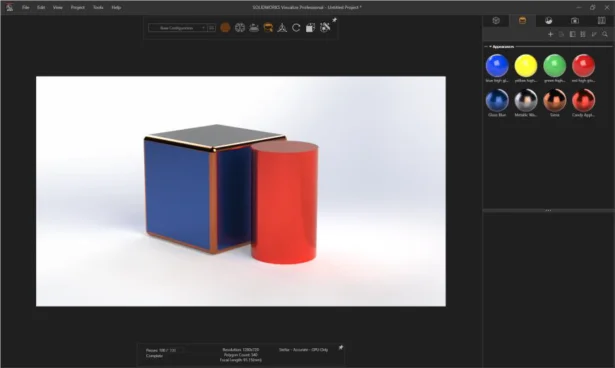
- Lastly, and perhaps most importantly for this behavior, is that upon completion of import, we will now automatically remove unused (i.e., imported but replaced by Auto-Paint) appearances. Previously, the result would have looked something like this, where the red, yellow, green and red high gloss plastic appearances were imported, but replaced, and left in the palette as unused:
Now we auto-remove the unused, imported appearances so they don’t clutter up the palette:
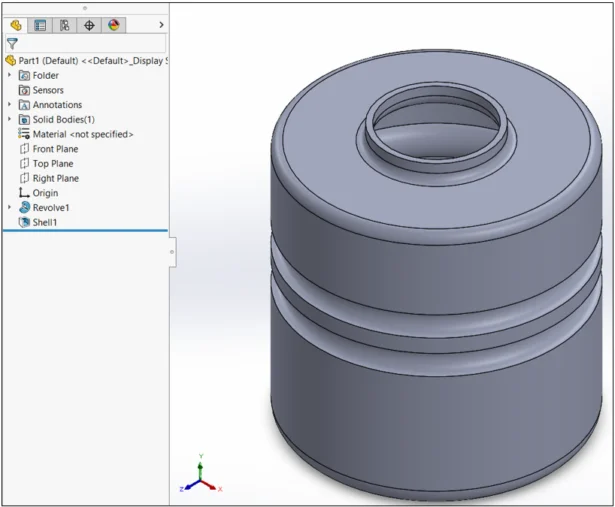
4. Quick Tip: How much Liquid a container can hold?
– By Shreyas BHAGWAT
After designing a container for any liquid (like water, oil, etc.), have you ever wondered how much liquid can that container hold?
Let us understand the process using an example. Here, I have with me a weird looking bottle, which I need to fill with water but am not sure of the volume the bottle will hold.
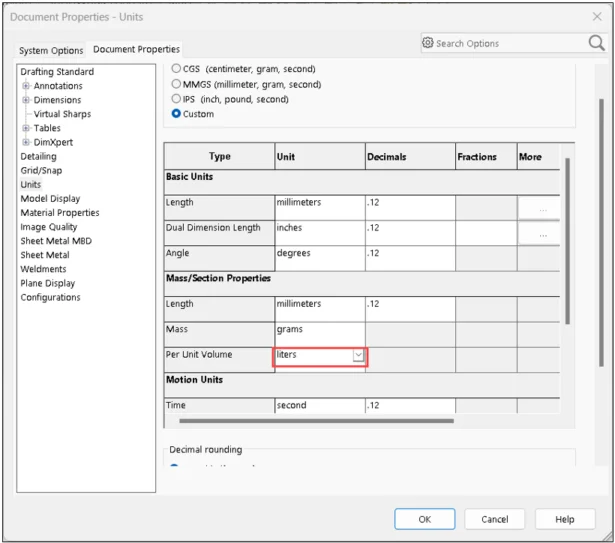
- Let’s change the unit system of the model. Go to Tools > Options > Document Properties > Units > Custom > Change the unit of per unit Volume to the desired unit. For me it is Liters.
- Create a reference plane at the section which marks the fill capacity of the bottle/container
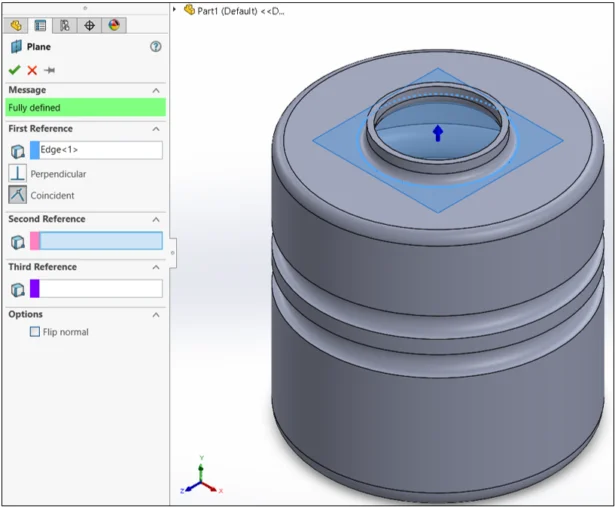
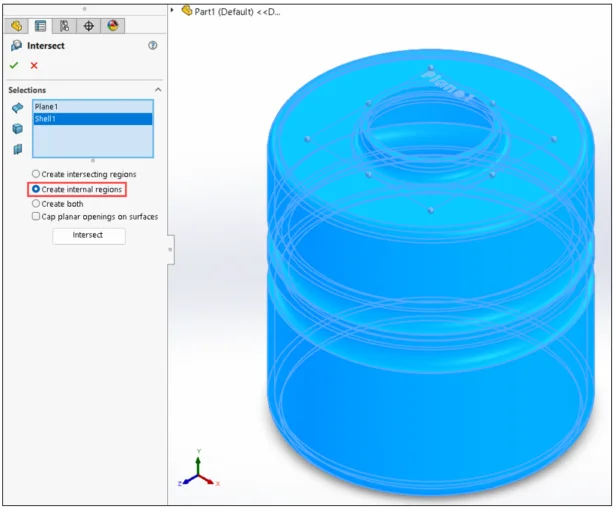
- Go to Insert > Features > Intersect > Create internal regions > intersect > select the appropriate region > OK
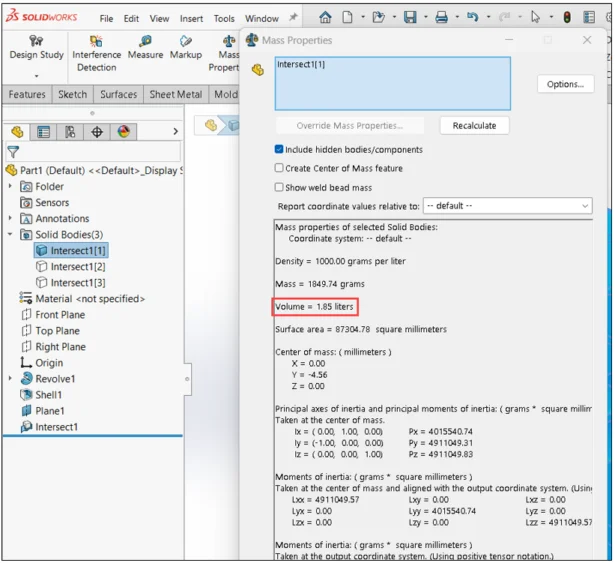
- Hide the original body and select the body created after intersection
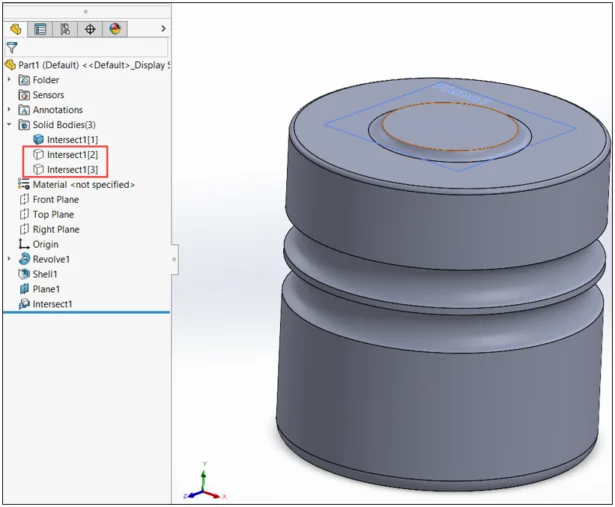
- Go to Mass Properties to see the volume of liquid the container can hold.