Hello to all,
Welcome to the new edition of the SOLIDWORKS® Support Monthly News! This monthly news blog is co-authored by members of the SOLIDWORKS® Technical Support teams worldwide. Here is the list of topics covered in this month’s Blog :
- Understanding SOLIDWORKS® Manage Professional Backup Process
- What is ‘Tiling Strategy’ in SOLIDWORKS® Visualize 2023? How does it function?
-
How to Remove Toolbox flag from SOLIDWORKS® part file?
1. Understanding SOLIDWORKS® Manage Professional Backup Process
By Rohit MAGAR
SOLIDWORKS Manage is an advanced, record-based data management system that extends the global file management and application integrations enabled by SOLIDWORKS PDM Professional to include a comprehensive set of capabilities that you can use and distribute to many areas of the business. Without a disaster recovery plan, all this centralized data could be at risk if there is a hardware failure, for example, a damaged disk drive or permanent loss of a server or ransomware attack. To prevent this catastrophic data loss you will need to backup two elements from your main server.
IMPORTANT: Most SOLIDWORKS® Manage systems have a SOLIDWORKS® PDM Professional Vault attached. If this is the case you will also need to take the SOLIDWORKS® PDM backup. A complete file vault backup must include backing up the file vault database and all physical file vault archive files. For more information on SOLIDWORKS® PDM backup procedure please refer to SOLIDWORKS® PDM Installation Guide > Backing Up and Restoring File Vaults.
The Backup Process :
- The SOLIDWORKS® Manage SQL Database backup (.bak): This database contains all of the item and project data created in your SOLIDWORKS® Manage environment.
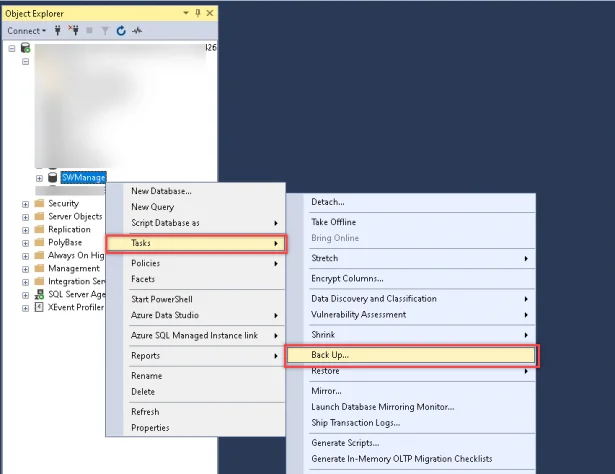
- In the Management Studio, right-click on the Manage database that needs to be backed up. Then go to the Tasks and select ‘Back Up’.See the image below.
-
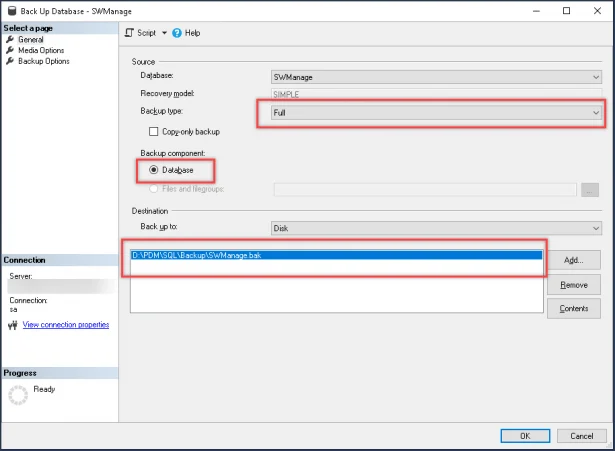
- In the Back-Up dialogue box, General page, ensure that the Backup type is set to ‘Full’ and the Backup component is set to ‘Database’. In the Destination area, select click ‘Add’ to select a backup destination on disk. See the image below.
-
- In the backup ‘Options’ page, it is recommended to use the Overwrite option and also mark the Verify backup checkbox.
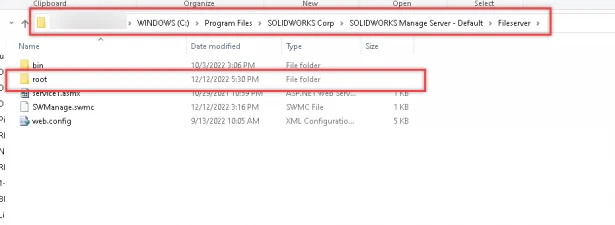
- The Root folder of the file server: The Root folder contains all the files that are stored in document objects and the related files for all records in SOLIDWORKS® Manage. Although the default location of the Root folder is C:Program FilesSOLIDWORKS Manage ServerFileServerRoot, you might have selected a different folder location during installation. To back up the Root folder, copy the contents to a secure, off-site disk.To find it on your Manage server follow the following steps:
a. Launch Microsoft Internet Information Services (IIS)
b. Expand Server > Sites > SWManage > SWMfs
c. Right Click and select Manage Application > Advanced Settings. Refer image shown below.
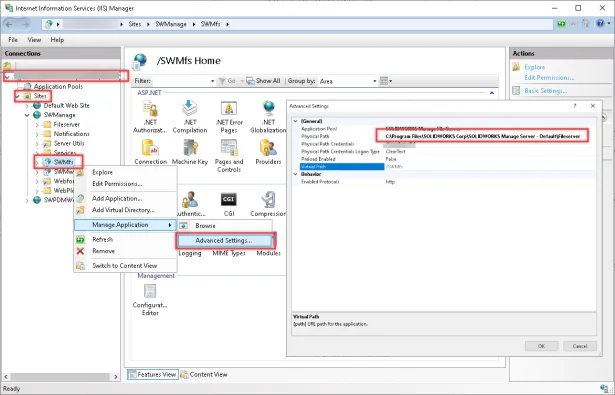
d. Find the “root” folder in the “Physical Path” location. See the image below.
If these two elements are backed up and copied from the server, then restoring from a complete system failure can be done very quickly with a minimum of data loss.
Recommendation: Use a backup utility that can perform verified, extensive backups using a checksum or similar method. Examples of these utilities include Microsoft® RoboCopy and XCopy. The advantages of using backup utilities are the:
-
-
- Ability to schedule the backups
- Ability to compare against an existing backup specified to only transfer the new and changed files
-
2. What is ‘Tiling Strategy’ in SOLIDWORKS® Visualize 2023?
By Richie MORE
Starting SOLIDWORKS® Visualize 2023, we find a new option “Tiling Strategy “in 3DViewport Settings.
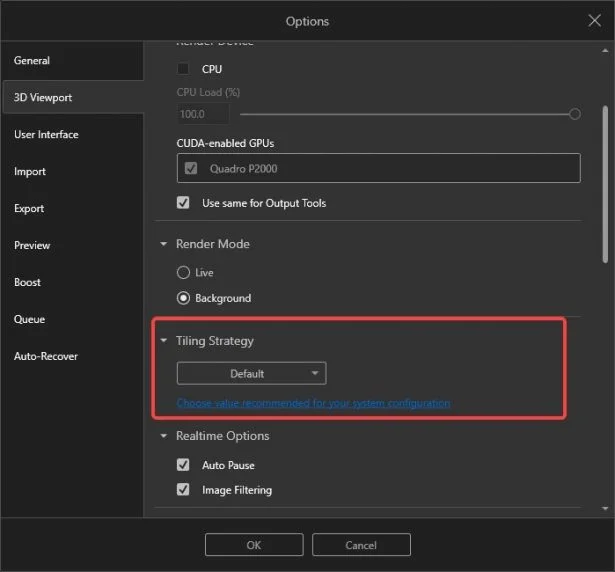
To limit the amount of GPU memory used for rendering, SOLIDWORKS® Visualize uses tiling, which subdivides an image. Into smaller tiles. After rendering, it combines the tiles into a single large image.
If you click the link” Choose value recommended for your system configuration “, SOLIDWORKS® Visualize probes the GPU memory and suggests a preset.
When you specify Tiling Strategy, the following options are available –
Disable: Completely disables tiling altogether even for very large images. This setting may lead to out-of-memory errors during rendering. Only recommended for users with a graphics processor unit (GPU) with a lot of memory.
Optimistic: Uses tiling for images larger than 33,177,600 pixels (8K). Only recommended for users with a graphics processor unit (GPU) with a lot of memory.
Default: Uses tiling for images larger than 8,294,400 pixels (4K). Recommended for users with an entry level graphics processor unit (GPU).
Conservative: Uses tiling for images larger than 2,073,600 pixels (2K). Makes heavy use of tiling to prevent out-of-memory errors. Recommended for users with an entry level graphics processor unit (GPU).
3. How to Remove Toolbox flag from SOLIDWORKS® part file?
By Deepika PUJARI
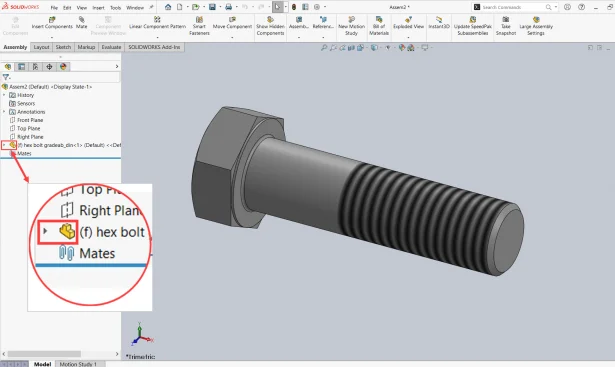
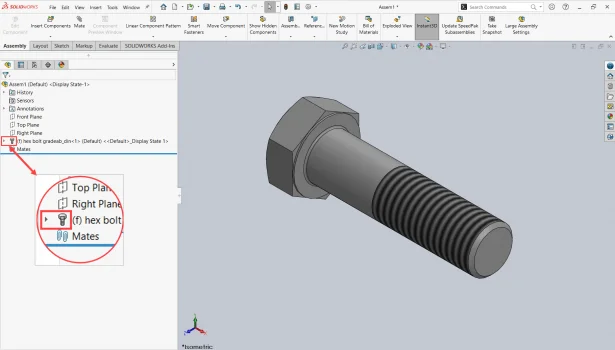
All SOLIDWORKS® Toolbox parts have an internal flag set that enables SOLIDWORKS® to identify such files as Standard toolbox file. The flag is a hardware icon beside the Toolbox part file name in the FeatureManager Design Tree, highlighted in the below image.
You can copy the existing standard toolbox file and customize it as per requirement.
Once customized, you can place this file either in the Standard Toolbox folder or outside the folder to a desired location as per need basis. The file with unflagged state corresponds to a Toolbox geometry with no link to the Toolbox. A mere dump parametric part, rather than an intelligent toolbox part.
To remove or set the flag for a part file, do as follows:
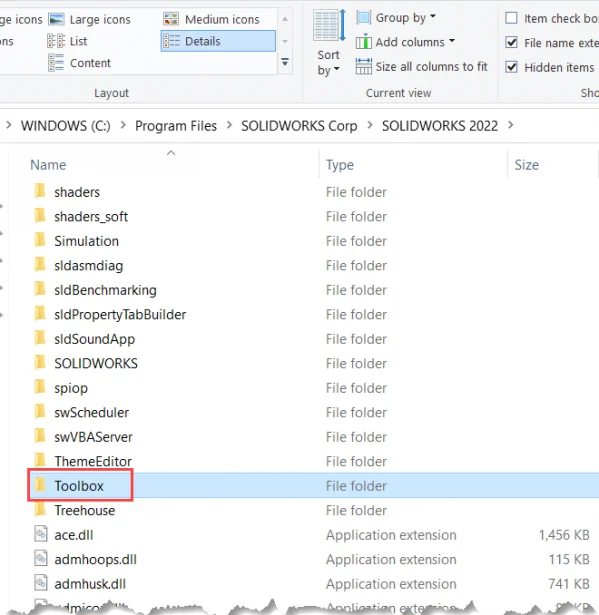
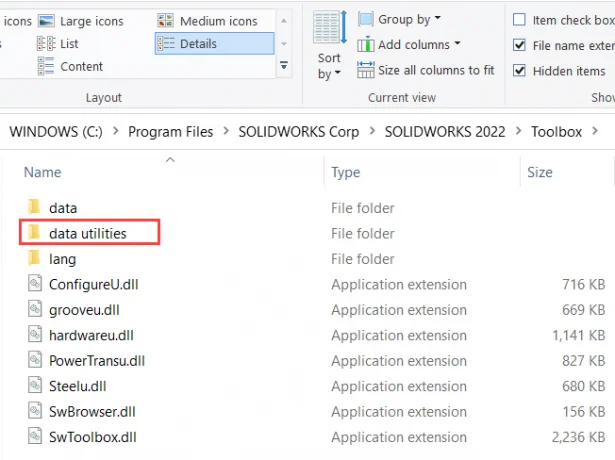
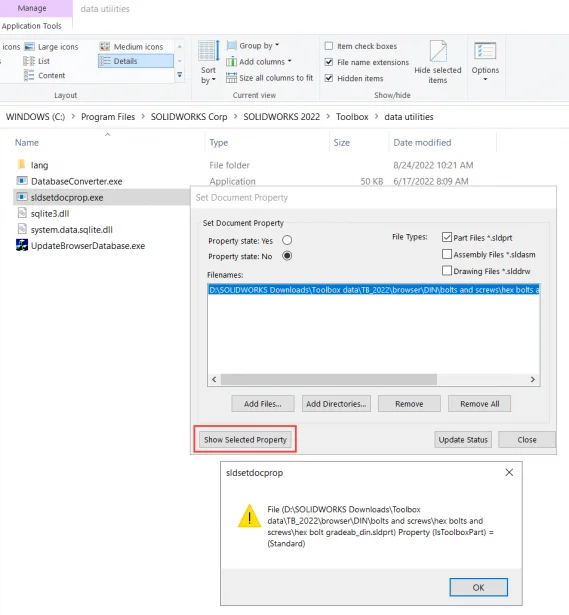
- Browse into the SOLIDWORKS® installation folder ‘[install_dir]toolboxdata utilities’.

- Right-click ‘sldsetdocprop.exe’ and select ‘Run as Administrator’
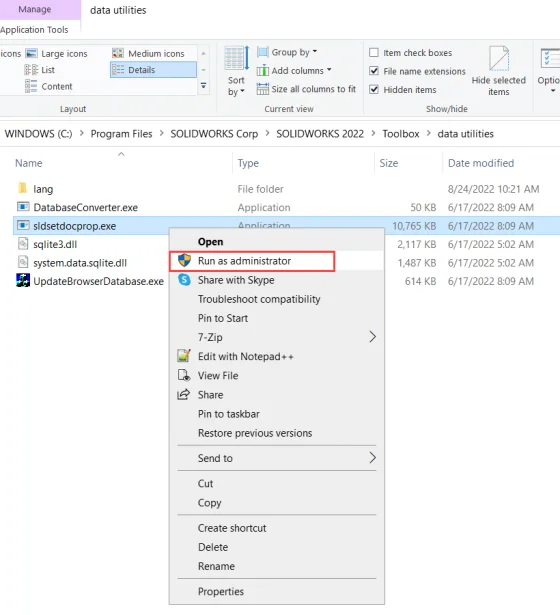
- Ensure that the files you are updating have the read-only flag disabled

- Add files or folders to the ‘Filenames’ list
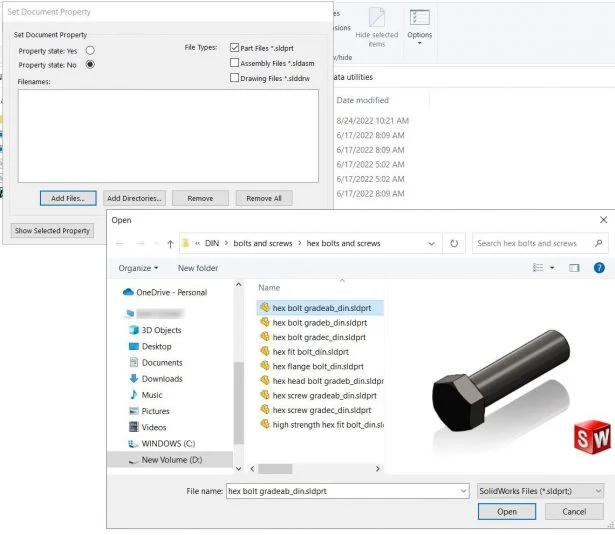
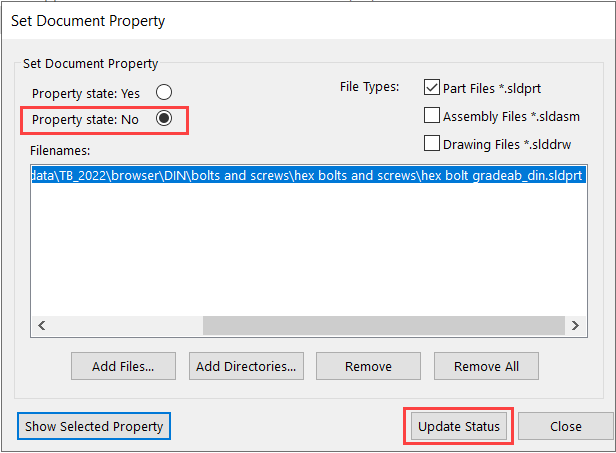
- Under ‘Set Document Property’, define the toolbox state of the files:
- Select ‘Property state: Yes’ to enable the toolbox flag.
- Select ‘Property state: No’ to remove the toolbox flag.
- To check if a listed file has the Toolbox flag enabled or not, select the file in the list and click the ‘Show Selected Property’ button.
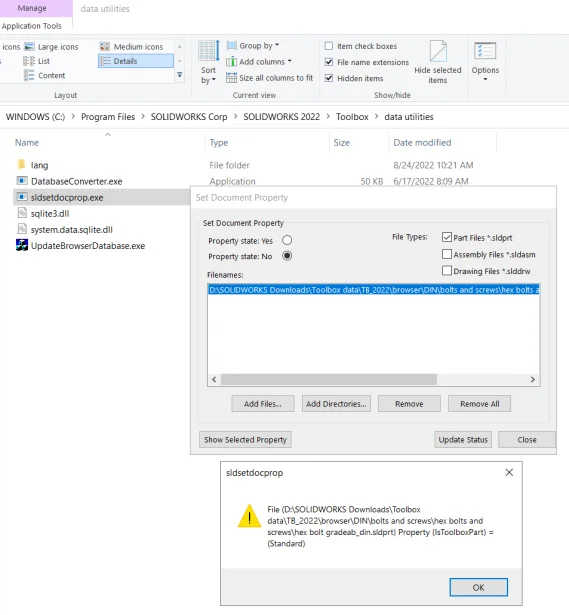
- Click the ‘Update Status’ button to apply the update.
When the Toolbox flag is removed, the icon in the FeatureManager looks like a regular part file. See the image below.