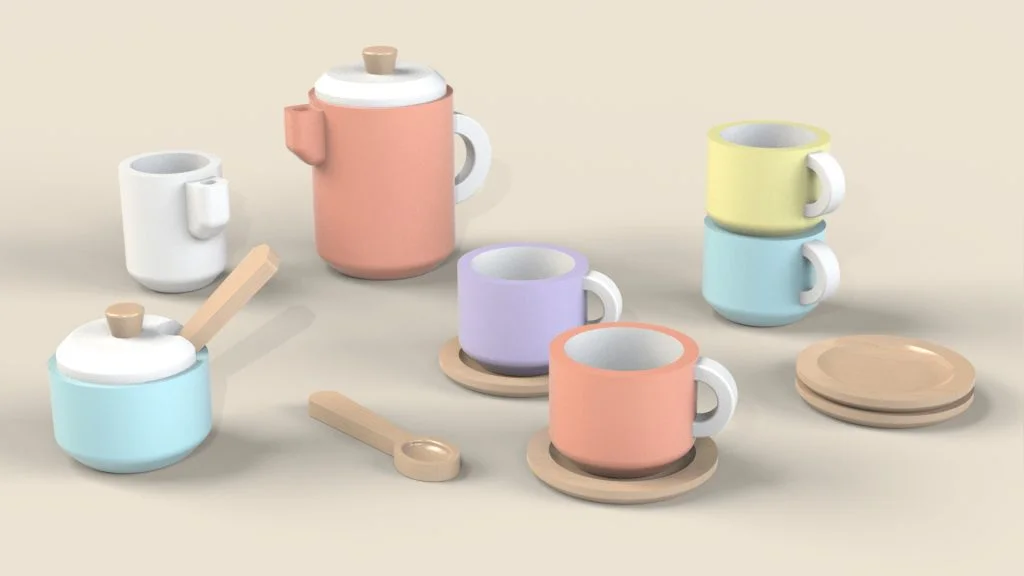

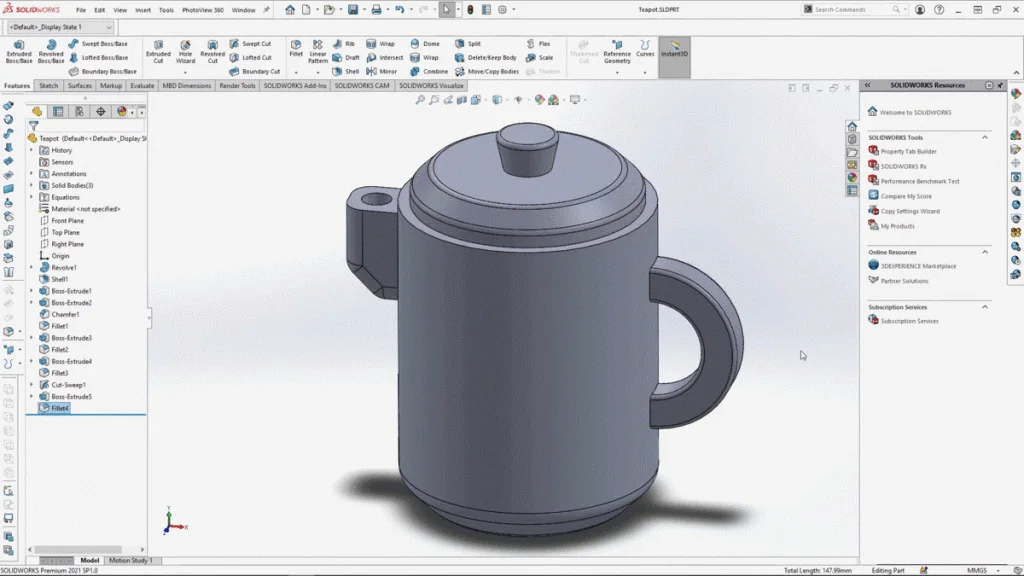
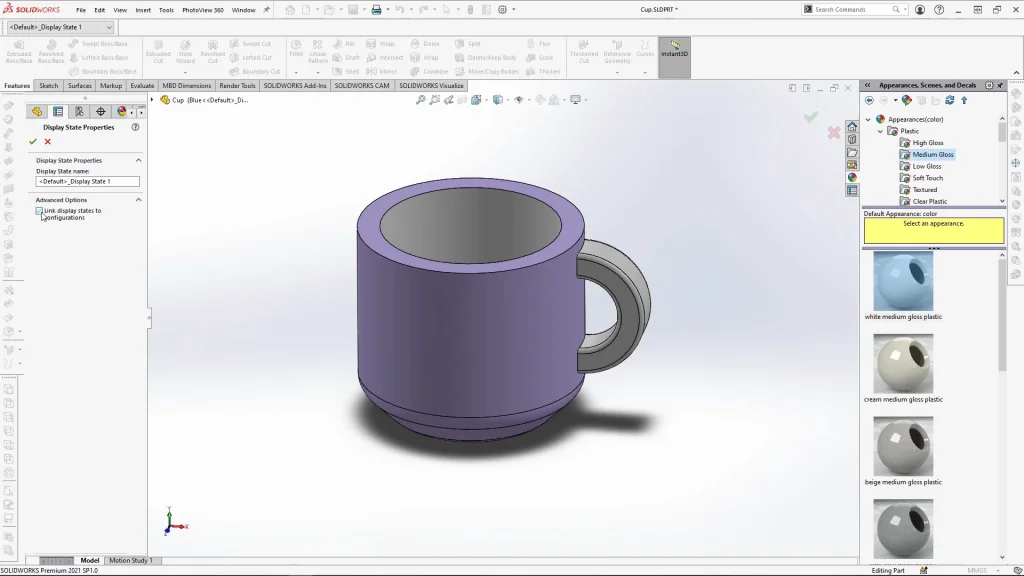
For this SOLIDWORKS tutorial I have designed a wooden toy tea set. In the tutorial I demonstrate how to create the teapot, milk jug, sugar bowl and tea cup parts. The saucer and spoon parts can be downloaded here. I also demonstrate the use of some of the more basic SOLIDWORKS features such as revolve, extrude, shell, fillet, chamfer and swept cut. Once all parts are modelled see how I use configurations and linked displays to apply different colored appearances to a single part. This is useful for assemblies where you have multiples of one part, and want to quickly change the appearance of each individual part.

When I design a cohesive set like this one, I like to try and keep similar features across the set. To make this easier and faster to model, I take one design and edit measurements of features to create another part, the part can then be saved with a new name. For this set I used the tea pot part to create the milk jug and sugar bowl from. I then used the sugar bowl to create the cup.
Once I have all my parts finished, I create an assembly with them. I have included multiples of the cup part. For this design, I wanted to have several different colored cups. One way of doing this would be to save multiple files of the cup part with a new name and different applied color appearances to each. Another way of doing this is through configurations, and linked display states to those configurations. Opening the cup part, I start by adding an appearance I want applied to all color variations/configurations of the cup, in this case it is the inner cup and handle that I add a white plastic appearance. With that applied, I can add a new configuration, and rename my configurations to the name of the cup color I will be applying. I create four more new configurations in total for the blue, lilac, yellow and peach cup variations. Selecting one of the color configurations, under display states, you need to right click and select the properties of the display state and tick the ‘link the display states to configurations’ box. Then with one of the color named configurations selected, go to the appearances tab and edit the color to the match the configuration name. Before applying the appearance, ensure you scroll down to specify display state, there you should now have the option to select which configurations you want the appearance to apply to.
Once applied, you can go between the different configurations and see how the color changes. Once appearances are applied to all configurations, I can go into my assembly, right click the cups in the feature tree, drop down their configuration menu for the part and select the color name I want. This is useful to see models in a range of appearances quickly, or to see multiples of a part in different appearances within an assembly. Below is an animation created using the renderings from SOLIDWORKS Visualize.
