

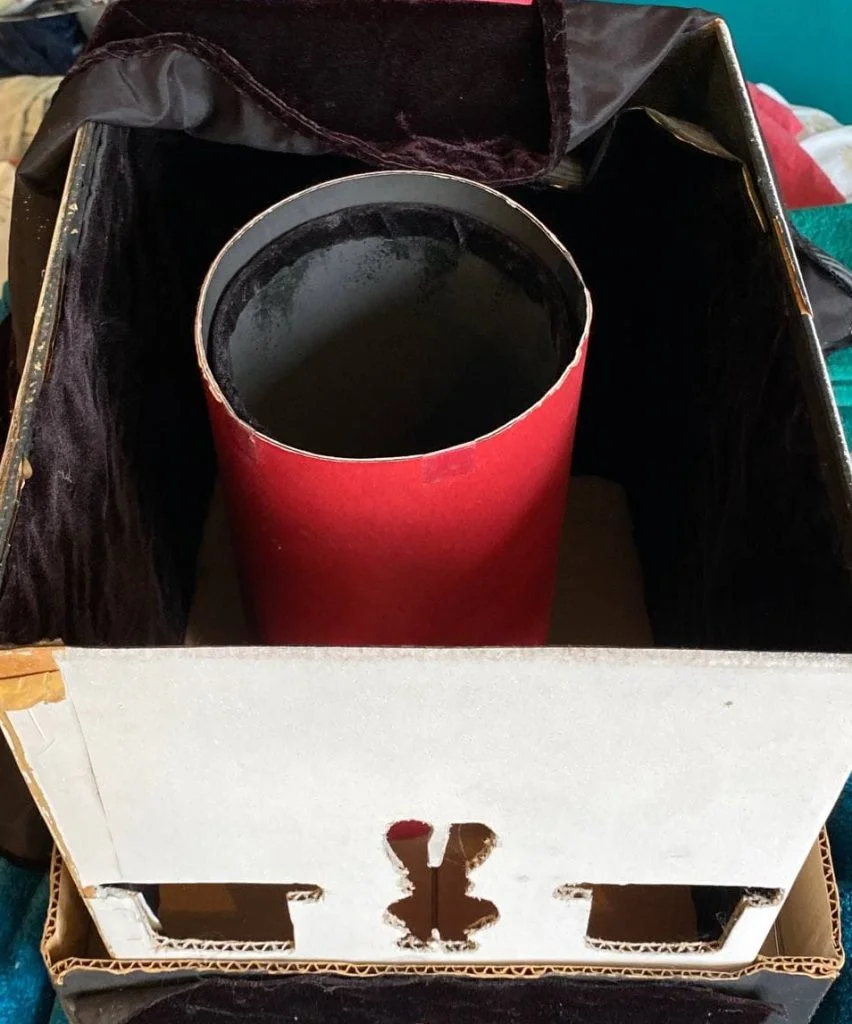
In this blog we create and test a classic magic trick from my childhood – the square circle. The effect of the trick is simple and effective. The magician starts by showing the audience the outer “square” and confirms that it is empty. Then they show the inner “circle” and show the same. Finally, they say the magic words and produce all kinds of outrageous objects from the previously empty cylinder.
I have fond memories of being 10 years old and performing this trick at a magic show (with my best friend, of course) for a party of 5 year old kids. I believe we originally found the instructions to make this trick in the Mark Wilson Book of Magic and I don’t think we could have been more proud of the results. Here’s the original, for reference:
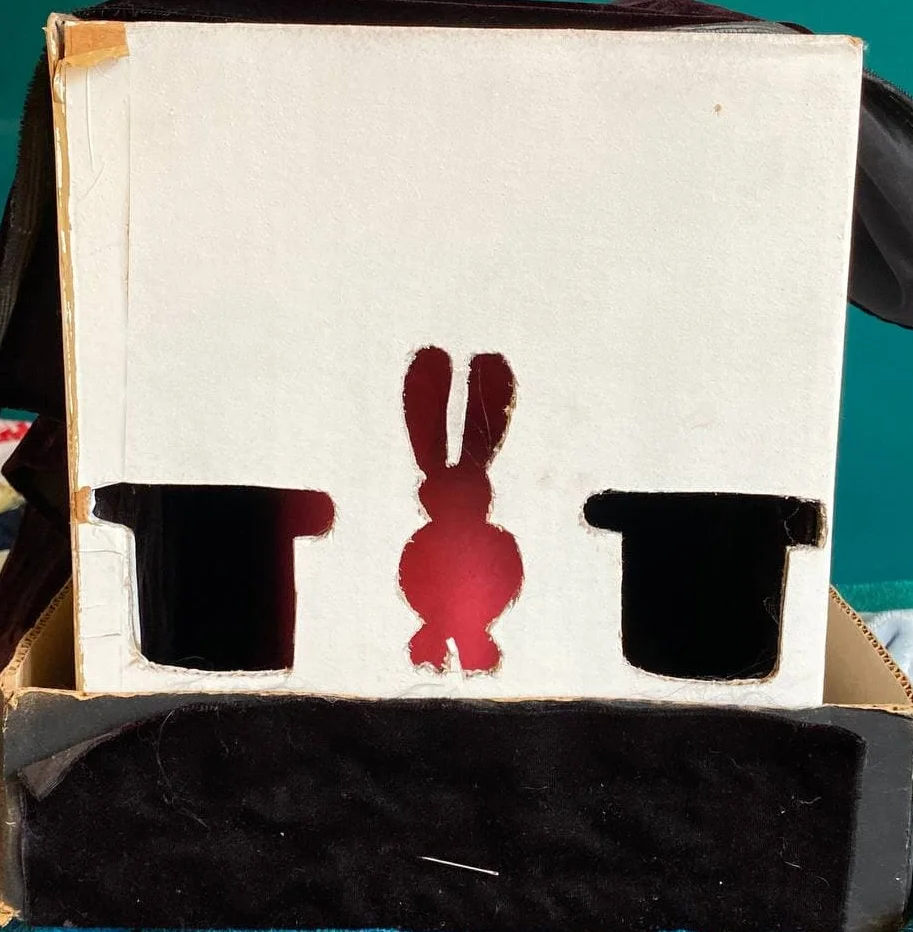
As you can tell, the trick has aged a bit, so I decided that it was time for a revamp… using SOLIDWORKS!
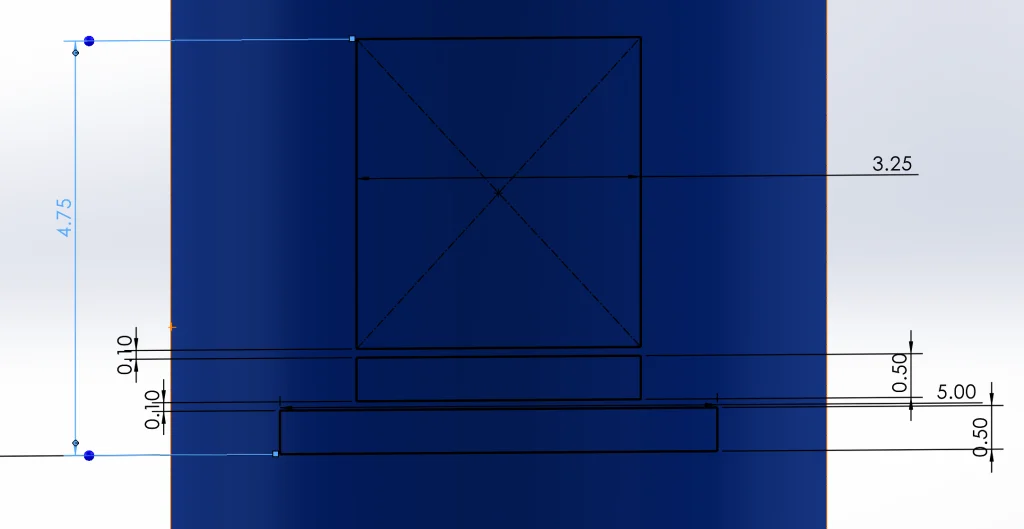
Let’s get started with some simple extrudes. To make life easier, I used the Thin Feature checkbox to get some thickness to my shapes without sketching an offset.
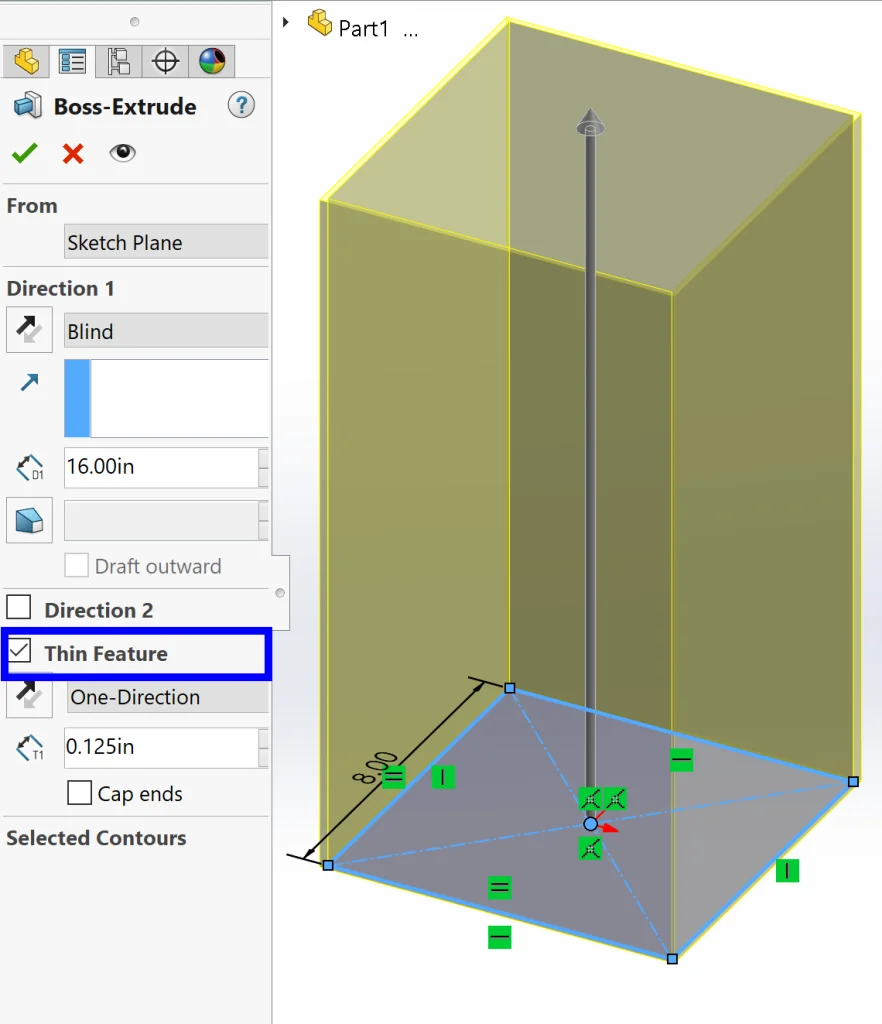
This will be our “square.” To create our “circle” we will also use an Extrude with Thin Feature checked, but to capture design intent with out dimensions we can use a trick. Usually Smart Dimension will dimension from the center of a circle to another entity, but in this case we want the measurement from the outer edge to the inside of the box. To do this, we can (1) activate Smart Dimension and select the circle, (2) hold down Shift, and (3) click on the inner edge of the box.
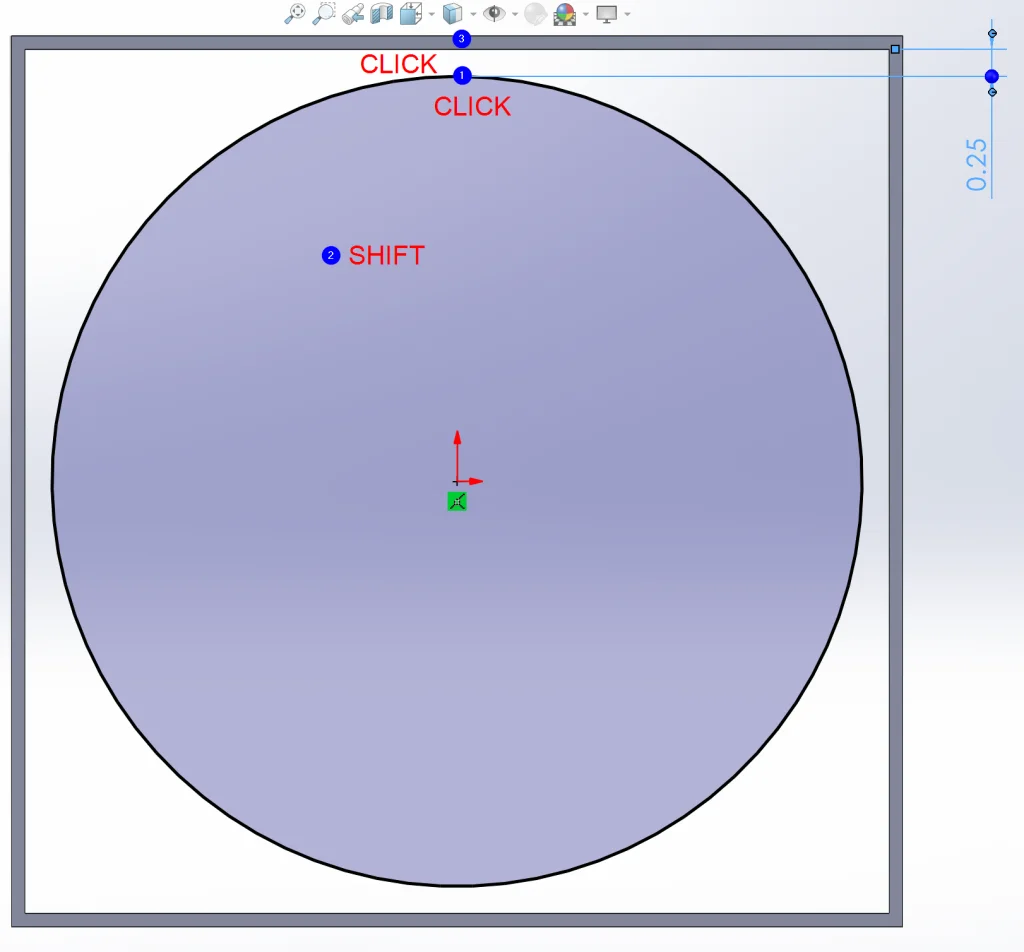
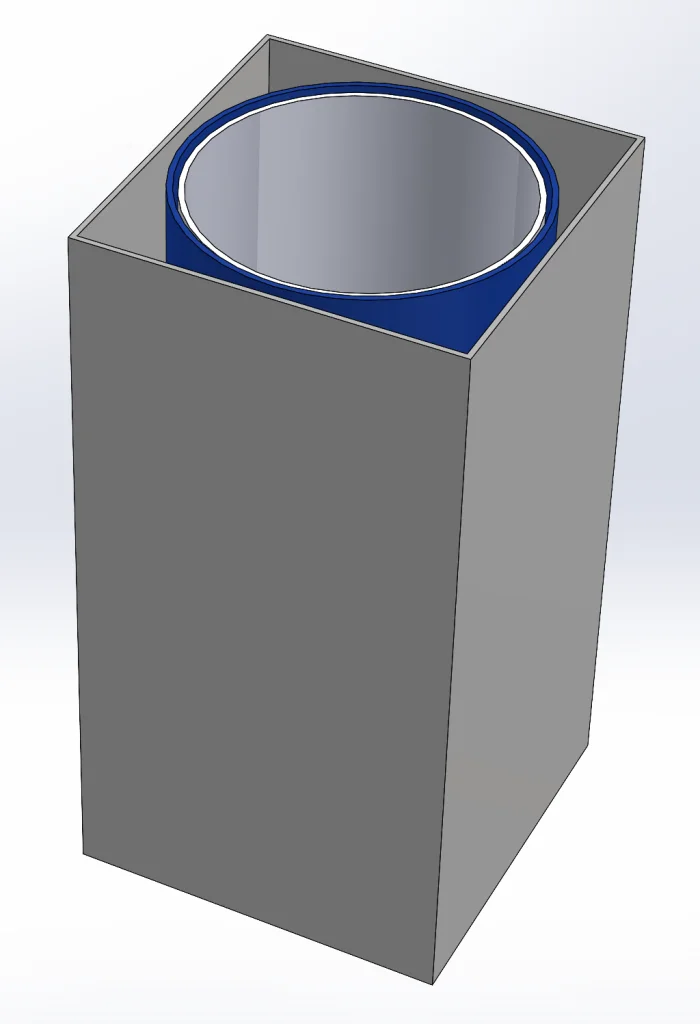
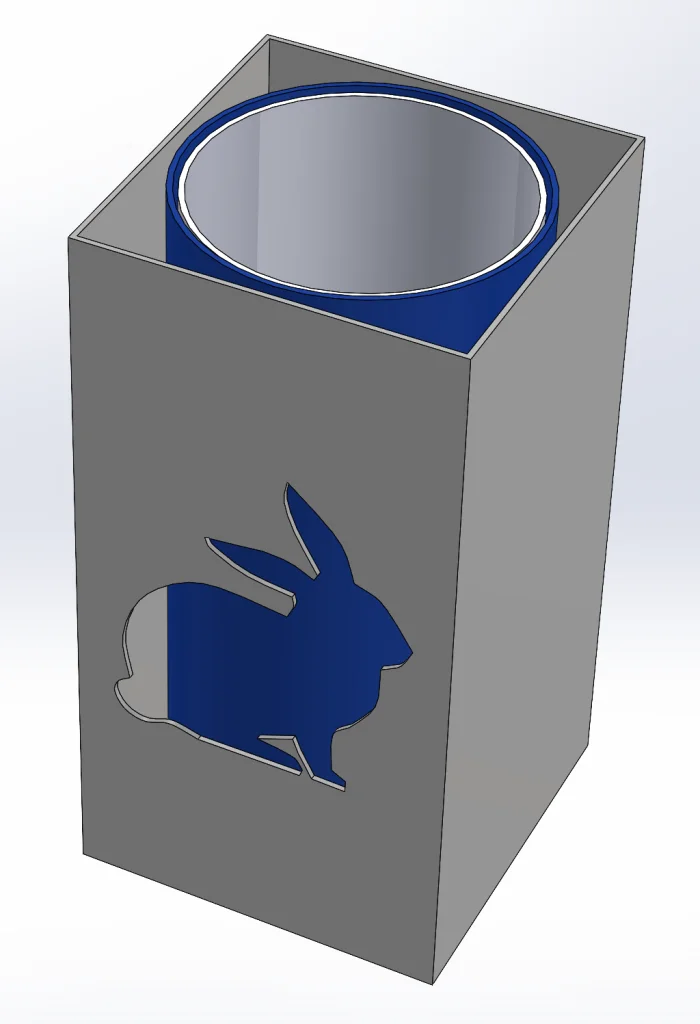
Now all we need to do is extrude our geometry, add a second (secret) circle concentric to the first, and then we can move on to add some fancy cutouts.
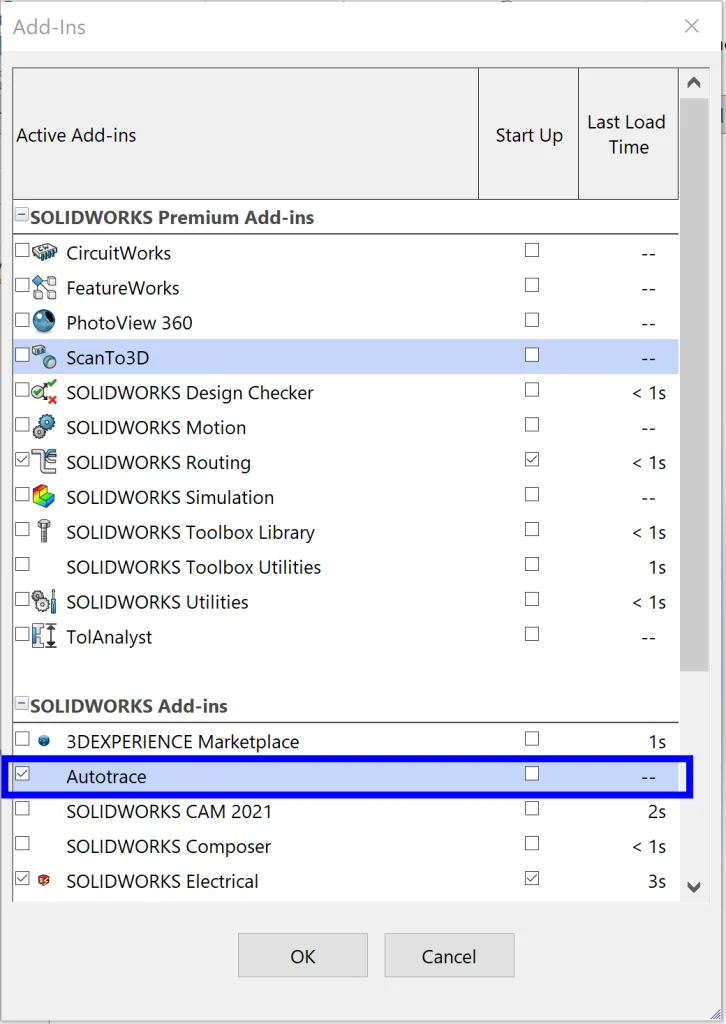
So far, very simple, right? Here’s where it gets fun. You may have noticed that my original 10-year-old self added a bunny cutout to the front. I’d like to do the same here, but slightly more complex and with less work thanks to the Autotrace feature in SOLIDWORKS Premium. First things first, we need to enable the add-in, so let’s make sure we have that checked.
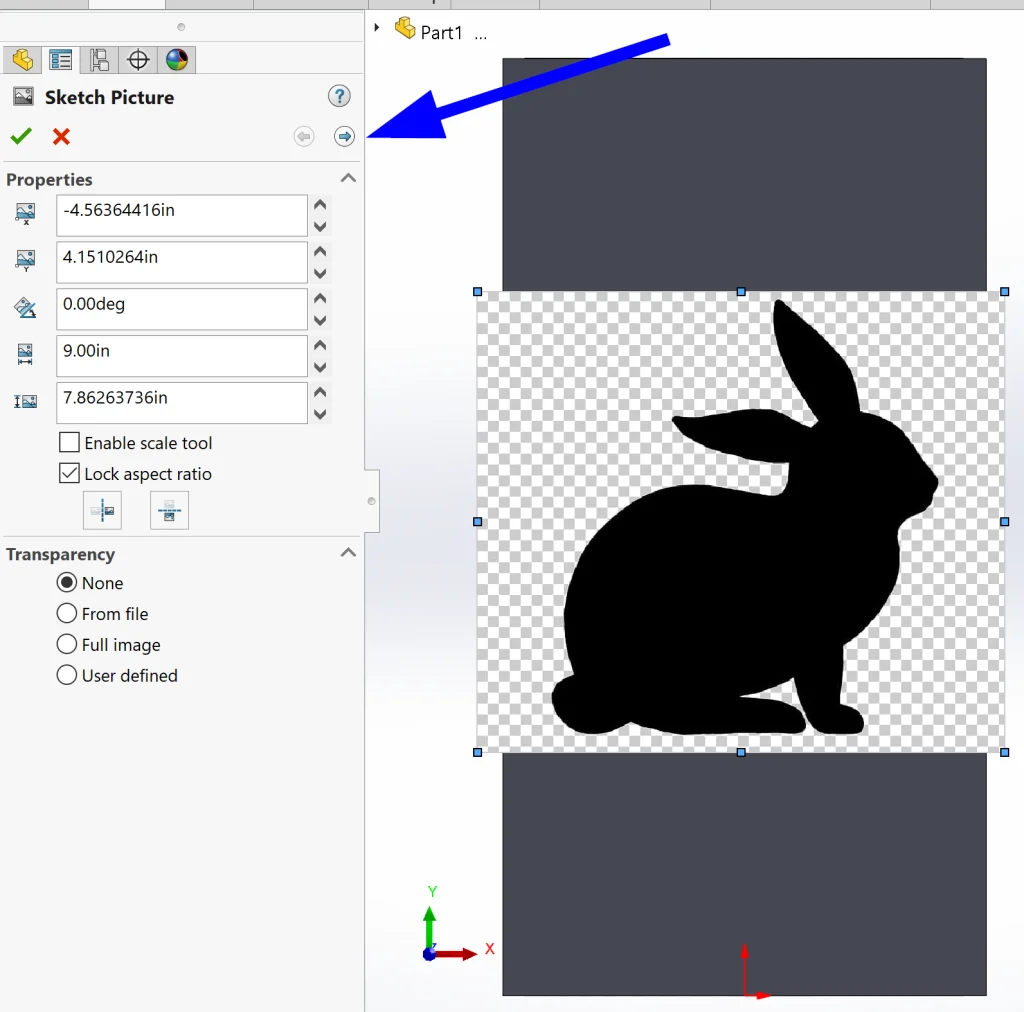
Now we can open a sketch on the front face of our “square” and insert a picture we want to trace from Tools > Sketch Tools > Sketch Picture. Once the picture is inserted, relocated, and resized, we can click the right-arrow in our properties box. This takes us to Autotrace.
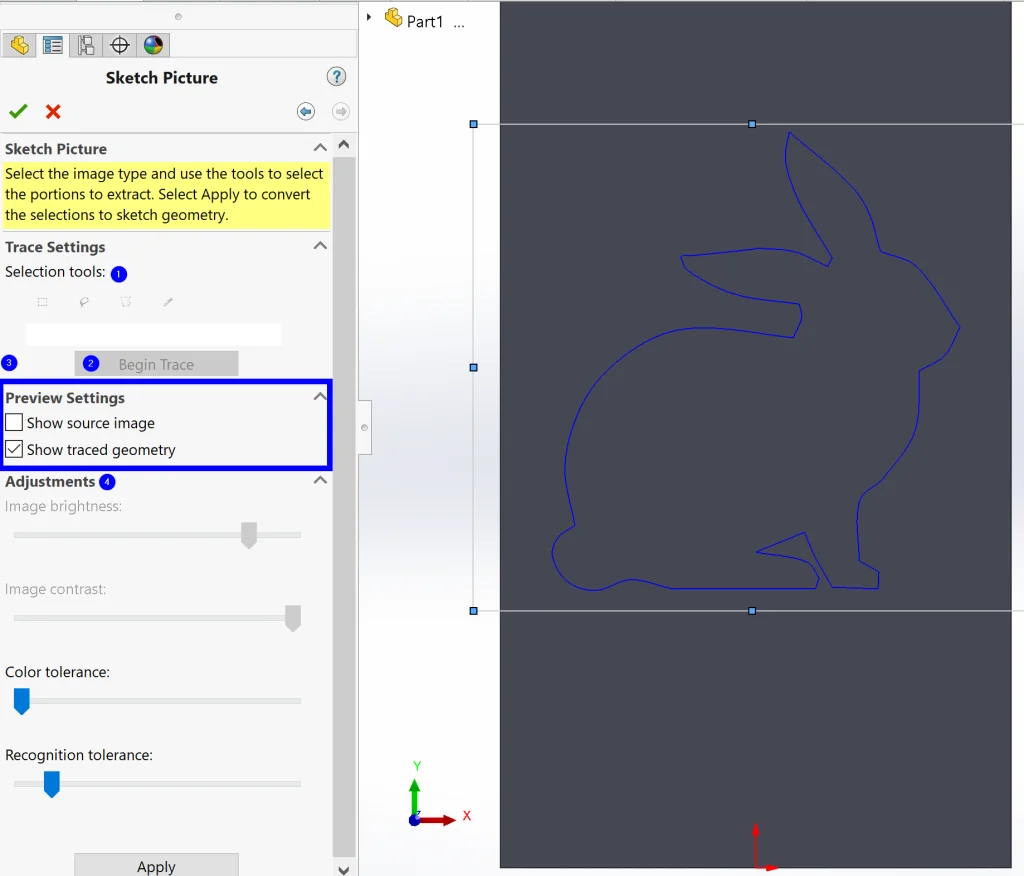
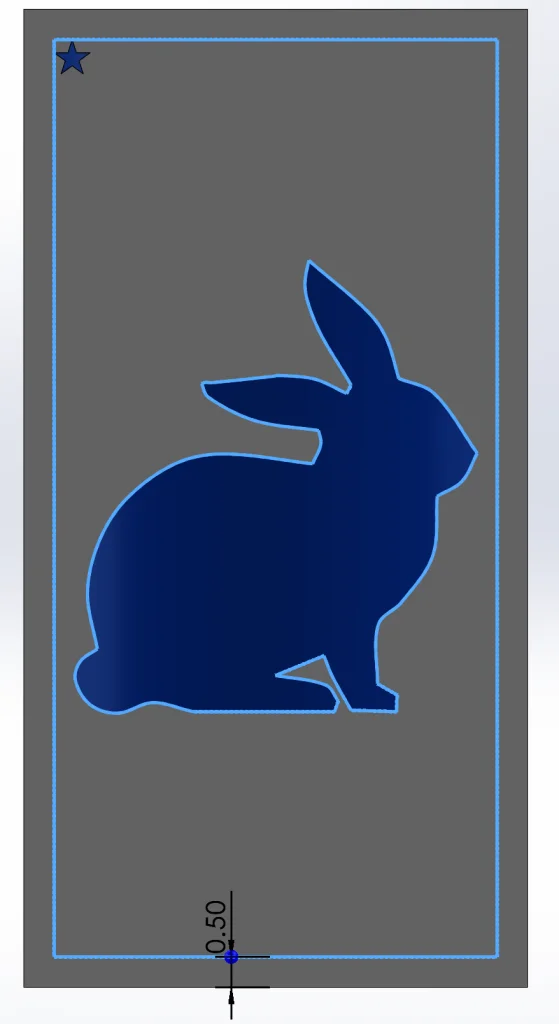
From here, we (1) use a selection tool to select the part of our picture we want to trace, (2) click Begin Trace, and (3) un-check Show source image to see our resulting geometry before (4) making adjustments until the image looks just right.
The final step is clicking Apply and the green checkmark. I also chose to right-click the original image and Suppress it after tracing just to clean things up a bit. Then we can just cut as we would normally, but in this case it took us 5 seconds to draw a bunny instead of 15 minutes.
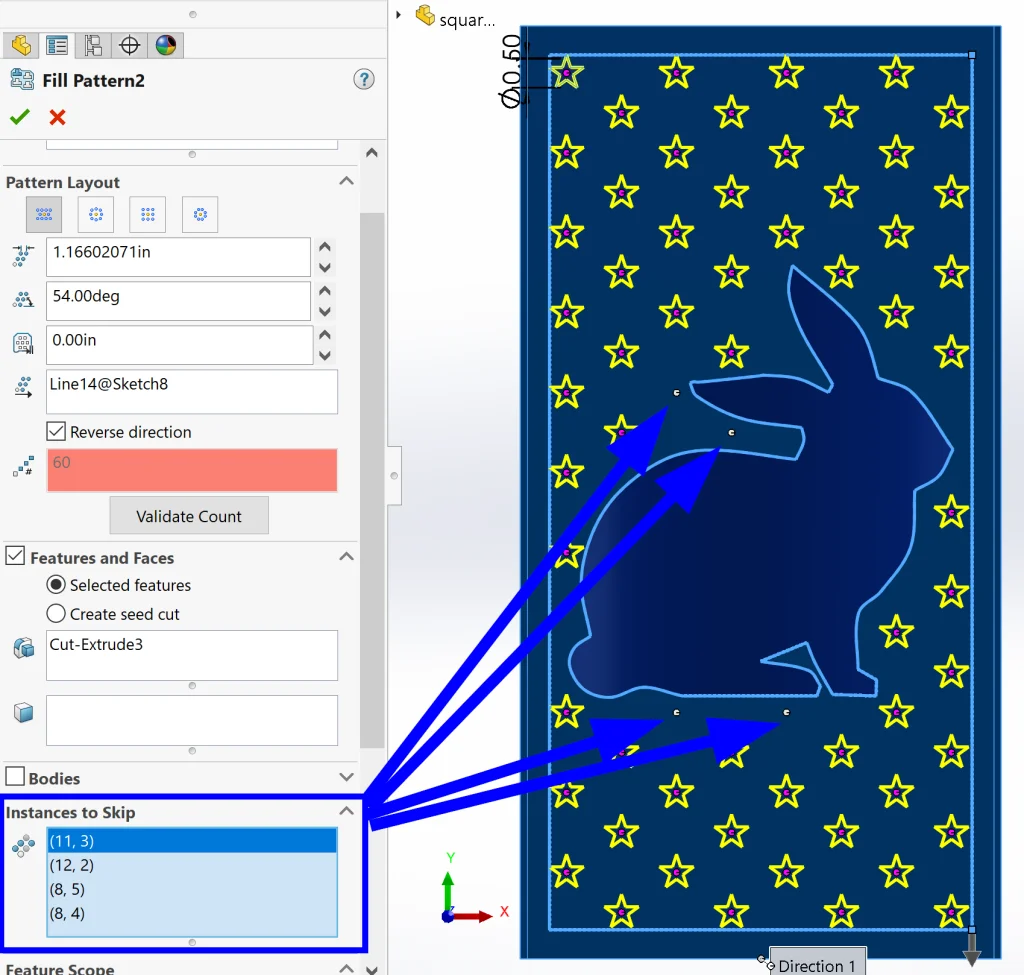
Things are starting to look more magical already! The next step is to add more cutouts. The trick works best if there’s fairly good visibility through the square to the circle, so I decided to use a Fill Pattern here with stars. All we need for our fill pattern is an initial cut and a boundary drawn out in a sketch as can be seen below.
Fill Pattern allows us to select the Pattern Layout as well as the spacing within that pattern. I played with these parameters until the preview looked almost perfect. Then I specified a few stars that I wanted to leave out under Instances to Skip. These stars would have over-crowded the bunny, so I’m glad I had the option to quickly remove them. Note: another option would have been to offset the bunny design in the boundary sketch so that none of the stars would have gotten quite as close to begin with, but in this case this was a great option as well.
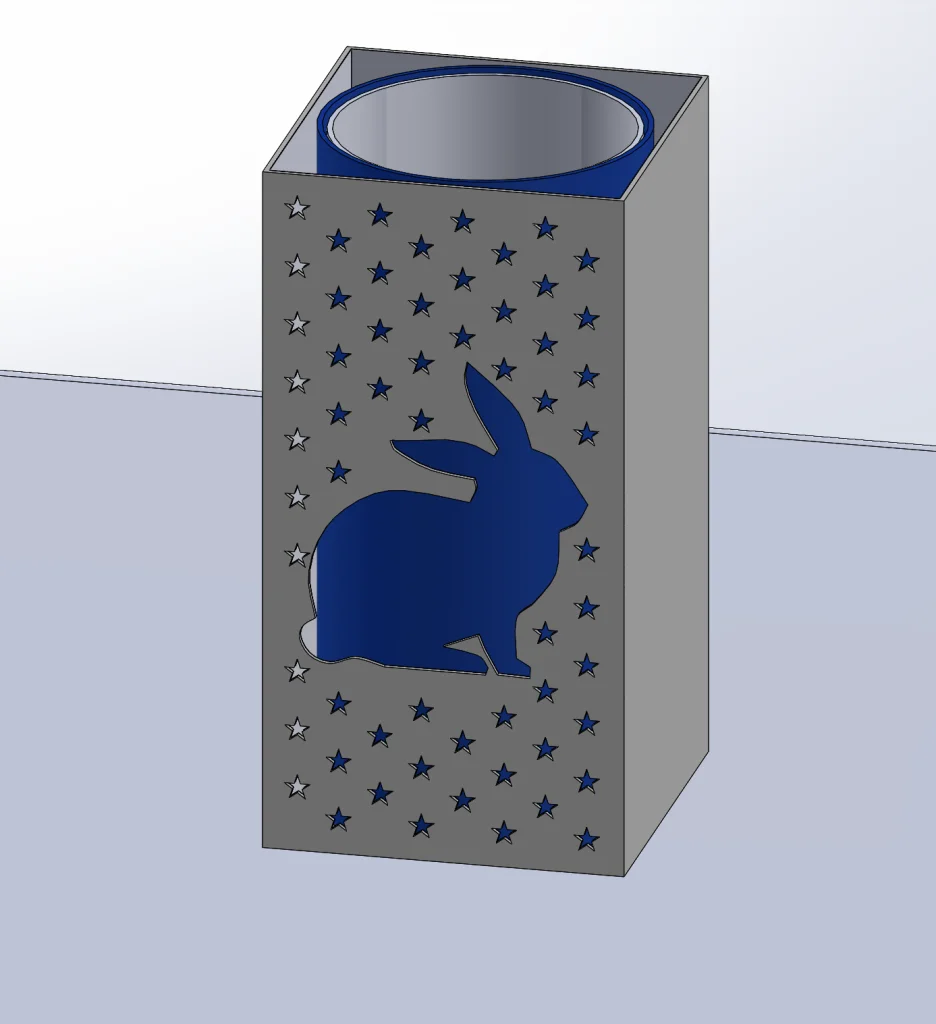
Gorgeous! I love how the pattern feature has so much flexibility and allows us to get so much done in so little time. Now things are reallylooking magical.
Before doing a Save Bodies and moving into my assembly, I also added a very thin extrude to line the “square” and represent the velvet inside that we need for the illusion to work. For the sake of presentation, I went ahead and extruded a table as well. Here’s what it looks like so far:
After right-clicking the Solid Bodies folder and selecting Save Bodies, I selected the option to make an assembly, opened the assembly, right-clicked my components (except for the table) in the tree, and selected to Float them before adding mates. One tip here: most of the mates I added were between primary planes (ie. the Front Plane of the cylinder mated to the Front Plane of the assembly itself. The only special mates I added were Limit Distance Mates between the bottom of the “square” and the table and also between the bottom of the “circle” and the table.
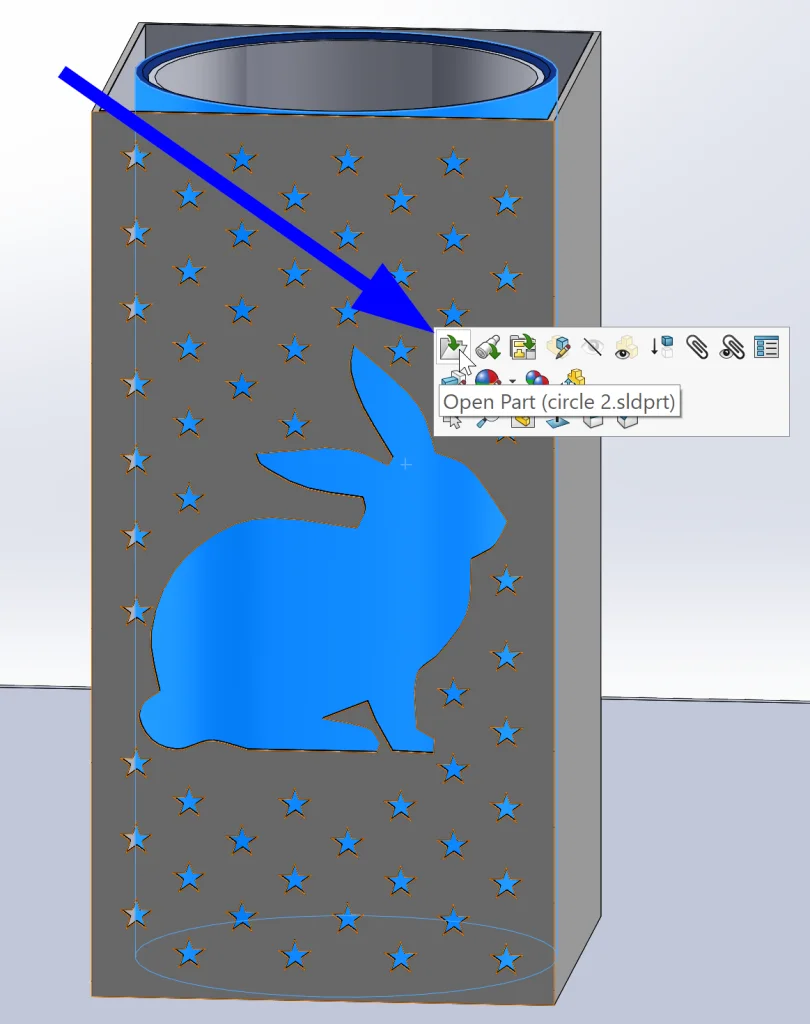
At this point, I also decided to go back and add some flair to the inner cylinder. Luckily, this is sinch – all we need to do is simply click on the part we want to edit and select to open it from the in-context toolbar that pops up.
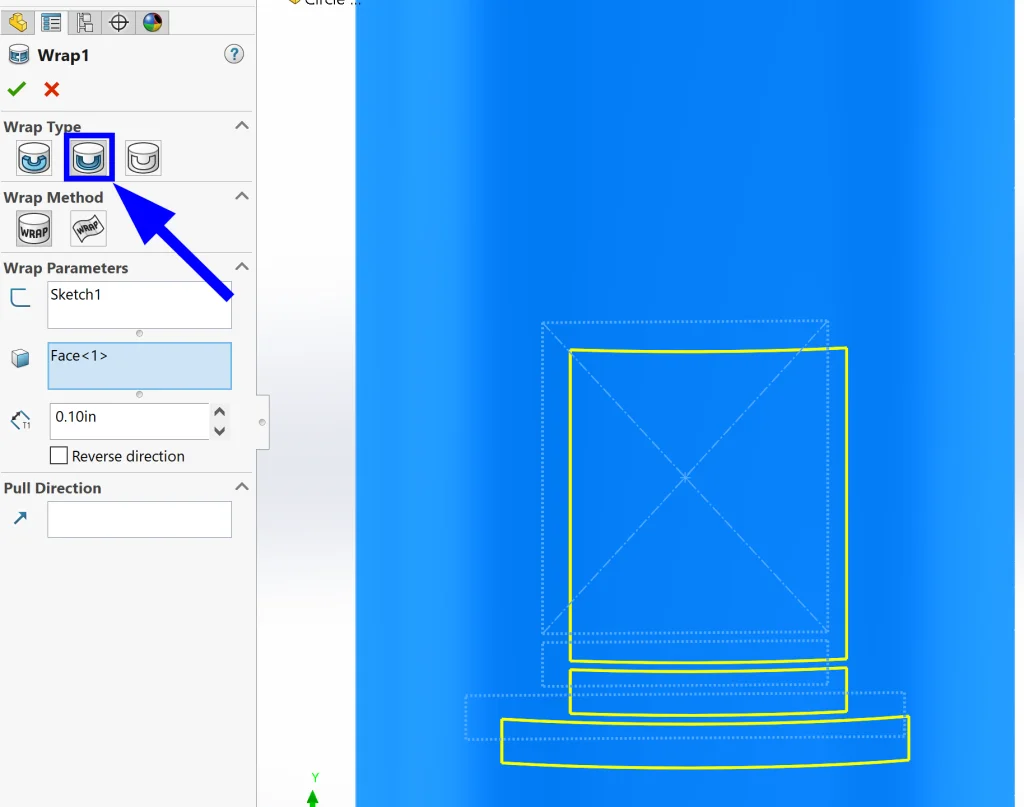
After opening the part, I quickly sketched out the likeness of a hat on the Front Plane.
Now we can use the Wrap feature to Deboss our design onto the cylinder.
After applying a bit of paint, our design is complete!
Now we can move on an create the object we will make appear – a pear, of course! (Yes, I did that on purpose. No, I am not sorry.)
Creating the pear was simple – all I did was draw a profile, Revolve, sketch a stem and Sweep it out using a circular profile (that I didn’t have to draw), and then, for artistic effect, I used Move/Copy Bodies to add a tilt using the Rotate feature.
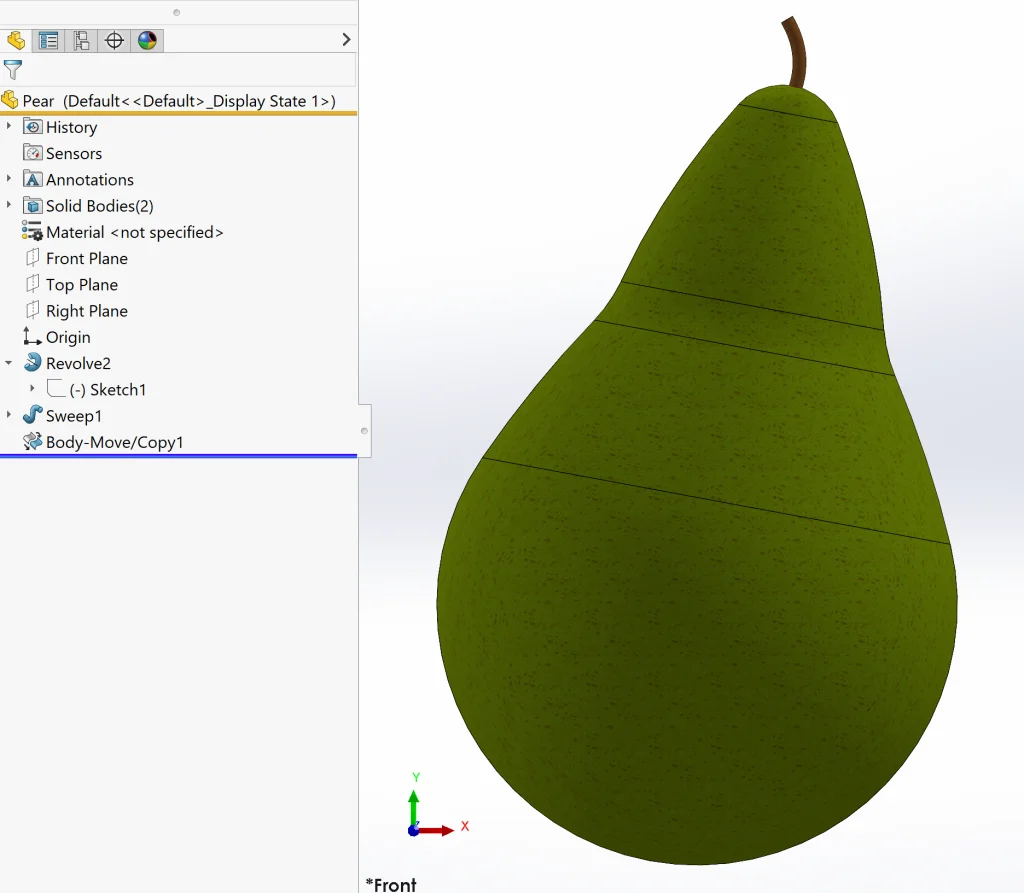
For the apPEARance, I actually used the default Sponge appearance and added a green color to it. I also changed the mapping under the Advanced tab so that it was more dense than a sponge. I’m pretty happy with how it turned out overall. What do you think?
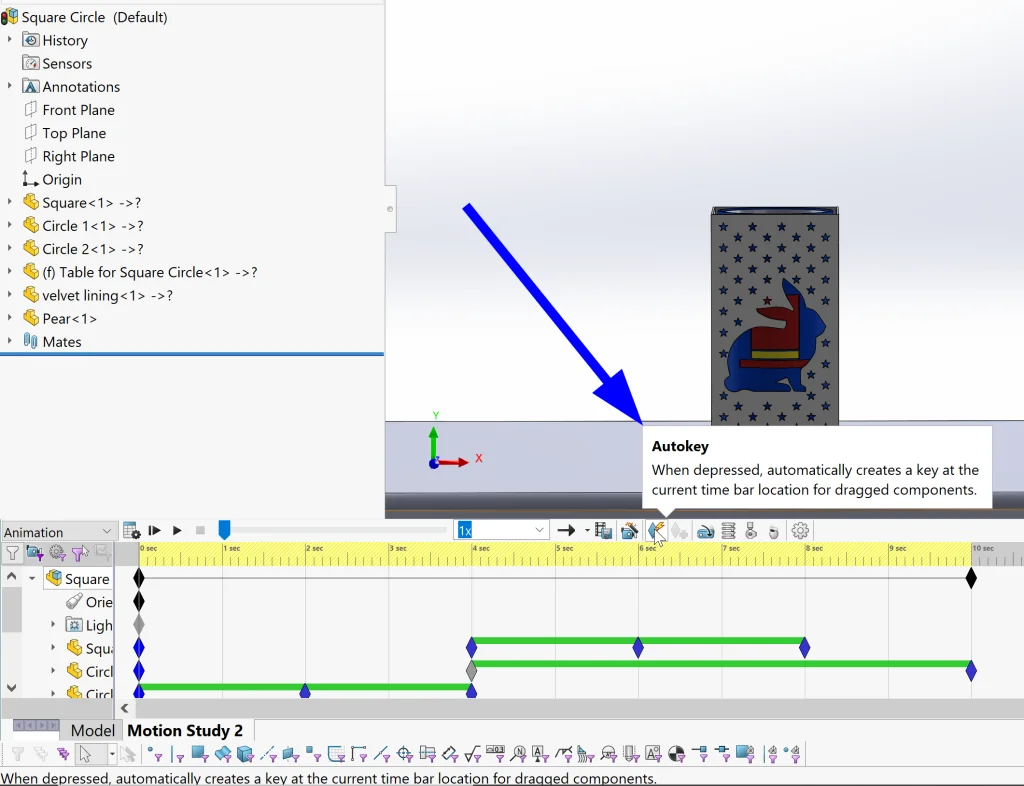
Alright, now it’s time to make some MAGIC happen with an animation. We start my creating a new Motion Study and selecting the type as Animation on the left. From here, I like to make sure that Autokey is turned ON. This will allow us to click on a time in the time line and move a component to automatically create a new step in our animation.
I used the following steps to create my animation: (1) selected the part I wanted to move on the left, (2) clicked on the timeline 2 seconds after the last key, (3) moved the part, and (4) repeated the process. I moved the “circle” first, then the “square,” and lastly we can see the pear appear! (Say that 10 times fast!)
It looks great *except* the illusion doesn’t work well here. The problem is that we need velvet inside our square and outside our hidden cylinder to conceal the secret. For this, we need to use SOLIDWORKS Visualize. Not only will this make everything look super spiffy and realistic, but it is also essential because the velvet appearance doesn’t exist in SOLIDWORKS alone.
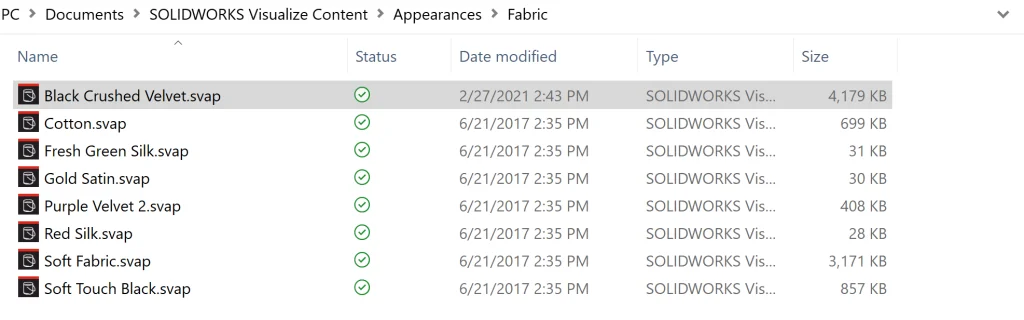
Actually, opening up Visualize Premium, I realized that velvet doesn’t exist here either by default. Luckily, there’s a GIGANTIC online database of additional appearances, scenes, etc. on MySolidworks.com. I did a simple search and found some black crushed velvet immediately (here’s the link). To add it to our library, all we need to do is click to download it and then move the file to your default location or, most likely, something like “C:Users
Now that it exists in this location, it will show up in our Visualize software as well!
Ok, so back to business – we want to get our entire assembly along with the animation we just created into SOLIDWORKS Visualize. Sounds like a lot of work, right? Nope. It is never a lot of work. Here’s the trick – the SOLIDWORKS Visualize Add-in and Export Advanced. (Thank you, developers, for making everything so easy!)
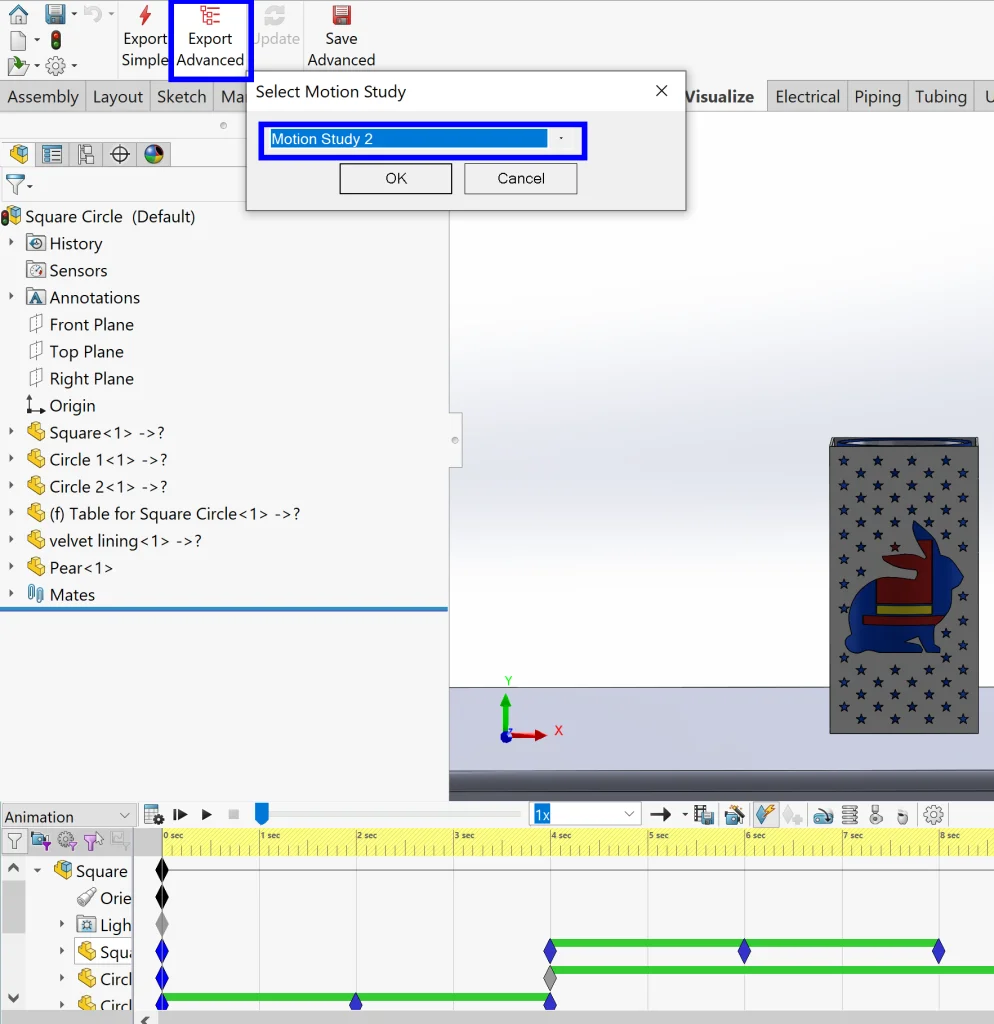
The first step is making sure the SOLIDWORKS Visualize Add-in is checked on in Add-ins. Then we should be able to access it in our Command Manager and we want to click Export Advanced. Once we do this, it will allow us to select our Motion Study for export and then recalculate it to make sure it is up-to-date before we jump into Visualize.
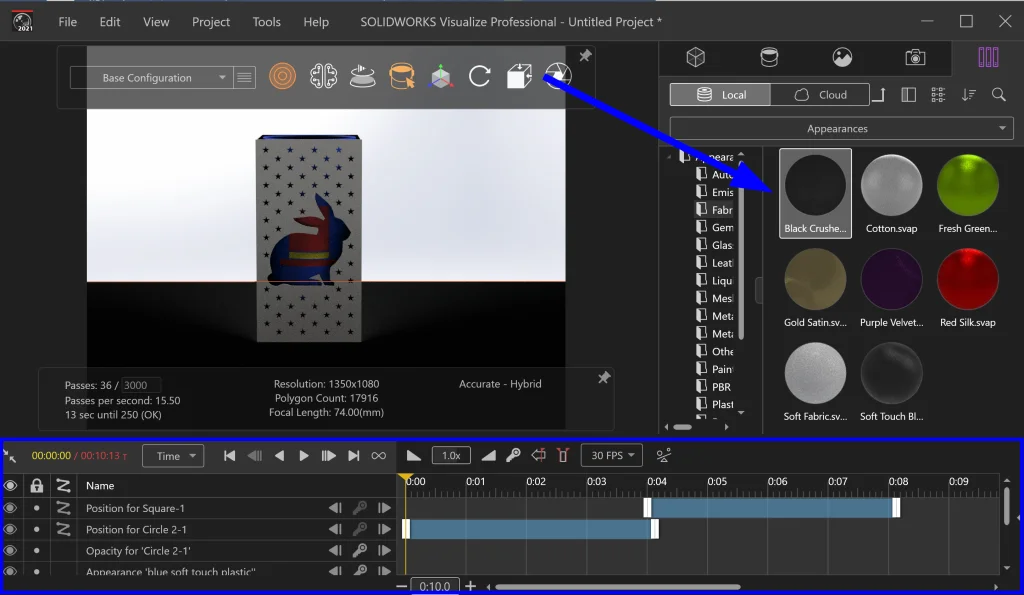
SOLIDWORKS Visualize automatically opens – just make sure you hit the T shortcut to show the timeline if it doesn’t show up at the bottom of your screen to begin with. So simple! Our entire animation came over automatically. Now let’s make a few tweaks before we export everything.
To add our Black Crushed Velvet appearance to our design, all we need to do is jump over to the File Libraries tab on the right and navigate the Fabric folder. From here we can drag and drop this appearance onto our table, our inner cylinder, and the velvet liner we designed for our outer box.
We don’t need to get too fancy with changing things up at this point since it looks pretty good already, but on the Scenes tab, I went ahead and also changed the Environment to High Contrast Ramp so that the white box would appear more clearly.

That’s it! We’re done. All that’s left to do is export our video. To do this, all we need to do is click on the Output Tools symbol in our heads-up toolbar.
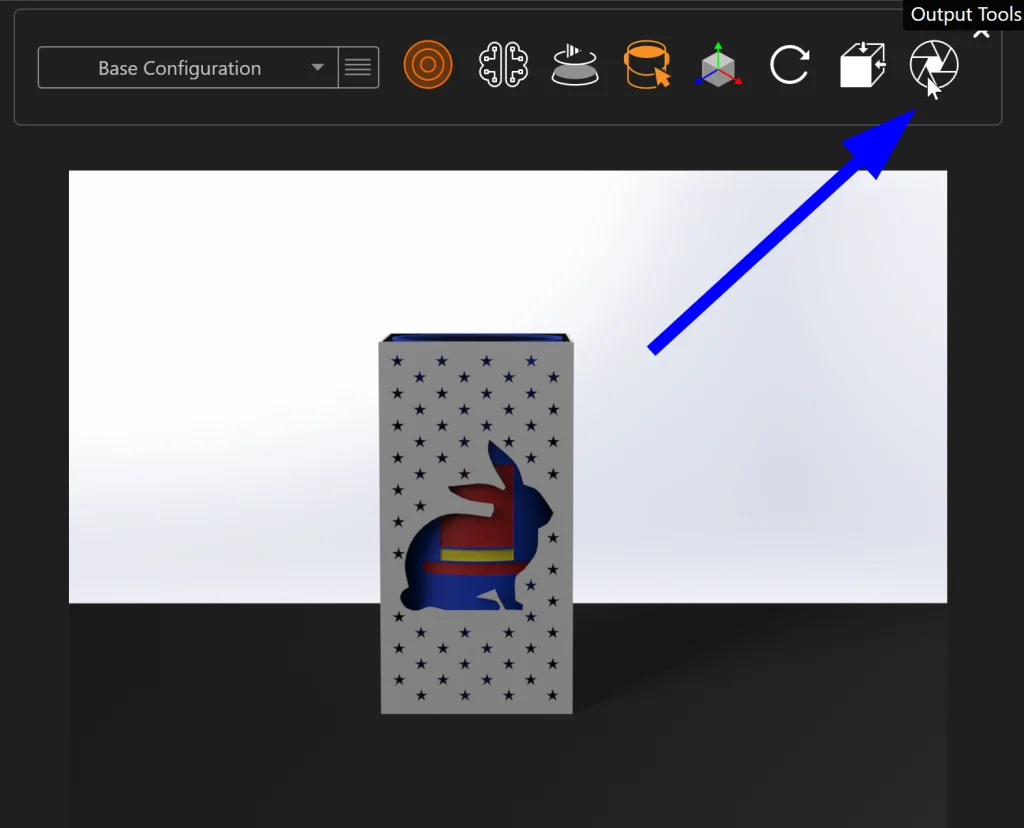
From here, we want to select to output our Animation on the left and then we can give our file a name and tweak settings like FPS. We can also change our render settings on the second tab.
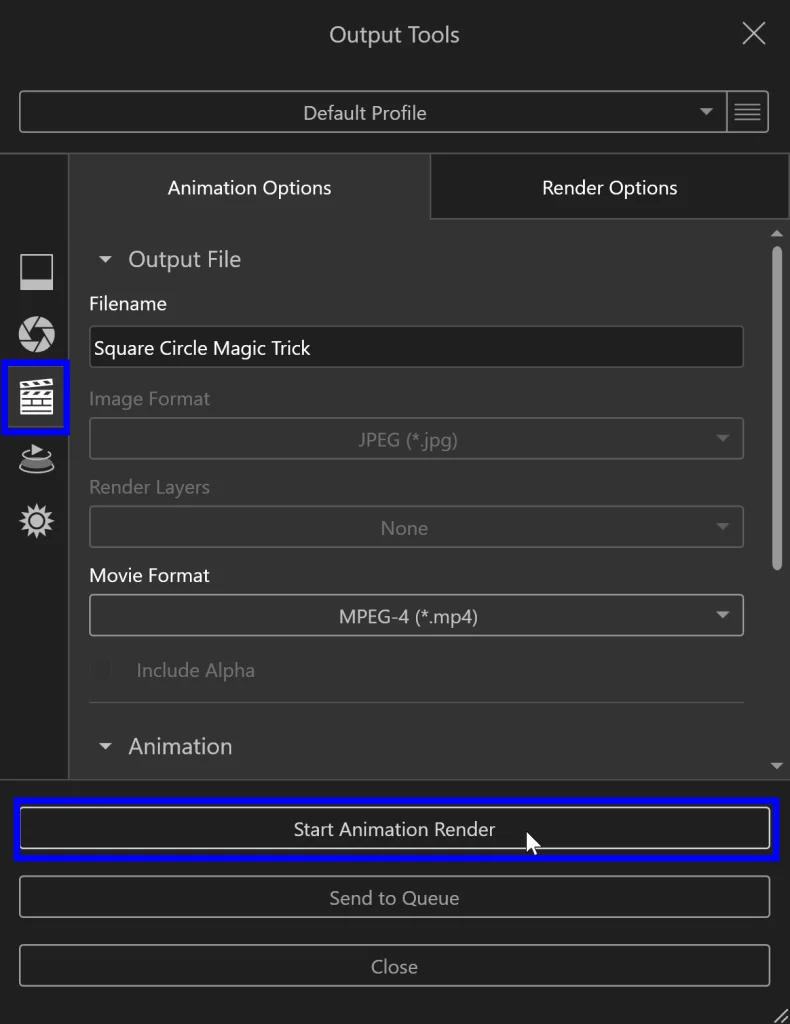
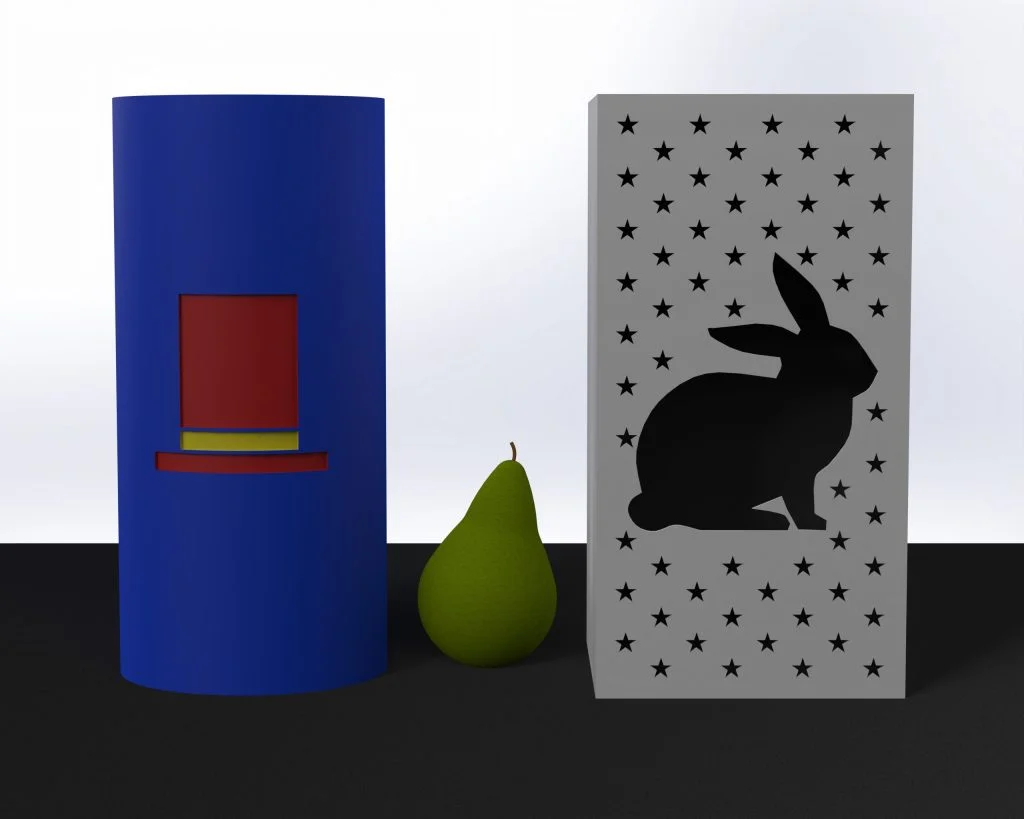
Depending on your settings and the speed of your computer, this might take a bit of time. I think it took my dinky laptop about an hour to render the whole movie – not bad considering the quality of the result! After the movie finished rendering, I went ahead and also rendered a few still beauty shots.
So… the moment of truth – check out our magical animation below:

Abracadabra! We made a pear appear! As my favorite magician Kent Cummins would say, FANTASTIC! Thank you all so much for following along. I hope you had fun and learned a few tricks along the way.
Don’t forget to comment below if you have any questions or if there’s something specific you would like to see in the next blog.