
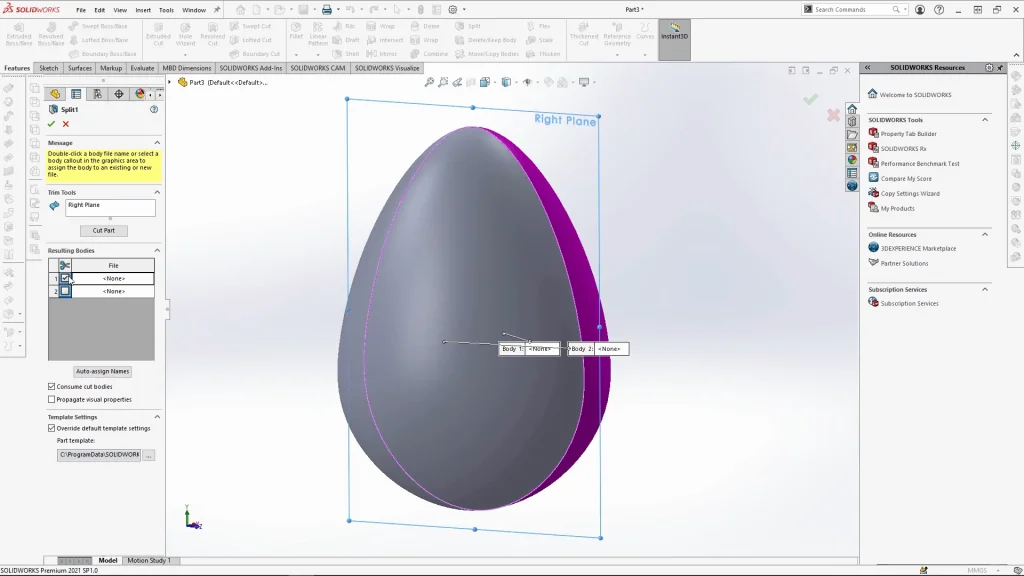
For this tutorial, download the DXF file for the egg pattern here and see how you can wrap a simple eggshell with a geometric pattern. I created the DXF file in vector software, but you could easily create your own design in SOLIDWORKS. To create the egg, a simple profile was sketched and revolved. the egg was then split into two parts using the right plane as the split line. Only one side of the egg was kept and shelled out to a 2mm thickness.
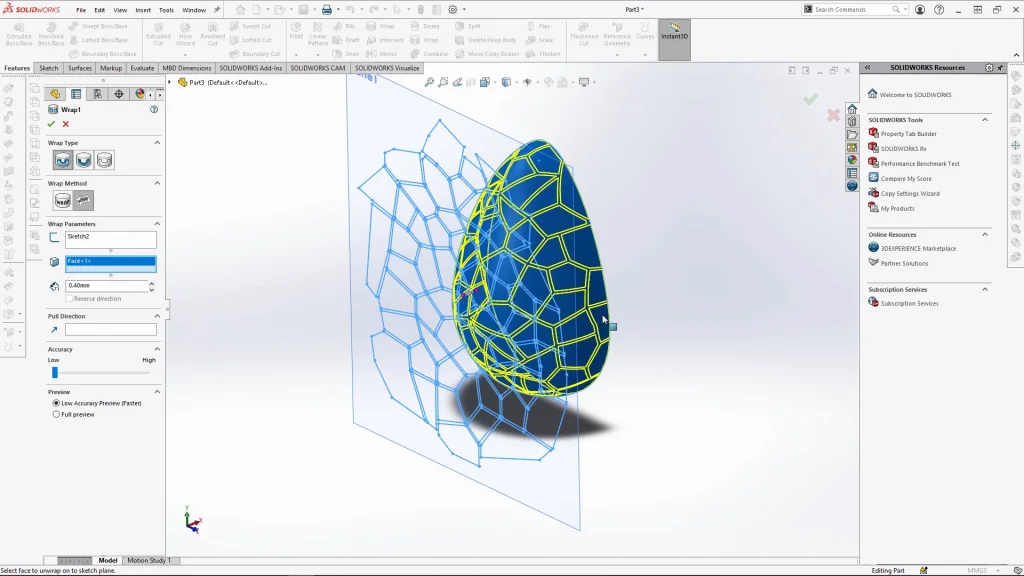
A new plane had to be created off the right plane, and sit parallel to the egg face. The DXF file could then be imported into SOLIDWORKS onto the new plane, a few things to remember if you haven’t used DXF files before is that you can not import a DXF file while in an active sketch, you must only select the plane you want the DXF to import into. You can dictate where the DXF will import onto the plane by its location in your vector software, I tend to centre my DXF to the centre of my document before exporting into SOLIDWORKS. There are however further options in SOLIDWORKS when importing the file for inputting the exact location of the DXF. Another tip would be to ensure that you switch the units of imported data to the units the DXF sketch was exported in. For this design millimetres was used for the units. Finally, before you can wrap a sketch, ensure that the sketch you want to wrap onto a surface is closed.
Once the DXF was imported onto the new plane, I closed the sketch, selected wrap, and change the wrap method to wrap on a spline surface. This is a very clever tool in SOLIDWORKS, I have quite a complex pattern which can it can wrap easily along this egg-like shape. The design was wrapped with an emboss, and goes off the edge of the egg.
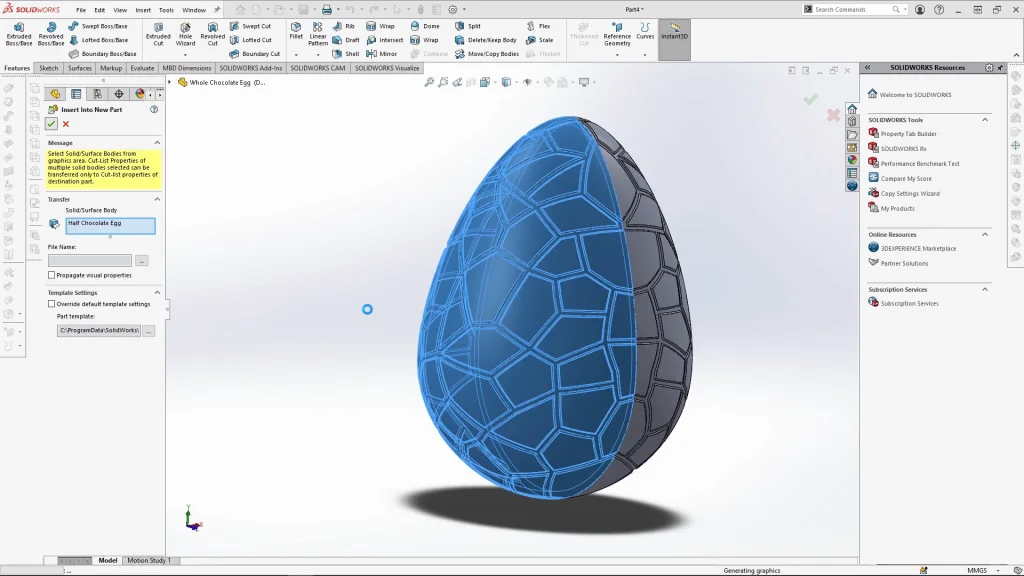
The wrap design was filled to soften the shapes and look like softer chocolate. The half shell was then mirrored over using mirror bodies, but merge result was unticked to keep both bodies separate. By doing this, I could save one of the half egg bodies into a new part from the solid bodies drop down. The reason for doing this is to create the assembly of the two chocolate egg halves, but also by saving the body into a new part, any changes made to the original egg part will apply to the half egg part too.
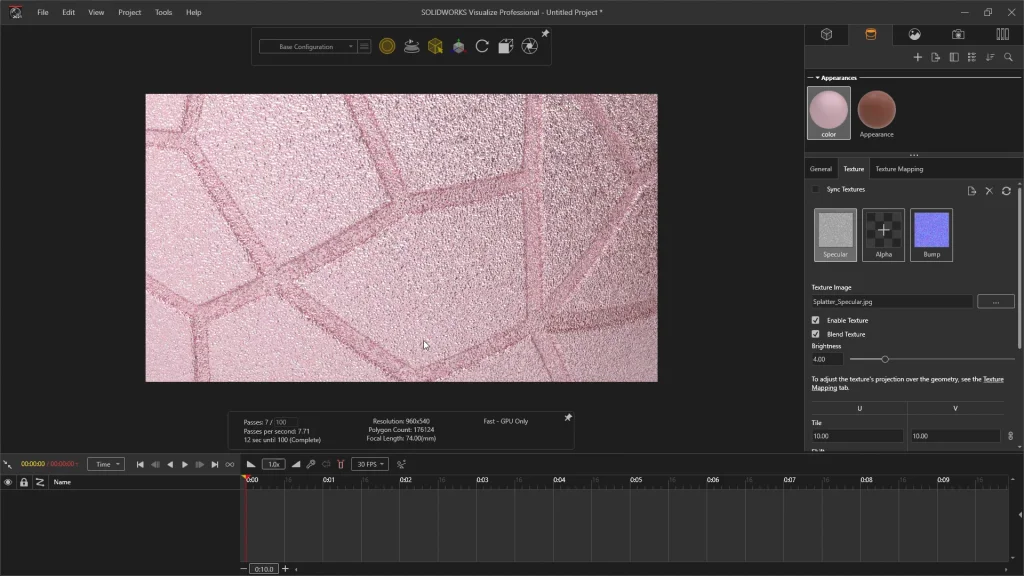
The parts were all assembled into an assembly before exporting into Visualize. If you follow the whole tutorial, you will see how I created a foil-like appearance using textures. The foil was created using a metal appearance, the metal then had a bump texture applied with moulded plastic. Then to add some brightness into the texture I added the splatter specular. I always enjoy experimenting in Visualize to see what appearances I can create with a few simple changes. There are so many different combinations to play around with.
Once I was happy with the render background and appearances, I wanted to add more eggs to the assembly. I didn’t need to change my original SOLIDWORKS assembly, I could do this within Visualize. So, I duplicated the whole egg parts and moved, scaled and rotated them into place. Appearances were also duplicated and applied to the new egg copies, the duplicated appearance colours could then be changed to create some more interesting renderings.
