Did you just upgrade your SOLIDWORKS PDM and are you finding now all your files are taking a considerable amount of time to open and save?
We know why and we have the solution, although you have upgraded the software version, all of your SOLIDWORKS files are still sitting in an older version. Working with older version files can be quite frustrating as they can lead to longer open and rebuild times, this is because they have to check the version of all referenced documents and upgrade them. But you cannot possibly go and open all these referenced documents, check them out and update them to the current version. This would be time consuming and inefficient.
This is where the PDM File Version upgrade tool comes in handy. This is pretty similar to the “Convert Files” option of SOLIDWORKS Task Scheduler but its best suited for files that reside in the normal Windows Explorer.
For the files within the Version Controlled PDM Environment, we need to consider a lot more things since the files have versions and are checked in the server. The PDM File Version upgrade tool automatically checks out, upgrades, and checks in the preferred SOLIDWORKS files that are stored in the vault for you, while maintaining all the file references, revision/version tags and workflow states. In case you have a massive data set to upgrade, the upgrade tool also allows multiple machines to manage files simultaneously to speed up the upgrade process.
Installing the File Version Upgrade Tool
The upgrade tool needs to be installed on all machines that are being used for the upgrade procedure.
It is available as a separate installation in the SOLIDWORKS installation media folder “…SWPDMClientSupportFile Version Upgrade”. Run the file “File Version Upgrade.exe” and follow the steps accordingly to finish the installation.
Preparations for the Upgrade
Following are some options and recommendations to prepare the workstations before you start the upgrade process:
- Backup your file vault database and the archive files
- Make sure that the correct SOLIDWORKS version is installed on all the machines participating in the upgrade process and close all unnecessary running applications.
- Check in all files into the vault as any checked-out files will not be updated by the Upgrade tool.
- Ensure that the participating clients and the logged in user have required access and permissions to all the files in the vault that you are upgrading.
- Perform a test run of the file upgrade process to check for any conversion errors and confirm that the upgrade runs smoothly.
Running the File Version Upgrade Tool
After completing the installation, run the tool from the Windows Start menu (Start > All Programs > File Version Upgrade). You will see a welcome screen as shown below where you can choose which task you want to launch.

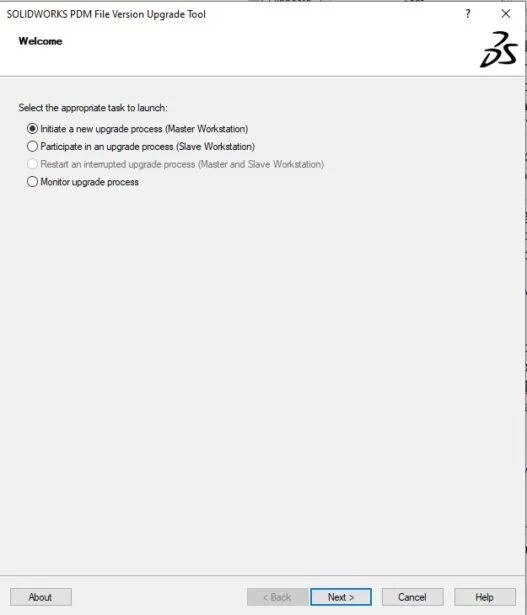
The default option when starting a new upgrade process is “Initiate a new upgrade process”. If you are planning to split the workload among several workstations this option still needs to be run on the master computer first to generate the work instruction files.
“Participate in an upgrade process” task needs to be run on the slave workstations after generating the work instructions. You also have the options here to restart an interrupted upgrade process as well as monitor the overall progress of the upgrade procedure.

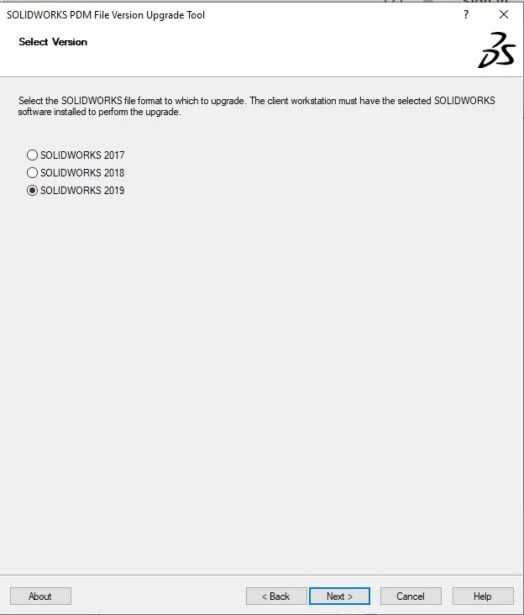
Next is to select the version of SOLIDWORKS you would like to use for the upgrade tool. NOTE: The selected target version of SOLIDWORKS must be installed on the workstation.

Select your PDM file vault where all your files that you want to upgrade are stored as shown below. You may be prompted to log in if you have not already. NOTE: Make sure you sign in as a user who has the required permissions to read and check out all the files you wish to upgrade irrespective of what state and workflow, they reside in. Hence, it is advisable to use “ADMIN” user.


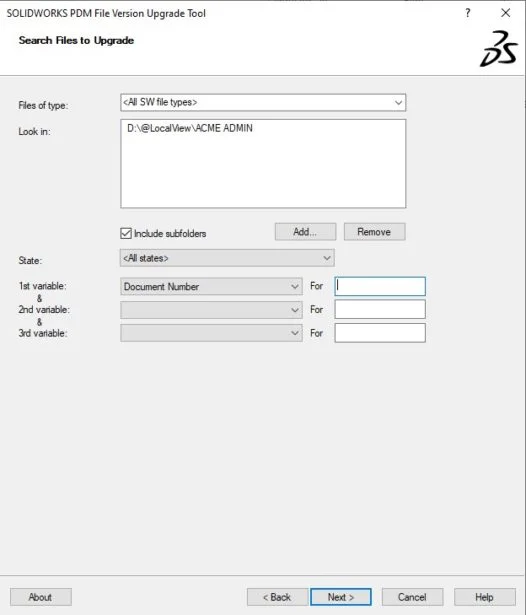
After this you will have the options to search for and select the preferred SOLIDWORKS files for the upgrade.
- You can use the file type section to choose to upgrade either all file types or one of the following: part, assembly or drawing files.
- You can search and select files in specific file locations,
- You can choose to select files that are in a specific state (although, all states recommended)
- You can also specify some input conditions to choose any files based on particular variables.
You can always leave these settings at default if you do not want to sort out the files chosen for the upgrade.

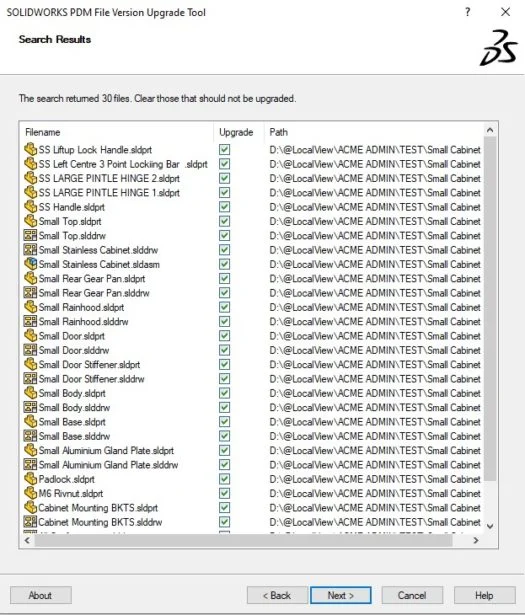
Based on your search criteria, FVUT will then list all the files that matched the specified conditions in the previous step. All the files are chosen for the upgrade by default, but you can un-check those that should not be upgraded individually if you want to. NOTE: It is especially important that you upgrade all the parent files if you are upgrading any of the referenced files. If only the parent files are shown in the search list, then the child references will be automatically incorporated in the final stage of the upgrade process.

Now you will see the most important screen out of all. This is where you do the version settings. You can select between the two options on how you want to upgrade the versions and revisions of the files.

A.Create New Version of files
You can choose the “Create new version of files” option to upgrade only the latest version of the chosen files to a new version. This is the recommended option because this way the older versions still exist and can be rolled back to in case there is an issue with the upgraded file.
You also have the choice to move the references to their latest version if an assembly or sub-assembly references older version of the parts using “Are re-linked to the new version” option.
NOTE: Use this with caution because if the newer versions of referenced files have undergone geometry modifications, using this option could result in unwanted assembly changes or rebuild errors. In addition, if file properties such as Part Number, Description, or Material have changed, in the newer versions, this could cause changes in Bills of Materials.
In case you have modified new version of referenced files, you should choose “Are Excluded”.
Finally, you can choose to update the revision by either incrementing it or just moving the existing revision to the new version.
B. Overwrite existing Version of files
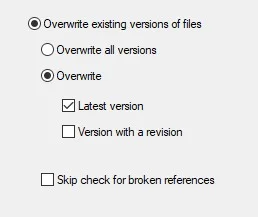
If you want to upgrade a specific version of the file and replace the existing version with the upgraded files, you can go with the second option to “Overwrite existing versions of files”. With this option you can either choose to upgrade all existing versions of the files or only the latest version of files in combination with files that have a revision tag. NOTE: Upgrading all files in the vault can be time consuming hence its recommended to clear the check box for the “Skip check for broken references” option to ensure that any parent files referencing the files chosen are also upgraded.

Once you select your desired option and go Next, you will see the penultimate screen of the process which consists of the Upgrade Settings.
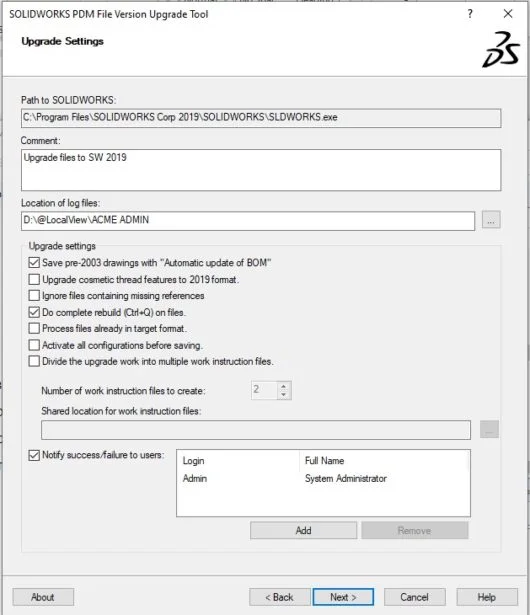
Here we can:
- Add a comment (which is compulsory) and will show up in the history of the files.
- You also have some further options to automatically update BOMs in drawings created prior to 2003 and do a complete rebuild of the files (recommended) even though it might add a bit more time to the process.
- You can create work instruction files to run the upgrade simultaneously on several machines to speed up the upgrade process. You will need to specify the amount of work instruction files to create depending on how many machines you are planning to use and then put these in a shared drive/location (must be in UNC format) with appropriate permissions.

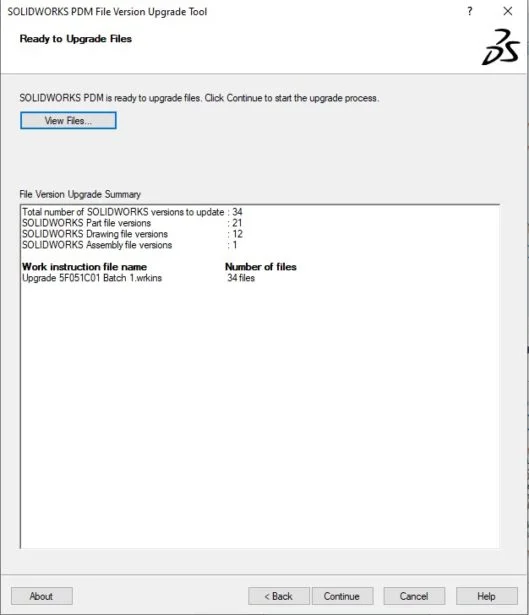
Finally, you will see a detailed summary of the upgrade process as shown above. This will give you a bigger picture of how many files and versions are being upgraded. Press continue and let the File Version Upgrade Tool do the rest for you.
Without a doubt, with this very user friendly and useful tool, you too will be stress free and will no longer have to worry about the lengthy opening/rebuild times which is one of the most common issues you face after a software upgrade. If you have all your files checked in, then simply let FVUT do its magic and at the end you will have all your files upgraded and ready to be used with the new version of SOLIDWORKS and PDM.
If you have any issues or need more information regarding the use of this tool, please contact our experienced staff at CADspace.
Written by
Sajith Wei Henage, CADspace Applications Engineer