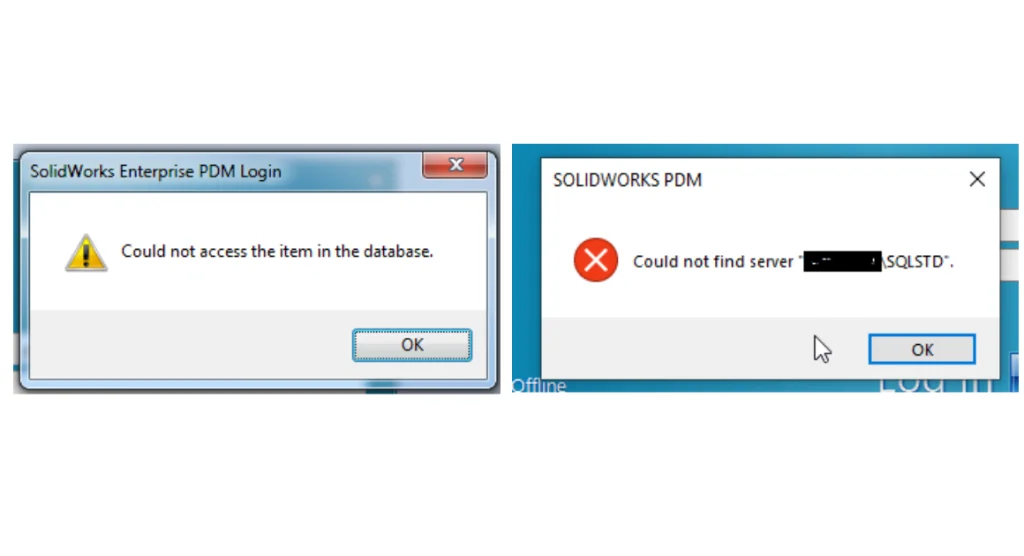
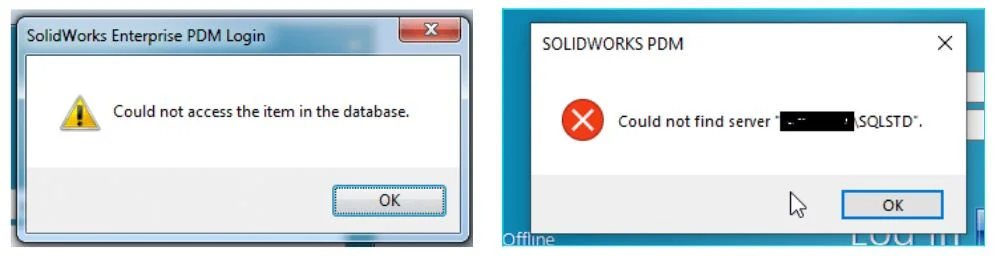
Using SolidWorks PDM is a great tool to control your revisions and versions, manage your files, etc. However, when it doesn’t work it can become very frustrating. Don’t worry, most issues are usually IT related, which can easily be resolved by following these troubleshooting steps. The most common and generic error when working with PDM is “Cannot access the item in the database” or “Could not find the Server”. Have you experienced this before? Here are our top 8 troubleshooting steps to resolve these issues.
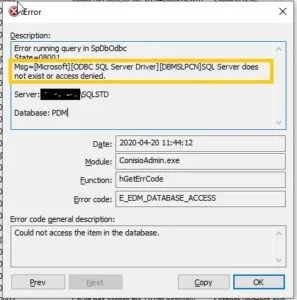
Firstly, about the error – we need to get as much information about the cause of the error. These messages only tell us what the error is, not what caused it. To determine the cause of the error, you’ll need to open up you PDM Administration Tool, the under Local Settings double click on Log File. This will give you a chronological list of errors and warnings, once you find the log at the time you got the error, double click on the entry to get full details. The description of the PDM Client Log will show you a similar message to “SQL Server does not exist or access denied.” This is the cause of the error and we need to address this.
As PDM is a client server setup, the error could be from your client or from the server. The first question you should ask yourself – is this happening to everyone or just me? If it’s just you, then it’s a client-side issue, if it’s happening to everyone then it’s a server-side issue. We cover both sides in this blog. Please note, it is assumed you are at least a little experienced with IT troubleshooting processes and have some administration permissions, otherwise, as always, we highly recommend you contact your reseller for support.
Troubleshooting For PDM Client
There are several reasons why this error message can occur. Below are some basic troubleshooting steps that can be performed on PDM client-side to establish connection with SQL Server.
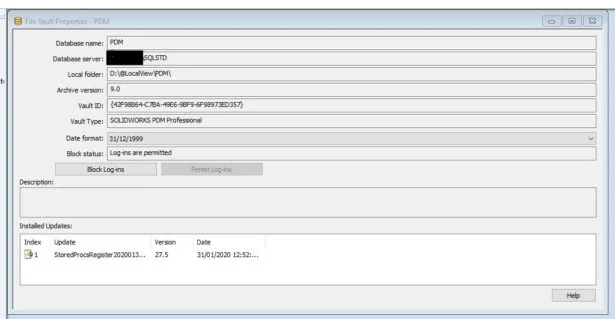
1. Check if the SQL Server Name and Database shown in the log description are correct.
The Server Name and SQL Database information can be found in the error log shown in the image above as well as from the PDM Administration tool. Open PDM Administration tool, right click on the vault and click properties. Consult your IT Team to check if the information about the server is correct.
If the server details shown here are correct, then contact your reseller so they can have a look if the registries of the Vault are correct. You may need Windows Admin log in for your VAR to be able to access and check registries.
2. Check if the client machine can communicate with SQL Server Machine
Perform a “Ping” test to the server machine from your client machine. First ping the server machine by server-name and then use the Server IP address to test. The ping test is a simple DOS command that tests network connectivity, it does not test ports. To access ping test, click Windows Start and type “Command Prompt”, you should right click and open as Administrator. Once open, you’ll need to type “ping SERVERNAME” and press enter, where you put in your Server Name or Server IP Address. Here are a few scenarios:
A. Ping test successful for either of the two but unsuccessful for another
If you can successfully ping the server using server name but no luck with IP address or vice versa, then this shows that this is a DNS Host Name issue.
To resolve this, use Host file to map the IP Address and the Server Machine name and this will fix the DNS issue and the SQL Server should now be recognised.
B. Ping test unsuccessful for both.
If this is the case, then Client machine is not communicating to the Server Machine. Check the network connection and make sure that both machines are on the same Domain Network. If not, you will need some support from your IT to fix the network connection issue.
C. Ping test successful for both
If the ping test returns successful for both, then it is important to test if the ports the client machine communicates to the SQL Server are open. More details about ports are in the next step.
3. Check if the ports used for SQL are open
If SQL is installed and configured to use default ports, then we need to make sure that Ports – TCP 1433 and UDP 1434 are open. To test this, perform a “Telnet” Test.
Remember to turn on the “telnet” client on the client machine for telnet test to work, in Control Panel -> Programs and Features -> Turn Windows features on or off.
To use Telnet to test a port, open Command Prompt again, this time you want to type – telnet
A. Telnet test Unsuccessful
If the Telnet test returns unsuccessful while the ping tests are successful, this means that the ports are blocked. The ports need to be opened. Contact your IT to make sure they have opened the ports that are being used for SQL.
B. Telnet Test Successful
If Telnet test returns successful, then the ports are open, and the communication should work fine.
If you still receive an error message while accessing the vault, then it is worth ensuring your client machine is using a static TCP port to communicate to the SQL Server – see next step.
4. Force Client Machine to use Static TCP Port for SQL Database communication
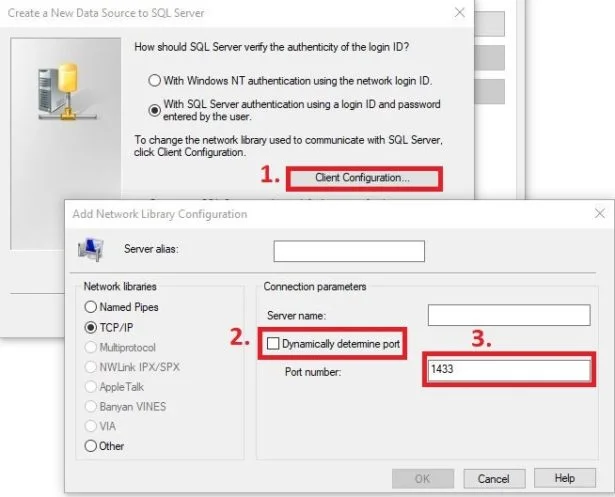
To enable a client to use a static port to communicate to SQL Database, an ODBC Test needs to be performed. The easiest way to find the tool is to click Windows Start and type ODBC, you’ll get the 32 and 64 bit version, use the 64 Bit version. When configuring an ODBC Test, it is advisable to use SQL “sa” (System Administration user) log in so please make sure that you have the password easily accessible. If not, please ask your IT/Admin to help you.
While configuring the test, make sure to click Client Configuration. In the dialogue box, alias name and server name will be automatically populated. There is no need to change them. Just uncheck “Dynamically Determine Port” and use the port number that is being used by SQL Server. If it’s a default, then it will be 1433.
Once you get a successful result from this test then you should not have any issues communicating to the SQL Server. Remember to restart your PDM Client.
ODBC Test establishes an ODBC connection alias which will then be used by the client when communicating with the SQL server instance. In most of the cases where the SQL has a named instance (i.e. when the name of the SQL instance hosting the vault database is different than the default name) ODBC Test is required. When all the above steps are performed and there is still an error message when communicating with SQL Server, then this requires a troubleshooting at the server level.
Troubleshooting on Server Machine
On the server, following are the few basic things that can be checked:
1.Make sure SQL Server Services are running
The list of these services can be checked from the task manager

2.Firewall Settings
As the firewall should be on for protection, please check that all the ports were added to the firewall exception list. Make sure the firewall exceptions are added for both incoming and outgoing. If PDM is configured using default ports, then following is the list of ports that need to be opened: i. SNL (SolidNetwork License Manager) Ports for PDM Licensing to work properly a. TCP 25734 & 25735 ii. Archive Server Ports a. TCP – 3030 b. UDP – 3030 iii. Database Server (SQL Server) Ports a. TCP – 1433 b. UDP – 1434
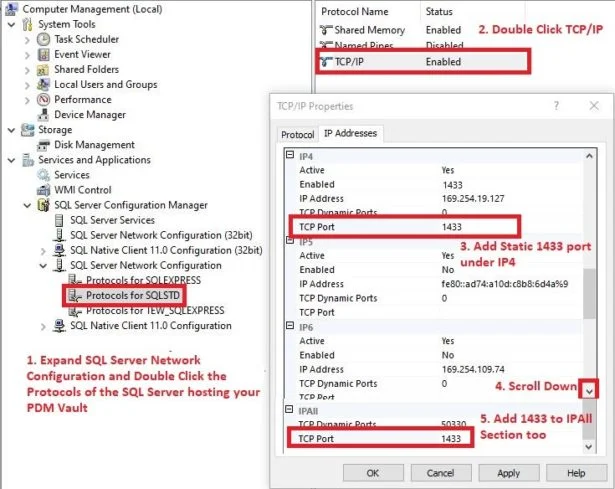
3.Force SQL to use Static TCP Port
Open SQL Server Configuration Manager. If you don’t have this tool installed, then press “Windows Key + r” and run “compmgmt.msc” to access the SQL Server Configurations. Use the following steps to make sure SQL Services are communicating through port 1433 for all IP Addresses.
4.Make sure SQL System Admin (sa) Log in Credentials are correct
There could be couple of scenarios: A. PDM is configured to use correct “sa” credentials B. Not sure if PDM Vault is configured with correct “sa” log in credentials or if “sa” login credentials have been changed recently
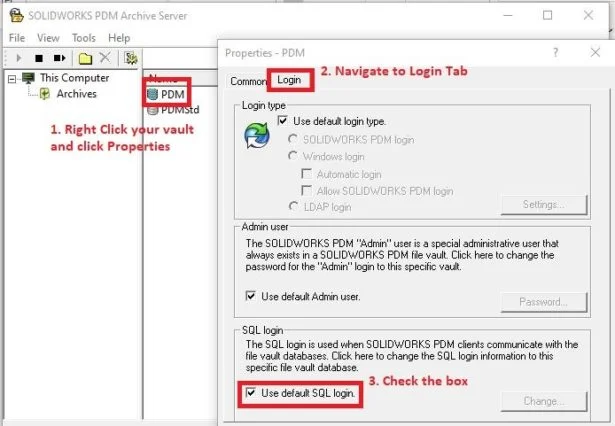
CASE A: If PDM is configured using correct “sa” credentials, then make sure that vault is using the “default” SQL Login. This setting can be done within the Archive Server Configuration tool. Access the properties – Right Click Vault -> Properties -> Navigate to Login tab. Check the box for “Use default SQL Login”
CASE B: If unsure that PDM was setup using correct “sa” credentials or if “sa” credentials have been changed then you can update PDM to use the correct SQL Password. Follow the steps mentioned above to navigate to the Login tab of the Vault Properties dialogue box and simply uncheck the dialogue box to enter the correct password.
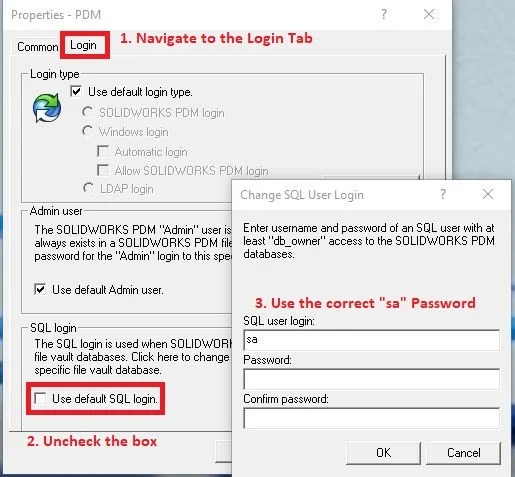
This will not test the password; it will just use this password whenever it needs to. So, if it is wrong you will get the error, however, once you fix up the correct password PDM will begin to work as normal.
Hopefully, you’ve successfully troubleshooted your PDM connectivity issues and are back on track using PDM to help with your SolidWorks designs. It’s always extra satisfying to resolve your own issues.
However, if you have tried all of these troubleshooting steps and solutions and you’re still having these issues, that’s what your reseller support is for. We have some highly experienced PDM application engineers on hand ready to get you back up and running asap.
Written by
Arpit Saxena, Applications Engineer Team Leader at CADspace, a SOLIDWORKS Value Added Reseller in Australia.