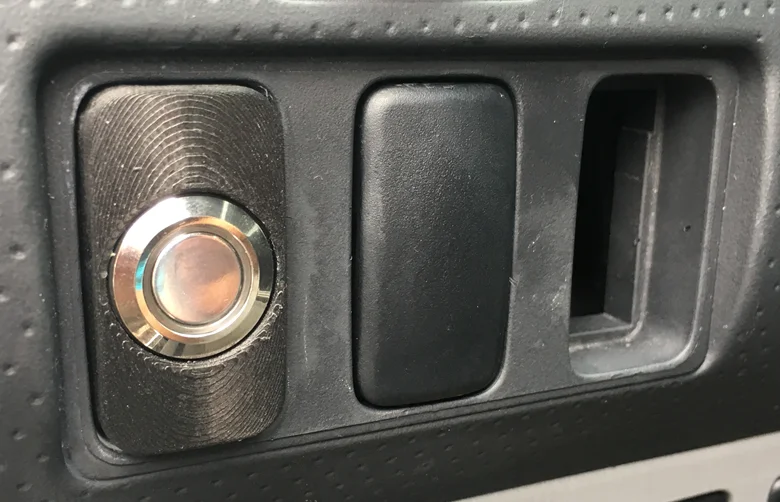
I drive a Toyota Tacoma, and I love this thing. Numerous cross-country trips have made this machine close to my heart, almost like a childhood home. I only want the best for this truck. I’m always looking for new ways to take care of and improve my baby, and recently I decided I wanted to incorporate a new button into the dash. The best way to do this, of course, is by using the power of SOLIDWORKS!
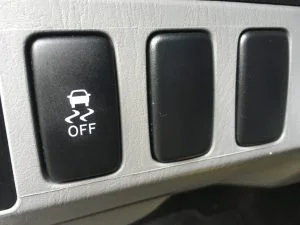
Tacoma’s come stock with a couple of buttonless blank inserts. These insert into the dash where wiring can seamlessly run behind the trim. Normally modders just drill these out with a step drill. Not for my baby. The plan looks something like this:
- Model the blank insert: Extract a blank from the Taco and get it modeled into SOLIDWORKS
- 3D print the blank to test fit: 3D print the blank insert model to check its fit
- Modify our model to house a button: Adjust the blank insert to fit with a button
- Print and assemble the button: 3D print the newly modified button insert and assemble the button
Step 1: Model the blank insert
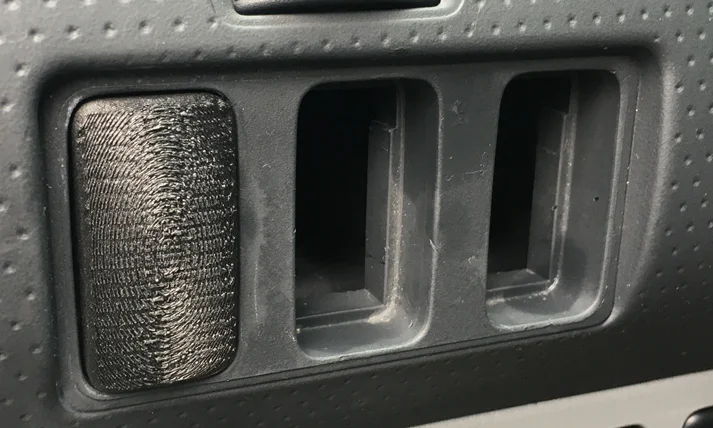
Using SOLIDWORKS, I will create a model of the insert pictured below.
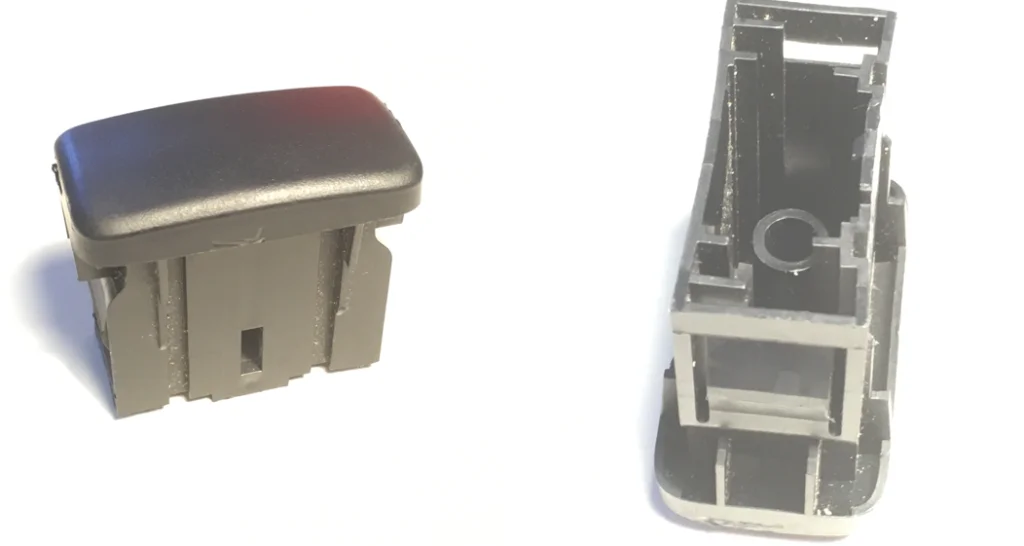
After gathering my measurements, I sat down with SOLIDWORKS, and within an hour came up with an exact copy. Here’s how:
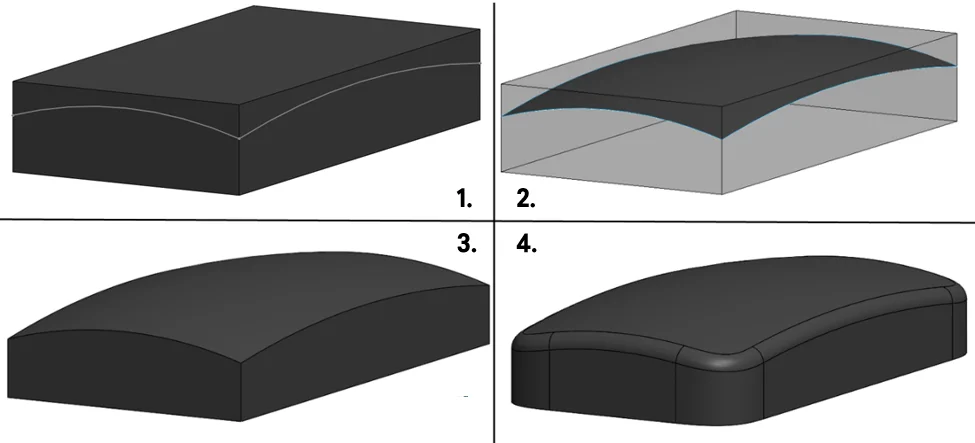
I decided that the top part (the part that faces the user when inserted) would be my base feature. In image one below, I started with a rectangle with the proper length and width and extruded it a little bit further than I needed to so that it was overbuilt. Next, I used the sides of the rectangular prisms to start sketches on each side that have circular arcs, the most measurable part. (See image two.) The sketches give me just what I need to loft a surface. The result is seen below, in image three, compared with the transparent rectangular prism for demonstration purposes. A quick replace face with the surface renders the result I need. A couple of fillets later and my model, shown in image four, is already starting to look slick!
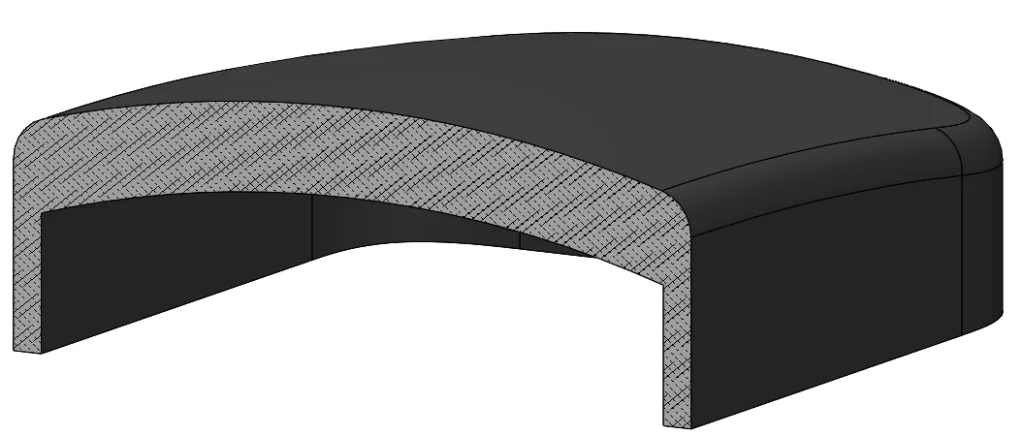
Given that all the walls are the same thickness (0.035in), this is an opportune time to use the shell feature within SOLIDWORKS. I used the multi-thickness settings to make the top surface thicker than all the walls. See the result below.
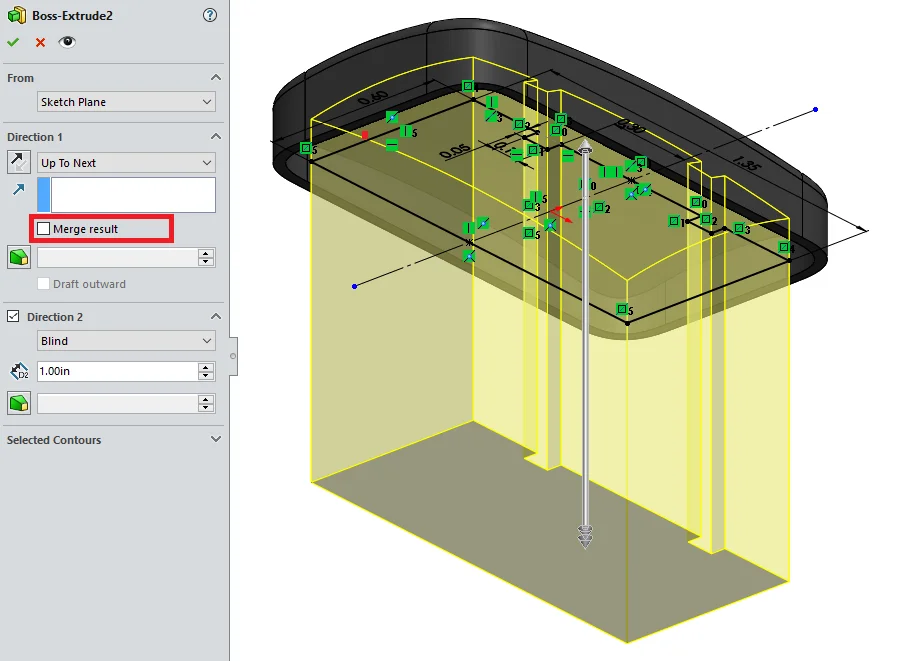
I then move to work on the bottom part. It is mostly a rectangular prism that nests under the top part. I extrude a solid and uncheck “Merge result” before confirming. Unchecking that box that will keep our new solid separate and bring us into the multibody environment. This is a perfect example of how working with multibodies can expedite the design process. One of the many benefits of multibodies is exemplified here. A cut-extrude can be applied, and by using feature scope we can include the body that we want to cut and exclude the one we don’t want to touch (the top part).
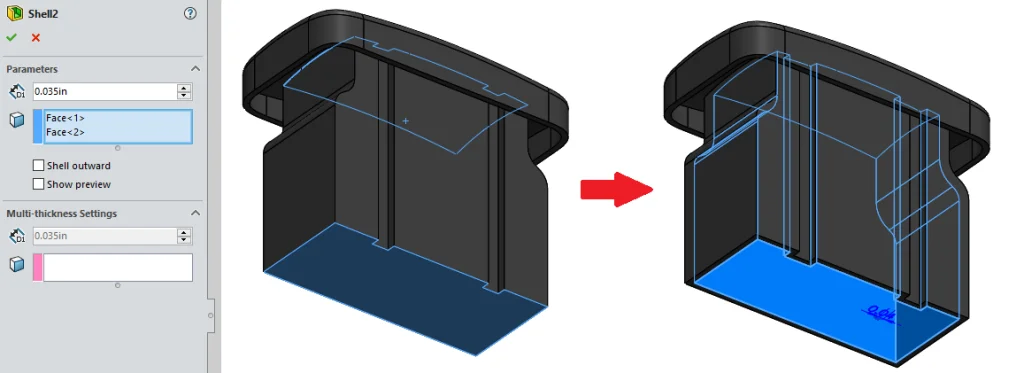
After mirroring the feature over to the other side, we can use another shell to get our thin walls. It is here we observe another benefit of using multibodies within SOLIDWORKS.
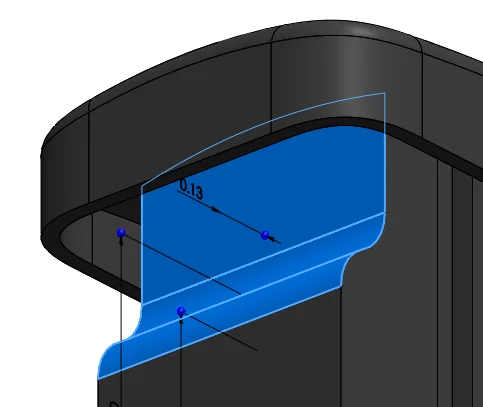
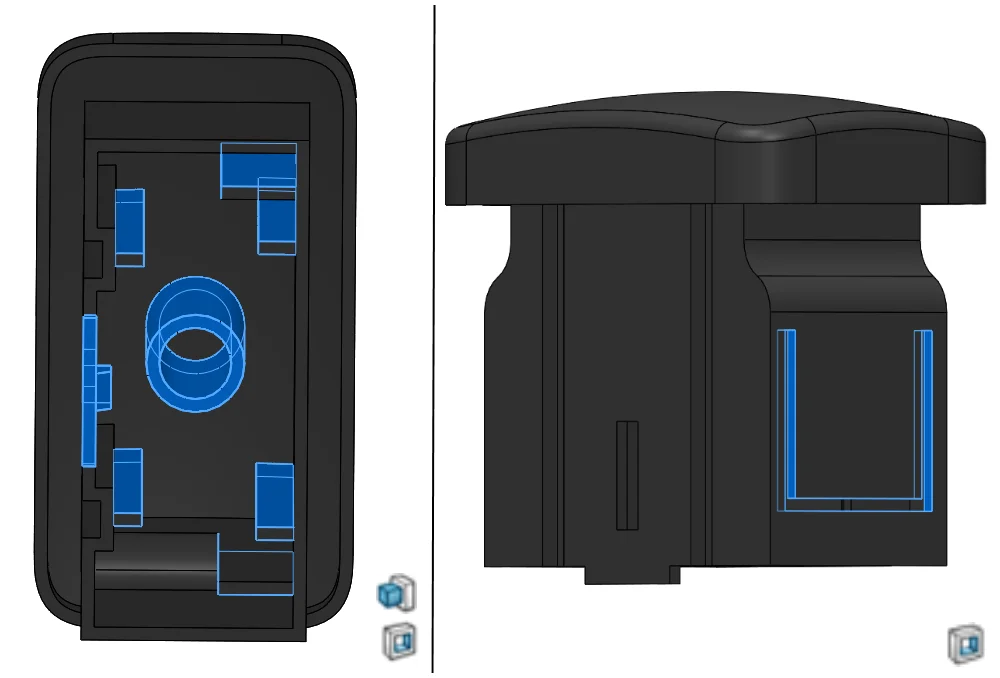
Much like using feature scope, there are certain applied features that can only be applied to one body, shell included. That way we can apply thickness only to the parts we care about and not undo the multi-thickness settings from last shell. I then use a series of cut extrudes and Boss-extrudes to add some detail walls as seen below. Now for the clips that retain the insert into the dash. A thin cut-extrude slices part of the side to make a hanging tab. This is where Thin Extrudes come in handy!
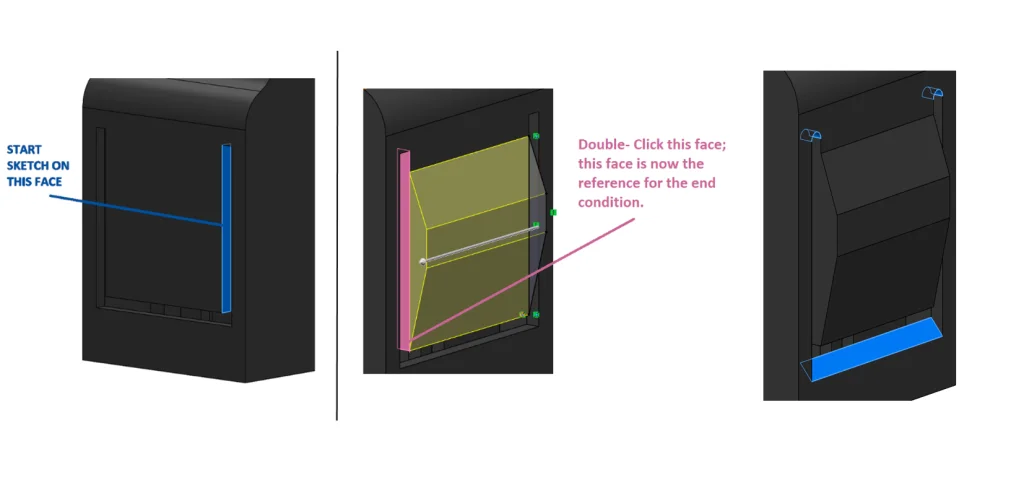
Here’s a tip for improved speed when modeling: start the sketch for the bump on one side of the tab. As soon as you boot up the boss-extrude, double click the opposite side of the tab, and the command will intuit that the face you double-clicked is the “Up To Surface” end condition reference. After that, just accept the command. Boom, the feature is done! A couple of Full-round fillets and a chamfer later, the tab is mirrored to the other side.
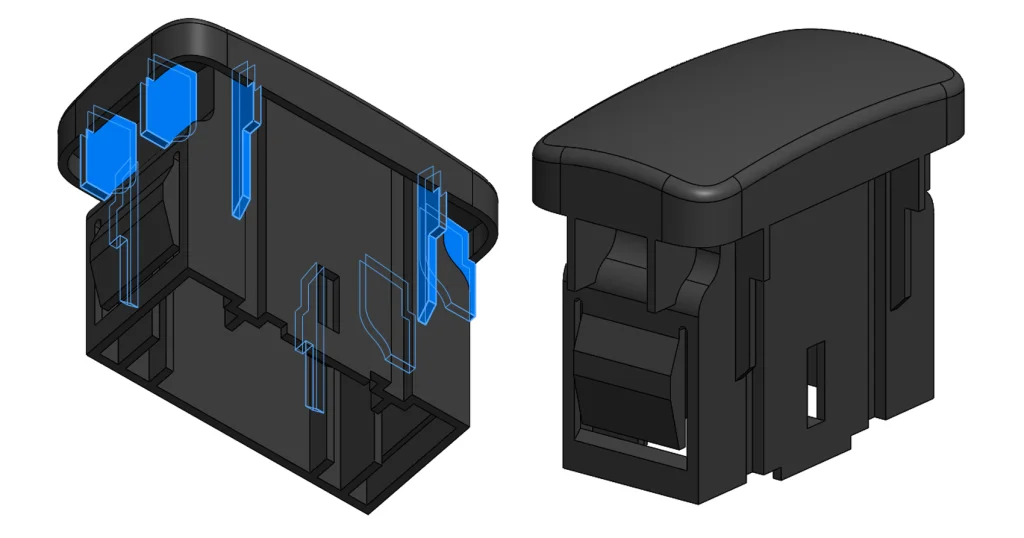
The last thing to do is to apply additional thin extrudes, cuts and chamfers for the outer fins, pictured below on the left. And now, the reverse engineering of the blank insert is complete!
Step 2: 3D print the blank to test fit
Now that our reverse engineered model looks the part it’s time to see if it plays the part too. I went out to the truck and popped it in, and it fit! Next, to cram a button in our new model.
Step 3: Modify our model to house a button
This is the button I wish to use on my truck, before and after modeling with SOLIDWORKS!
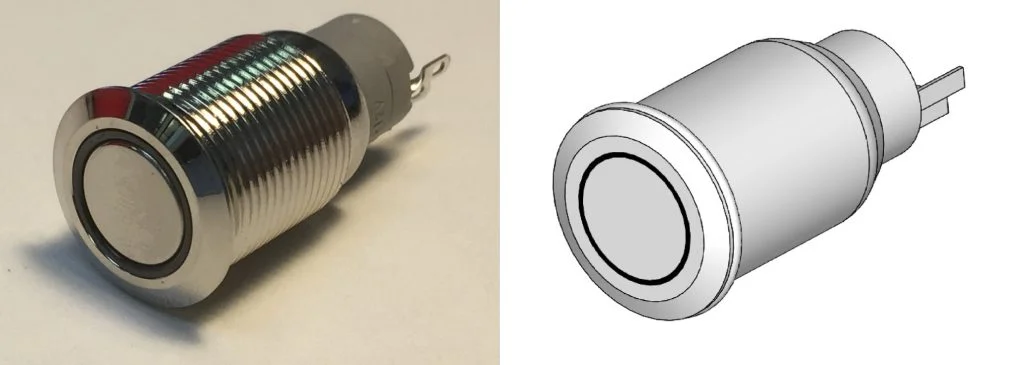
After I gather all of the dimensions of the button, making a button-shaped recess was easy! I performed a series of cut extrudes and finished it off with a fillet for a smooth appearance. But now comes the question of how the button will stay in place. And that’s where the first problem lies. The button uses a nut that screws in from the back, and it’s so large that it will not fit within the walls of the bottom of the insert. One option to give it space would be to cut away a bunch of material, but that will make our new model very flimsy.
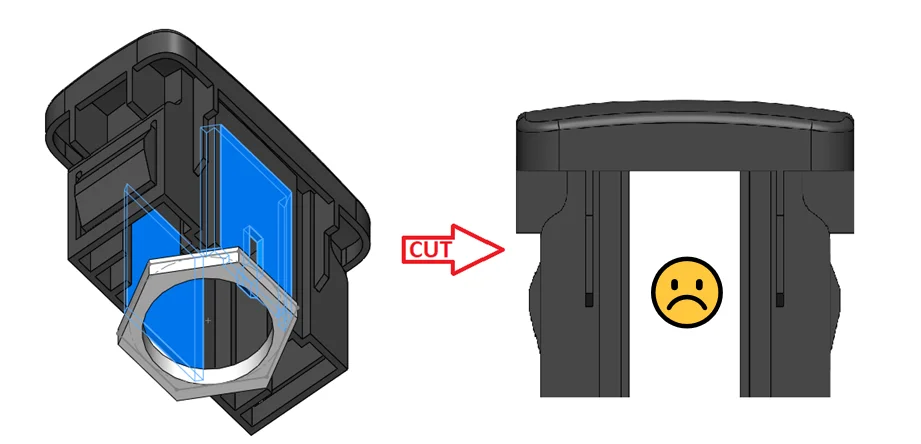
The solution I came up with (and verified with a SOLIDWORKS Motion Study) is to cut a slot in the side to have the nut slide into. A hex shaped recess receives the nut and keeps it snug in place for the button.
Now that the retention issue is solved, it’s time for a test fit with SOLIDWORKS. Here is the assembly with the button pushed into place. Another problem is immediately apparent. The gray area protruding from the side is part of the button, and it’s interfering with our insert.
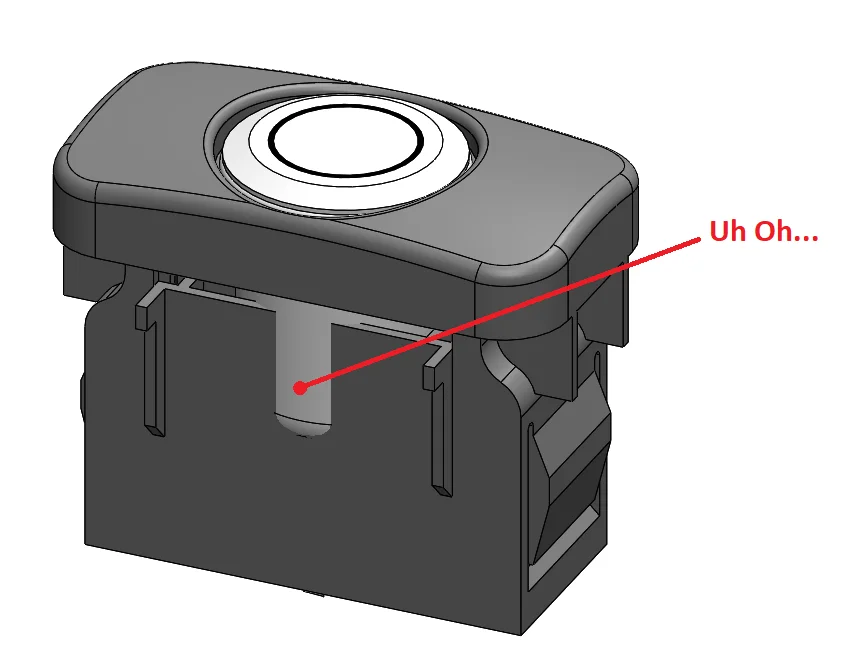
I am okay with that knowing SOLIDWORKS will save me from another round of prototyping. So let’s get to the fix, we’ll reroute the wall a little bit so that it goes around our button. I thin-extrude a cylinder large enough to encompass the button through the model, and then I apply some cleverly placed cut-extrudes to remove the extra inner walls.
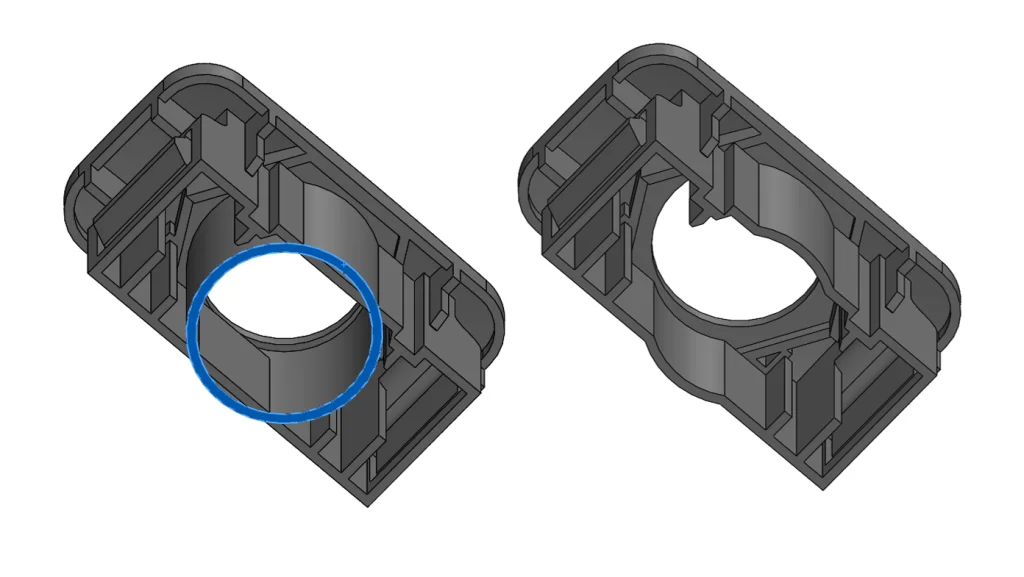
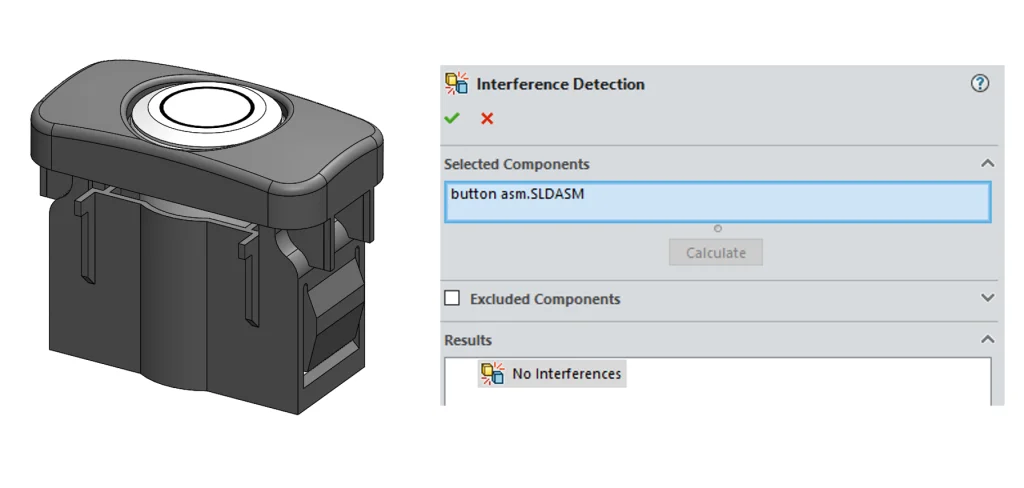
And now for the test-fit. Ah, it fits like a glove, and SOLIDWORKS interference detection agrees!
Step 4: Print and assemble the button
After the model was sent to the printer, and assembly went without a hitch thanks to the verification tools of SOLIDWORKS, I now have a functional, spare button in my car.

Some of you may be asking what exactly this button is for. The truth is, I don’t know exactly what this button is going to control. If you have a fun suggestion be sure to leave a comment! I know that whatever project I tackle next, SOLIDWORKS will be there to make sure I get the job done right!
Author: Robert Maldonado, Application Engineer at DesignPoint
