
After teaching 1000’s of students and writing about SOLIDWORKS and SOLIDWORKS Simulation, David Planchard, retired professor WPI, is exploring Design Study, Optimization Analysis and Generative Design. Through this lesson series, David helps educators and their students understand iterative processes through simple examples and industry practices.
In Lesson 1 and Lesson 2, we focused on applying a Design Study and Topology Study using the SOLIDWORKS desktop environment for an Additive Manufacturing process.
In Lesson 3, we saved the Mesh model in the Topology Study and opened the model in SOLIDWORKS.
In Lesson 4, we investigated a few Mesh modeling tools in SOLIDWORKS. We created a Mesh Body from the Mesh model.
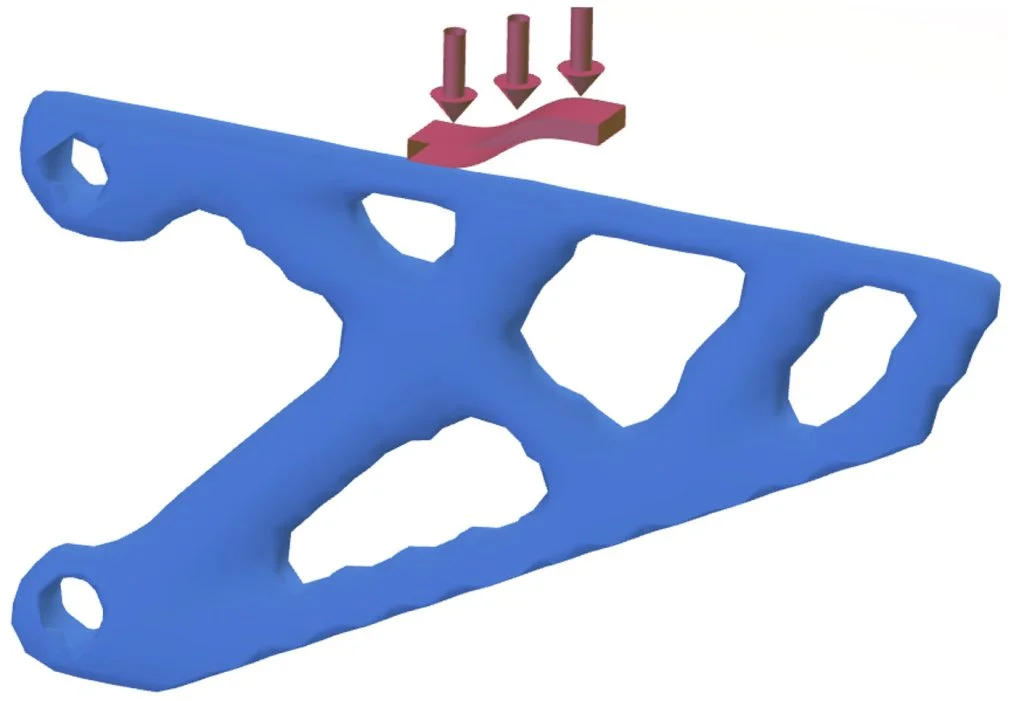
In this Lesson, we will use the 3DEXPERIENCE Platform to investigate Design Guidance in SOLIDWORKS xDesign for an Additive Manufacturing process. The Design Guidance tool helps you design geometries taking into account, loads, restraints, material, space, and contributing obstacles. Design Guidance works with new designs or a redesign of existing geometry.
We will apply the Redesign option on an imported existing SOLIDWORKS (*.slprt) part. The Design Guidance tool will then create the shape of the geometry to support our requirements with reduced mass. Save the Cantilever_Bracket-xDesign Physical Product as a 3DXML (*.3dxml) and a STL (*.stl) file.

Before you begin: You need to purchase a 3DEXPERIENCE education offer from your Value Added Reseller (VAR).
Create and register your 3DEXPERIENCE ID (credentials) to the platform. An internet connection is required.
Install the Design with SOLIDWORKS App. This App provides the ability to upload, store, manage and share files.
You need to have a basic understanding of the 3DEXPERIENCE Platform and the xDesign App.
The 3DEXPERIENCE Platform provides downloadable content (DLC) from a secure cloud location within your SOLIDWORKS session. The platform enables you to collaborate with students and teams through a browser.
Think of the 3DEXPERIENCE Platform simply as a SOLIDWORKS Add-In on your desktop. Experience a single modeling environment. Access the platform within the SOLIDWORKS Task Pane.
Start SOLIDWORKS or SOLIDWORKS xDesign App
Start a SOLIDWORKS session from your desktop. Note: You can also access the SOLIDWORKS xDesign App directly using the following link: solidworks.com/xdesign/student.
Double-click the SOLIDWORKS 2025 icon.
Connect to the 3DEXPERIENCE Platform. Enter the requested information.
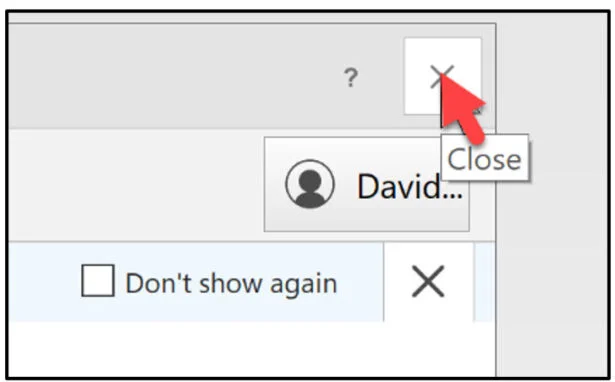
Close the Welcome dialog box.
Download the SOLIDWORKS Part and Save to the 3DEXPERIENCE Platform
Download the Cantilever_Bracket-xDesign part to follow along with this lesson.
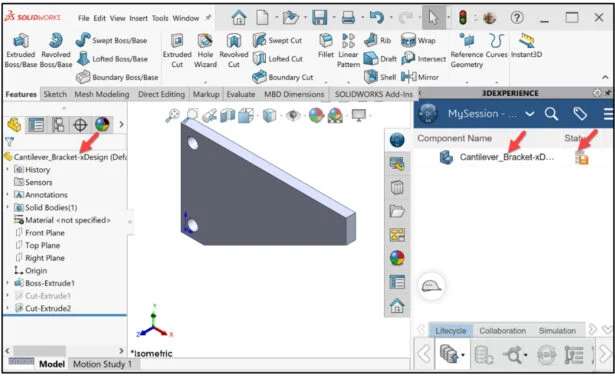
Open the SOLIDWORKS Cantilever_Bracket-xDesign part.
Click the 3DEXPERIENCE icon in the Task Pane. The MySession panel is displayed.
In this lesson, use your default Collaborative space on the 3DEXPERIENCE Platform.
The 3DEXPERIENCE Platform is browser driven. Your existing cookies and cache determine what you will see on your computer desktop or during a SOLIDWORKS login. A full installation of SOLIDWORKS 2019 SP0 or later is required.
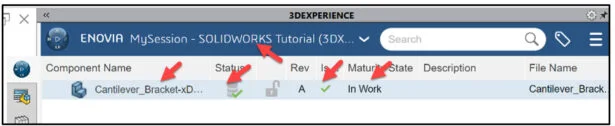
The MySession panel displays the two-way communication between SOLIDWORKS running on your computer and the 3DEXPERIENCE Platform running in the cloud in a single modeling environment.
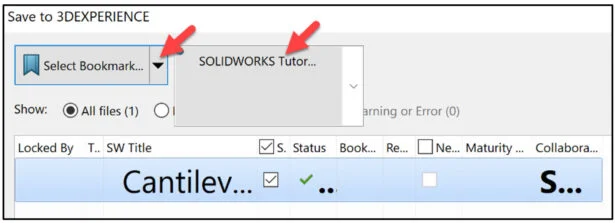
Save the model to your Collaborative space in the MySession panel under a created Bookmark. Note: Collaborative space is defined by an administrator (instructor or IT personnel) or the user, if the user has access rights.
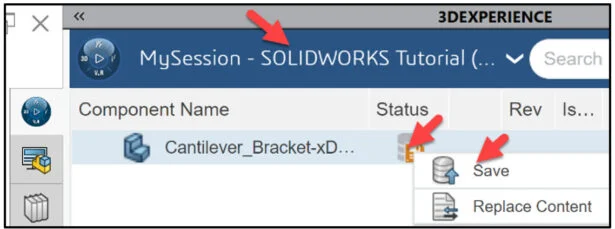
In this lesson, my Collaborative space is named SOLIDWORKS Tutorial.
Right-click the orange Save icon in the MySession panel.
Click Save.
The file is temporarily being saved to a local cache area. The platform is checking the model. Note: for an assembly, the platform is checking for out of date components, modified components from the last save to the platform, different revisions, missing components, etc.
The Save to 3DEXPERIENCE dialog box and Product Lifecycle Management (PLM) attributes are displayed. The PLM attributes include: Locked By, SW Title, Saved Status (3DEXPERIENCE), Revision, New Revision, Maturity, and Collaborative Space name.
Save the model. Use your existing Collaborative space. Create or use an existing Bookmark.
One of the best simple practices for SOLIDWORKS data is to create or use a Bookmark upon the initial save to the 3DEXPERIENCE Platform.
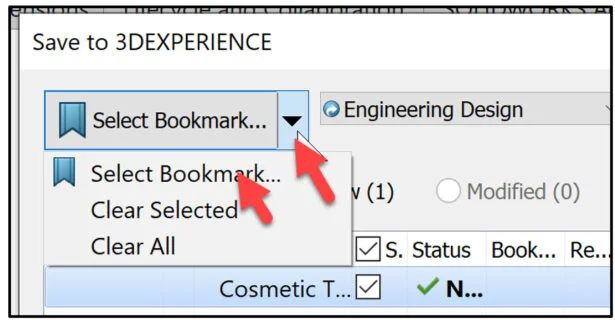
Click the Select Bookmark drop-down arrow.
Click Select Bookmark (Workspace). The Select a Bookmark dialog box is displayed.
View your options. Either create or use an existing Bookmark. In this lesson, we will use Design Project 106.
Click Apply from the Select a Bookmark dialog box.

Return to your SOLIDWORKS desktop session.
Click Save from the Save to 3DEXPERIENCE dialog box.
The model is saved to your Collaborative space and Bookmarked on the 3DEXPERIENCE Platform.
Expand the Task Pane area. View the auto generated embedded model properties.
Click the center of the Compass. The Compass is a means of launching your Apps inside the 3DEXPERIENCE Platform and inside a SOLIDWORKS session.

View your available My Roles, My Cockpits, My Favorite Apps and My Apps. The display will vary depending on your licenses and roles. Drag the slider downward to view additional Widgets and Apps. A Widget is an extension of the App that allows you to use it in the Dashboard. A Widget is displayed with an arrow in the upper right corner of the icon as illustrated.

SOLIDWORKS xDesign App
Start an xDesign session
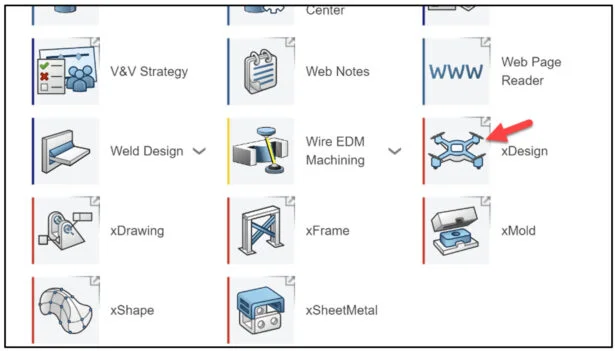
Click the xDesign Widget.
Note: You can also access the SOLIDWORKS xDesign App directly using the following link: solidworks.com/xdesign/student.
Log into the 3DEXPERIENCE Platform.
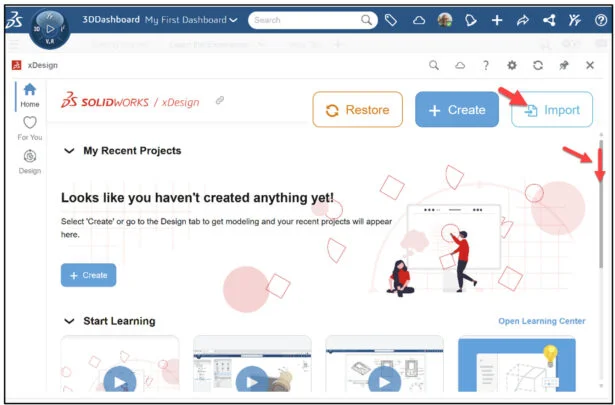
The SOLIDWORKS / xDesign dialog box is displayed.
Scroll down-ward and view the available xDesign Tutorials.
Import the SOLIDWORKS part.
Click Import.
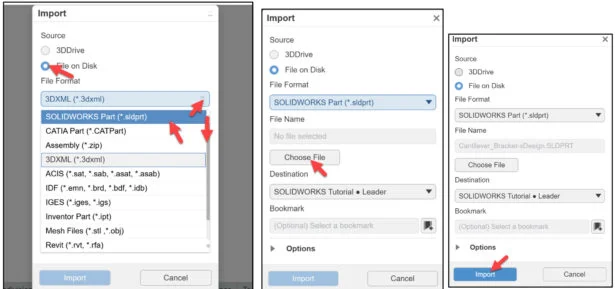
Th Import dialog box is displayed. You can import directly for your 3DDrive or from a File on your local hard drive. In this example, Import the SOLIDWORKS part for your hard drive.
Select File on Disk for Source. Click the File Format drop-down arrow. View your options.
Select SOLIDWORKS Part (*.slprt).
Click the Choose File button. Locate the SOLIDWORKS part Cantilever_Bracket-xDesign on your hard drive.
Click OK from the Open dialog box.
Accept the defaults.
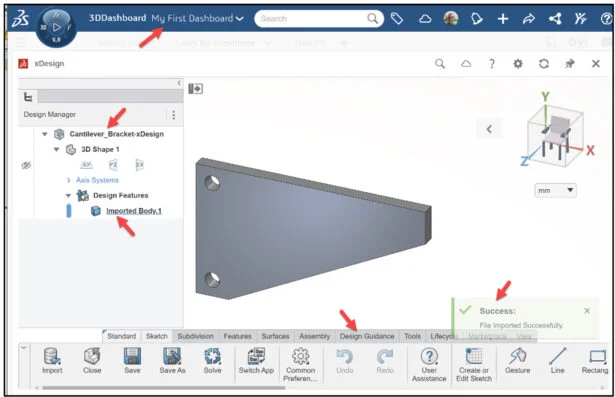
Click Import from the Import dialog box.
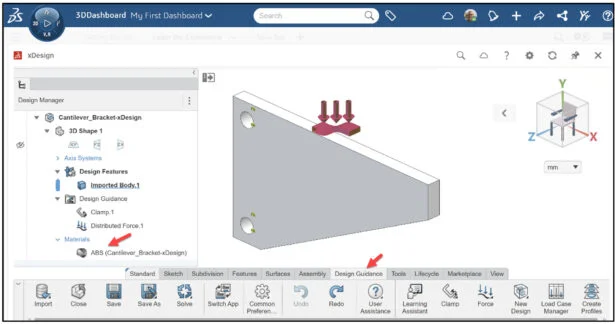
The xDesign Work Area is displayed. View the Work Area.

Cantilever_Bracket-xDesign is the name of the Physical Product. xDesign is a single modeling environment. The term Physical Product is used because both parts and assemblies are treated the same. This is not true in SOLIDWORKS.
Design Guidance
The Design Guidance tool helps you design geometries taking into account loads, restraints, material, space, and contributing obstacles. Design Guidance works with new designs or a redesign of existing geometry.
Click the Design Guidance tab in the Action bar.
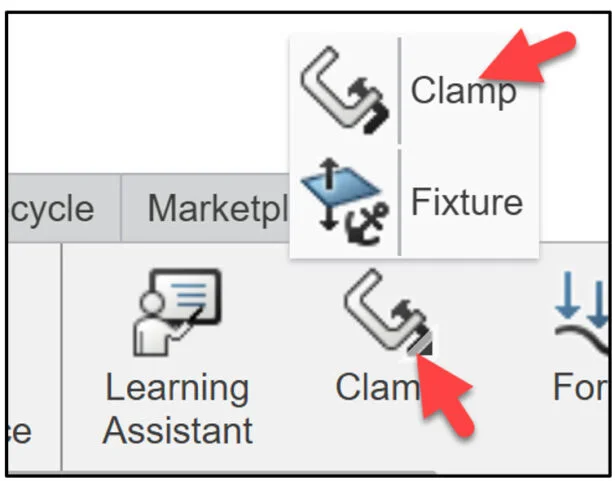
Define the Restraints. Click the drop-down arrow under Clamp. There are two options: Clamp and Fixture. A Clamp restrains the part from moving in all directions. A Fixture restrains the part from moving in one or more directions.
In this example, apply a Clamp restraint.
Click Clamp in the Pop-up menu.
The Clamp dialog box is displayed. Select the four half cylindrical faces of the two holes as illustrated. Click OK from the Clamp dialog box.
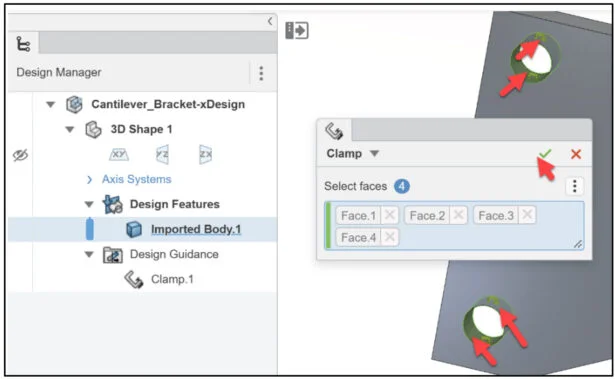
Clamp.1 is displayed in the Design Manager. Define a load. Click the drop-down arrow under Force. There are three options: Torque, Pressure, and Force. Apply a distributed force in a single direction (Normal to face at center) on the top face of the Bracket.
Click the Force icon.
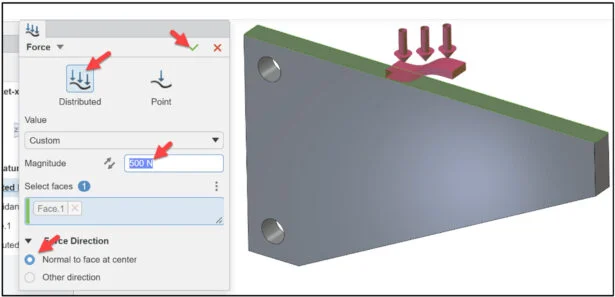
The Force dialog box is displayed. Click Distributed. Click the top face of the Bracket.
Click the Custom drop-down arrow. View the provided information.
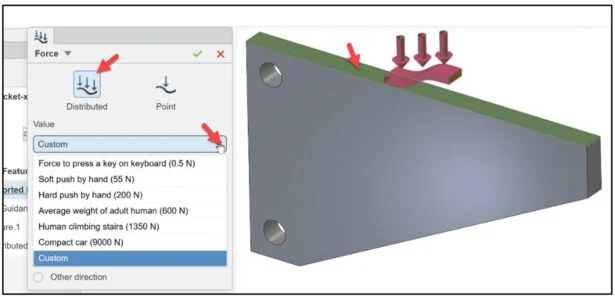
Enter 500 N for Magnitude.
Select Normal to face at center for Force Direction.
Click OK from the Force dialog box.
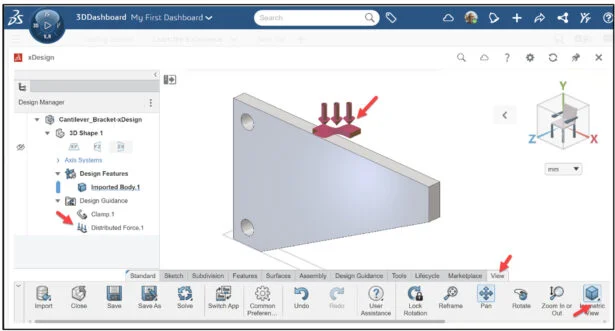
Distributed Force.1 is displayed in the Design Manager.
Display an Isometric view.
Apply Material
Assign material to the Physical Product.
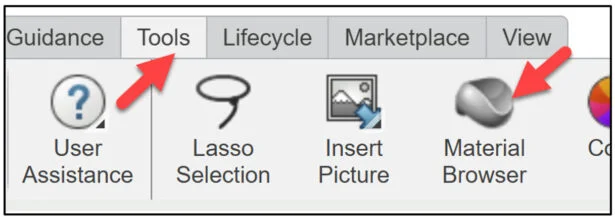
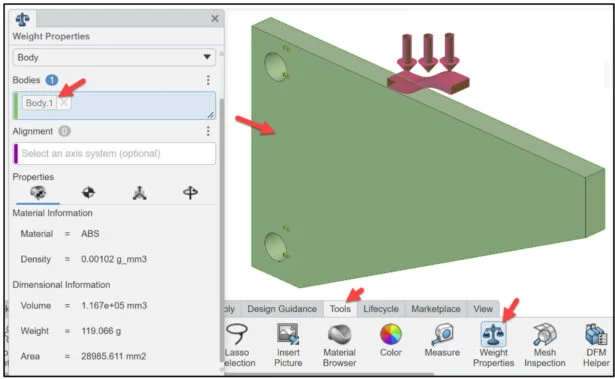
Click the Tools tab from the Action bar.
Click Material Browser.
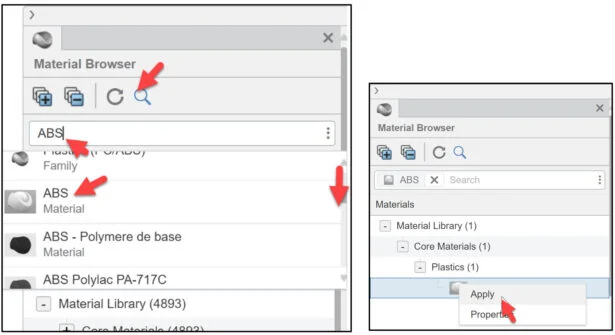
The Material Browser dialog box is displayed.
Click the Search icon. Enter ABS.
Slide the selection arrow downward.
Right-click ABS Material. Click Apply.
Canitiever_Bracket-xDesign is selected by default.
Click OK from the Pop-up menu.
Close the Material Browser dialog box.
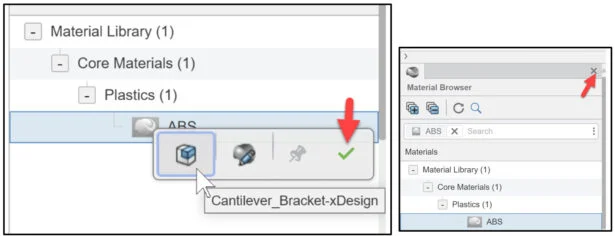
Material is displayed in the Design Manager.
The current mass of the Canitiever_Bracket-xDesign is 119 g.
Return to the Design Guidance tool.
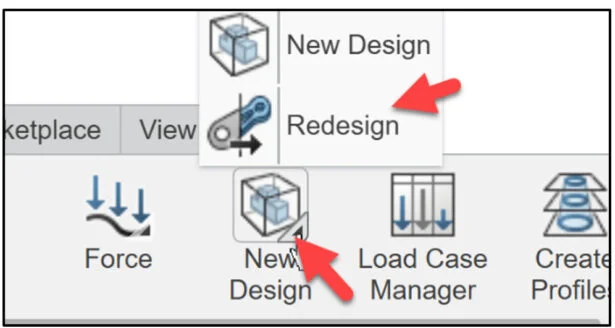
Click the Design Guidance tab in the Action bar.
Click the New Design tool drop-down arrow.
Two options are displayed: New Design and Redesign.
A goal of this lesson is to redesign the part with 70% less material. Analyze the results using Design Guidance.
Click Redesign.
The Design Guidance dialog box is displayed.
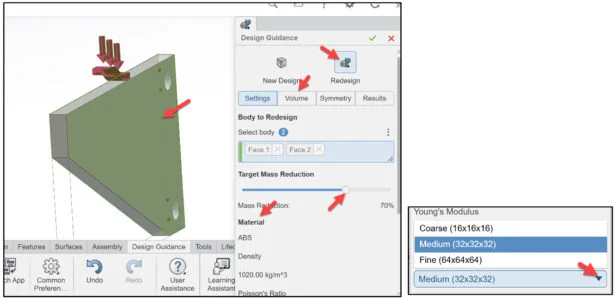
Redesign
The Redesign icon is selected.
The Target Mass Reduction is 70%. Material is ABS for the Additive Manufacturing process.
Select the front and back faces for Select body to redesign. The Voxel Granularity default is Medium (32x32x32). Note: Finer granularity provides a more refined shape but increases the time required to generate the shape.
Click the Volume tab.
Select Preserve regions. Select faces to preserve on the generated shape.
Select the four half cylindrical faces of the two holes as illustrated.
Select the top face as illustrated.
Click the Generate button. This should take a few minutes.

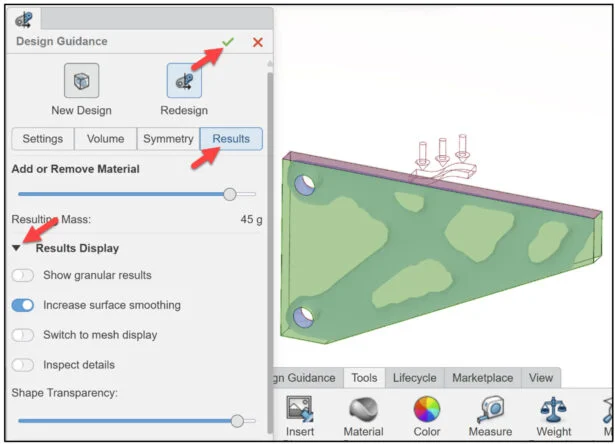
The Results button is highlighted when finished. View the Results Display options.
Click the Results Display drop-down arrow.
Click OK from the Design Guidance dialog box. The new mass is 45 g. The original mass was 119 g.
The Design Guidance dialog box closes, keeping the generated shape hidden.
Display the new generated shape.
Right-click Cantilever_Bracket-xDesign in the Work Area.
Click Hide from the Pop-up menu.
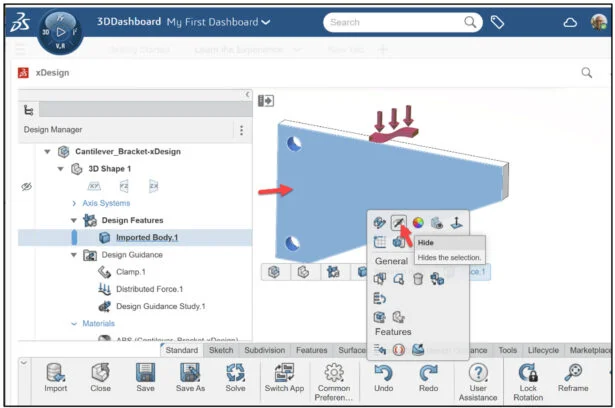
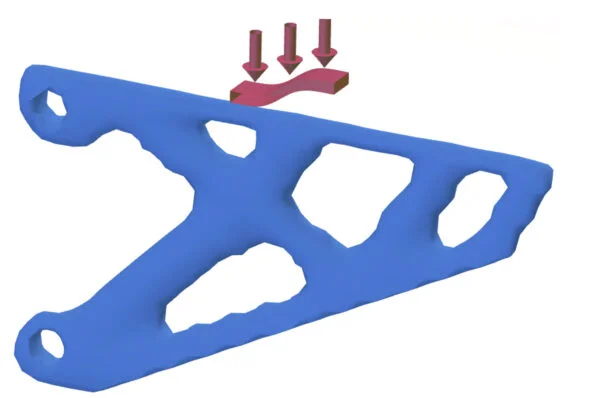
View the results in the Work Area.
Save and Export
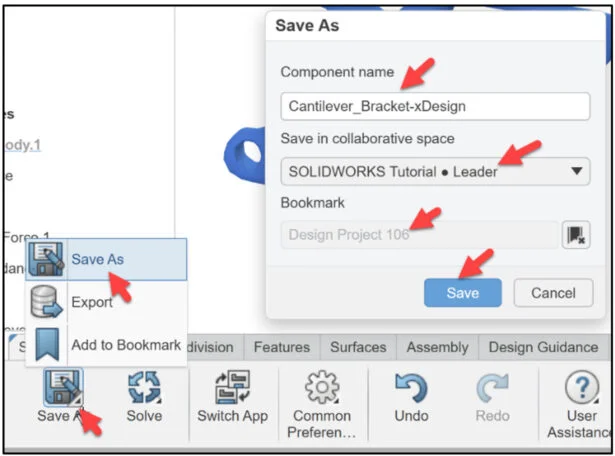
Save the Cantilever_Bracket-xDesign Physical Product.
Click the Save As drop-down arrow from the Action bar.
Click Save As.
Select your Collaborative space. Select the Bookmark. Click Save.
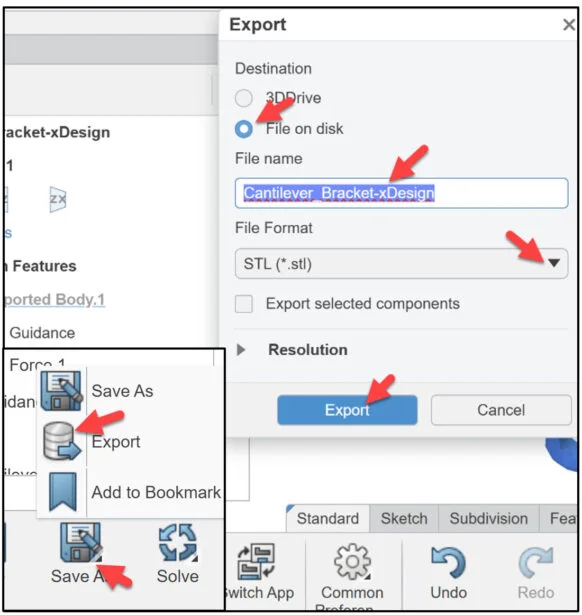
Save the Cantilever_Bracket-xDesign Physical Product as an STL (*.stl) file.
Click the Save As drop-down arrow from the Action bar.
Click Export from the Pop-up menu. The Export dialog box is displayed.
Select File on disk.
Select STL (*.stl) from the File Format drop-down arrow.
Click Export. The STL file is downloaded to your Download folder on your desktop.
The lesson is finished. You can also download my Final model files to review the solution.
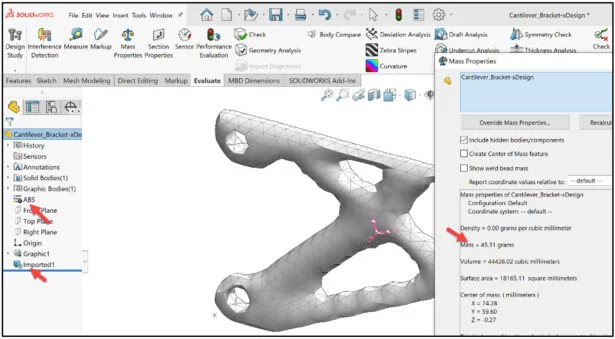
Note: I opened the download STL file into a SOLIDWORKS session. I utilized the Convert to Body mesh tool and added ABS material from the SOLIDWORKS Library. The Mass Properties tool was applied. The resulting Mass is 45 g.
In Lesson 6, we will explore the Case Load Manager in Design Guidance. We will create a new Load Case and edit material removal to create a new shape.
Learning Modules
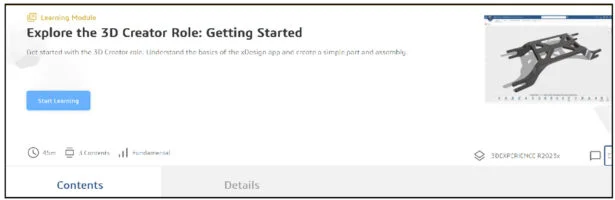
The 3DEXPERIENCE Edu SPACE online learning modules for the 3D CREATOR Role is free. There are two recommended learning modules.
The first learning module https://eduspace.3ds.com/, (Log in/Register) and locate the Explore the 3D Creator Role: Getting Started module. The module offers 3 learning lessons (45 minutes).
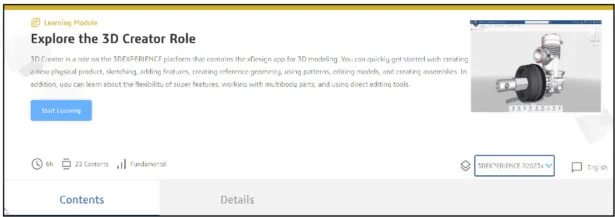
The second learning module https://eduspace.3ds.com/, (Log in/Register) and locate the Explore 3D Creator Role. The module offers 22 learning lessons (6 hours).
Additional Resources for Educators and Students – MySolidWorks
You can find additional lessons and learning paths about SOLIDWORKS and SOLIDWORKS Simulation at My.SOLIDWORKS.com.
Become a SWUGN Member
SOLIDWORKS and SOLIDWORKS Simulation Educators, register to be part of the SOLIDWORKS User Group Network (SWUGN) with virtual and in person meetings for ever thing about SOLIDWORKS and more.
Design well, Marie