
After teaching 1000’s of students and writing about SOLIDWORKS for over 25 years, David Planchard, emeritus WPI, is exploring SOLIDWORKS desktop and the integrated 3DEXPERIENCE Platform. Through the 3DEXPERIENCE Works Lesson series, David helps educators understand the 3DEXPERIENCE Add-In with simple examples and industry practices. The platform offers are available thru your Education Partner (VAR)
What is 3DDrive? Why should I use 3DDrive? Is 3DDrive useful in a classroom or team environment?
Think of 3DDrive as another online storage space such as OneDrive, Dropbox, or Google Drive to keep files organized and shared through folders.
Are there other free cloud storage options? Yes, but having data stored with Dassault Systèmes that understands your content is the differentiator for me.
3DDriveis fully integrated within your SOLIDWORKS desktop and is auto-synched to Windows Explorer. You can access 3DDrive three different ways: through Windows Explorer, directly in SOLIDWORKS or from the 3DEXPERIENCE platform.
3DDrive provides the ability to store, share and manage files inside and outside of your class or team through a link using any device (phone, tablet, PC, etc.). View embedded design comments during the lifecycle process of the document. When the sharing of the link is finished, you can remove the outside person. No file is provided. This ensures security on the platform of your design.
In this lesson, install 3DEXPERIENCE Drive for Windows directly from your SOLIDWORKS desktop. The following items are covered in 3DDrive: upload, download, view properties, share, roles, embed comments, links, 3DSwym, members, revoke access and delete and restore files.
Before we start, there are a few items that you need to know.
In this lesson, use your default Collaborative space named “Common Space”. An internet connection is required. A 3DEXPERIENCE ID is required. Note: 3DDrive is required to share the link.
Login to the Platform
3DEXPERIENCE Launcher needs to be installed. 3DEXPERIENCE Works Lesson 1: Getting Started with SOLIDWORKS.
The 3DEXPERIENCE platform is browser driven. Your existing cookies and cache determine what you will see on your computer desktop or during a SOLIDWORKS login. A full installation of SOLIDWORKS 2019 SP0 or later is required.
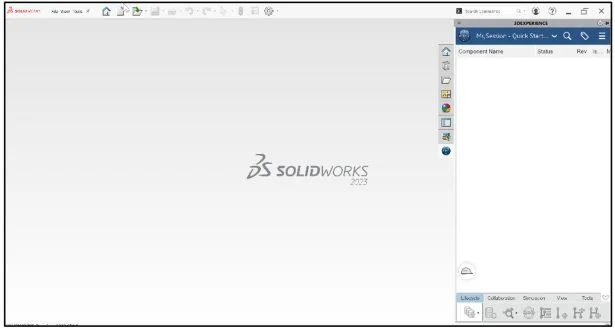
Start a SOLIDWORKS session from your desktop.
Double-click the SOLIDWORKS icon.
View the illustration below. Depending on your system setup, cookies, and cache, it will be different.
Input the requested information.
Click Accept All.
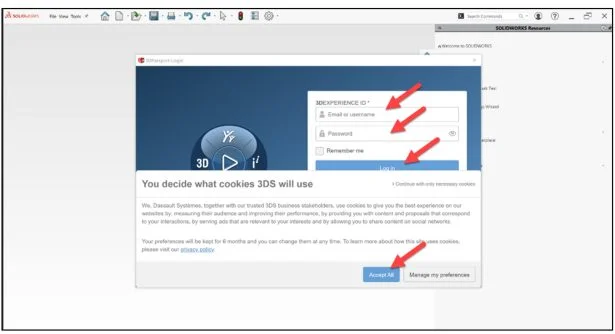
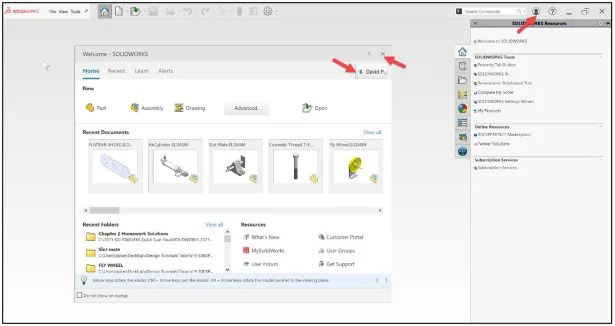
The Welcome – SOLIDWORKS dialog box is displayed.
Close the Welcome dialog box.
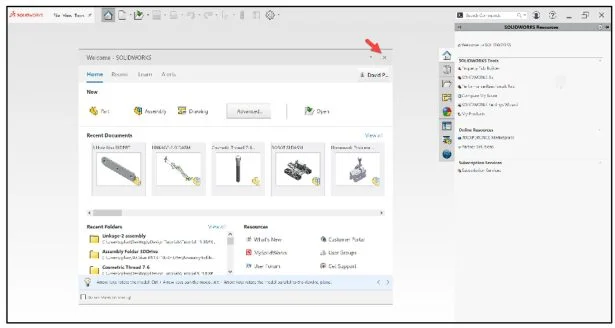
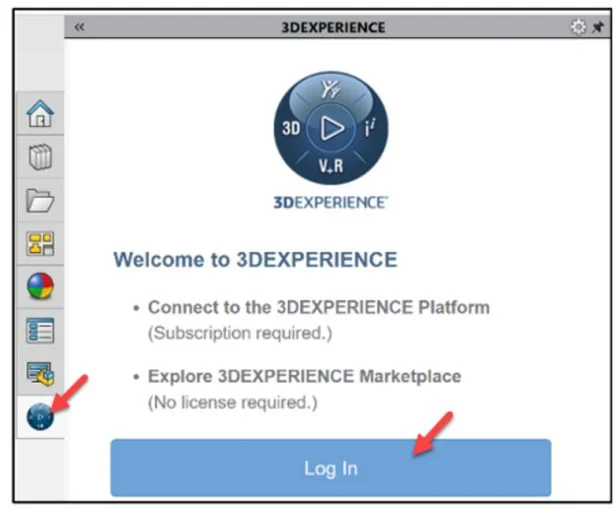
Click the 3DEXPERIENCE icon in the Task Pane. View your options.
Connect to the 3DEXPERIENCE Platform.
Click Log In.
View the illustration below. Depending on your system setup, cookies, and cache, it will be different. Read the information. Click Accept All.
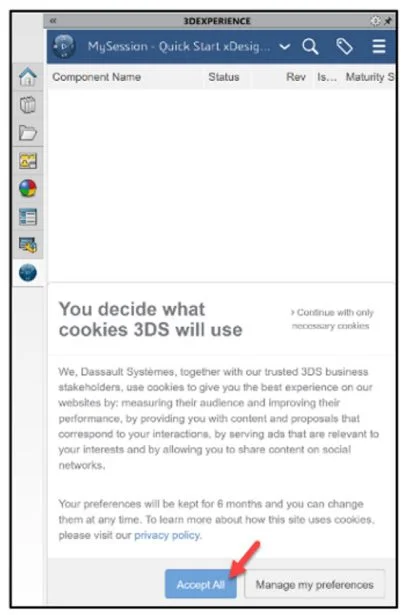
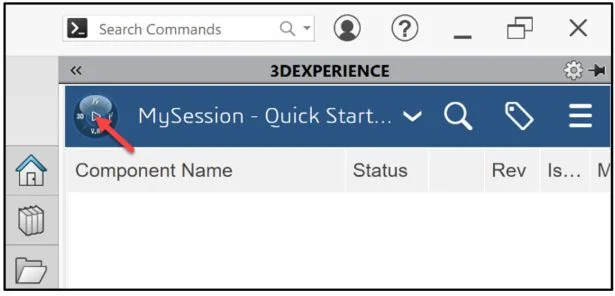
The MySession panel is displayed. This displays the two-way communication between SOLIDWORKS running on your desktop and the 3DEXPERIENCE platform running in the cloud.
The default Collaborative space for a student is named, Common Space. In this lesson, I’m using a Collaborative space named Quick Start.
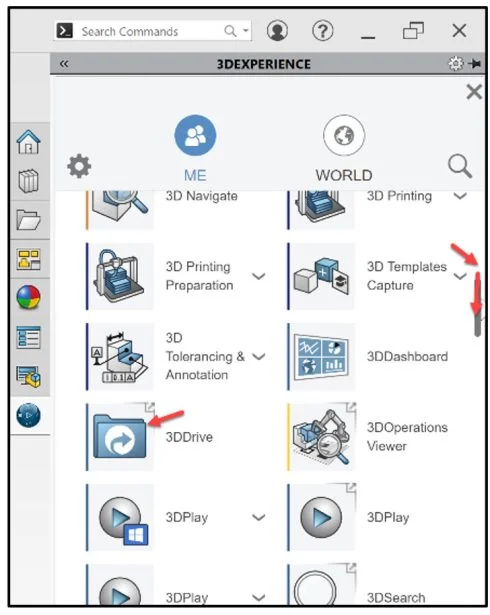
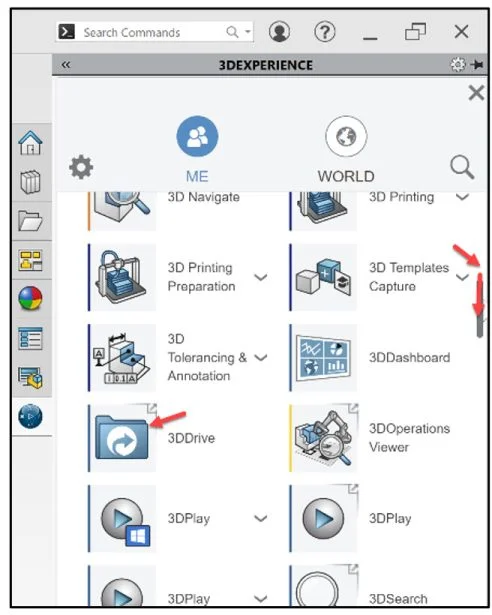
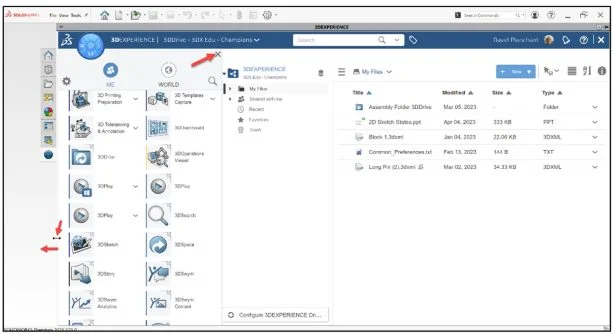
Click the center of the Compass. View your available Roles, Cockpits, My Favorite Apps, and My Apps.The display will vary depending on your license and Roles.
Drag the slider downward to view the 3DDrive Widget under My Apps.
Click the 3DDrive Widget as illustrated.
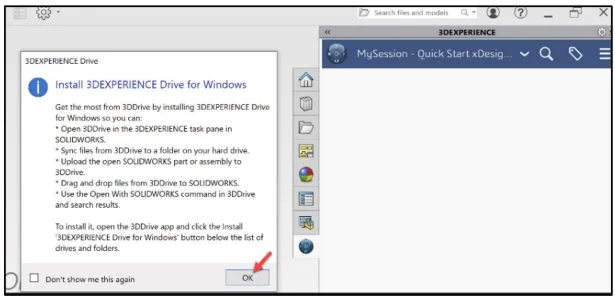
Read the provided information. Open 3DDrive in the 3DEXPERIENCE SOLIDWORKS Task Pane. 3DDrive auto-synchs to your local hard.
Click OK.
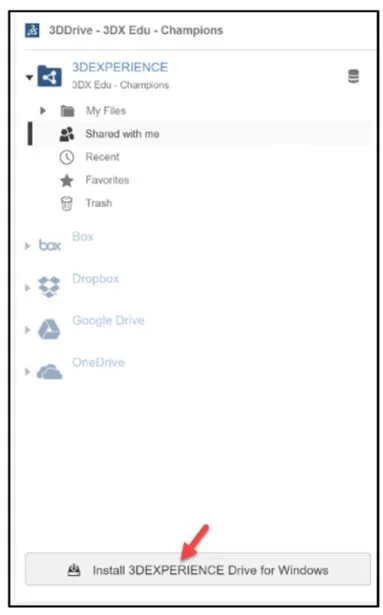
View the 3DDashboard for 3DDrive on the platform. Whatever you upload or save to 3DDrive will be stored in the “My Files” folder, and whatever is shared with you by others in a different 3DDrive will be stored in the “Shared with me” folder. Anything you discard will end up in the trash bin awaiting a final deletion. This gives you a second chance to consider whether you really want to delete a file.

3DEXPERIENCE Drive for Windows
Install 3DEXPERIENCE Drive for Windows on your machine.
Click Install 3DEXPERIENCE Drive for Windows.
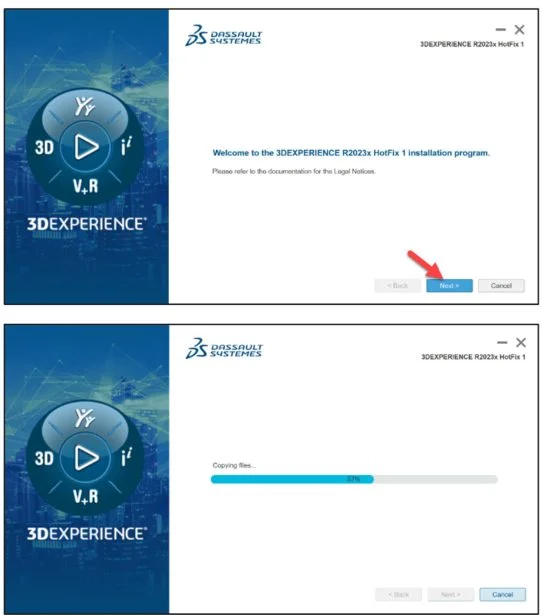
The Welcome to the 3DEXPERIENCE dialog box is displayed.
Click Next.
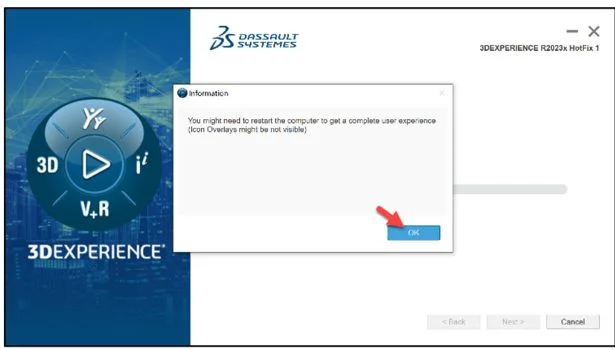
Read the message.
Click OK.
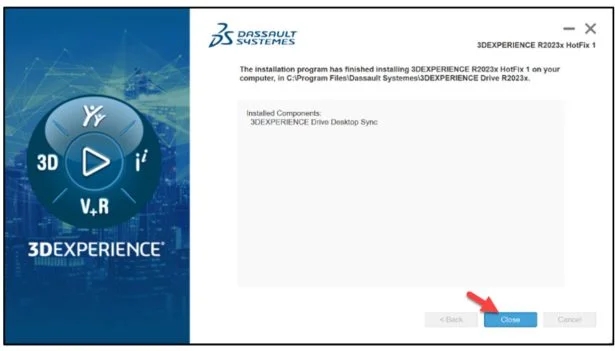
Installation is finished. The 3DDrive on the platform is auto-synched to your local hard drive. An Icon is created on your desktop.
Click Close.
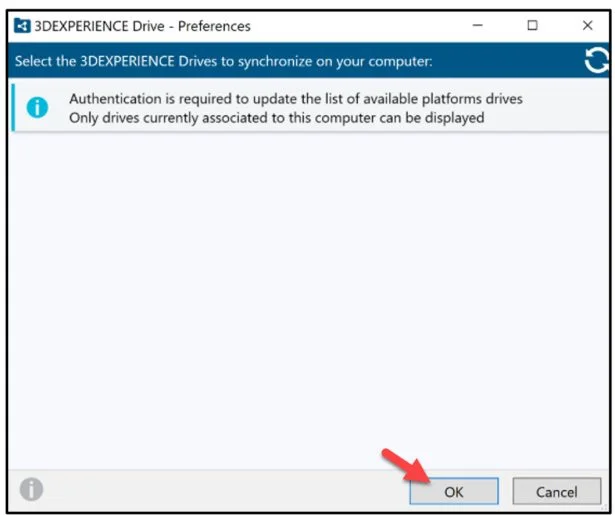
The 3DEXPERIENCE Drive – Preferences dialog box is displayed. Read the message.
Click OK.
Start SOLIDWORKS
Start a SOLIDWORKS session from your desktop.
Double-click the SOLIDWORKS icon.
View the illustration below. Depending on your system setup, cookies, and cache, it will be different.
Close the Welcome – SOLIDWORKS dialog box.
Click Close. If needed, Input the requested information. Click Accept All.
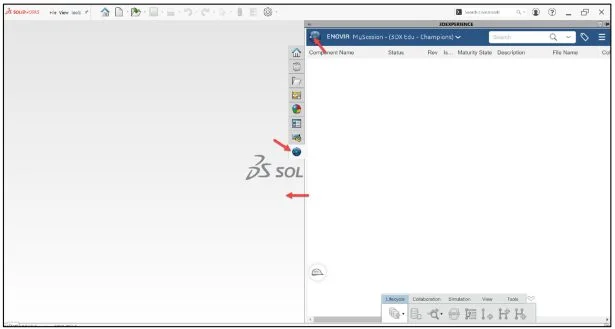
Click the 3DEXPERIENCE icon in the Task Pane. The MySession panel is displayed. This displays the two-way communication between SOLIDWORKS running on your desktop and the 3DEXPERIENCE platform running in the cloud, a single modeling environment.
The default Collaborative space for a student is named, Common Space.
Expand the Task Pane.
Click the center of the compass. The display will vary depending on your license and Roles
3DDrive Widget
Drag the slider downward to view the 3DDrive Widget under My Apps.
Click the 3DDrive Widget.
Expand the Task Pane.
The 3DDrive dialog box is displayed. You are inside of a SOLIDWORKS session.
Expand the 3DDrive dialog box.
Click Close.
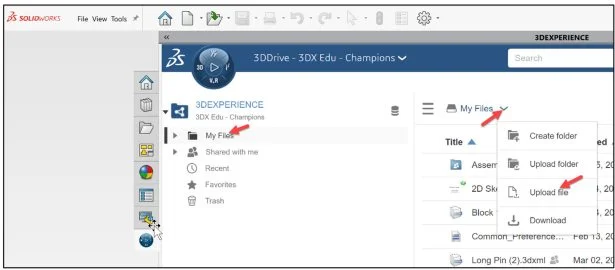
The My Files folder is selected by default.
Click the drop-down arrow next to My Files as illustrated. View your options: Create folder, Upload folder, Upload file and Download.
Click Upload file.
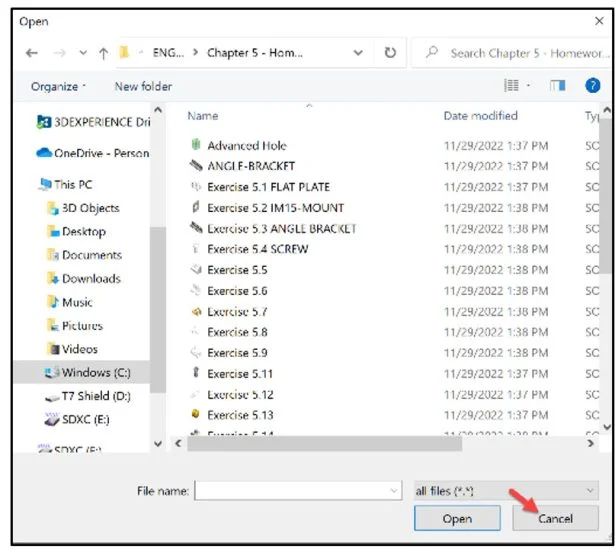
The Upload file command brings you directly to your local hard drive. 3DDrive on the platform is auto-synched to your local hard drive.
Click Cancel.
Note: Throughout the remainder of this lesson, examples are illustrated based on my model history.
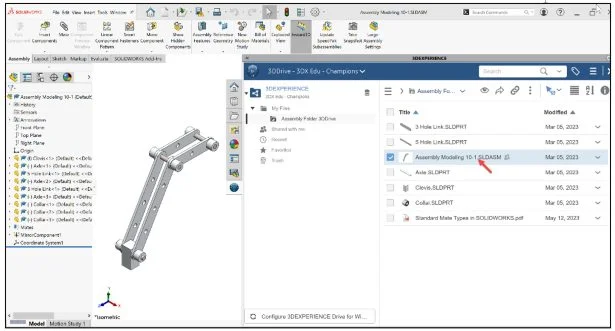
Expand the My Files folder. I have a sub-folder called Assembly Folder 3DDrive. Whatever you upload or save to 3DDrive will be stored in the “My Files” folder.
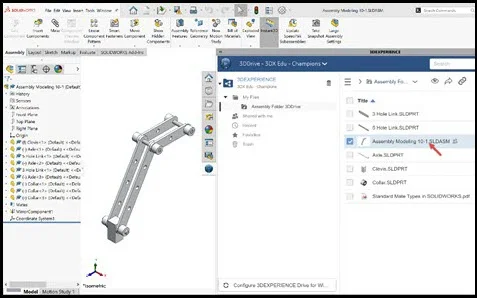
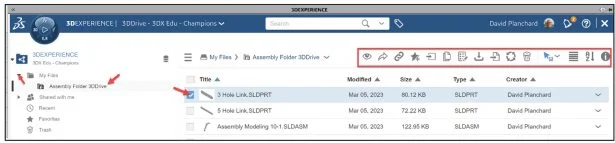
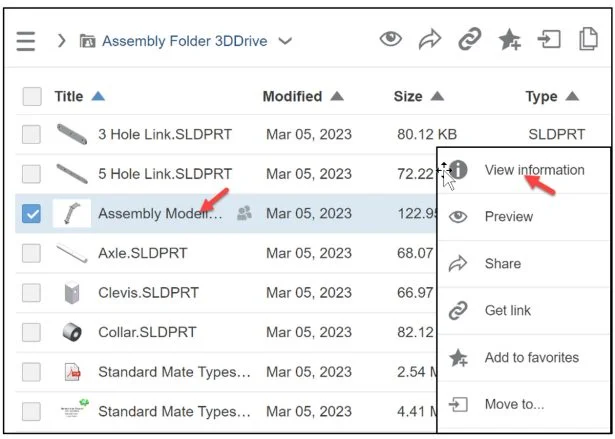
Click the Assembly Folder 3DDrive. View the files and documents in the folder.
Select the 3Hole Link (SOLIDWORKS part). View the available tools in the top menu area.
The tools from left to right are: Preview, Share, Get link, Add to favorites, Move to, Copy to, Change properties, Download, Insert, Update, Delete, Select/Unselect All, View, Sort and Information.
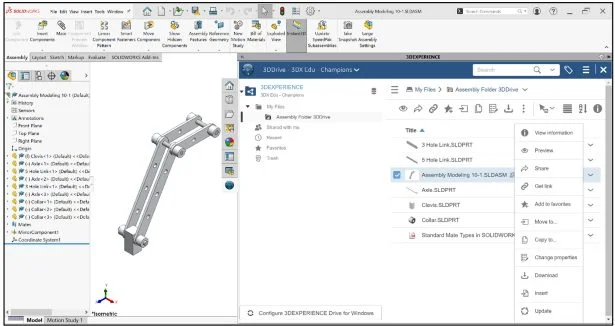
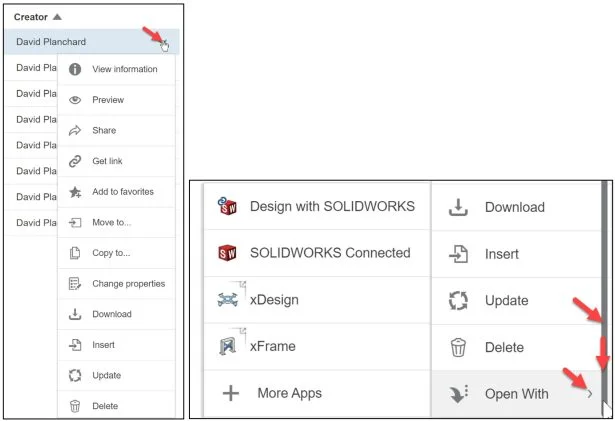
Click the drop-down arrow as illustrated. View the available tools: View information, Preview, Share, Get Link, Add to favorites, Move to, Copy to, Change properties, Download, Insert, Update, Delete, Open With (Design with SOLIDWORKS, SOLIDWORKS Connected, xDesign, xFrame, and More Apps). The More Apps tool brings you to your My Apps section under the 3DEXPERIENCE platform compass.
Deselect the 3Hole Link part.
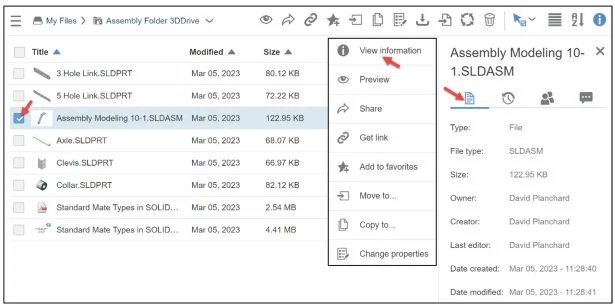
Select the Assembly Modeling 10-1 document.
Right-click Assembly Modeling 10-1. The Pop-up menu is displayed.
Select View Information.
The View Information box has four tabs: Properties (selected by default), History, Members and Comments. Use 3DDrive to share links, add members to links and view embedded design comments during the lifecycle process of the document.
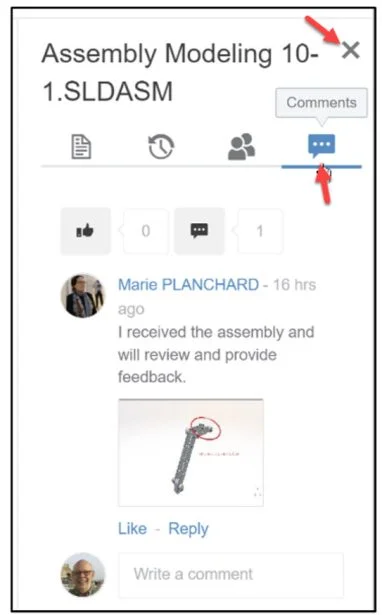
Click the Comments tab. I started a conversation to another engineer in my Collaborative space.
Close the Comments tab dialog box.
Click Close.
Let’s explore the Share feature.
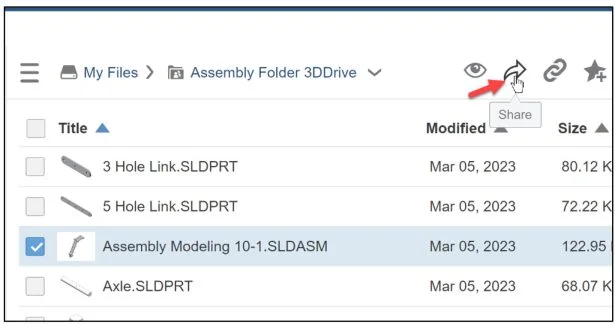
The Assembly Modeling 10-1 document is selected. Share the document.
Click Share as illustrated.
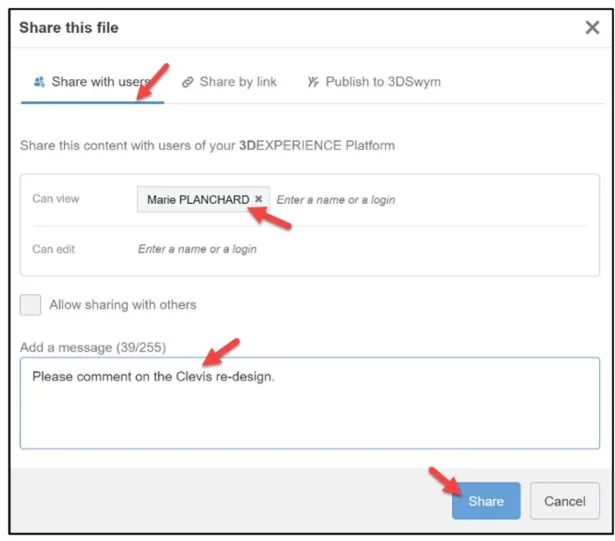
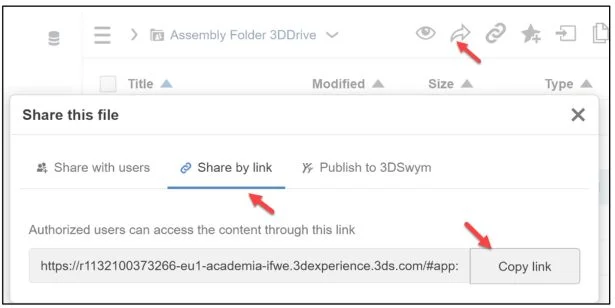
Share this file dialog box is displayed. There are three tabs: Share with users (selected by default), Share by a link, Publish to 3DSwym.
Use the Share with users tab to share files with members in your Collaborative space. Use Share by link to share a link (from the platform) to anyone outside of your Collaborative space. Use Publish to 3DSwym to start a conversation and collaborate on a post about your design. You can choose to publish as a post, a media, a question, or an idea.
In dialog box, I selected the Share with users tab. I entered Marie Planchard who is a member of my Collaborative space. I provided view rights.
Click Share.
The Member’s icon is displayed next to the Assembly Modeling 10-1 document.
Right-click Assembly Modeling 10-1. The Pop-up menu is displayed.
Click View Information.
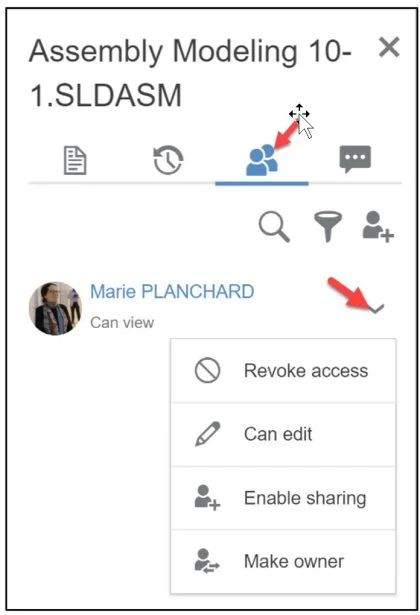
Click the Members tab.
Click the down-arrow.
View the available tools: Revoke access, Can edit, Enable sharing (with others), Make owner. Note: When the sharing of the link is finished, you can remove the person. No file is provided. This ensures security on the platform of your design.
Close the Members tab dialog box.
Click Close.
Assembly Modeling 10-1 is selected. Create a link to the assembly for someone outside of your Collaborative space.
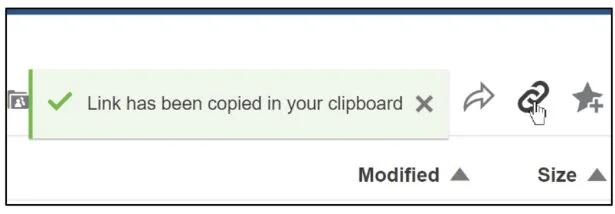
Click Get link as illustrated.

The Link is generated and is copied to your clipboard.
Use Paste from MS Word (Ctrl-P) to insert the link into an email.
Note: You can also click the Share icon as illustrated and click the Share by link option.
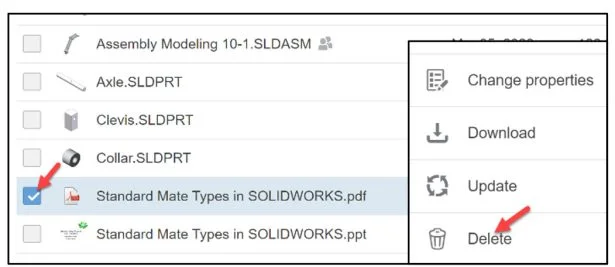
Delete a file from 3DDrive.
Select a file.
Right-click Delete from the Pop-up menu.
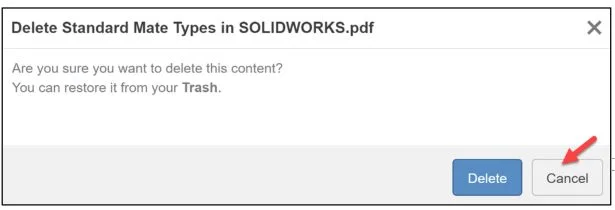
The Delete dialog box is displayed. Note: You can restore an item from Trash.
Click Cancel.
Restore a deleted a file from 3DDrive.
Click the Trash icon.
Right-click the file that you want to restore in the 3DDrive.
Click Restore from the Pop-up menu.
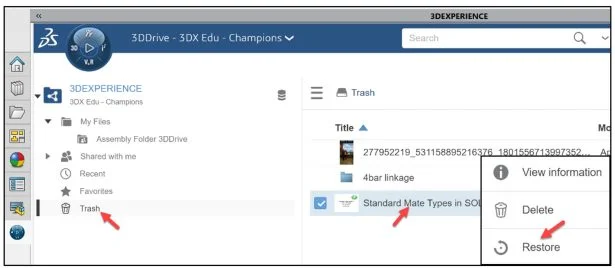
The file is restored in the 3DDrive.
Open a part or assembly directly in your SOLIDWORKS session.
Double-click the part or assembly from the My Files folder.
The part or assembly is displayed in the SOLIDWORKS Graphics area.
We are finished with this lesson.
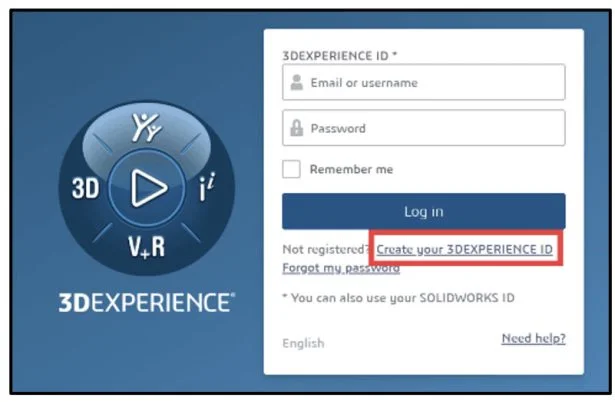
Academic Community: After you create a 3DEXPERIENCE ID, Educators, can get more information on SOLIDWORKS and the 3DEXPERIENCE Platform. Request to join the 3DEXPERIENCE Academic Community for free at go.3ds.com/academiccommunity.
Student Community: Students, join the student community for free at go.3ds.com/studentcommunity. Check out great posts on Mechanism Mondays, FEA Fridays, Solid Saturdays (animations), Formula Student and Formula SAE exercises.
Check out other lessons in this series:
3DEXPERIENCE Works Lesson 1: Getting Started with SOLIDWORKS and the Platform
3DEXPERIENCE Works Lesson 2: SOLIDWORKS and Save and Revision
3DEXPERIENCE Works Lesson 3: SOLIDWORKS and Bookmarks, Share and Delete
3DEXPERIENCE Works Lesson 4: SOLIDWORKS and Lifecycle Maturity States
3DEXPERIENCE Works Lesson 5: SOLIDWORKS, Collaborative Space and Bookmarks
3DEXPERIENCE Works Lesson 6: SOLIDWORKS with Search Tools
3DEXPERIENCE Works Lesson 7: SOLIDWORKS with 3DPlay
Design well, Marie