
After teaching 1000’s of students and writing about SOLIDWORKS for over 25 years, David Planchard, emeritus WPI, is exploring SOLIDWORKS desktop and the integrated 3DEXPERIENCE Platform. Through the 3DEXPERIENCE Works Lesson series, David helps educators understand the 3DEXPERIENCE Add-In with simple examples and industry practices. The Platform offers are available thru your Education Partner (VAR).
What is 3DPlay? Why would I want to use 3DPlay? Is it useful in a classroom or team environment?
3DPlay is the universal player and viewer on the 3DEXPERIENCE platform. Use 3DPlay to view 3D models, image files, PDFs, 2D drawings, Power point presentations, and assembly instruction files.
For design reviews, 3DPlay provides the ability to explode and collapse components in the assembly while making hand or typed markups and measurements. There are various Section tools to view the internals of a complex assembly.
When the 3DPlay link is shared with people outside of your team/platform via another App called 3DDrive, 3DPlay is INCLUDED. This provides someone who has no roles and isn’t even associated with your platform the ability to view the link and even mark it up during the review or quote process.
When the sharing of the link is finished, you can remove the outside person. No file is provided. This ensures security on the platform of your design.
If your students use SOLIDWORKS edrawings, the 3DPlay tools will be familiar.
Open SOLIDWORKS directly from your computer. Open a SOLIDWORKS assembly that has not been previously uploaded or saved to the platform. View the 3DEXPERIENCE Add-Ins on your SOLIDWORKS desktop.
Access the 3DPlay Widget. View your default or created Dashboard on the platform. View and explore various tools in the Action bar.
Note: This lesson is written for an individual Member, who has permission, with their own computer. For computer lab installation, contact your Value Added Reseller (Partner).
Before we start, there are a few items that you need to know.
In this lesson, use your default Collaborative space named “Common Space”. An internet connection is required. Note: 3DDrive is required to share the link. 3DDrive is addressed in the next lesson.
Login to the 3DEXPERIENCE platform
3DEXPERIENCE Launcher needs to be installed. 3DEXPERIENCE Works Lesson 1: Getting Started with SOLIDWORKS.
The 3DEXPERIENCE platform is browser driven. Your existing cookies and cache determine what you will see on your computer desktop or during a SOLIDWORKS login. A full installation of SOLIDWORKS 2019 SP0 or later is required .
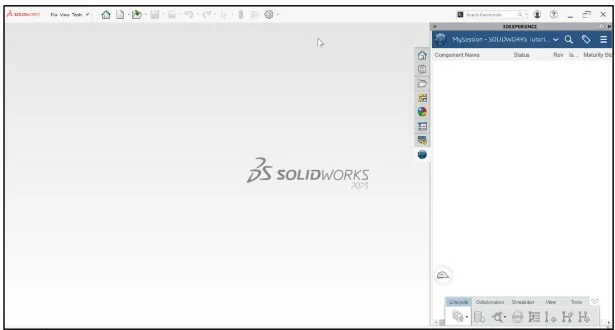
Start SOLIDWORKS
Start a SOLIDWORKS session from your desktop.
Double-click the SOLIDWORKS icon.
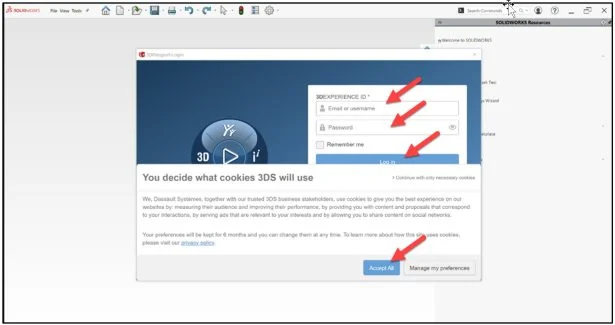
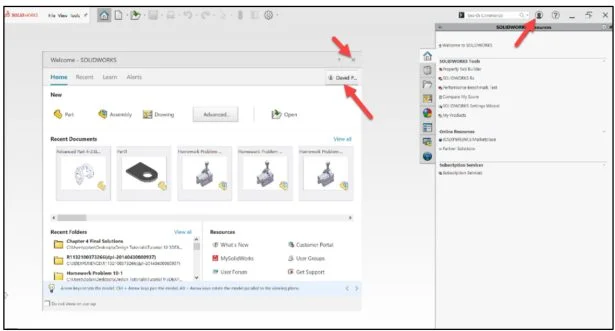
View the illustration below. Depending on your system setup, cookies, and cache, it will be different. Read the provided information.
Input the requested data.
Click Accept All.
The Welcome – SOLIDWORKS dialog box is displayed.
You are logged into the 3DEXPERIENCE platform.
Close the Welcome dialog box.
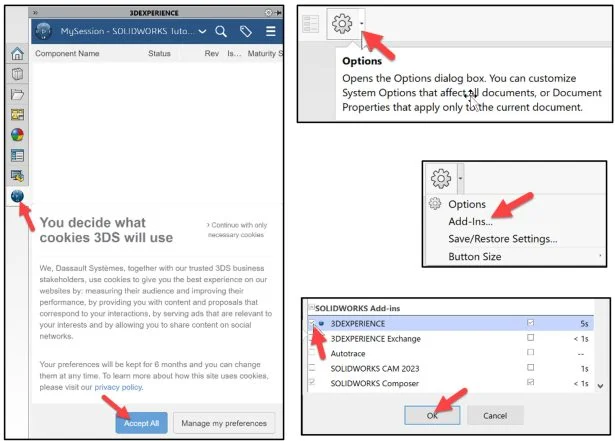
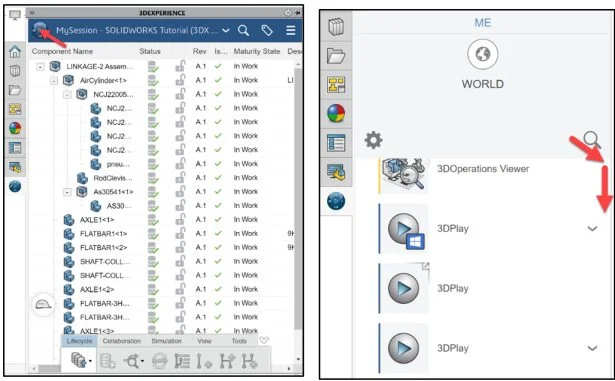
Click the 3DEXPERIENCE icon in the Task Pane. The MySession panel is displayed. This displays the two-way communication between SOLIDWORKS running on your desktop and the 3DEXPERIENCE platform running in the cloud.
The default Collaborative space for a student is named, Common Space. In this lesson, I’m using a Collaborative space named SOLIDWORKS Tutorials.
Note: If you do not see the 3DEXPERIENCE icon, click the Options drop-down arrow, click Add-Ins, check the 3DEXPERIENCE box, click OK, from the SOLIDWORKS Main menu.
Click Accept All.
Download and open LINKAGE-2 assembly
Download the SOLIDWORKS assembly, LINKAGE-2 to follow along with this lesson.
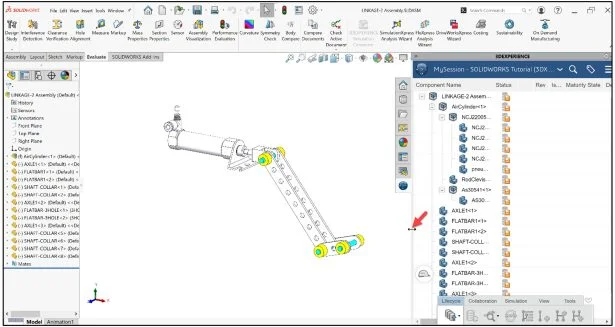
Open the SOLIDWORKS assembly that has not been previously uploaded or saved to the 3DEXPERIENCE platform.
Expand the Task Pane bar. The MySession panel displays a tree view of the active file and a list of commands that can be accessed through the Action bar and context menu.
Save to the 3DEXPERIENCE platform
Save the assembly to the 3DEXPERIENCE platform.
Click Save Active Window from the Lifecycle tab in the Action bar
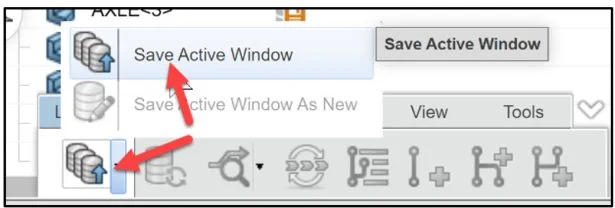
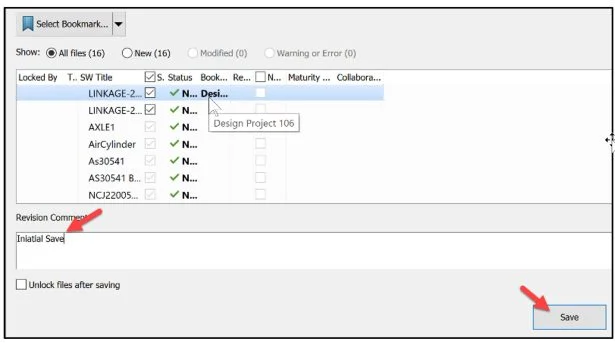
The Save to 3DEXPERIENCE dialog box and PLM attributes are displayed. The PLM attributes include: Bookmark, Revision, Maturity State, Collaborative Space, and Reservation Owner.
Save the model. Use your existing Collaborative space.
Create a new Bookmark
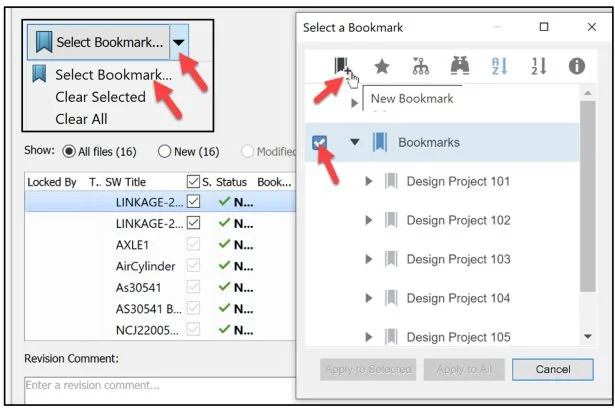
Click the Select Bookmark down arrow.
Click Select Bookmark. The Select a Bookmark dialog box is displayed.
Select the Bookmarks box as illustrated.
Click the New Bookmark icon. The below illustration displays a few of my created Bookmarks.
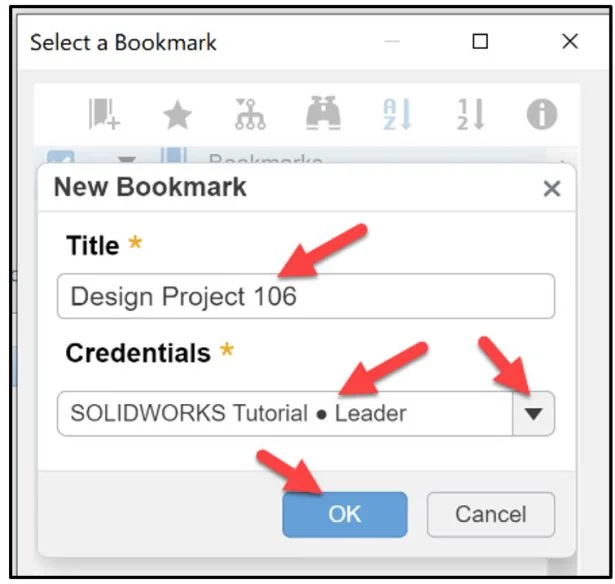
Enter Design Project 106 for New Bookmark Title.
Select your Collaborative space (Credentials) if you have the rights.
Click OK.
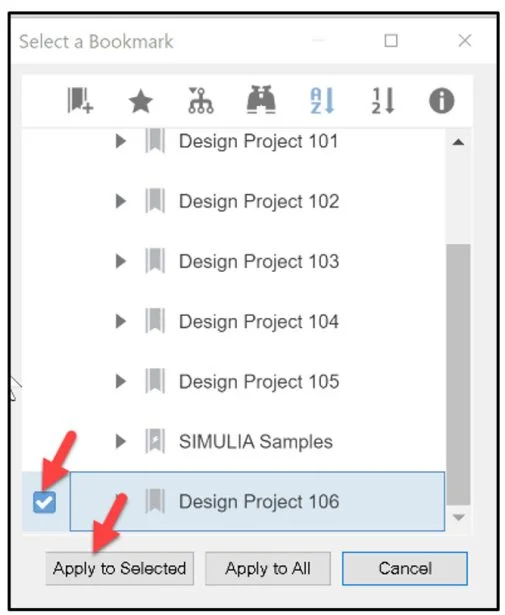
Bookmark Design Project 106 is created.
Select Design Project 106.
Click Apply to Selected.
Hover over the Bookmarks column. Design Project 106 is displayed.
Enter Revision Comment.
Enter Initial Save.
Click Save.
The files are directly loaded into your Collaborative space and Bookmarked on the 3DEXPERIENCE platform. You are returned back to your SOLIDWORKS session.
View the columns in the updated MySession panel.
Introducing 3DPlay
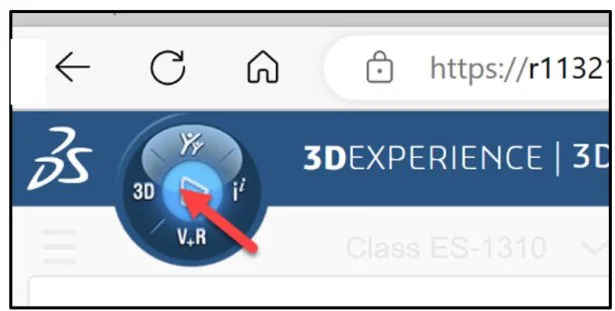
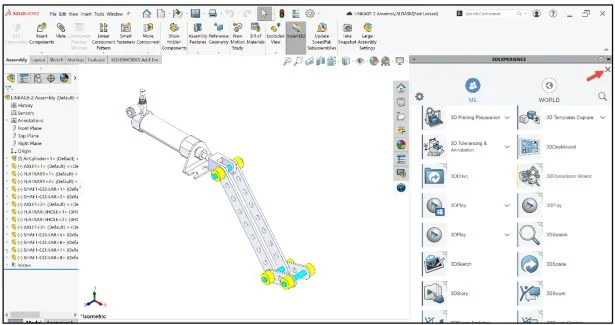
Click the center of the Compass. View your available Roles, Cockpits, My Favorite Apps, and Apps. The display will vary depending on your license and Roles.
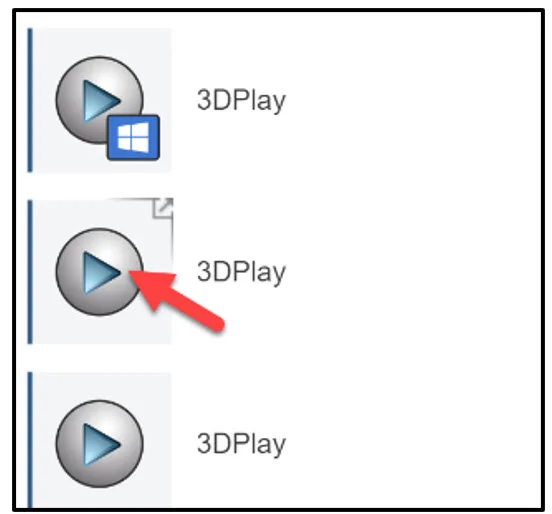
Drag the slider downward to view the 3DPlay for Windows store icon, the 3DPlay Widget icon and the 3DPlay App icon. A Widget is an extension of the App that allows you to use it in the Dashboard. An App cannot be used in a Dashboard. A Widget is displayed with an arrow in the upper right corner of the icon as illustrated.
In this lesson use the 3DPlay Widget.
Click the 3DPlay Widget icon.
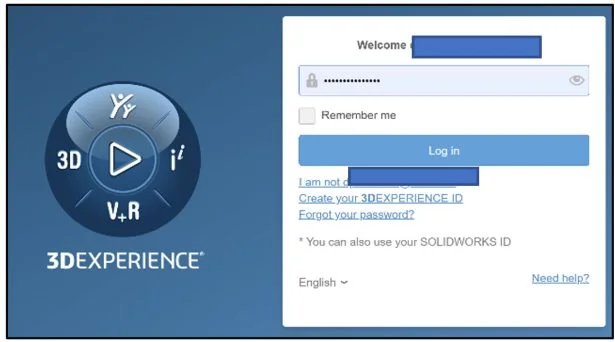
Login to the 3DEXPERIENCE platform.
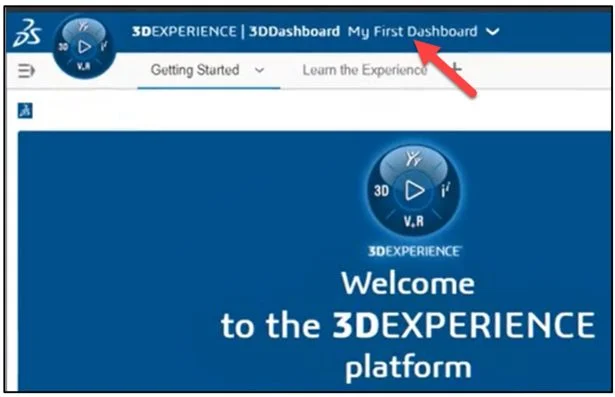
You are brought into the 3DEXPERIENCE / 3DDashboard which you created, or a general Dashboard (My First Dashboard) per your license type. You were provided with a general 3DEXPERIENCE Dashboard at your initial login to the 3DEXPERIENCE platform. The name of the Dashboard was My First Dashboard. See 3DEXPERIENCE Works Lesson 1: Getting Started with SOLIDWORKS and the Platform.
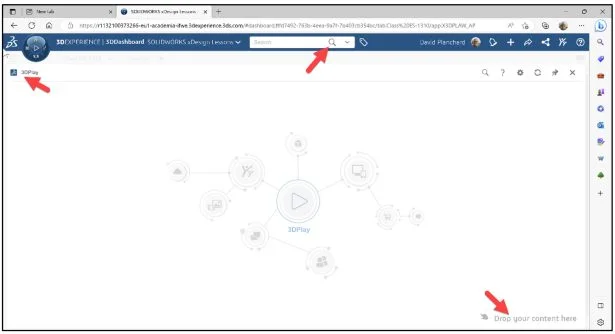
You can either Drop your content into the 3DPlay area from your Dashboard or use the Search tool to locate your content on the platform.
In this lesson, use Search to locate the content on the 3DEXPERIENCE platform.
Enter LINKAGE-2 Assembly in the Search box.
Click Search.

Select the LINKAGE-2 Assembly box. A checkmark is displayed.
Right-click in the LINKAGE-2 Assembly box. View your options.
Select Open With. Click 3DPlay.

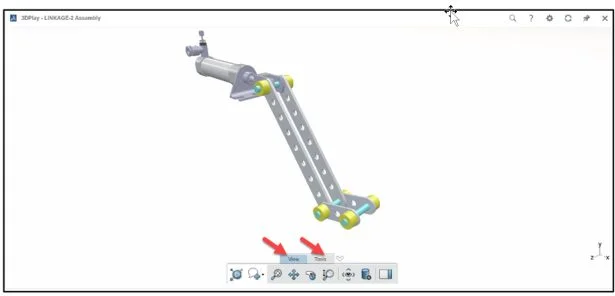
The 3DPlay area is displayed. The Action bar has two tabs: View and Tools. In this lesson, we will explore various tools in 3DPlay.
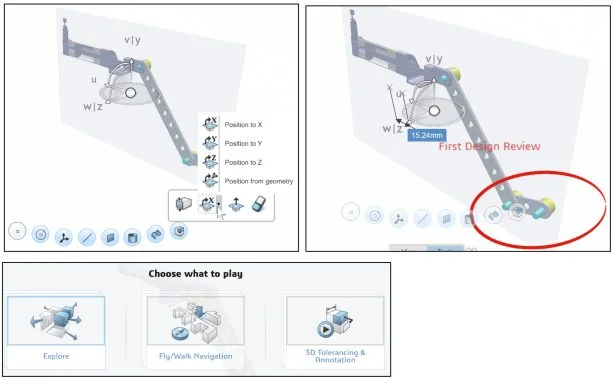
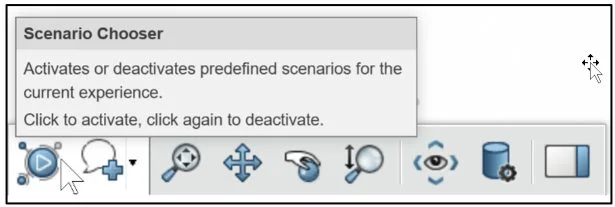
The first tool under the View Tab in the Action bar is Scenario Chooser. There are different scenarios to select from: Explore, Fly/Walk Navigation, 3D Tolerancing & Annotation.
3DPlay View Tab
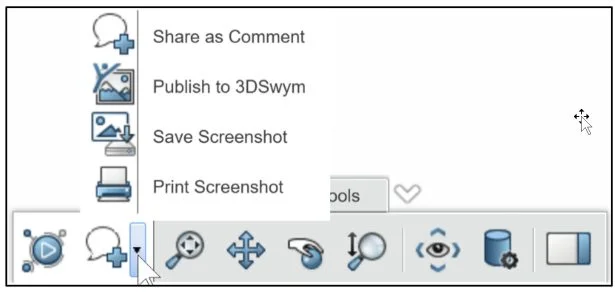
The second tool under the View Tab in the Action bar is Share as Comment.
Expand the drop-down arrow to view three additional tools: Publish to 3DSwym, Save Screenshot and Print Screenshot.
3DPlay provides the ability to share these files with other team members in a secure cloud environment. There are several sharing collaboration options within 3DPlay. One of them is Share to 3DSwym. A Swym community is a place where you start the conversation and collaborate on a post about your design. You can choose to publish as a post, a media, a question, or an idea.
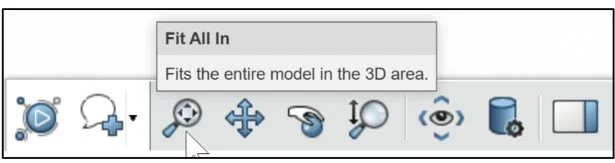
The third tool under the View Tab in the Action bar is Fit All in. This tool provides the same function as pressing the f key in SOLIDWORKS.
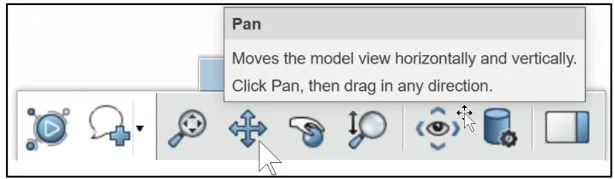
The fourth tool under the View Tab in the Action bar is Pan. SOLIDWORKS has the same tool.
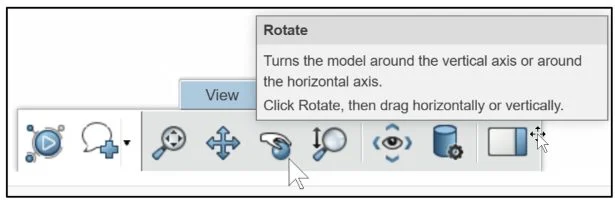
The fifth tool under the View Tab in the Action bar is Rotate. SOLIDWORKS has the same tool.
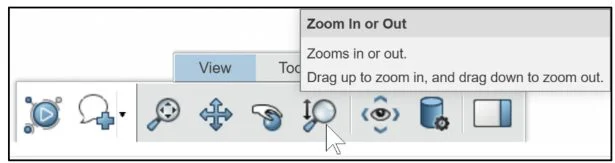
The sixth tool under the View Tab in the Action bar is Zoom in or out, similar to SOLIDWORKS.
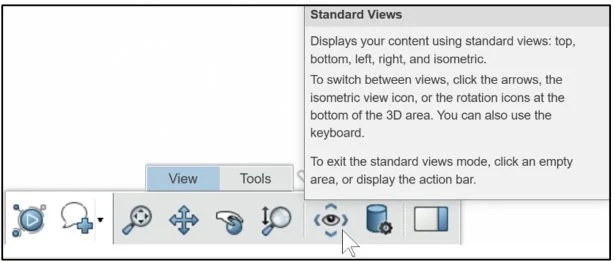
The seventh tool under the View Tab in the Action bar is Standard Views, similar to SOLIDWORKS.
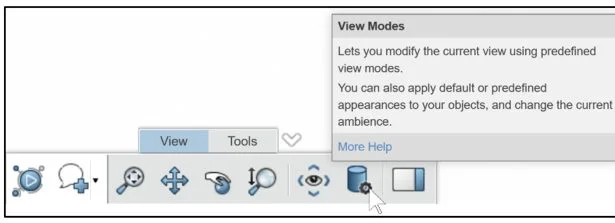
The eighth tool under the View Tab in the Action bar is View Modes.
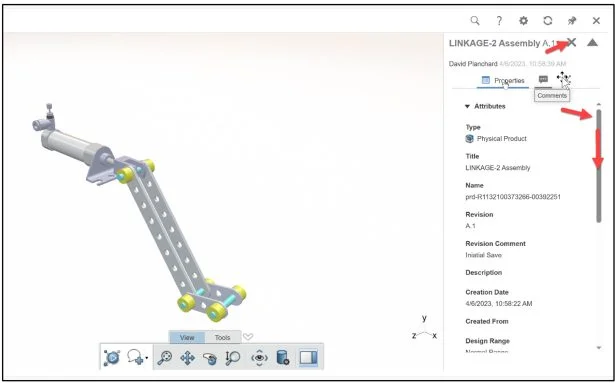
The last tool under the View Tab in the Action bar is Display Side Panel.
Click Display Side Panel from the Action bar.
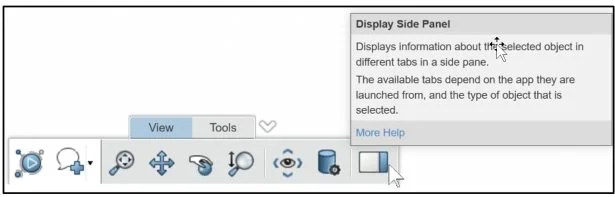
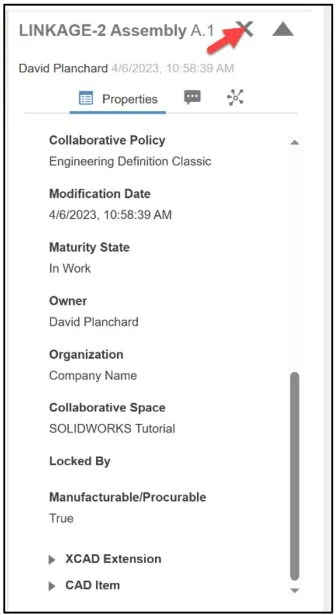
View the information in the Side Panel. The platform provides the ability to search by the auto generated embedded model properties of the document. Search by Description, Name, Owner, Creation date, etc.
Drag the slider downward to view addition information.
Return to the original 3DPlay window.
Click Close.
The 3DPlay area is displayed.
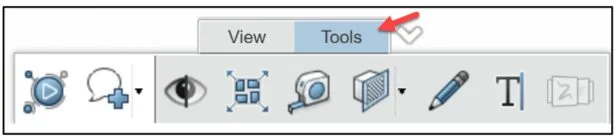
3DPlay Tools Tab
Click the Tools tab in the Action bar.
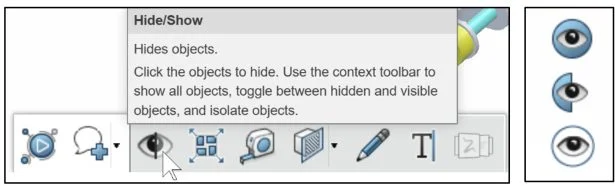
The first tool under the Tools tab is Hide/Show. Hide/Show has three options: Show All, Swap Visibility and Isolate.
The second tool under the Tools tab is Explode.
Click Explode from the Tools tab. Use the Explode arrow bar to explode and collapse the assembly or click and drag a single component.
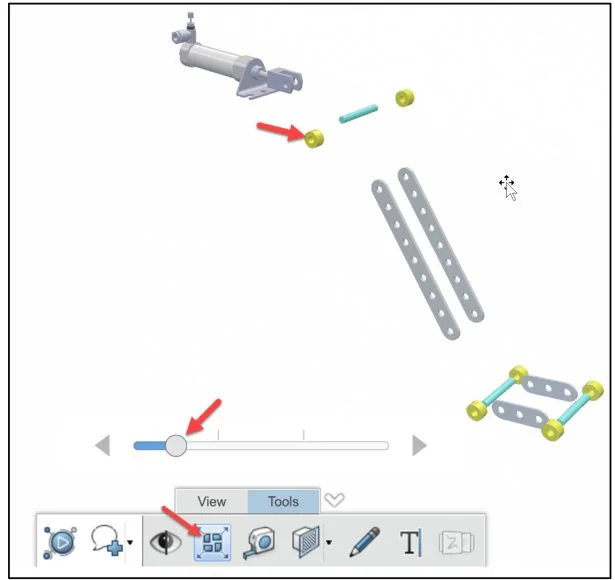
Collapse the assembly. Return to the original 3DPlay window.
Click Explode from the Tools tab.
The third tool under the Tools tab is Measure.
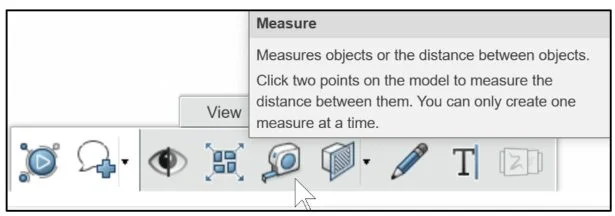
Click the Measure tool.
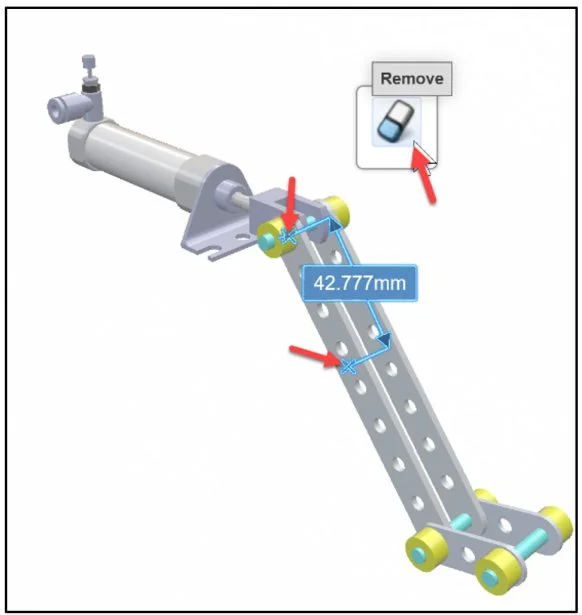
Click a point on the first 9 HOLE Flatbar.
Click a point on the first Shaft Collar. View the results.
Click the Remove icon to return to the original 3DPlay window.
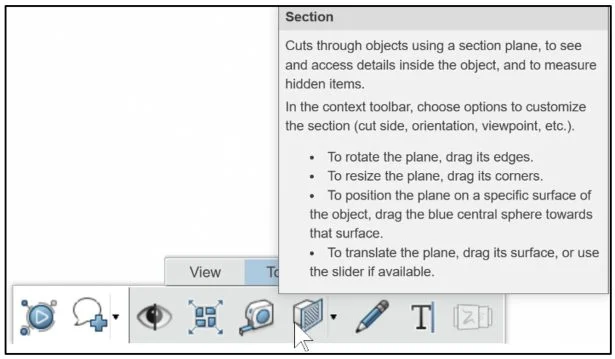
The fourth tool under the Tools tab is Section. Expand the drop-down arrow to view an additional tool: Hide or Show Section Plane. The Section tool provides the ability to cut into the model. Set the plane orientation with a Pop-up tool, then drag the plane to dynamically view inside.
Section the assembly.
Click Section from the Tools tab.
View the available tools. Return to the original 3DPlay window.
Click the Remove icon.
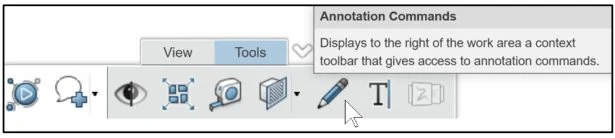
The fifth tool under the Tools tab is Annotation Commands. This tool provides the ability to add typed or handwritten notes. Draw on the screen with a mouse, pen or finger. Note: a touch screen is required.
Click the Annotation Commands tool. View your options.
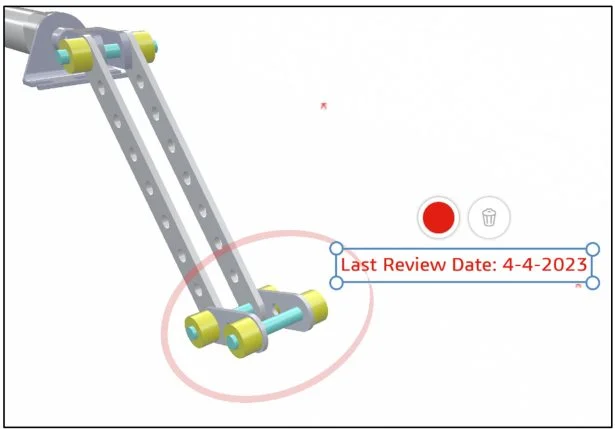
Draw a circle around the bottom section of the assembly as illustrated. Use the Erase icon to erase your annotations. Return to the original 3DPlay window.
Click Exit.
The sixth tool under the Tools tab is Text Annotation Command.
Click the Text Annotation Command. View your options.

Enter Text
Return to the original 3DPlay window
Click in the Graphs area.
The last tool under the Tools tab is the Annotation Tour. This tool provides the ability to switch from one annotation viewpoint to another.

Return to SOLIDWORKS
Return to your SOLIDWORKS desktop session
Click the center of the compass from your 3DDashboard. View your available Roles, Cockpits, My Favorite Apps, and My Apps. The display will vary depending on your license and Roles.
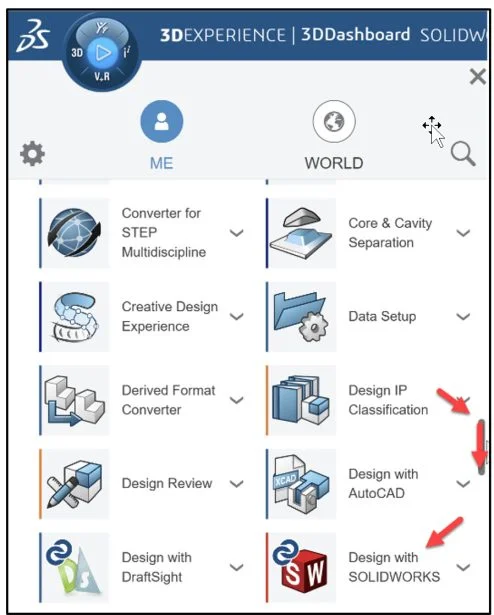
Drag the slider downward to view your available Roles, Cockpits, My Favorite Apps, and Apps. The display will vary depending on your license and Role.
Click Design with SOLIDWORKS.
You are returned to your SOLIDWORKS session.
Click Close.
We are finished with this lesson. In the next lesson we will explore 3DDrive.
Community
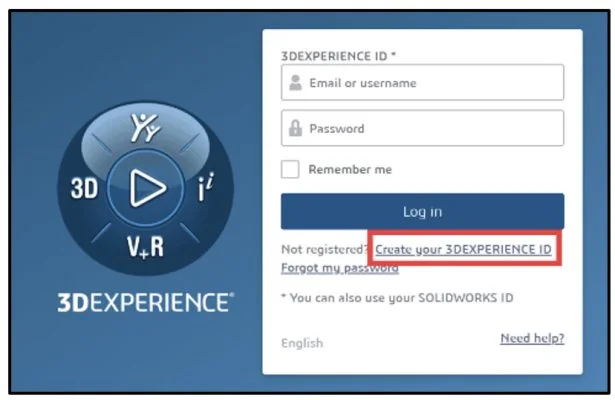
Academic Community: After you create a 3DEXPERIENCE ID, Educators, can get more information on SOLIDWORKS and the 3DEXPERIENCE Platform. Request to join the 3DEXPERIENCE Academic Community for free at go.3ds.com/academiccommunity.
Student Community: Students, join the student community for free at go.3ds.com/studentcommunity. Check out great posts on Mechanism Mondays, FEA Fridays, Solid Saturdays (animations), Formula Student and Formula SAE exercises.
More to Explore
Other lessons in this series are:
3DEXPERIENCE Works Lesson 1: Getting Started with SOLIDWORKS and the Platform
3DEXPERIENCE Works Lesson 2: SOLIDWORKS and Save and Revision
3DEXPERIENCE Works Lesson 3: SOLIDWORKS and Bookmarks, Share and Delete
3DEXPERIENCE Works Lesson 4: SOLIDWORKS and Lifecycle Maturity States
3DEXPERIENCE Works Lesson 5: SOLIDWORKS, Collaborative Space and Bookmarks
3DEXPERIENCE Works Lesson 6: SOLIDWORKS with Search Tools
Design well, Marie