
After teaching 1000’s of students and writing about SOLIDWORKS for over 25 years, David Planchard, emeritus WPI, is exploring SOLIDWORKS desktop and the integrated 3DEXPERIENCE Platform. Through the 3DEXPERIENCE Works Lesson series, David helps educators understand the 3DEXPERIENCE Add-In with simple examples and industry practices. The Platform offers are available thru your Education Partner (VAR).
Why should I care about using the new Search tools on the 3DEXPERIENCE platform?
Using the traditional Windows Explorer search tools are limited in a CAD environment. There are numerous times that my students do not remember their naming system or where they stored their models. Conventional Save tools in SOLIDWORKS do not capture many key PLM attributes.
My Electric FSAE team tries to find previous year’s models, design specifications, and identify the last student who worked on the files (for contact purposes).
In this lesson, we will address how to open a file (using the Browser) within SOLIDWORKS. To open a file in the Browser requires searching for the file. No Apps are required. It should remind you of using Google or any other search engine.
View the searchable metadata that is automatically generated and embedded in each model.
Search by Description, Name, Owner, Creation date, etc. Use 6W Tags (What, Who, When, Where, How and Why). Perform source searches using Collaborative spaces, Communities, 3DDrive and more. Search by Type: Physical Product, 3D Shapes, Documents, 2D Component Templates and 3D Annotations.
The entire lesson is within the SOLIDWORKS environment connected to the 3DEXPERIENCE platform. Experience a single modeling environment.
There are three different user types when using 3DEXPERIENCE: Administrator, Member (student), and Administrator/Member (educator). This lesson is written for an individual Member, who has permission, with their own computer. For computer lab installation, contact your Value Added Reseller (Partner).

Before we start, there are a few items that you need to know.
In this lesson, use your default Collaborative space named “Common Space”. An internet connection is required.
Login to the 3DEXPERIENCE Platform
3DEXPERIENCE Launcher needs to be installed. 3DEXPERIENCE Works Lesson 1: Getting Started with SOLIDWORKS and the Platform.
The 3DEXPERIENCE platform is browser driven. Your existing cookies and cache determine what you will see on your computer desktop or during a SOLIDWORKS login. A full installation of SOLIDWORKS 2019 SP0 or later is required.
Start a SOLIDWORKS session from your desktop.
Double-click the SOLIDWORKS icon.
View the illustration below. Depending on your system setup, cookies, and cache, it will be different.
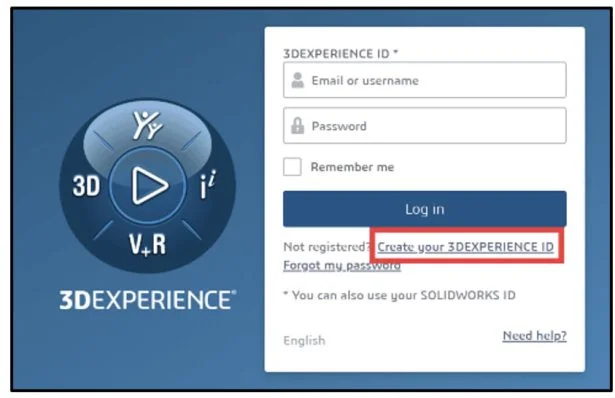
Input the requested information.
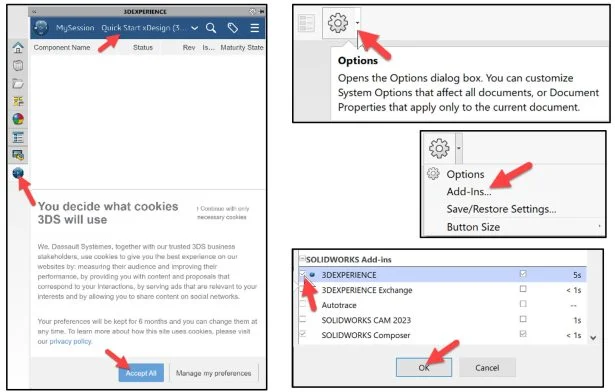
Click Accept All.

The Welcome – SOLIDWORKS dialog box is displayed.
You are logged into the 3DEXPERIENCE platform.
Close the Welcome dialog box.

Click the 3DEXPERIENCE icon in the Task Pane. The MySession Panel is displayed. This displays the two-way communication between SOLIDWORKS running on your desktop and the 3DEXPERIENCE platform running in the cloud, a single modeling environment.
The default Collaborative space for a student is named, Common Space. I’m using a created Collaborative space named Quick Start xDesign.
Note: If you do not see the 3DEXPERIENCE icon, click the Options drop-down arrow, click Add-Ins, check the 3DEXPERIENCE box, click OK, from the SOLIDWORKS Main menu.
Click Accept All.
Open a New Part in SOLIDWORKS.
Click File, Open from the Main menu.
Double-click Part from the New SOLIDWORKS Document dialog box. Part1 is displayed in the FeatureManager and in the MySession Panel.
Using Search
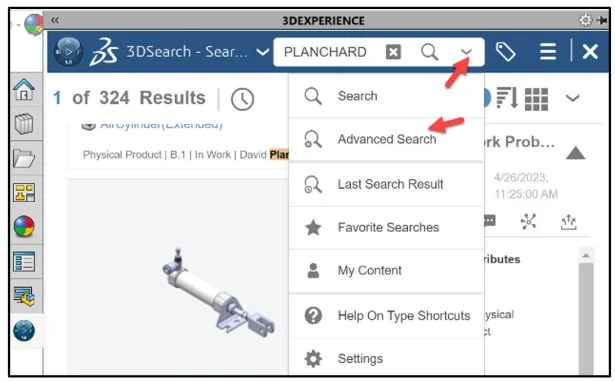
Click the Search icon in the MySession Panel. This displays the last few searched items on the 3DEXPERIENCE platform.
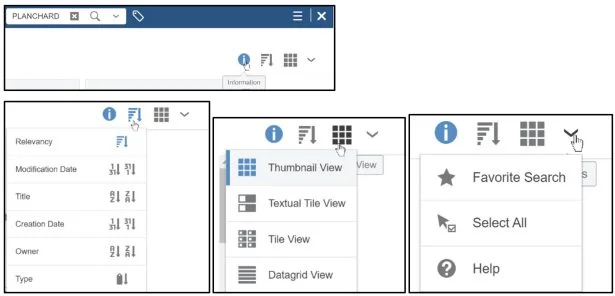
Click the Search drop-down arrow as illustrated. View the additional tools.
Use the standard Search box. Locate files or folders created by a person.
Enter the last name in the Search box. In this example, I used my last name. Note: Throughout the remainder of this lesson, examples are illustrated based on my model history.
Click Search. Platform information is loaded. The 3DSearch dialog box is displayed.
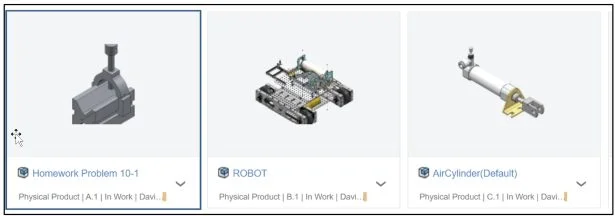
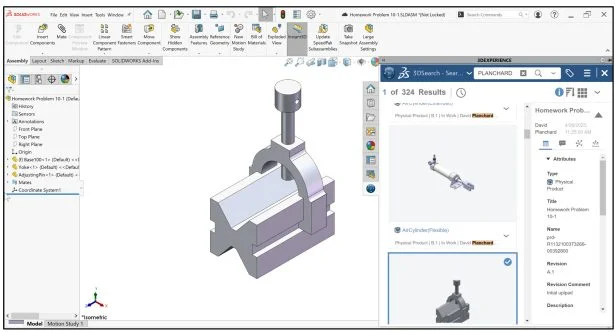
Expand the Task Pane in your SOLIDWORKS session. View the results.
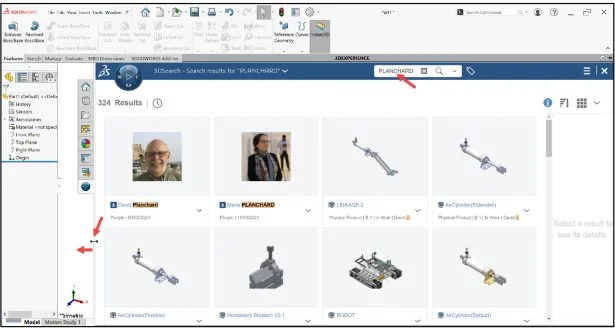
The large Thumbnail view icons display general searchable metadata that is automatically generated and embedded in each model when saved to the platform.
General information is displayed, Model name, Physical Product, Revision, Maturity Status, and Owner.
The 3DSearch dialog box displays four icons in the upper-right hand corner; Information, Sort, Thumbnail View and Actions.
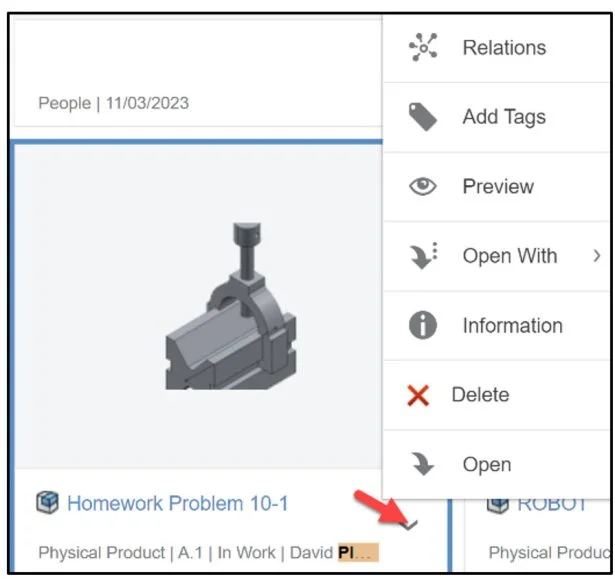
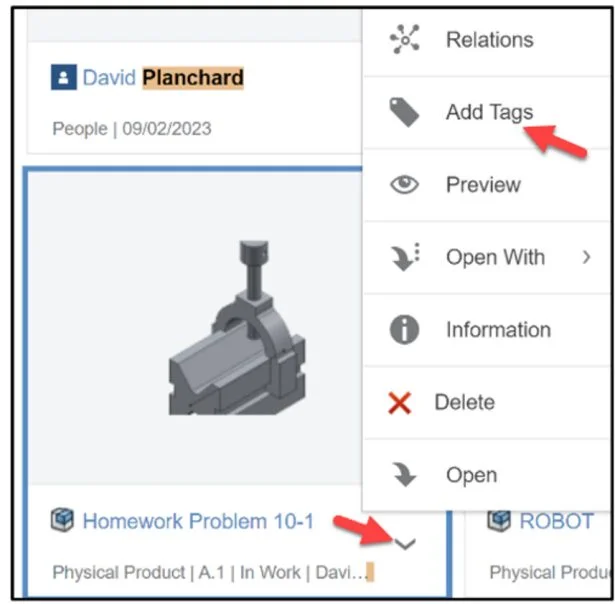
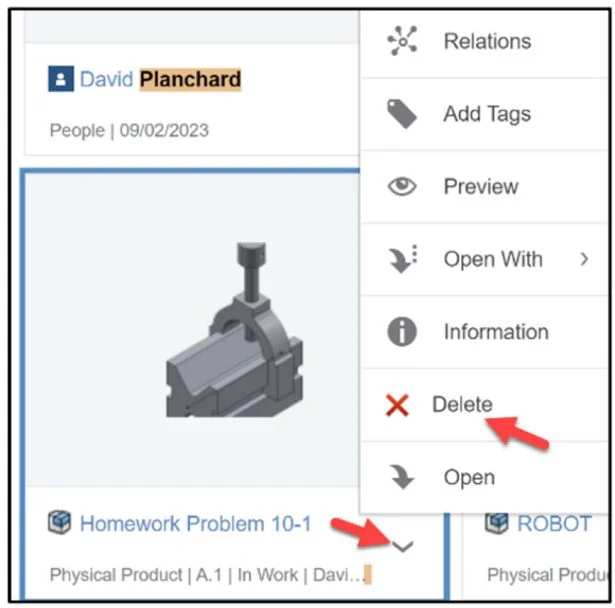
Click the drop-down arrow in one of the Thumbnail view icon boxes.
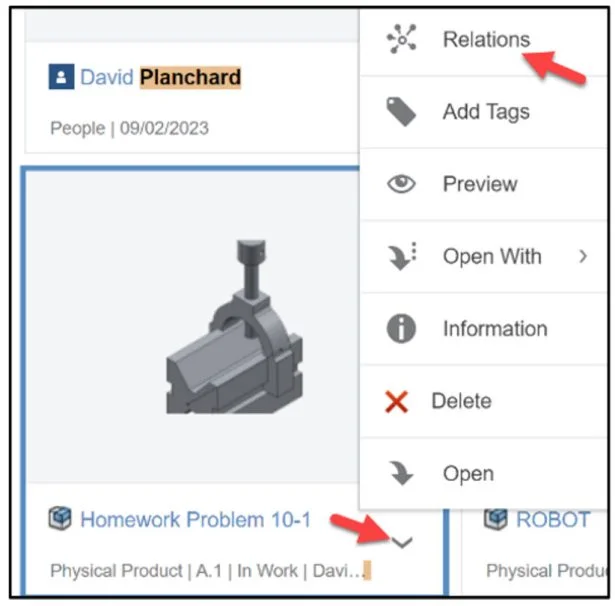
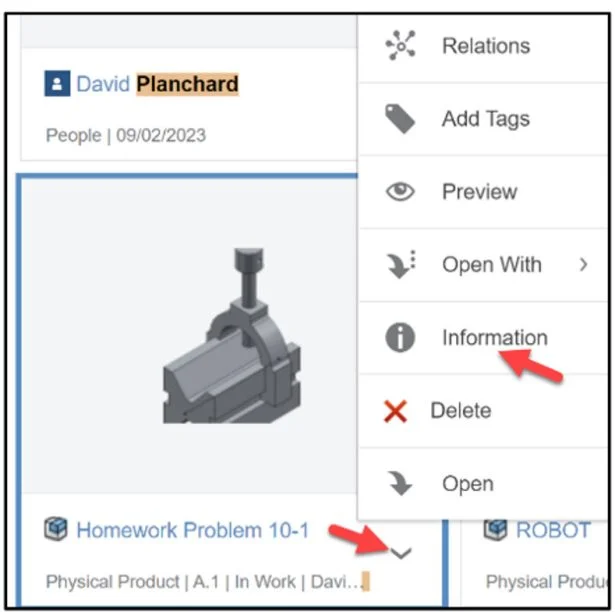
Additional tools are displayed; Relations, Add Tags, Preview, Open With, Information, Delete and Open.
Click Relations.
All Relations
The All Relations dialog box is displayed. The Relations tool provides the ability to view Active Member and Bookmarked locations, view and open children of the parent with 3D Markup, 3D Navigate, 3DPlay, Design with SOLIDWORKS and More Apps. The More Apps option brings you to your My Apps section under the 3DEXPERIENCE platform compass. Note: By default, the information is displayed in a Graph view.
Click the Plus icon on the left. Two objects are displayed: Active Member and Bookmarked locations. Click the Plus icon on the right. Three objects are displayed: 3 Children of the parent.
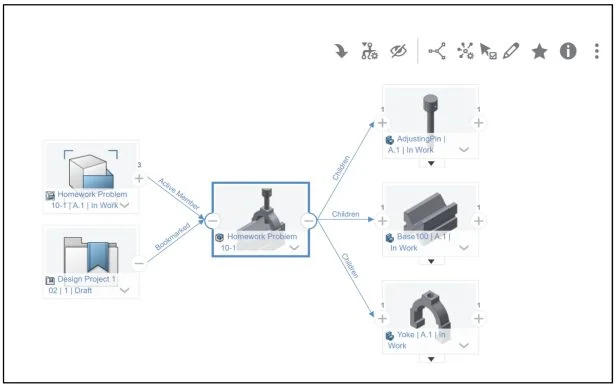
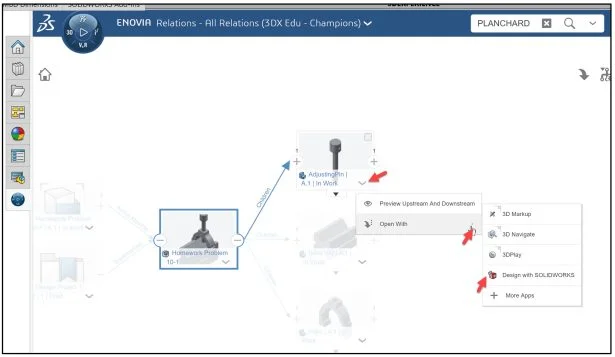
Click the drop-down arrow of the AdjustingPin.
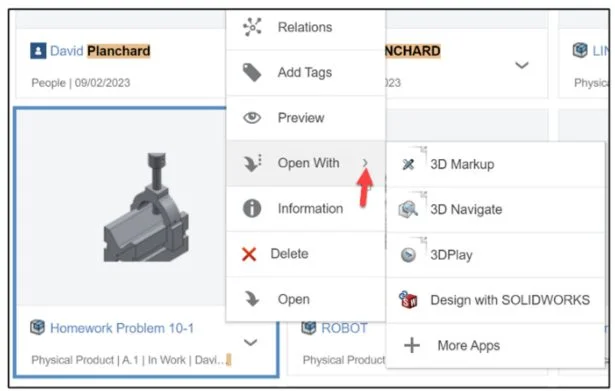
Click the drop-down arrow in the Open With box. The options are: 3D Markup, 3D Navigate, 3DPlay, Design with SOLIDWORKS and More Apps.
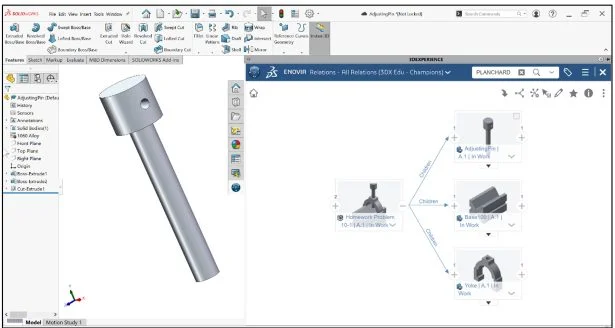
Click Design with SOLIDWORKS.
The AdjustingPin is displayed in your open SOLIDWORKS session.
Close the AdjustingPin in SOLIDWORKS.
Click File, Close from the Main menu.
Datagrid Display and Graph View
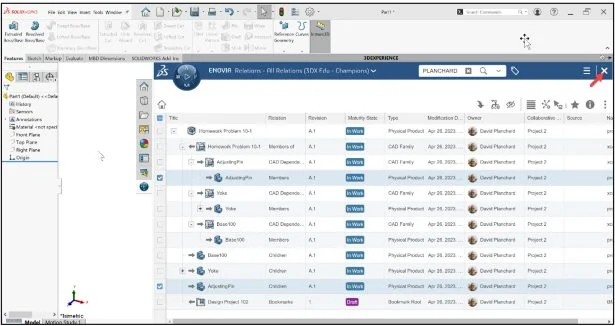
Use the Datagrid display.
Select the Homework Problem 10-1 icon as illustrated.
Click the Graph View icon.
Click Datagrid View from the drop-down menu.

Expand the folders. View the available information with the Datagrid display.
Return to the 3DSearch dialog box.
Click Close.
Click Add Tags. The Add Tag dialog box is displayed.
6W Tags
Create and use 6W Tags (What, Who, When, Where, How and Why) to quickly locate the model and needed information.
In this example, I created a What ME2300 Tag. Click Add. Note: The icon association is unique for each tag.

Click Preview.

Use 3DPlay
Click 3DPlay. You are still inside of a SOLIDWORKS session.

A preview of the model and Physical Product information is displayed.
Click the up arrow to access various tools; Rotate, Pan, Zoom in or out, and Fit All in.
Return to the 3DSearch dialog box.
Click Close.

Expand Open With, view your options.
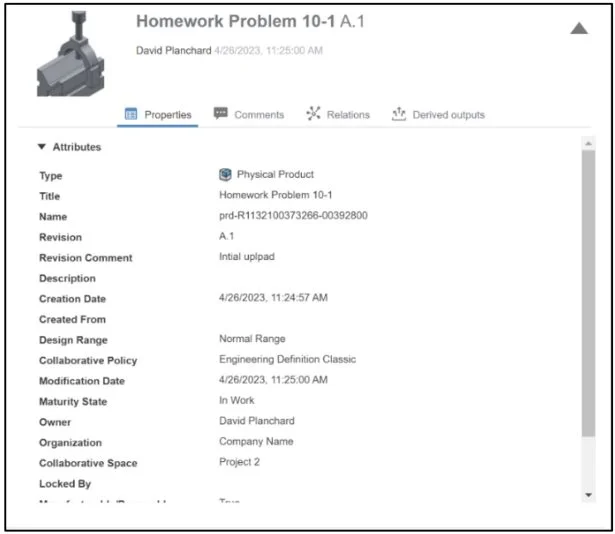
Click Information.
The Information dialog box is displayed. The Properties tab is set by default. Additional tabs are: Comments, Relations and Derived outputs.
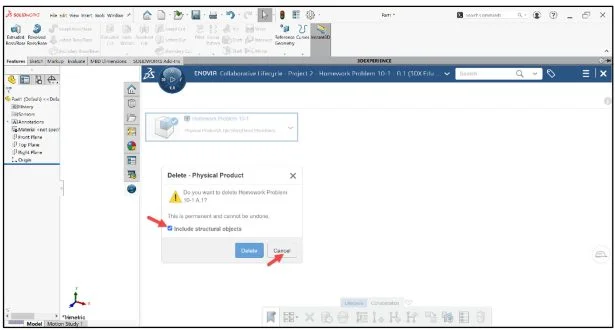
Click Delete.
The Collaborative Lifecycle dialog box is displayed.
There are two ways to delete entire groups of data or just a single file. Delete using Bookmarks or the Collaborative Lifecycle dialog. Both have an option to delete the entire structure of the assembly and all reference components (Include structural objects).
Click Cancel from the Delete – Physical Product dialog box.
Return to the 3DSearch dialog box.
Click Close.
Open the SOLIDWORKS model.
Click Open.
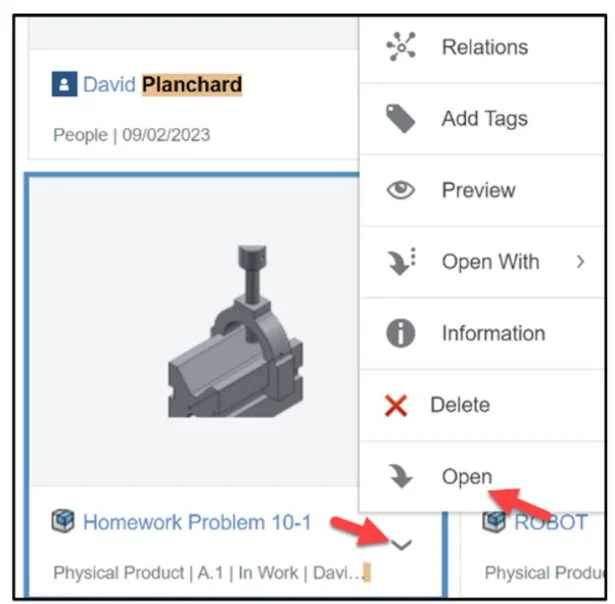
The SOLIDWORKS model is opened in your SOLIDWORKS desktop.
Advanced Search
Click the drop-down arrow from the 3DSearch box.
Select the Advanced Search tool.
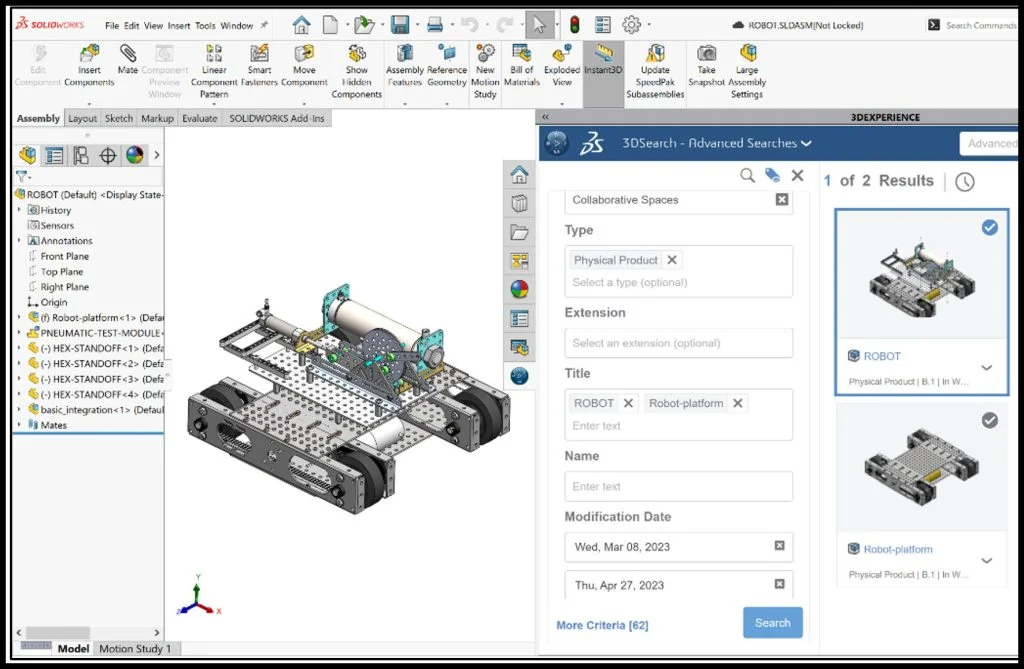
The Advanced Searches dialog box is displayed. The default Source is Collaborative Spaces.
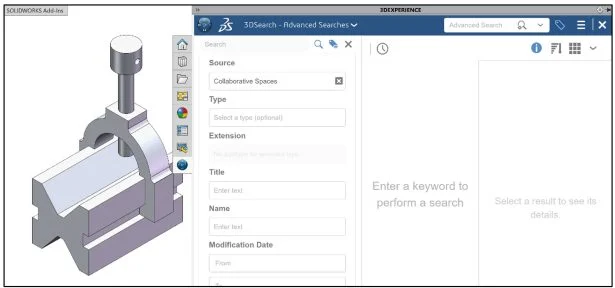
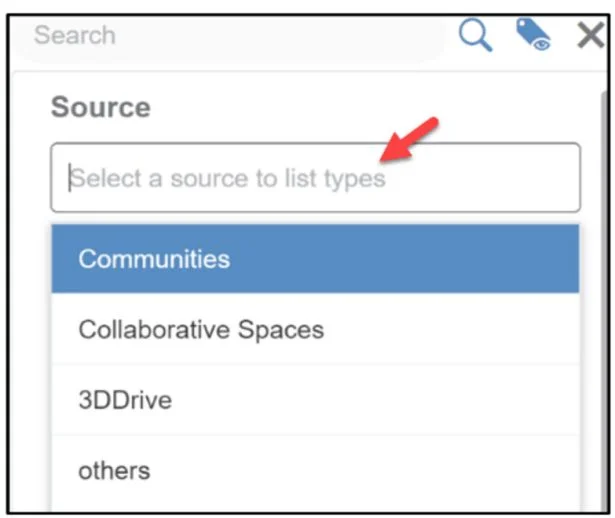
Click inside the Source box. View the options.
Click inside the Type box. View the options.
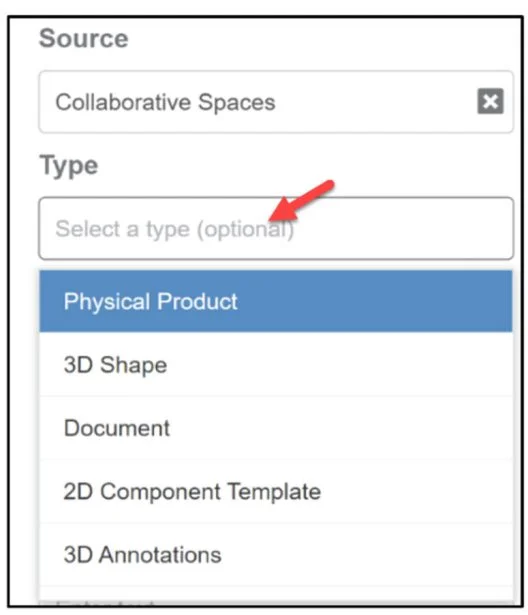
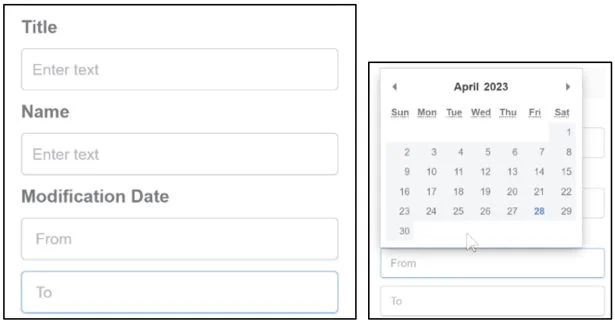
Enter a Title, Enter a Name or a Modification Date range.
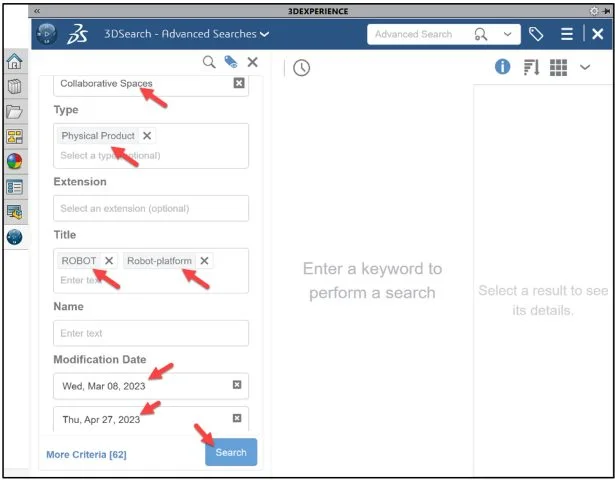
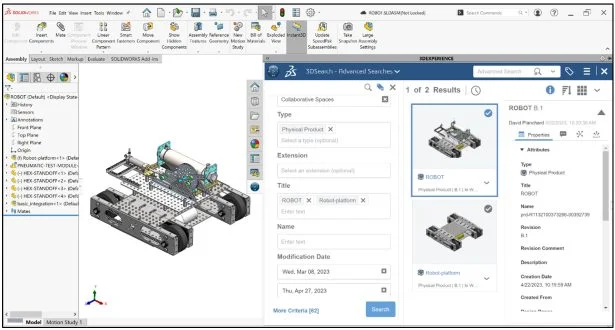
In the example below, I used the Advanced Search options.
1. Collaborative Space as Source. 2. Physical Product as Type. 3. ROBOT and Robot-platform as Title. 4. Modification Date as Wed, Mar 08, 2023 to Thu, Apr 27, 2023.
Click Search.
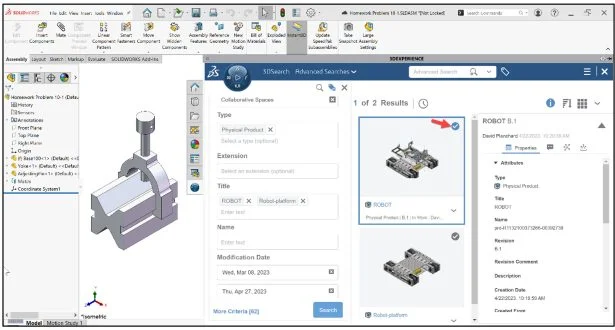
The results are displayed.
Click inside the ROBOT Thumbnail. View the model attributes.
Close the Homework Problem 10-1 model in your SOLIDWORKS desktop.
Open the ROBOT from the 3DSearch dialog box.
View the results in your SOLIDWORKS session.
This entire lesson was within the SOLIDWORKS environment connected to the 3DEXPERIENCE platform.
We are finished with this lesson. In the next lesson we will explore 3DPlay.
Academic Community: After you create a 3DEXPERIENCE ID, Educators, can get more information on SOLIDWORKS and the 3DEXPERIENCE Platform. Request to join the 3DEXPERIENCE Academic Community for free at go.3ds.com/academiccommunity.
Student Community: Students, join the student community for free at go.3ds.com/studentcommunity. Check out great posts on Mechanism Mondays, FEA Fridays, Solid Saturdays (animations), Formula Student and Formula SAE exercises.
Other lessons in this 3DEXPERIENCE Works series include:
3DEXPERIENCE Works Lesson 1: Getting Started with SOLIDWORKS and the Platform
3DEXPERIENCE Works Lesson 2: SOLIDWORKS and Save and Revision
3DEXPERIENCE Works Lesson 3: SOLIDWORKS and Bookmarks, Share and Delete
3DEXPERIENCE Works Lesson 4: SOLIDWORKS and Lifecycle Maturity States
3DEXPERIENCE Works Lesson 5: SOLIDWORKS, Collaborative Space and Bookmarks
Design well, Marie