
While I’m working from home, I thought this would be a really great time to invest in a 3D printer for myself. I purchased a budget-friendly printer that can still achieve quality prints. I’ve also found it really important to take some time to get out of the house and get some exercise. So I’ve started using my bicycle to fulfill that calling, going on 10-14 mile rides a few times a week now.
There was one thing missing from my bike, however, and that was a place to keep my water bottle. I was getting a little fed up with not bringing one, or having to carabineer a bottle to my handlebars. So I took it upon myself to make my own water bottle bike mount
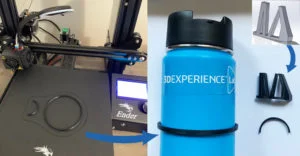
The first thing I did was measure the diameters of both the water bottle, as well as the tube of my bike frame. Then I opened SOLIDWORKS, created a sketch based around those dimensions, and began designing.
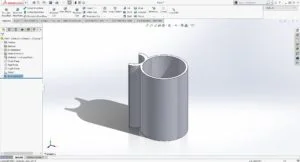
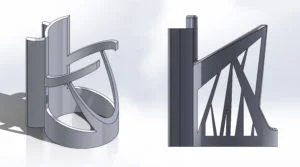
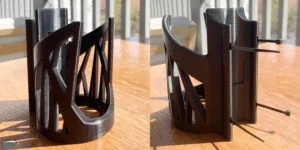
I came up with a general base shape that I liked, and then tweaked and modified it until I got a shape I was happy with. A big part of my design was being able to print it without any slicer generated supports. Thus, being able to print on my budget 3D printer in one single piece without any modifications.
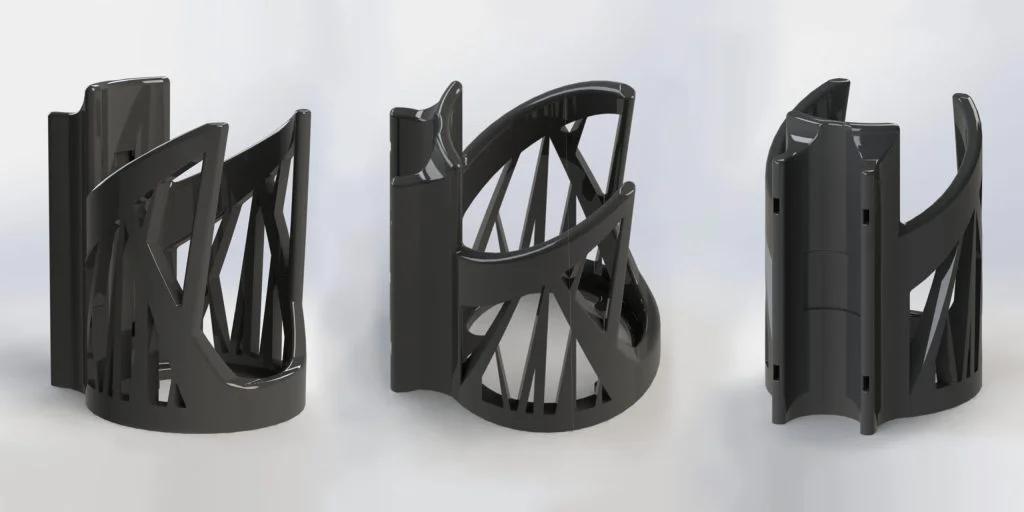
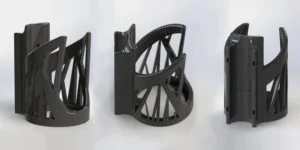
Finally, after some time I got the kind of final result I was aiming for. The photos below are renders of the final cad model from SOLIDWORKS using the PhotoView 360 function.
Before fully committing to printing the full file, and risk wasting filament, I decided to print a few features of it, to test out tolerances, print quality, and strength. First was a test print of the diameter of the bottle portion of the mount, as well as a test of the radius for the bike frame portion of the mount. Once printed, I checked to make sure that my measurements of the bike frame were correct, and that the bottle would fit in the mount once printed. Once these were tested and confirmed to be the correct sizing, I printed a small cutout of the structural portion of the side of the mount. This helped me get a good sense of how the entire mount would look once printed, as well as seeing whether or not the printer would retain quality on sloped surfaces. This print seemed strong enough for such a small section, so after all this testing I felt no need to change any of the settings or parameters I previously used.
So the next step was to print the bottle mount. All in all, it took just around 14 hours to print, at a 0.2mm layer height with 30% infill, not utilizing any supports or rafts.
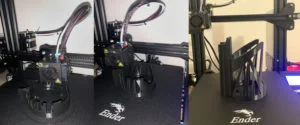
The final print came out surprisingly well, with no flaws what so ever. This was the first big large print I tasked my new 3D Printer with, and I am very happy with the result.
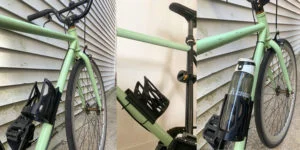
During the initial design process I was debating on a few different ways of attaching the bottle mount to bike. After researching different DIY alternatives to bottle cages, I ended up deciding to go with a combination of two methods: I utilized zipties to attach the mount, followed by adding a small square of double sided mounting tape placed in a recessed area, to prevent the bottle mount from sliding or turning on the bike frame.
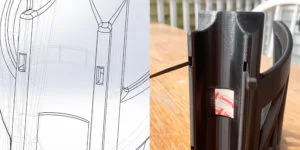
And thus is the final product, mounted and in use. I took it for a 12 mile ride this past weekend and it held up, and worked flawlessly.
Find out what you can create from home with The SOLIDWORKS Student Edition