

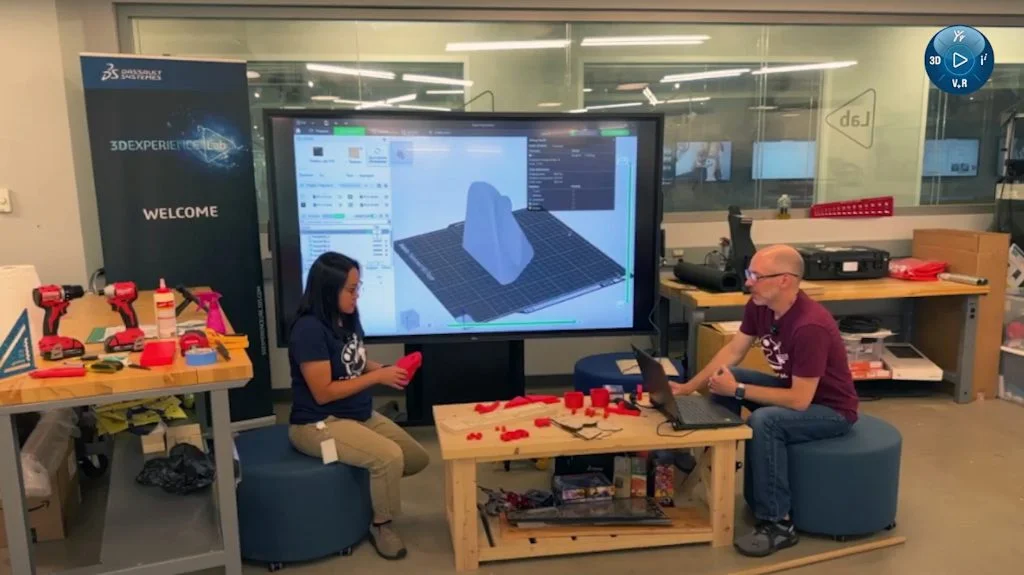
Workbench storage often feels like a never-ending project. As tools evolve and priorities shift, what seemed like a good setup six months ago starts to slow you down as needs and tools change. This is what Sal and Chinloo Lama aimed to tackle in their live Discord design session: creating smarter workbench storage solutions in real-time, with input from the community, using SOLIDWORKS for Makers alongside the fabrication tools available in the 3DEXPERIENCE Lab.
Through a series of live sessions dubbed “Let’s Talk Shop,” Chinloo and Sal collaborate with the maker community to enhance the 3DEXPERIENCE Lab’s shared makerspace. Each Let’s Talk Shop session focuses on a phase of the design process – brainstorming, designing, prototyping, and building- and encourages feedback from designers, hobbyists, and DIY enthusiasts who are passionate about optimizing workshop spaces.
Both mechanical engineers on the SOLIDWORKS R&D team, Chinloo and Sal, have years of experience in designing software and physical builds. Beyond their professional endeavors, they document their personal shop projects on their YouTube channel, Our Next Make, sharing their journey with fellow makers.
Sal and Chinloo started with what was already there: a table and a pile of tools that included clamps, markers, tape, and a speed square, all spread out by hand.
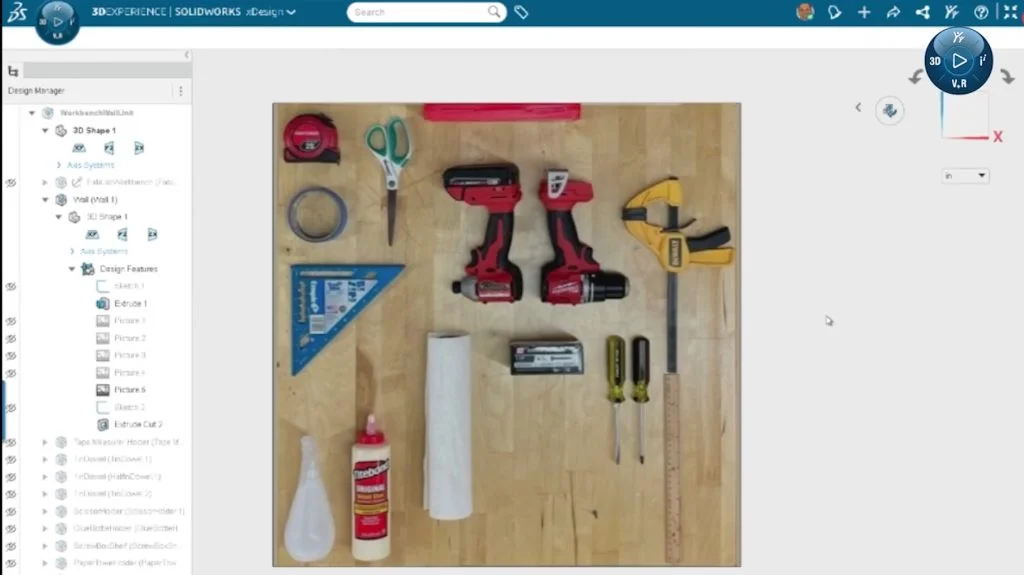
They also wanted to use the wall behind the bench to mount frequently used items. A photo of the layout was uploaded to xDesign to serve as the starting point for modeling. From there, things were designed and rearranged live to determine where the clamps should go, which tools needed more clearance, and what could block access to something else.
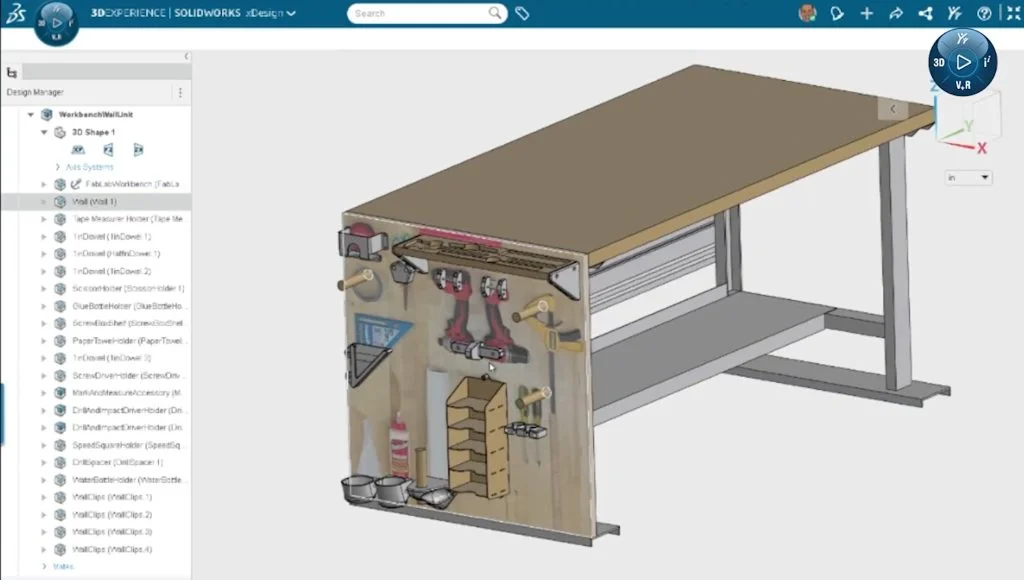
One early adjustment was to move the clamps higher on the wall to accommodate longer sizes. Another involved shifting tools so they wouldn’t block each other or interfere with nearby mounts.
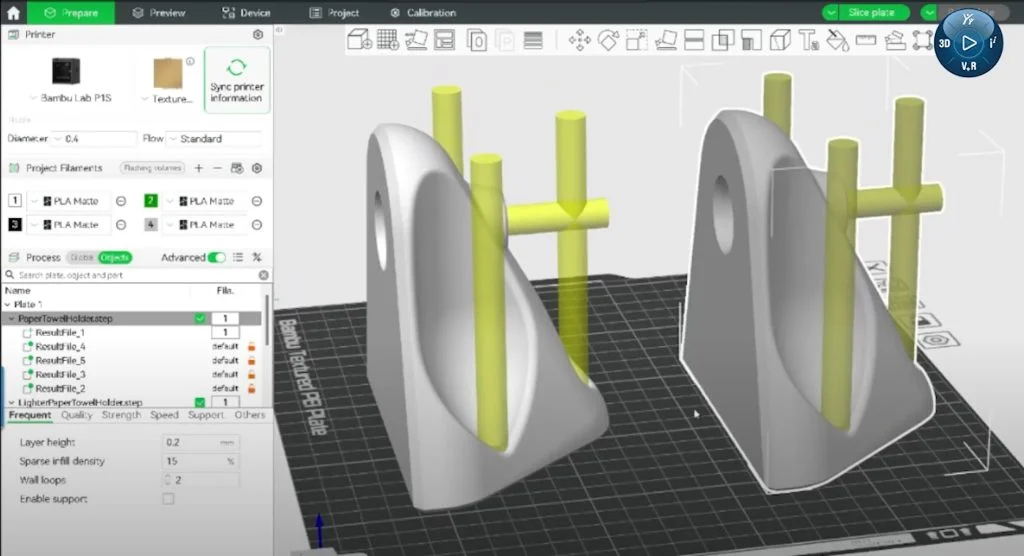
Throughout the working design session, decisions were made live and tested quickly. A glue bottle holder was shown in progress.
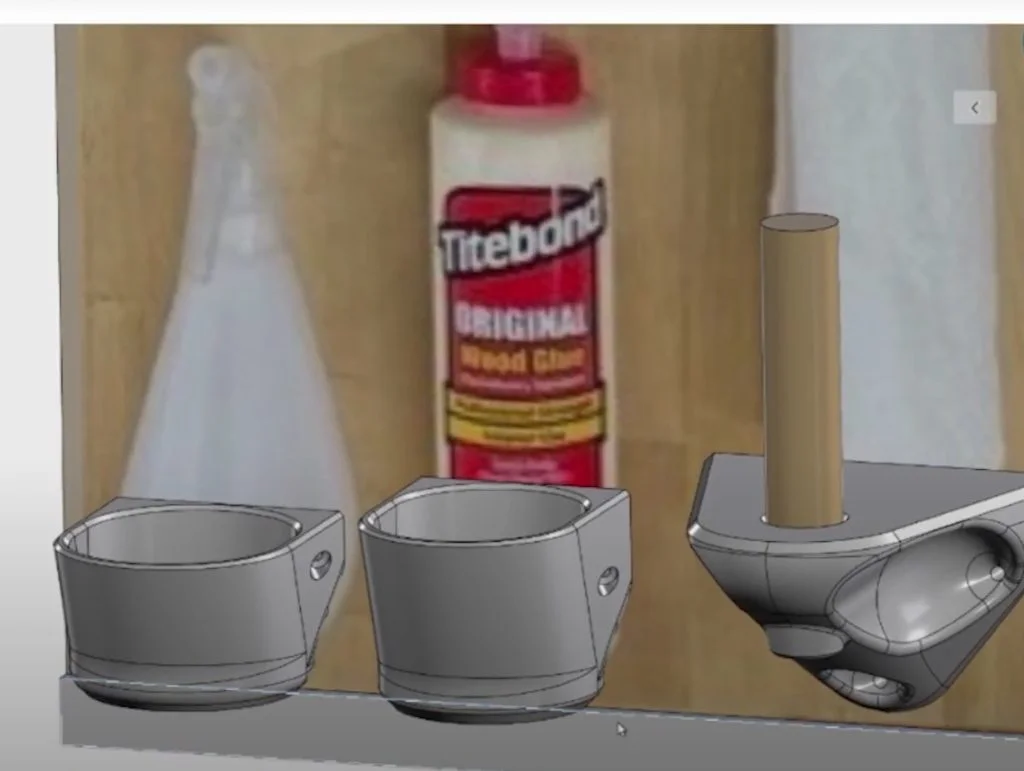
It tilted forward for easier access and included a base opening that allowed the bottle to be stored upside down, if needed. As they reviewed it, the team pointed out areas for improvement in strength, reducing print time, and aligning the screw holes with denser parts of the print using modifiers in the slicer.
Most parts were designed to mount with a single type of screw, inch and a quarter. That constraint helped simplify assembly, but it also meant the team had to be thoughtful about how parts were reinforced. They walked through screw placement, infill strategy, and material thickness as they modeled and prepped prints.
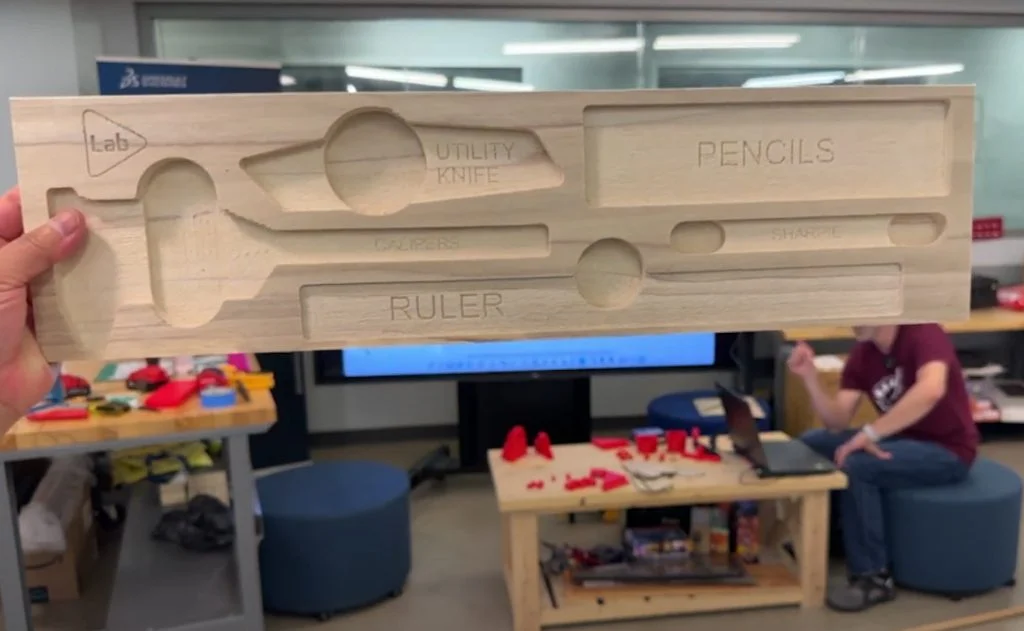
Instead of a pegboard behind the workbench, they used plywood. It could be replaced, if needed, and it handled wear better in a shared space. Tool holders were a mix of 3D-printed, CNC-cut, and laser-cut parts. One holder used finger pockets to make it easier to grab pens and calipers. Another used a trapped nut to hold a drill by its belt clip. Each method was chosen based on the tool, the material, and the machines available in the lab.
3D printing was integrated throughout the project, with design tweaks and part adjustments shaped in part by input from the live chat. Viewers asked about print orientation, infill density, tool placement, and other methods for designing and improving common parts.
The session was focused on small decisions, such as how to make parts easier to print, mount, and use, without straying from the goal of building something useful. Feedback from the community helped guide decisions during the session, keeping the build flexible and focused on what would work well in a shared shop setting.
Toward the end of the session, they showed a test version of a tape measure pouch made from laser-cut leather, shaped using 3D-printed molds.

The flat pattern was created using xDesign’s sheet metal tools and cut on the laser. A drill guide was added for mounting holes. After forming the leather while wet, a wooden guide was used to drill mounting holes, and the final piece was riveted to the wall panel.
Watch the recording of the Live Discord Design session.
Join Us for the Next Session on September 12th
This session was just one part of a larger build. When the full workbench storage wall is complete, Chinloo and Sal will host another live review to go over the finished assembly and discuss how the workbench performed under regular use. We hope you’ll join in the project and conversation for the next Live Discord session:
The Stage “live stream” will start at 12 pm ET.
Note: A Discord login is required to view the event.
Join the Stage within the SOLIDWORKS server on Discord.
(ref. details are on support.discord.com)
Learn More About SOLIDWORKS for Makers
Feeling inspired? Tackle your next maker or DIY project with SOLIDWORKS for Makers, CAD for personal use. LEARN MORE.