
Welcome to this SOLIDWORKS tutorial to create a star tree topper. For this tutorial I really wanted to play around with the circular pattern to show off how you can take a seemingly simple form and pattern it to create something very complex and detailed. I also wanted to demonstrate just how powerful the combine tool can be using both the add and subtract operation. If you are following the tutorial, please download the star pattern DXF file used to create the stars pattern here. As mentioned in the tutorial you will find as you model the star it is quite small. It has been modelled at a third of the scale, you can scale up the design once it is finished, but I only used my model for a rendering.

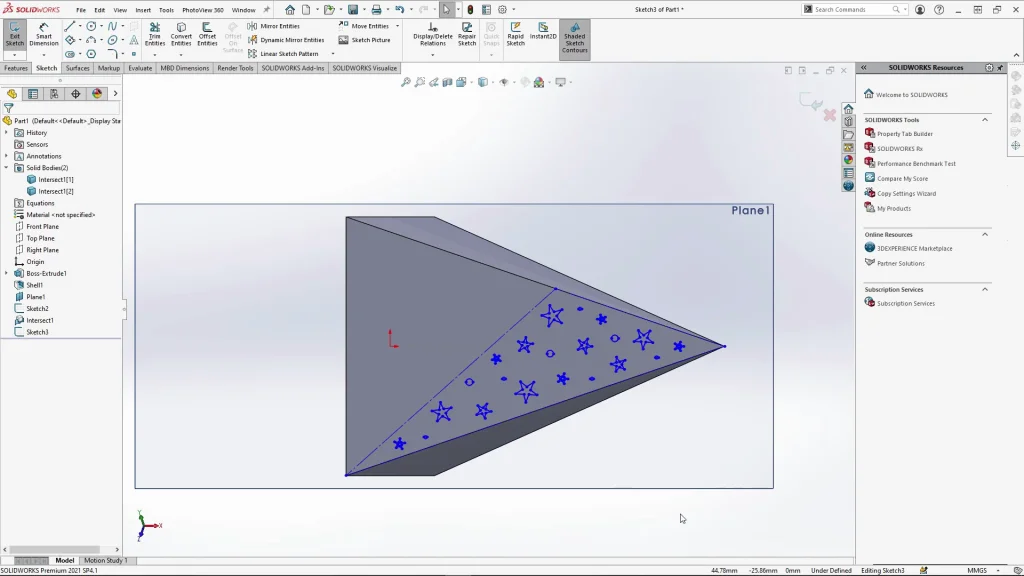
To model the star, I started with a single spire of the star, extruding a square with a draft angle to create a pyramid. From here, the spire was shelled, and an intersection was created inside of the shelled space. The reason why I needed to use the intersect tool here will become apparent further into the modelling steps. From here I inserted the star pattern DXF file onto a face of the star. This DXF was created specifically to fit the segment of the star that when circular patterned the below face would be visible. The DXF is not fully defined but it has been exported in place so that when it was imported into SOLIDWORKS it will be in the correct position, For the sake of this model it’s not necessary to fully define it. I know this is a SOLIDWORKS sin for most, but if you would like to fully define or create your own pattern within the centerline guides, feel free to do that.
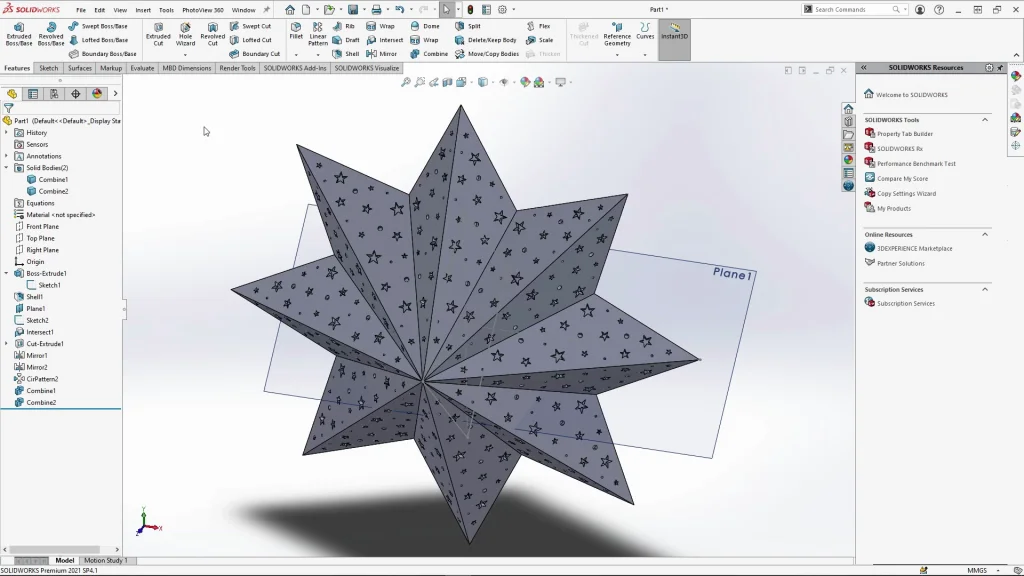
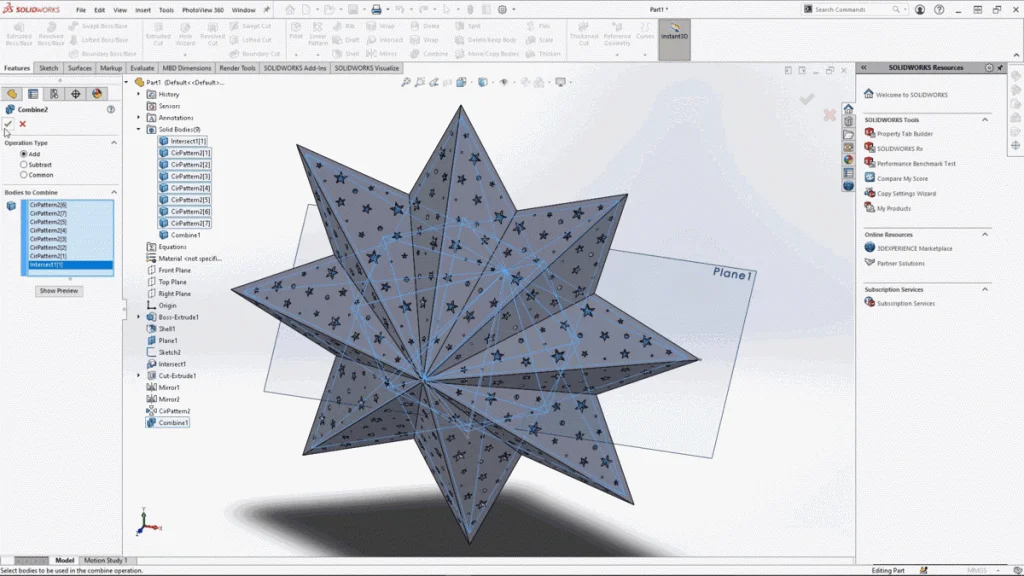
Once this sketch has been cut extruded from the outer shell of the star spire, it needed to be patterned across planes to be on all four sides of the spire. I then used circular pattern to create a star. For this feature I applied the pattern to both the inner and outer star bodies as the inner intersected bodies would be needed within all the patterned star bodies.
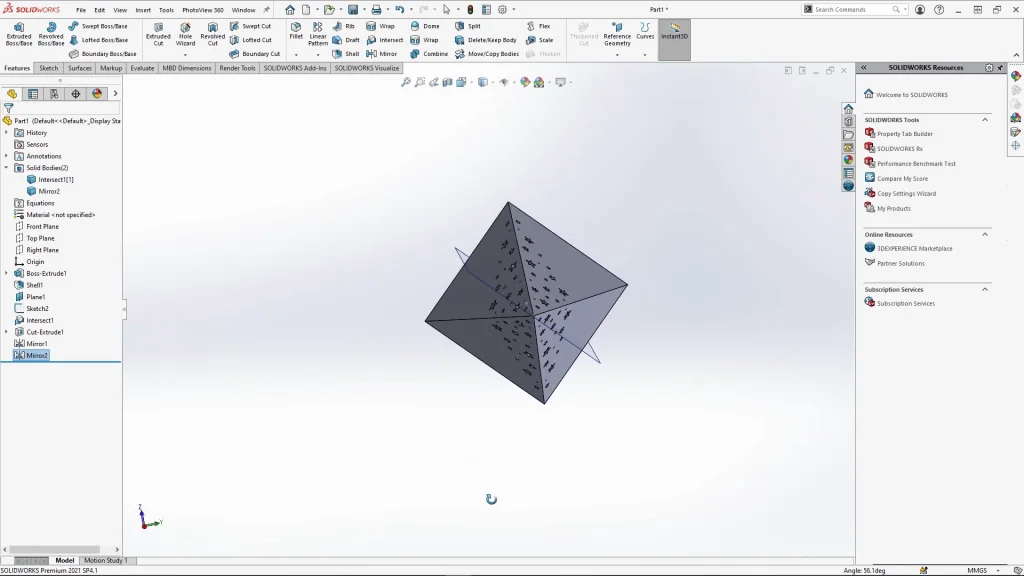
To achieve a hollow star as one solid body, the outer star parts were all combined into one body and all the inner intersected bodies when combined create a solid inner star body. When the inner body is combined and subtracted away from the outer star body it cleans up the excess inner bodies of the star created by the circular pattern, you can see this below. Before the bodies are combined and subtracted from each other, with section view turned on, you can see how the star intersects itself. Once I was left with a single body part, I moved onto the base of the star that would sit onto a tree branch.
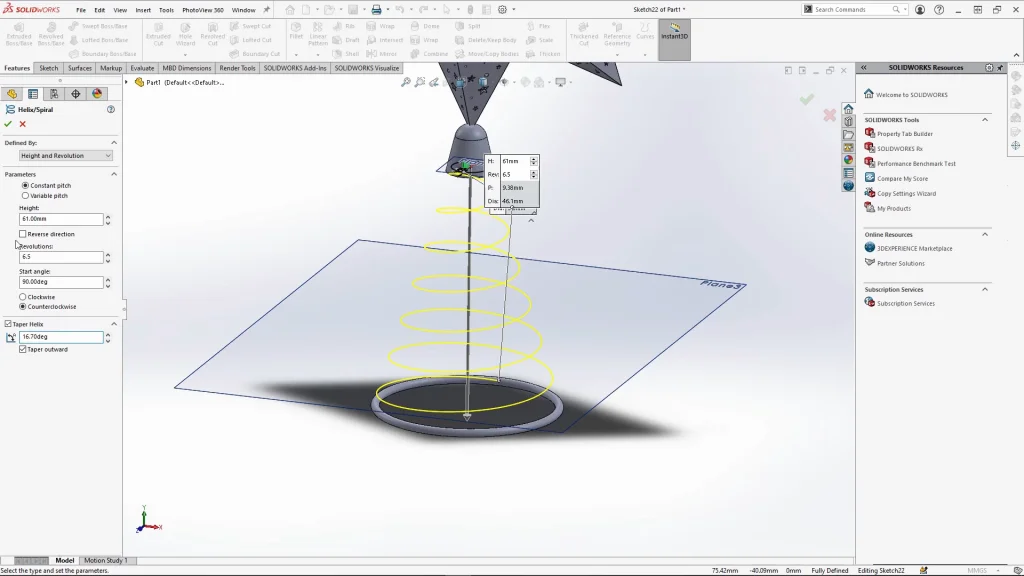
The base was created using a revolved join part, then a swept helix/spiral which was tapered out. For the helix, I find it easier to use defined by Height and Revolution, so I can choose the overall height of the spiral and how may revolutions within that specified height. Once we have the helix/spiral it is easy to just apply a swept boss using circular profile. With all the features of the star modelled, the based was combined to the star to again make it one solid body. I could then apply an appearance to my finished design, for this I used the satin finish gold, when rendered this can look glittery which just adds to the festive feel.
As mentioned in my tutorial I used SOLIDWORKS Visualize to render my model. To add the light into the star which shines through the cut-out holes, I used a point area light with a warm temperature. When creating the animation seen at the end of the tutorial you will see the light turns on and off, this was achieved using keyframes in Visualize. I also added a backdrop part and baubles into visualize so that the light would shimmer onto them.