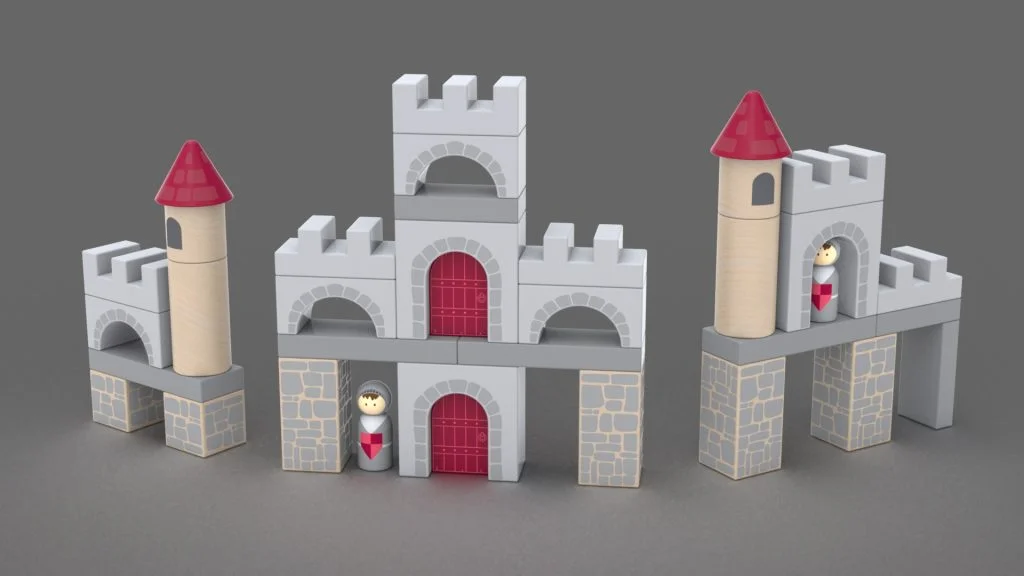
Welcome to this SOLIDWORKS tutorial for a wooden Castle themed set of blocks. I often like to experiment with SOLIDWORKS tools and features in their simplest forms to see what I can achieve with them; I also enjoy having a fun design to apply them to. The decals for this design are available to download here. I don’t apply the decals during the tutorial, but if you feel like adding them to your block set, I applied them to the individual blocks after save bodies was used, that way you only need to add them to one of each block copy.
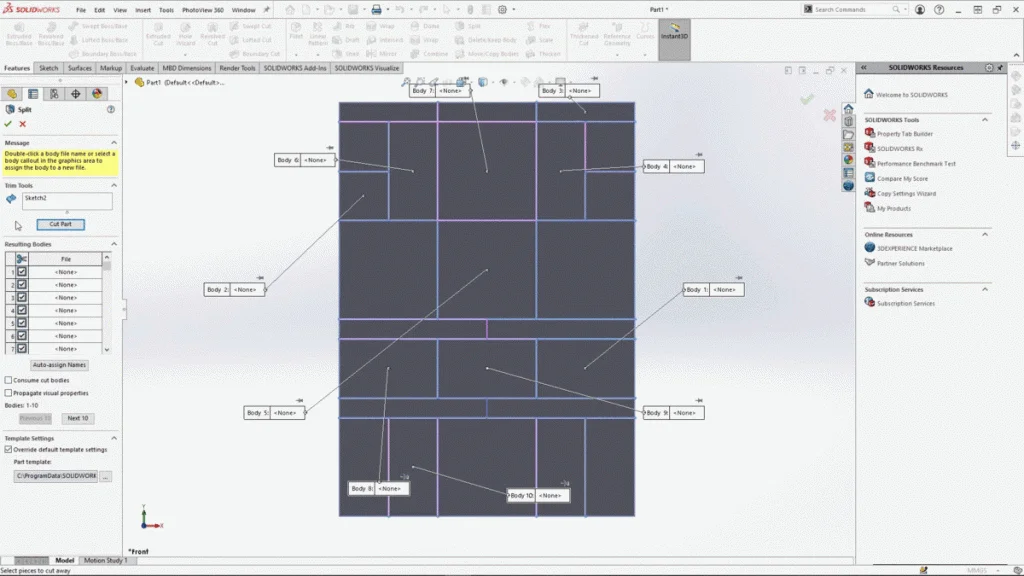
For this tutorial, I really wanted to showcase the use of the split tool. So, I decided to design a block set around this idea. Extruding a rectangle block, I divided up this block into segments using a series of sketched lines. There were 7 different split features needed to create the full set of blocks. Through each split I showcase how useful the split tool can be to divide up solid bodies without taking away from the overall mass or dimensions of the body. I also demonstrate how you can split through selected bodies to create specific cuts, but also consume cut bodies to remove them from the set.
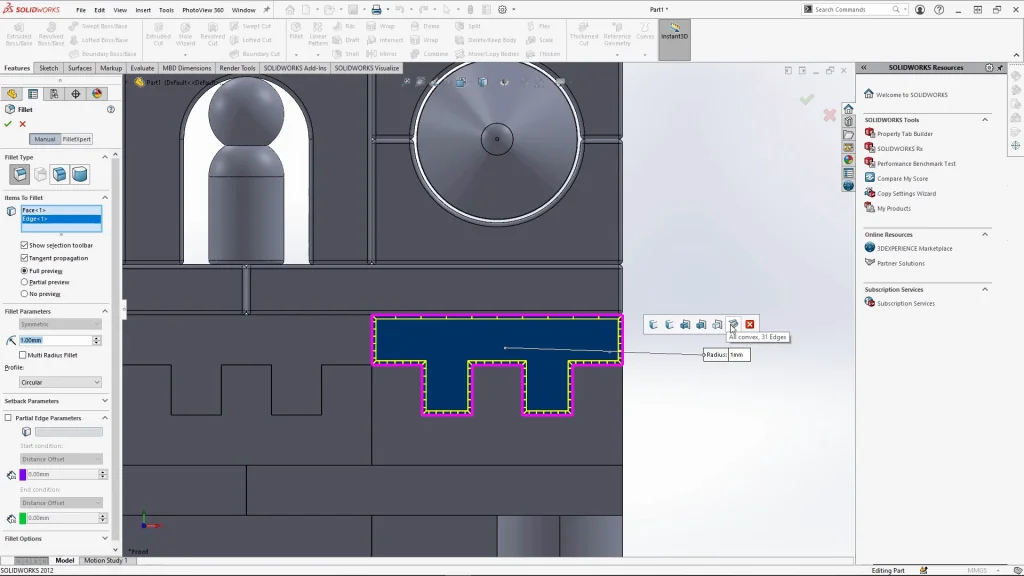
Once all the splits were applied, I used simple chamfer and fillets to create more varied block shapes, from cones to cylinders, which would turn into castle towers and turrets. I also added a simple revolve sketch to create some peg characters for the set. When it came to softening all the edges of the blocks I utilized the fillet selection options this included the connected edges and all convex edges, this feature sped up the filleting of all the blocks, but also makes it easier to select the edges you can’t see, especially when all the blocks are side by side.
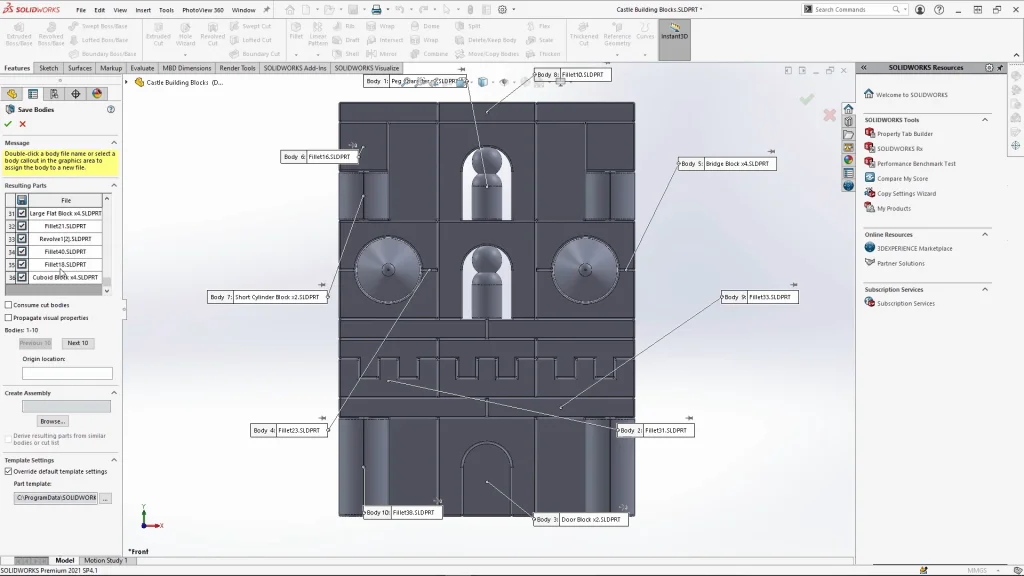
The final part of the tutorial I needed to save the bodies, but first, so that I didn’t have duplicate blocks, I renamed bodies and input the quantity of each block so that when I created an assembly with the blocks, I place the right number of blocks into it. As I rename the bodies, I would hide all the duplicates until all block types are named. Bringing all the bodies back into view, I had to save the part before I could use save bodies. Right-clicking on solid bodies and selecting save bodies, as the feature box opens and I select auto assign names, all the bodies appear as a list and are checked. You need to go through this list and untick all the bodies that haven’t been renamed. Once done, applying the save bodies all the selected parts save as individual part files. These parts can then be opened and if you would like to, apply any appearances and decals before you create an assembly with them.
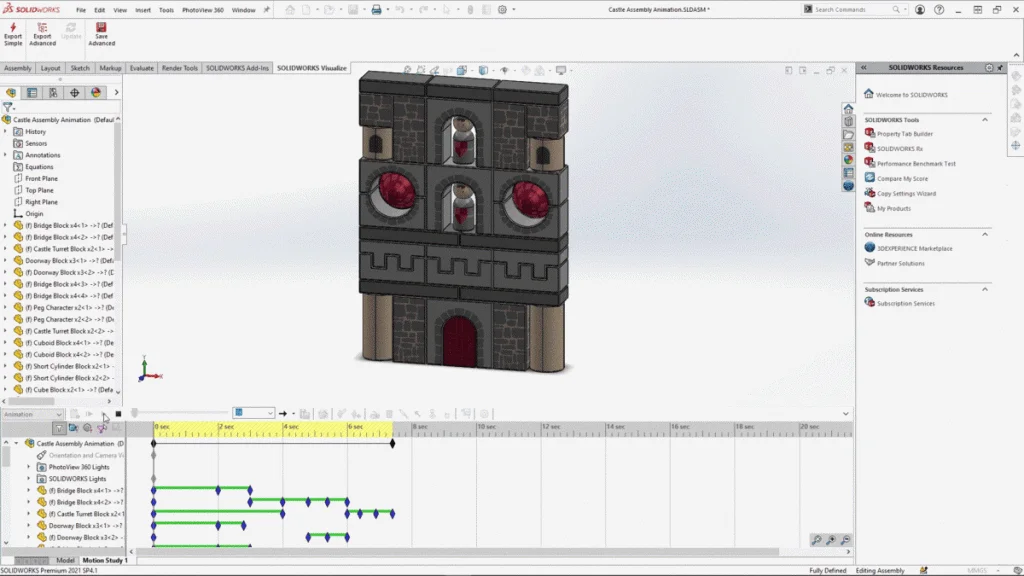
Playing around with my blocks, I decided to create an assembly and a motion study animation of the blocks being set up. Feel free to play around in an assembly to try out different layouts of the blocks.