

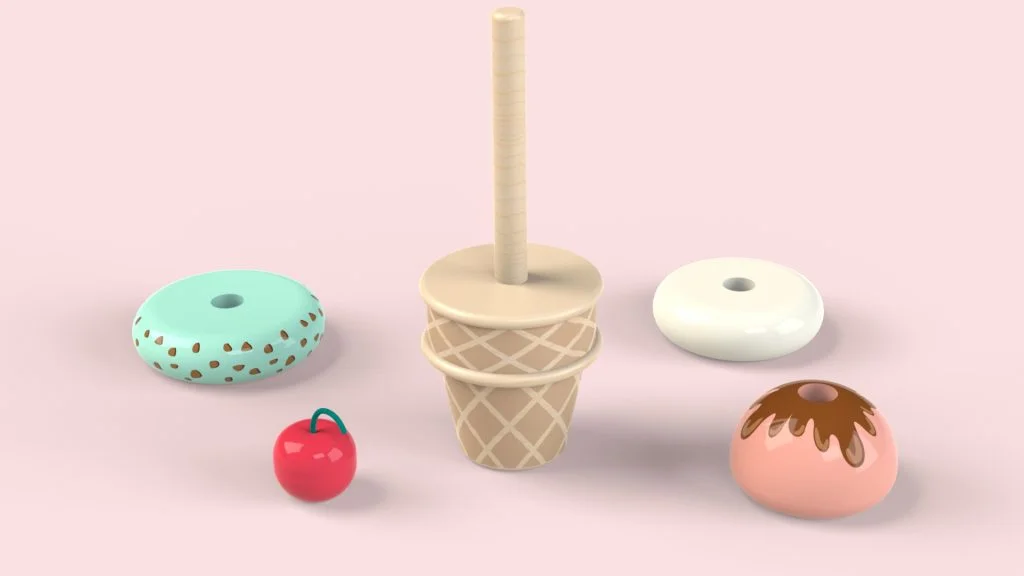
For this SOLIDWORKS tutorial I designed and modelled this ice cream stacking toy. I used this model to feature the use of equations, for quickly amending sketch and feature dimensions. The tutorial demonstrates a very simple use of this feature to create 4 different parts. All the decals seen in the tutorial are available to download from here.
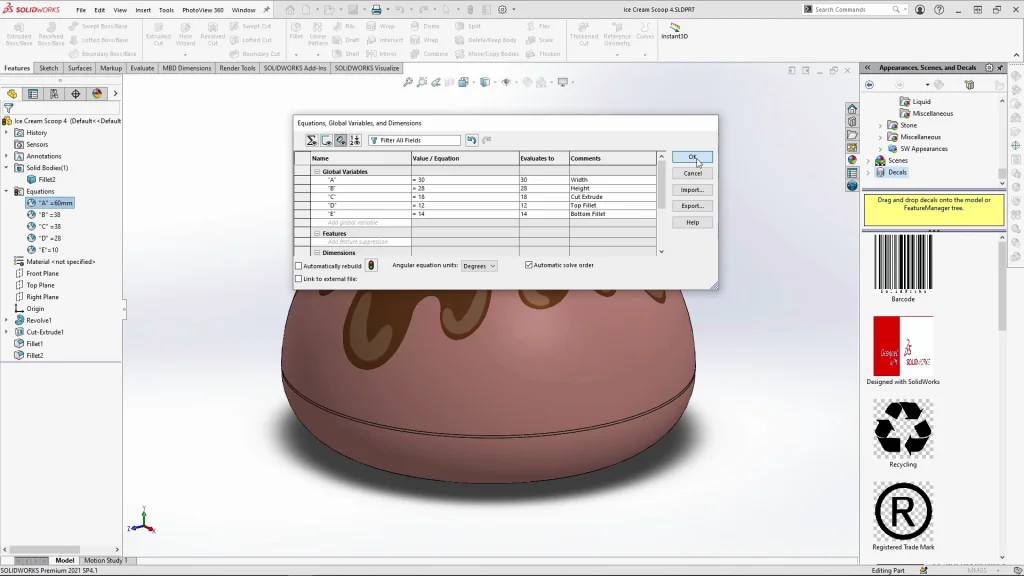
I applied equations to the initial revolve sketch height and width, an extruded cut for slotting onto the cone base, and two separate fillets. There is a comments box at the end of each equation, here I input for my own reference what the equation applies to. This is especially useful when you have many different equations, without this, it could get quite confusing. You can choose to automatically rebuild a model as you input each dimension, but I kept this unticked, my model would rebuild once all the equations are all applied. As mentioned in the tutorial, this is a very simple use of the equations, and the initial setup of the equations for the first ice cream layer does take longer than it would take to model the part normally. However, by setting up all the equations, the other 3 ice cream layers will be modelled much quicker. Once the first layer is modelled with equations and saved, save as is then used to rename the part for the second ice cream part and the equations can be tweaked with new dimensions. This process can be repeated until all 4 parts are modelled. This feature can save you so much time for editing dimensions of sketches or features quickly, especially for projects where a part may need quick dimension tweaks.
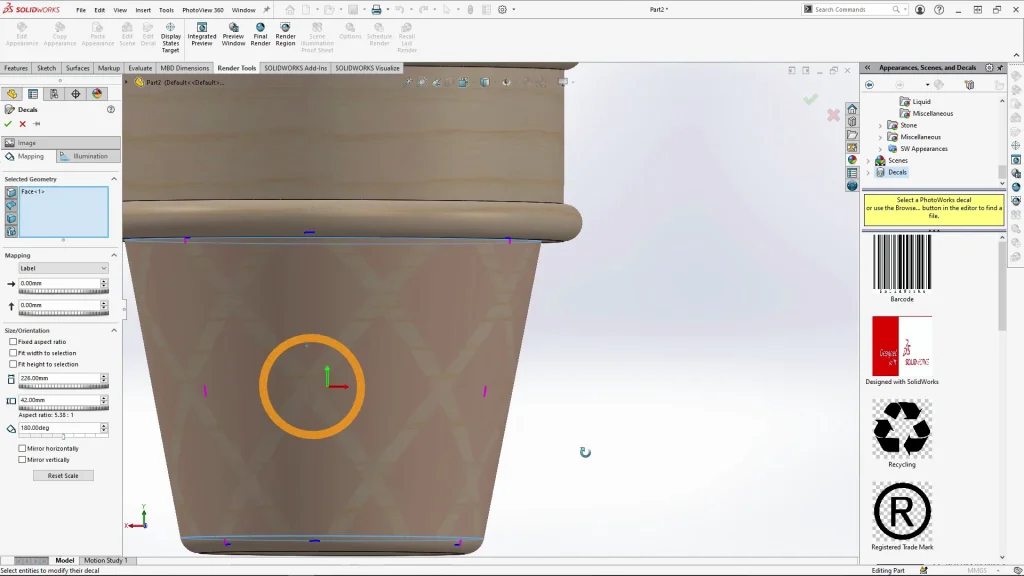
When adding the decals during the tutorial, you may see some of the tricks I use to apply my designs to circular or spherical faces. This includes using label or cylindrical mapping settings. Decals are also designed to overlap into each other. PNG file decals were used so that the background could be masked using decal image alpha channel, this allows the decal to sit on top of an appearance, the appearance will then show up through the masked areas of the decal. The best example of this can be seen on the cone part of the toy. The diamond cone design I created for this tutorial was exported without a background as a PNG file, so when it is brought in, the background of the design will show through with the applied wooden ash appearance. It was fitted to the cone using label mapping, it was resized with fixed aspect ratio unticked, so that I could overlap the decal around the cone shape.
With all the finished parts, I created an assembly of the finished toy. All pieces were mated onto the cone base, and an exploded view was added to the assembly with auto-spaced components. This is a quick way of moving several parts in one direction all together. The exploded view was used in a motion study and exported into SOLIDWORKS Visualize, the finished rendered animation can be seen in the tutorial.