
Have you ever been working away on a project, only to be told the CAD file you’ve been using is out of date? Going back to square 1 and starting again is probably the last thing you want to consider in this situation.
One of the handiest features of SOLIDWORKS Composer is the way it separates the files you’re working on from the CAD file you originally imported, allowing engineers to continue working on the CAD file while we build up our Composer document. Composer also allows us to update our project with the modified CAD file, which can be a huge time-saver.
So, let’s have a look at the process.
Let’s say we have been working on the .smg file below. We’ve created some views with our exploded view steps and we’re happy with our work, but we’ve just been told some changes have been made to the assembly.
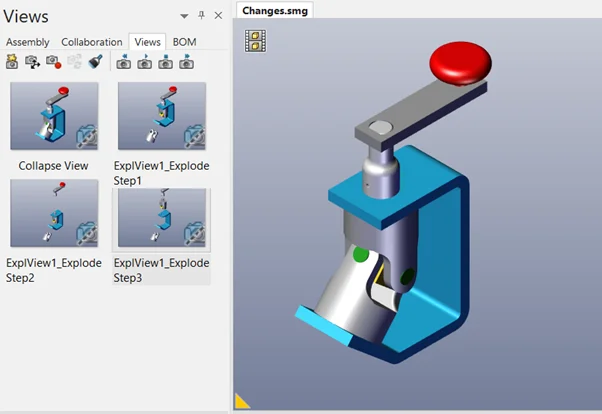
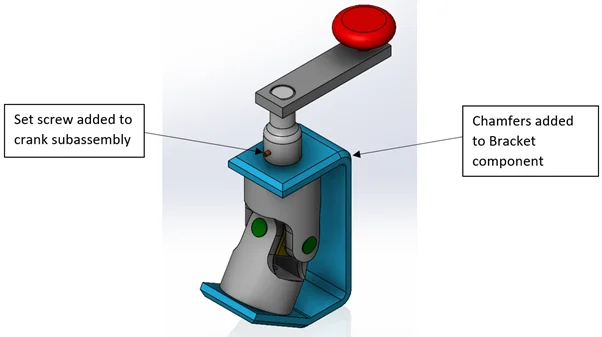
Some modifications have been made to the blue bracket component, including some dimensions changes and chamfers, and an orange set screw has been added to the crank subassembly.
In Composer, with the original .smg file open, we can simply go to File > Update > SOLIDWORKS Composer Document, browse to the modified SOLIDWORKS file, and click Update.
IMPORTANT – The SOLIDWORKS file you select here must be the same file that the original .smg was created from. If you use a similar assembly, or one with a new name, Composer will not recognise it as the same file and the update will not be successful.
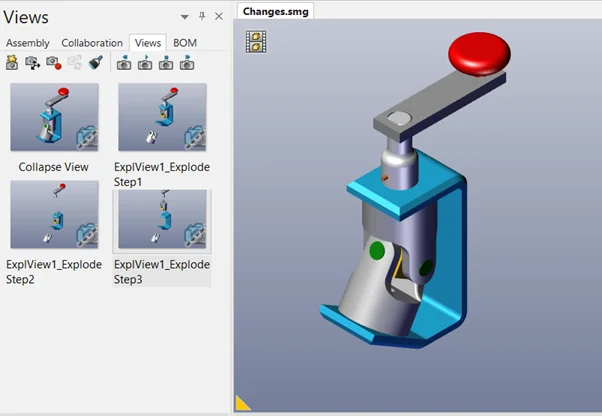
As we can see in the above image, the .smg file has been updated to reflect the changes made to the SOLIDWORKS assembly, and our exploded views we made earlier are still intact, with the new set screw actor present and correct.
So, there you have it, if you’ve been working hard on some views or animations in Composer and you receive the dreaded news that the SOLIDWORKS file has changed, not to worry, Composer is ready to get you back on track.
Other things to note for the update process:
- The names of the original CAD files cannot be changed.
- The actors cannot be rearranged in the Assembly tab. They cannot be dragged to a different sub-assembly or inserted into a new assembly group. The update function will try to recreate the original CAD structure.
- Actors that you merge into an assembly using the Merge into the current document option on the Open dialog box are removed during the update process. This is because their IDs do not exist in the updated assembly and will be treated as old parts to be deleted.
- You should use the same import settings for the updated CAD file as used when importing the original CAD file. For example, if you select Merge file into one actor per part for the original assembly, but not for the updated assembly, the update process will fail. We recommend setting the Import profile on the Open dialog box to SOLIDWORKS (default) every time unless you have a reason to change this setting.
***
Scott Hope is an Applications Engineer at TMS CADCentre, a SOLIDWORKS Value Added Reseller in Scotland.
You can read more from Scott on the TMS CADCentre blog