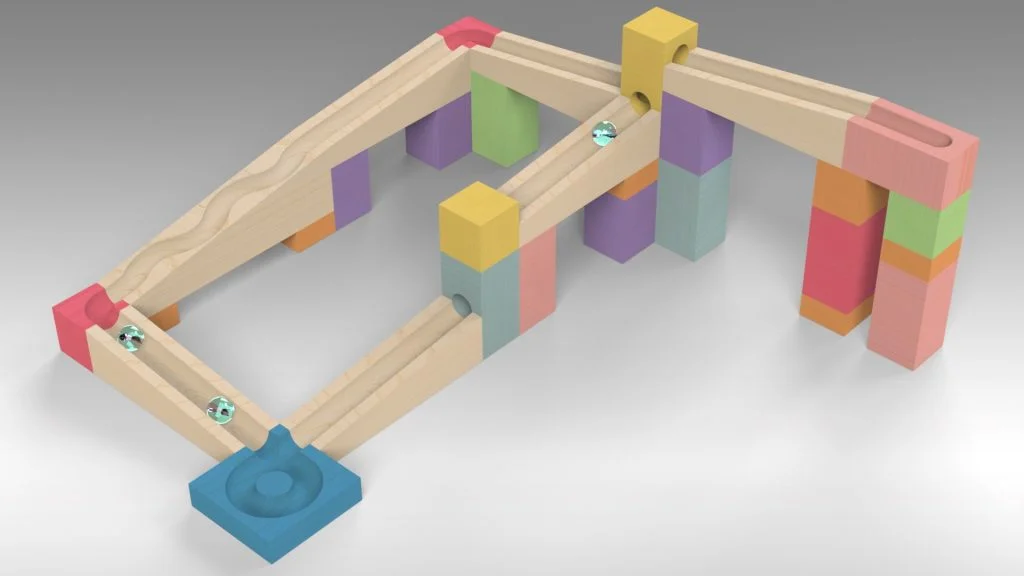

In this fun SOLIDWORKS tutorial you can follow simple steps to create different blocks and track pieces for a wooden Marble Run set. By the end of the tutorial, you will be able to create a marble run track either by copying the set up in the tutorial or by creating your own, it’s about being creative! Feel free to create new track parts or edit existing ones. The marble part for the tutorial is available to download here.
The sweep tool was used for several of the track pieces, but it was very useful when creating the winding track ramp. A guide sketch was created to split the ramp into 4 parts before using the 3-point arc sketch tool to draw out the winding path alternating the arc. the start and end of the path start straight but have a fillet added to soften the join up to the arcs. The path was then used to sweep a circular profile along it.

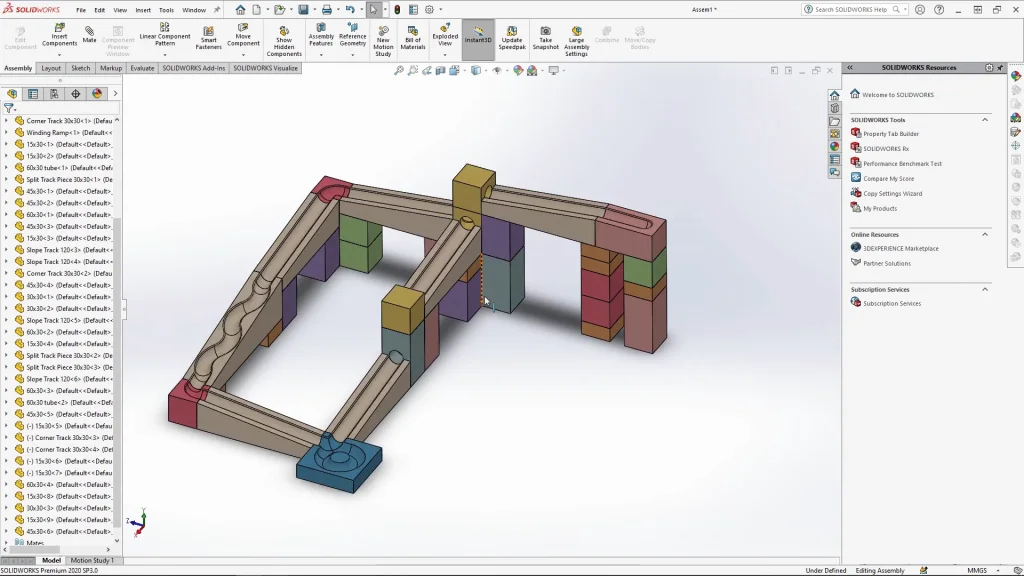
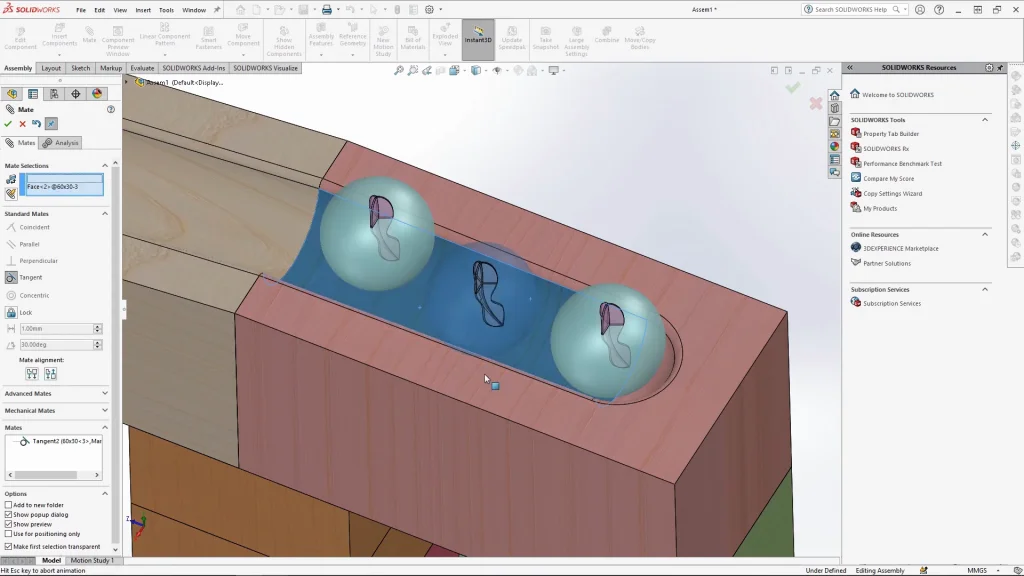
Once all 10 track pieces are done, I added stained wooden appearances to each before re-saving the parts and closing them ready for the assembly. When creating the assembly, it’s always easier to start with the end track and work up, I added components in stages to overwhelm myself with parts to mate. Ensure that all the parts are fully mated in place, so they don’t move as you’re adding more parts too. With the marble run fully assembled I fix all the track parts ready for the motion study. If you don’t fix these parts, they may just fall through the floor of the assembly, doing this also ensures that they don’t interfere with the analysis. The marbles are dropped into the assembly at the top of the starting track block and are mated with a tangent mate, but only temporarily for placement.
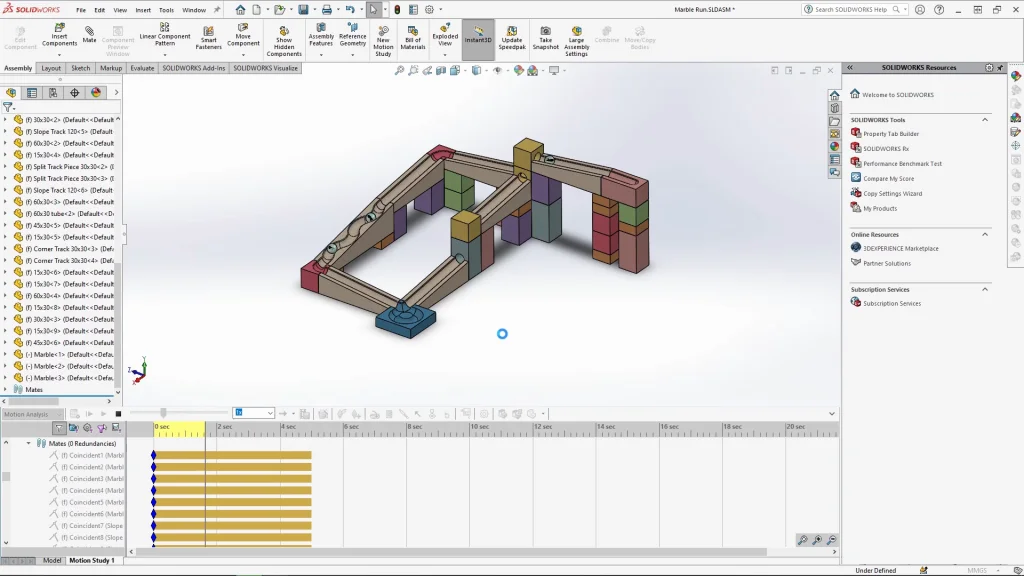
For the motion study of the assembly, I used motion analysis, and added gravity to the y-axis, and contacts to all the parts in the assembly. With those added I suppressed the tangent mates on the marbles, and run the analysis. The interesting thing about the analysis, is that I can get different results depending on where the marble starts on the ramp. I enjoy using the motion analysis for simple motions like this, as the finished animation can be very fun to watch.
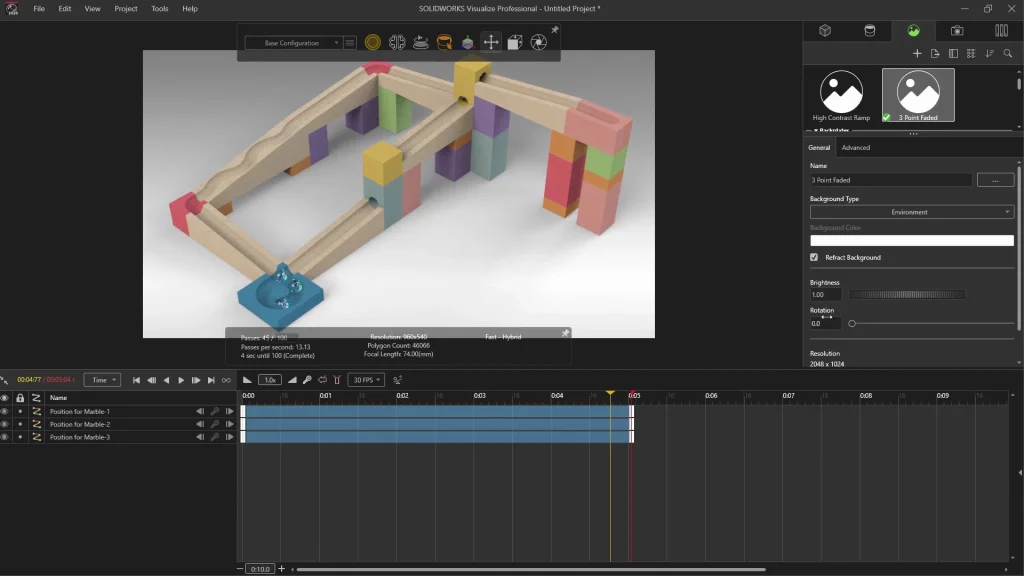
When your analysis is complete, if you have access to SOLIDWORKS VISUALIZE you can export it directly into the programme ready to render into a video animation. Use export advanced within the SOLIDWORKS VISUALIZE tab, and under the drop-down menu, select your motion study, it will then open in VISUALIZE with the animation keys in place. If you watch the tutorial to the end, you will see how I make the camera ratio larger, edit the background and backplate. I could then render the animation into an mp4. file with a few easy steps. VISUALIZE also allows you to control how many frames per second are rendered for the animation, this is useful for when I want to edit and slow down parts of the animation later without losing video quality. I haven’t played around with extra camera angles for the rendering because it is such a quick animation. For this model its best to stay still to see the whole animation from one viewpoint, start to finish.
You can see the finished rendered animation at the end of the video tutorial. Once you have created your own marble run, share it with us, we would love to see what you can do.