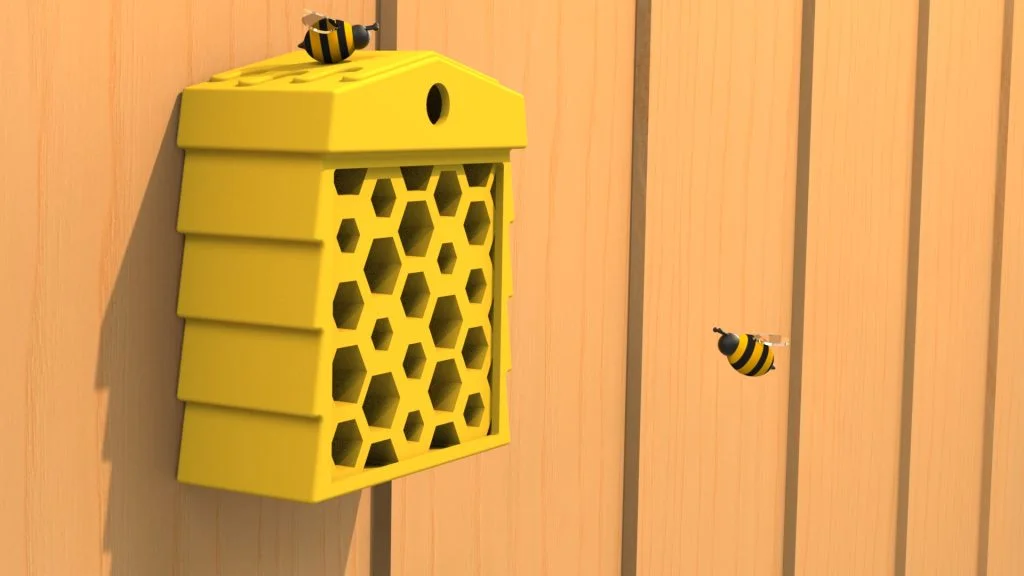
I have created several bee themed videos before for SOLIDWORKS, the reason for this is to spread awareness for bees. They have lost much of their natural habitat in the past 60 years with threats from pesticides, intensive farming and climate change. So for this tutorial I wanted to give back to our bees and create a bee-friendly space in my garden. Bee houses are used as breeding places by cavity-nesting solitary bees like Mason, Leafcutter and Yellow-faced bees which naturally nest in hollow stems or holes in dead wood.
In this tutorial, the fill pattern was used to create the honeycomb design. By extruding one hexagon shape onto the back face of the bee house, it could be patterned to fill the face shape, you can even have the feature offset over the edge of a face so that it is totally covered.

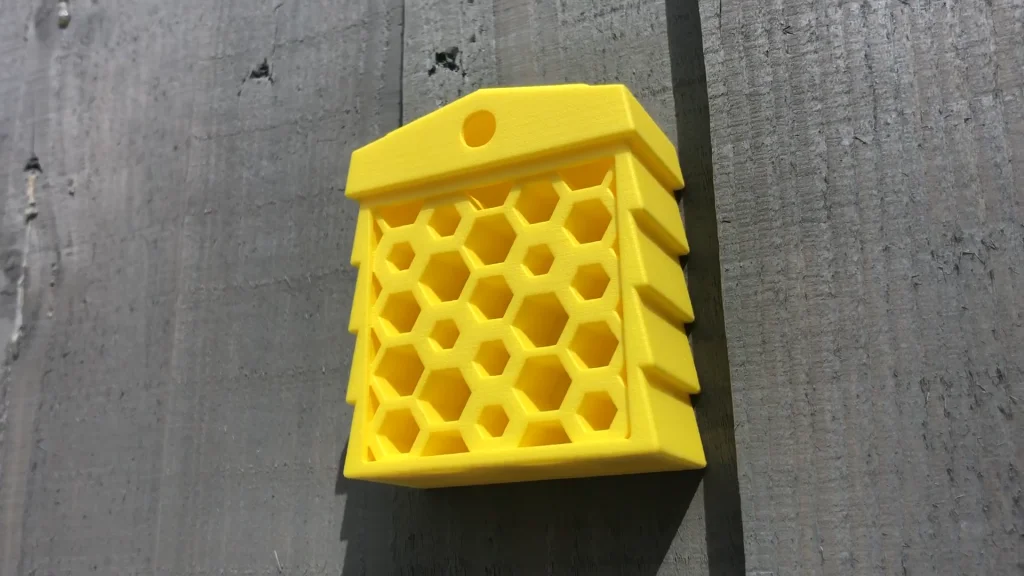
It was important while designing and modelling the bee house that there was a cavity for the bees once they got into the house, this was achieved with the shell feature. Bodies were kept separate through the tutorial steps so that the cavity could be created. This design is 2mm thick overall for anyone who is thinking of 3D printing the model. I scaled up my model a little before 3D printing and the finished print was 75.6 x 88.6 x 38 mm. Feel free to go larger but be aware that these bees only need a minimum hole diameter of 6mm to get in, so if you print too large the holes may be too large for the bees and not offer them the shelter they require.

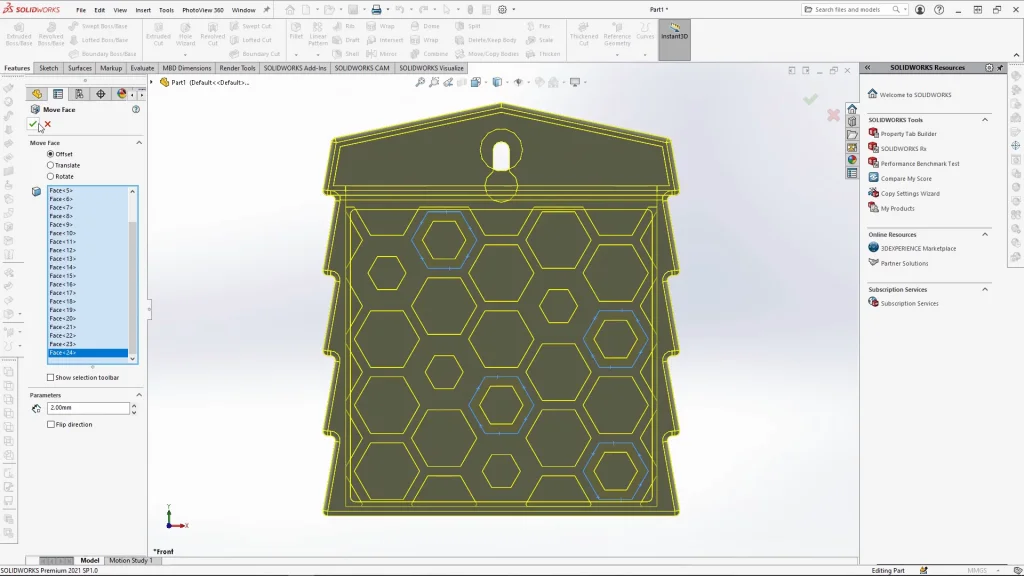
Once the house was modelled, to try and mimic the varied hole sizes found in nature, move face with an offset was used. The inner faces of different hexagons were offset with varied dimensions.
If you do 3D print the bee house here is some information on where to hang your house.
Your house should be placed in full sun, facing south or south east and must be at least a meter off the ground, with no vegetation blocking the entrance. Secure it firmly to a wall, fence or free-standing post while in use, there is a slotting screw or nail hole on the back of the design for hanging. The Bee House should be placed against a flat surface and located in an area protected from high winds. You will need to move your bee house in the autumn and winter to protect any possible bee eggs inside. Anywhere dry and unheated. Do this from October to February, and then put it back in the sun in March.
Below is my 3D printed bee house, I coated mine in a waterproof lacquer paint to protect it from rain as it was printed in a dyed yellow Polyamide (SLS), the surface has a sandy, granular look, and is slightly porous, so the lacquer should seal it from the elements.