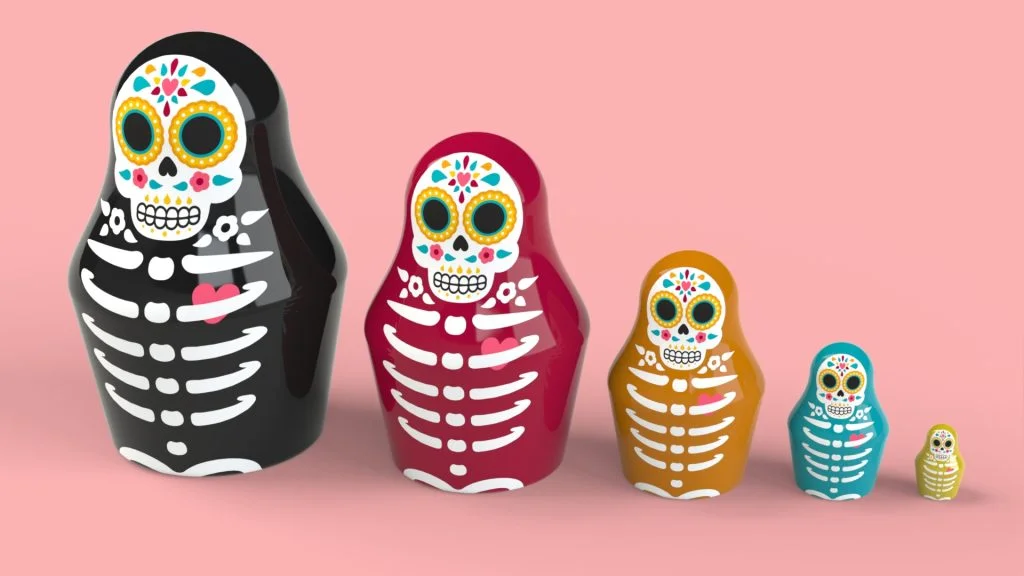
For this tutorial I decided to create Sugar Skull themed nesting dolls, my family had nesting dolls as ornaments when I grew up, but I just seen them as toys! Who didn’t enjoy taking these apart as a child to find the tiniest doll inside all those layers? For this tutorial I only created 5 nesting dolls, you could increase this number by scaling down the dolls in smaller increments or by starting with a larger doll. The decal used in this tutorial is available to download here.
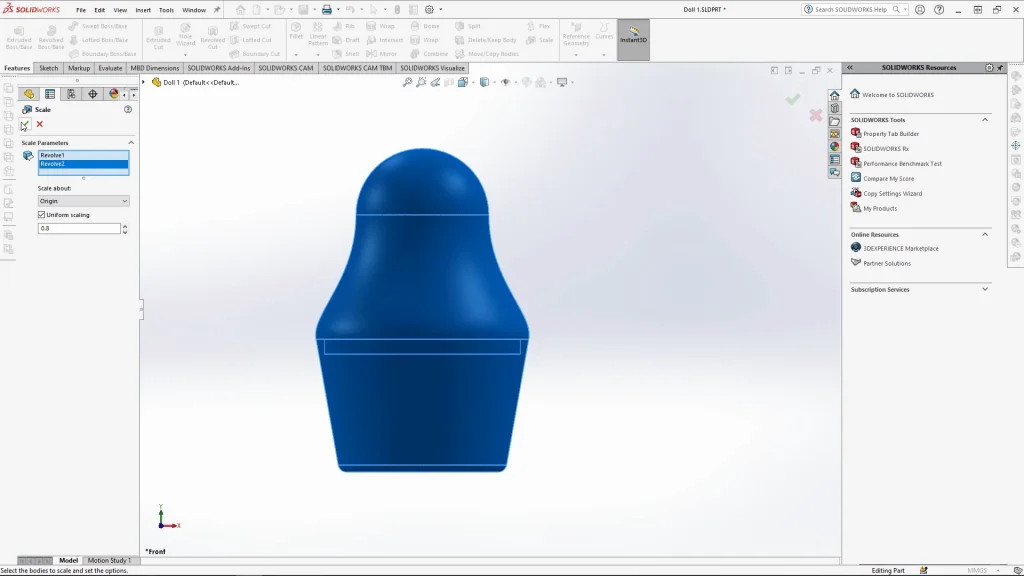
To create the dolls, the top and bottom parts were revolved in separate features. Starting with the largest doll, I used the scale tool to shrink the doll down, I then used ‘save as’ to save the part as Doll 2, I repeated this process until I had 5 dolls. I had to shrink Doll 1 before I shelled the parts otherwise each doll would get thinner and thinner, so this was done after the parts were scaled down. Doll 5 was combined into a solid doll as this is usually the case with the smallest nesting doll.
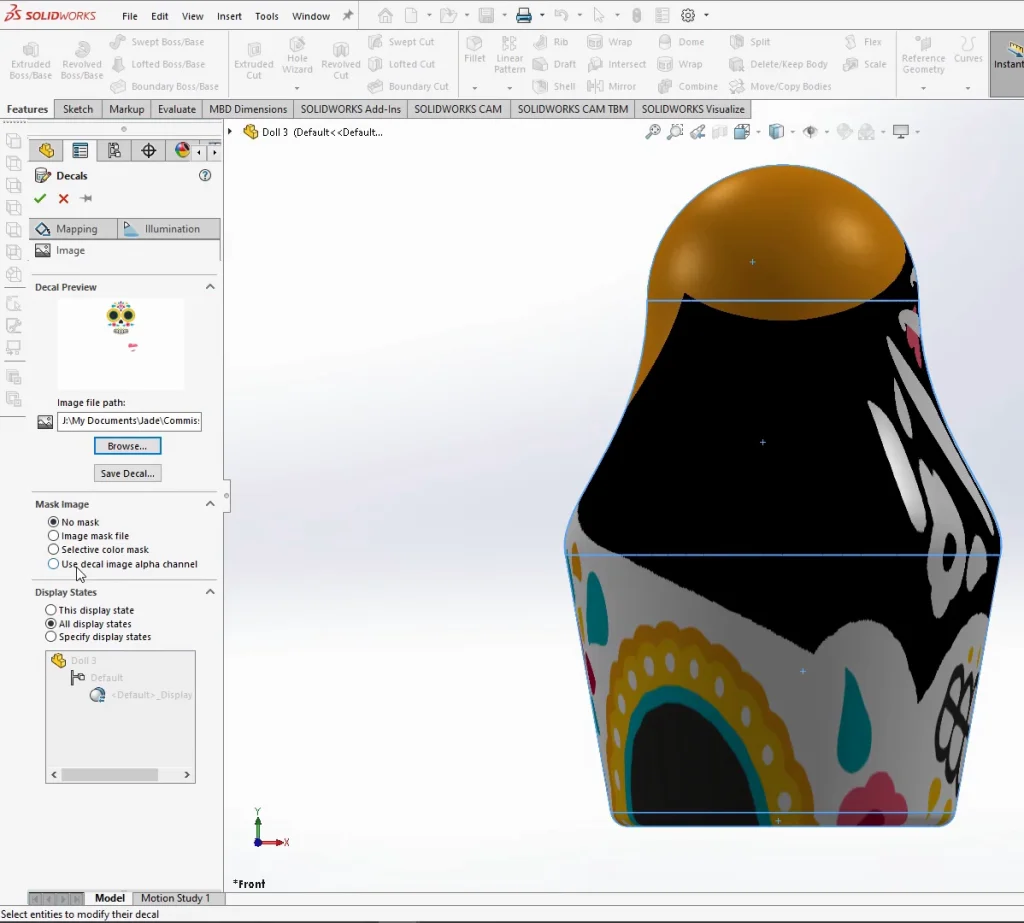
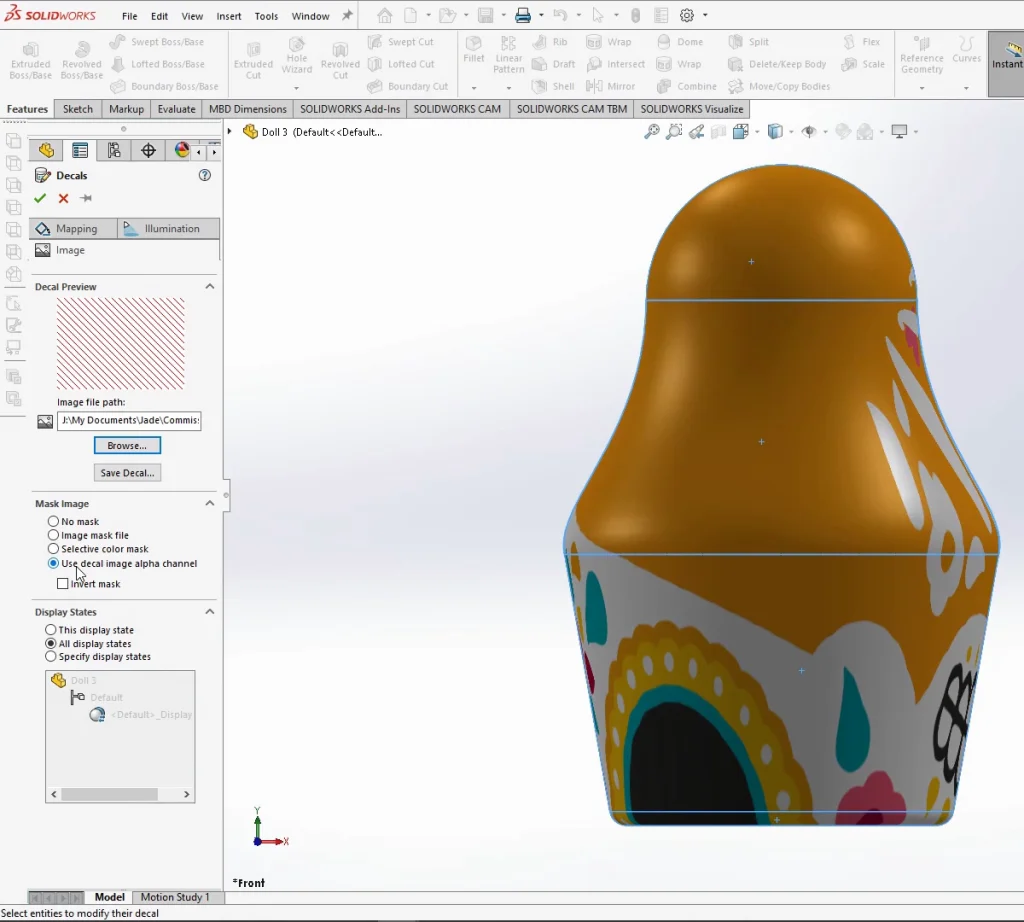
The sugar skull decal is applied using projection mapping so that it is visible on both sides of the doll. The decal I created is a PNG file, the reason I am using a PNG file is because I want the background of my decal to be transparent. That way I can put it over any appearance. When it opens you’ll get a decal preview, under mask image you will need to change this to use decal image alpha channel, this makes the black background transparent.
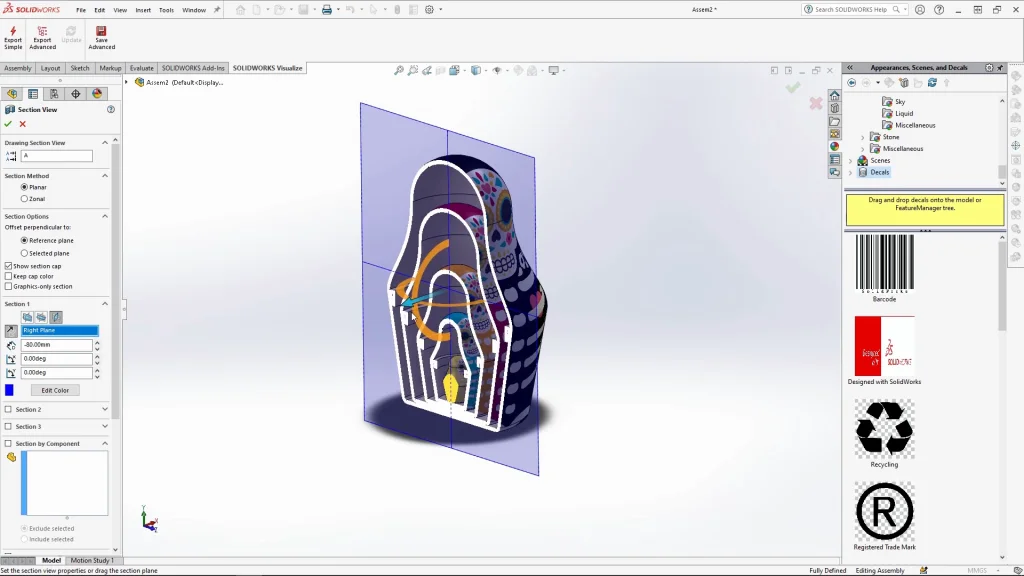
Once all the parts have their appearances and decals applied, I brought them all into an assembly and mated them inside of each other. As I mention in the video tutorial, if you want to create open nesting dolls you can use save bodies and save the top and bottom of each doll as individual parts. I then re-added the decals to each. You can see an animation I created using this method at the end of the tutorial. The animation and renderings seen in the tutorial are all created in SOLIDWORKS VISUALIZE.

