

For this SOLIDWORKS tutorial I decided to create a 3D printed accessory set for a pumpkin. In recent years ‘no carve’ pumpkins have become very popular, the reason for this is not only is there less mess, but it is often easier to decorate the pumpkin in a creative way without carving. I have also found that when you carve a pumpkin it begins to deteriorate and rot away, no carve pumpkins last a lot longer! So for the tutorial I decided to create a bat pumpkin, you will see me create a miniature set of parts such as wings, ears, eyes and fangs. All the parts can be 3d printed and pressed into a pumpkin. The parts I’ve created for this tutorial are for a mini pumpkin 12cm by 8cm. If you want to decorate a larger pumpkin feel free to scale up the parts.
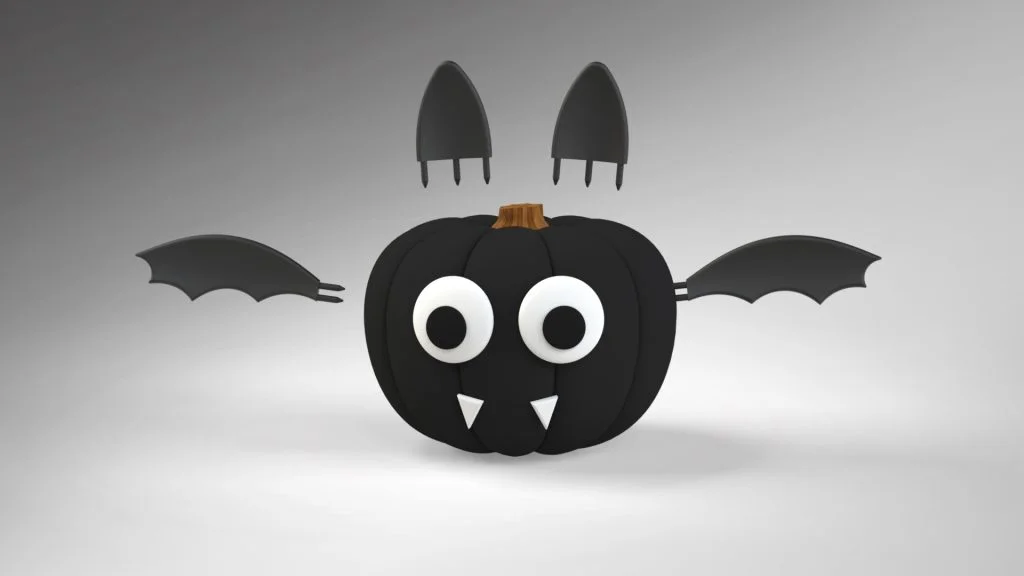
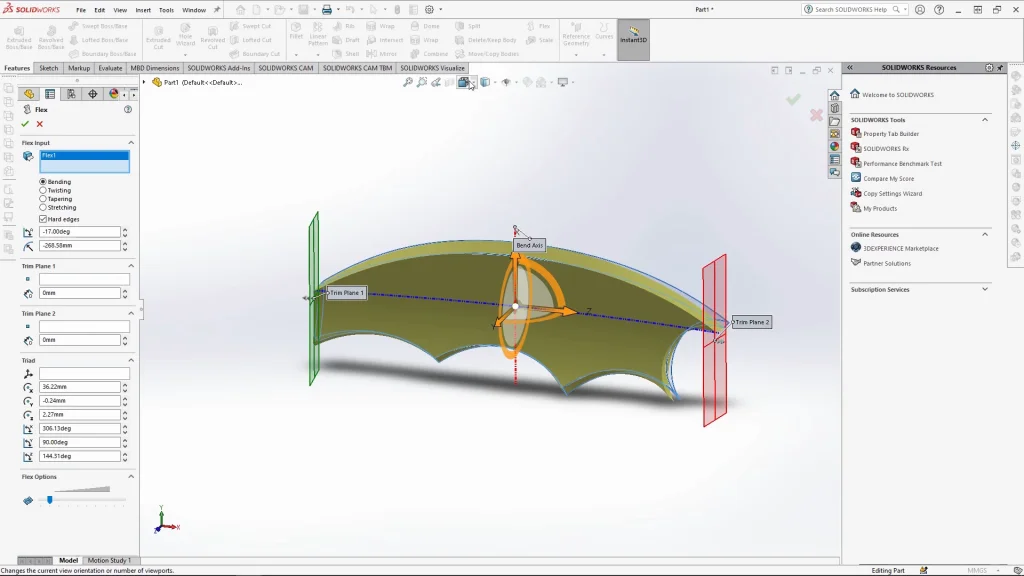
The parts are fairly simple to model but when it came to the wing, the flex tool turned a flat extruded wing into a more realistic curved wing. I used the flex tool on bending both vertically and horizontally. the same process was used to created the bats ears. For each part such as the ear, eye and fang only one model was needed and multiples of the part can be printed. however the wing needed to be mirrored, the fasted way to do this was with mirror part. Where you select a mirror plane and use Insert/Mirror Part, the mirrored wing opens into a new document. The best part about this feature is that any changes I make to the original wing will also be applied to the mirrored part, this saves me a lot of time.
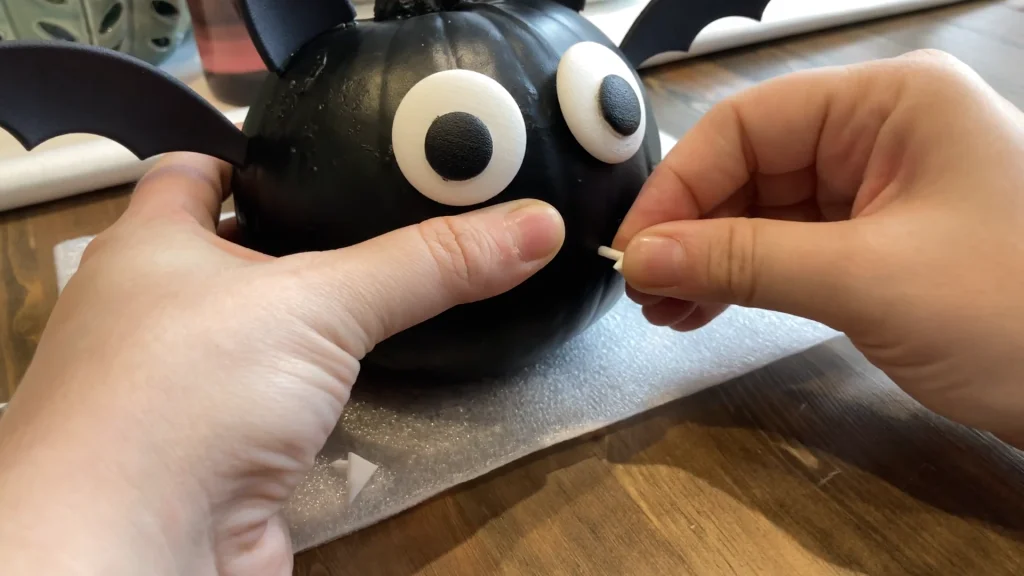
Once all the parts are modelled they are all saved as STL files. My parts were 3D printed in Polyamide (SLS) which is a strong, flexible nylon, but you could print them in any material. As mentioned in the tutorial video, if your pumpkin is quite tough like mine was, you may want to puncture the pumpkin with something a little sharper first to make way for the 3D printed part pins. I used a mini screwdriver to make holes and then pushed in my bat parts. I used a craft matt black spray paint to paint the pumpkin beforehand, if your using spray paint, make sure you use it in a well ventilated area, i did mine in the garden! plus it dried much quicker outside.
The black pumpkin model seen in the tutorial is available to download here.