
It’s always interesting to know about some cool tricks that you can use when it comes to modelling within SOLIDWORKS. Well, within this blog we just happen to have one of those tricks for you. They always say a magician never reveals his tricks, but let’s look at the magic that SOLIDWORKS can perform for you.
When it comes to modelling, patterns can be a great way to save time instead of recreating the same geometry time and time again. The only thing is, it can be useful to have a pattern number next to each of our patterned instances, but can we do that? Well this is where the magic lies.
Say we wanted to create a model of a steel rule, it wouldn’t be too hard to create all the markings for each unit measurement, but how could we add the numbers without having to create a separate sketch for each number? And how would we get the placement of each number correct? Well, with this trick, it has never been easier. All we require is a sketch to contain our first number as well as the ‘magicians secret’ – a dummy dimension.
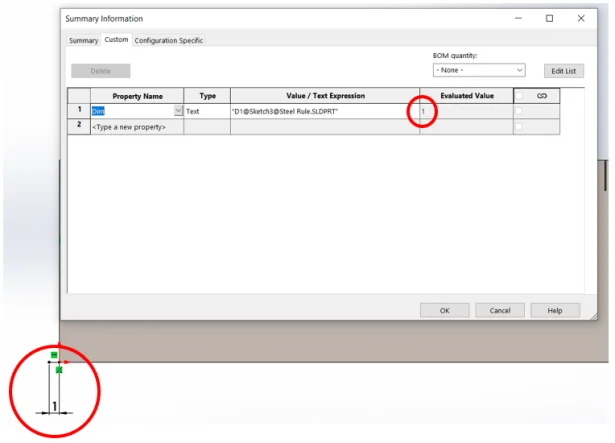
As I will start with the metric side of the steel rule, the first number listed will be 1 cm. Therefore, I will add a dummy construction line into the sketch and dimension it to be one unit in length. With the dummy dimension in place, I can then create a custom property that is linked to this dimension (Value = 1).
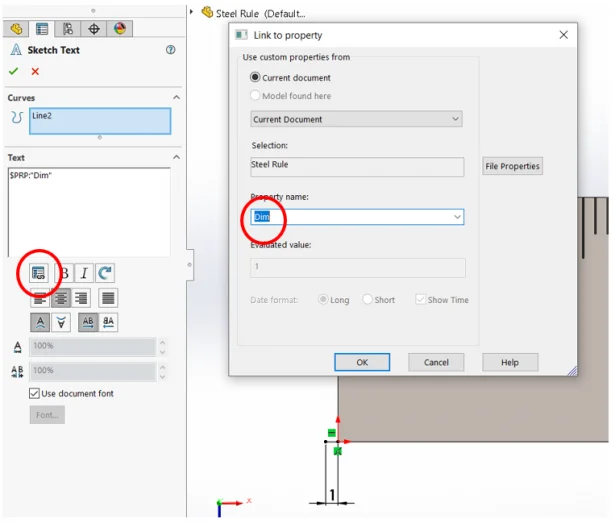
With this custom property added, we can return to the same sketch and add in some sketch text for the number that we are interested in. However, before we just type in the value that we want, we are going to use the link to property option, where we can get access to the custom property that we have just created.
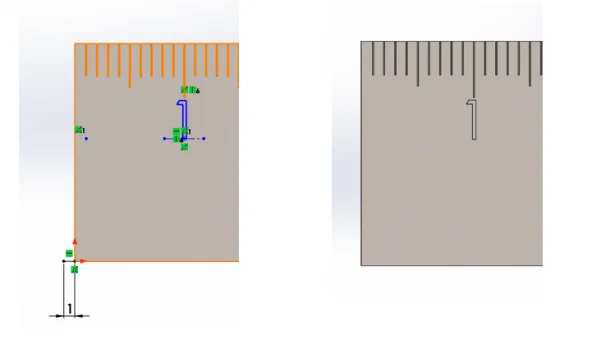
We could even sketch a reference line/curve to snap the text too. A reference line and the centre align text option work great for the example. Then to finish the number off, we can make a small cut into the surface of the rule.
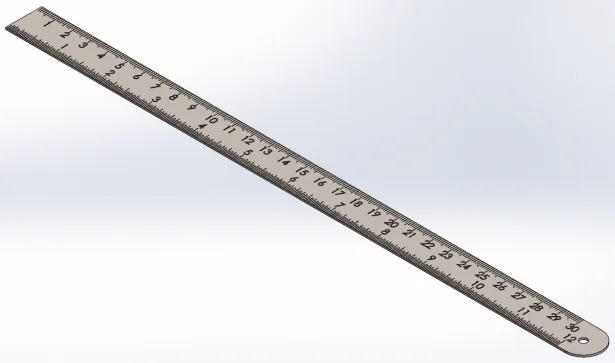
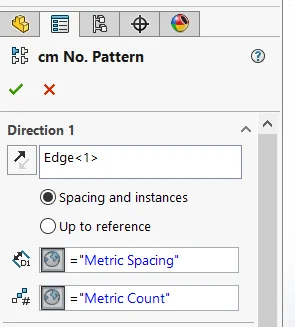
Finally, we can add the rest of the numbers and this is where the magic (dummy dimension) comes into play. Using a linear pattern, we can pattern the number 1 using the correct spacing and number of instances to complete the steel rule. Normally this would result in just having the number 1 patterned all the way along the rule. However, to get the number to change, we can use the option ‘Instances to Vary’. This allows us to select the dummy dimension and set it to increment in desired values (in this case 1). With this setup we can then let SOLIDWORKS do the counting for us.
We could even finish things off by repeating the same process for the imperial side of the rule.
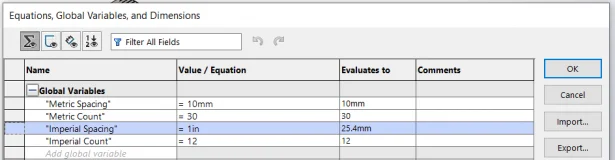
Finally, we could get a little fancy and makes thing even easier to control with the use of some global variables. The global variables can then be used to drive the instance counts and the spacing, meaning we can drive our steel rule all from a single location.
Kieran Young is an Applications Engineer at TMS CADCentre, a SOLIDWORKS Value Added Reseller in Scotland.
You can read more from Kieran on the TMS CADCentre blog