3D Printing Spooky, Style Spline Stamps Made in SOLIDWORKS


Editor’s Note: We’re partnering with MakeDaley, Luke and Karen’s YouTube channel, to help bring you a series of videos that combine their love of making with ideas brought to life within SOLIDWORKS! Be sure to subscribe to their channel to keep up with all of Luke and Karen’s quirky-cool creations!
—–
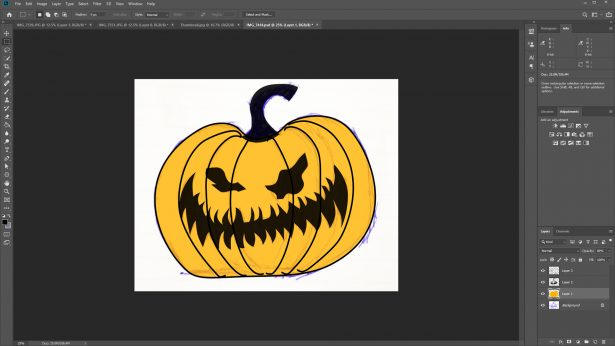
Hi, my name is Luke. I’m a maker & fledgling YouTuber from the UK. I’m going show you the steps you can take to make your very own multi-layer stamp design, as you follow along with my video to get more insight into my process. Because it’s the season of all things orange, we’re going to make a Halloween Pumpkin. You can start with a masterfully hand-rendered illustration… or just do what I did, and scribble something ugly and roughly like what you want!

Next, if you’re happy with your hand sketch and it doesn’t look like the deranged scribblings of Aleister Crowley himself, then I’m jealous and skip to the next step. In our case, however, my ‘sketch’ needed all the help it could get so I brought it into Adobe Photoshop to tidy up the lines and get the proportions right.
With your shiny new concept, we’re ready to dive into SOLIDWORKS. After entering sketch mode, head to Tools>Sketch Tools>Sketch Picture. Be sure to use the scale tool to set the size of your creepy creation before you continue, as this will help you out down the road.
Begin to draw out your shapes using the Spline tool; I’m particularly partial to the Style Spline as it gives much smoother curves when your eyeballing things. Don’t be afraid to split out things into separate sketches. You’ll need at a minimum one sketch per colour.
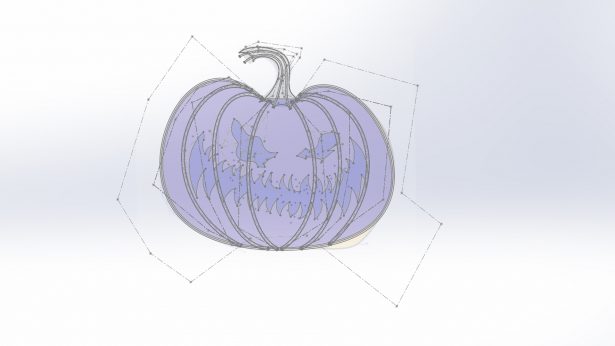
Once you’re done, you can extrude them all out and merge the extrusions that are supposes to be one colour using the Merge Result feature OR by using the Combine tool. You should now be left with one object per colour with your Solid Bodies folder showing 2 or more bodies (depending on how many colours features in your design).
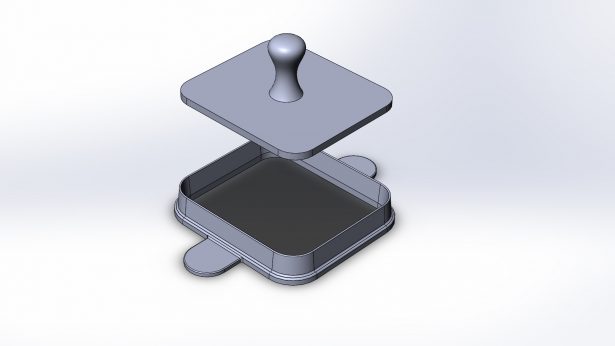
From here you can take your design and make a stamp handle to suit. I made a simple, rounded rectangular shape with a rounded handle so it would be comfortable to stamp with; you can use the same stamp handle design for all your stamp plates. A big benefit of working with the same stamp handle is that we can constrain the stamp print with a simple extruded shape that will align and orientate the stamp plates in the same position for each successive layer of our design.
After this step, export your design, slice it up, and 3D print it. If you want to get your stamping surfaces flat, then follow along on my video to see some of my tips and tricks on printing and how to get a great surface finish for a fantastic result!
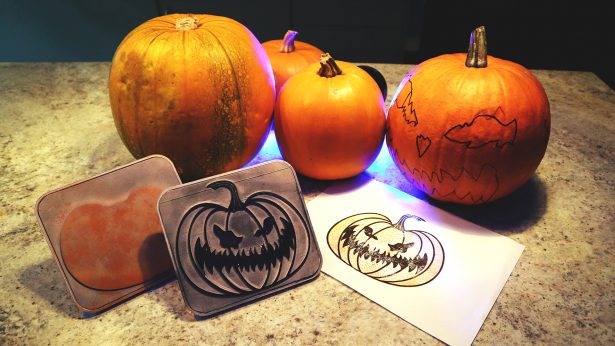
Good luck! Until next time, may your candy bowls be full, and your pumpkins hollow!