

Have you ever wondered if there was a way to save a simulation feature such as a load, fixture, or a connector as a library feature, just like SOLIDWORKS? Simulation library features could serve as templates and help accelerate the design iteration process. Especially when multiple users across design teams are tasked with using simulation, this hidden gem can boost up productivity and minimize errors / mistakes commonly made while setting up the simulation studies.
SOLIDWORKS Simulation comes packed with a ton of productivity tools. In this blog, we will discuss how to create and reuse simulation library features.
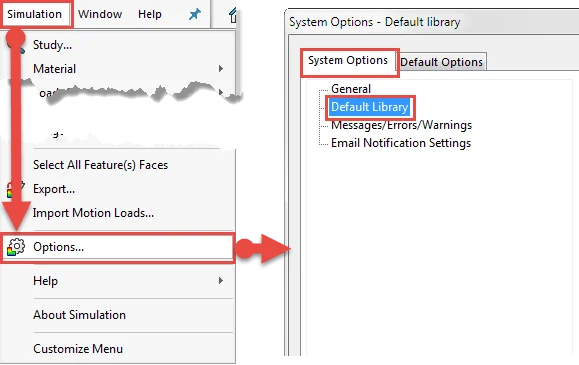
The first step is to ensure you dedicate a folder on your machine as the location where all your simulation library features would be saved. On the SOLIDWORKS menu, go to Simulation – Options – System Options – Default Library as shown below.
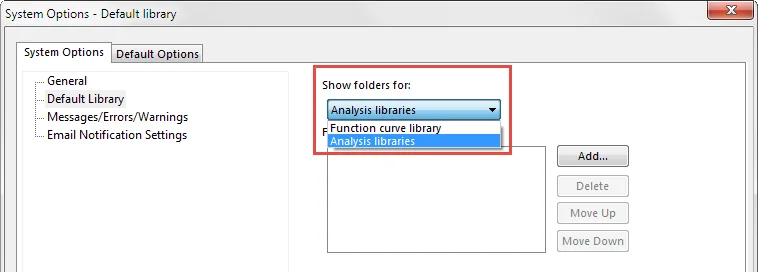
In the dialog box, click the drop down option under Show folders for: Select Analysis Libraries
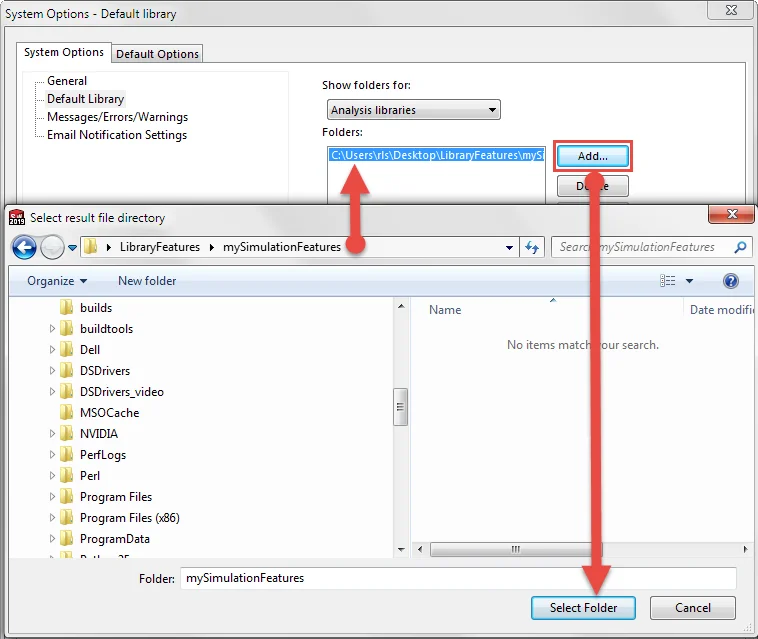
Click Add and select a folder on your computer.
Click OK on the Systems Options dialog box to save your changes and exit.
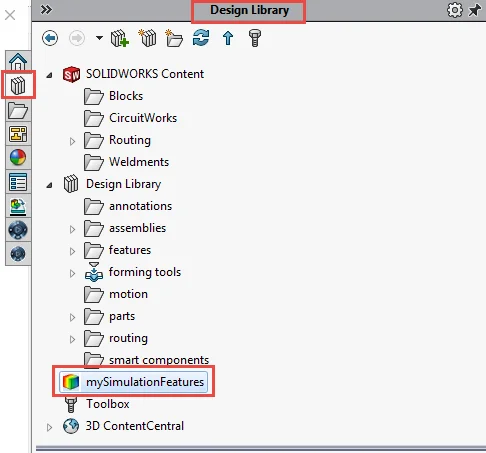
In the SOLIDWORKS Task Pane, under Design Library; the folder should be now visible. See image below.
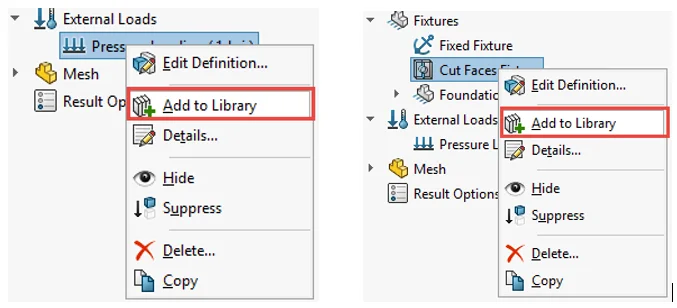
In the SOLIDWORKS Simulation feature tree, RMB on a load, fixture or a connector feature and select Add to Library as shown below.
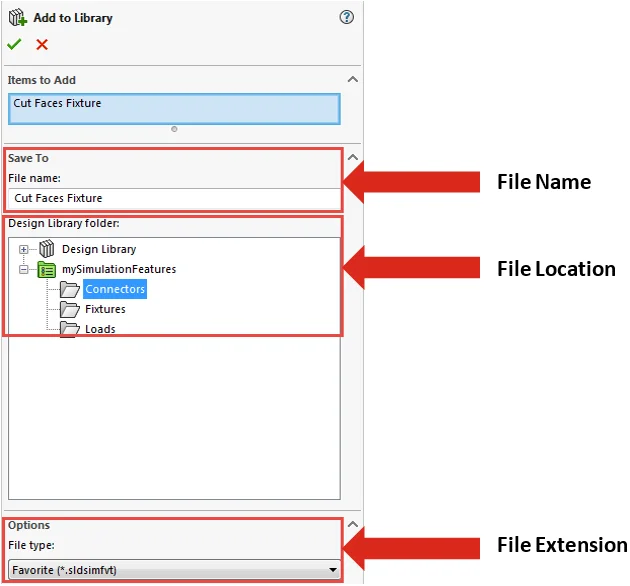
In the Add to Library dialog box, input a file name and location to store the library feature. Notice that the feature is saved as a file with extension *.fldsimfvt
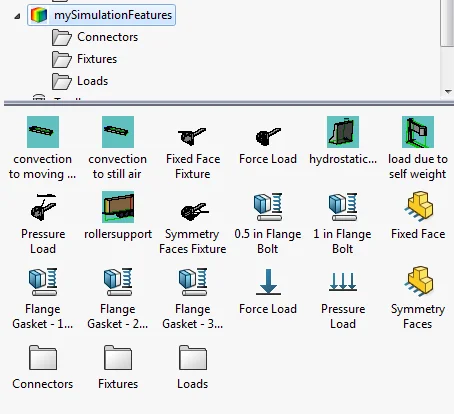
Below is a sample example of the simulation library that contains a lot of different types of simulation library features. Think about how the library feature folder itself can reside in a network location and is accessible to all designers and engineers across the company!
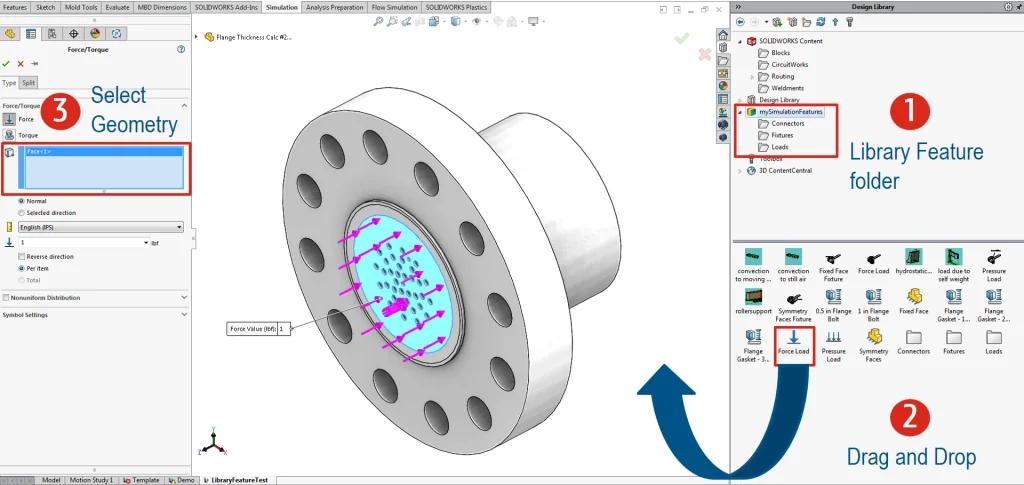
Next let’s see how these library features can be re-used in a simulation setup. There are three simple steps.
- First locate the folder containing the library feature files
- Select the desired library feature. Drag and Drop them to the graphics area
- After the feature dialog box opens, resolve the input field. In the illustration shown below, a force library feature is dragged and dropped. In the force dialog box, the magnitude of the force is already pre-defined. All that needs to be done is selecting the geometry on which the force needs to be applied.
Sample simulation library feature files are provided if you want to test drive this productivity feature in SOLIDWORKS Simulation. Click here to download.
Stay tuned for more upcoming discussion on some of the other productivity tools such as Contact Visualization, Degree of Freedom Analysis, 2D Simplification, Shape / Topology Optimization, Simulation API and many more.
To learn more about SOLIDWORKS Simulation, visit us at https://www.solidworks.com/category/simulation-solutions