
Written by: Michael Nolte, Application Engineer, DASI Solutions
From time to time, there is a need to create a test environment so that any potential changes to a SOLIDWORKS PDM vault can be tested away from the production vault or a vault that is actively being used. This way, change can be vetted out without causing delay or problems to a company’s normal activities in a production PDM vault. Some examples are: new workflow approval process, updating file and folder data cards, etc…
In this Tech Blog, we only copy the settings from the production vault and none of the CAD data. Some of the items that come over are: Workflows; File, search, folder cards; SOLIDWORKS PDM templates; variables; users; group; etc…
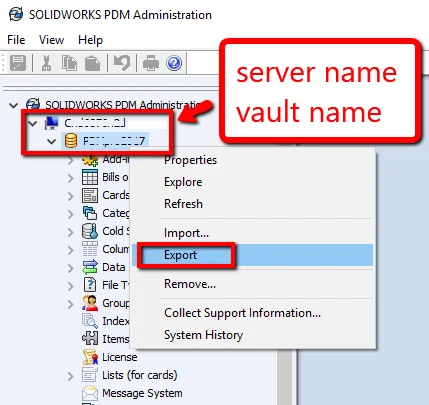
- To get started: Open the ‘Administration’ program, log into the production vault, right click over the vault name, select ‘Export’
This will open a window titled something like: ‘Administrative Export File1’. Go to the File menu, select ‘Save As..’. I recommend saving this (.cex) file to a location you can easily get to but also make a backup of this file just in case it’s needed in the future. I recommend naming these file something like: ‘VaultName Full Settings Backup 20170221’
- Next, we need to check to see what data format and what Database server the production vault is using. This way, when we make a test vault, it matches the existing production vault. Right click over the production vault while in the ‘Administration’ program, select properties. Write down a note or even screen capture the ‘Database server:’ and ‘Date format:’ fields
- To create a new vault requires the necessary credentials for SQL and for the PDM server(s). Collect these prior to moving onto the next step.
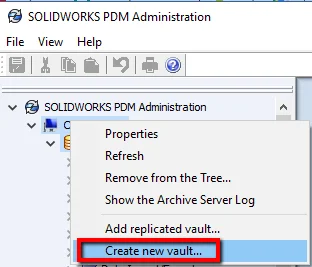
- Time to create the new vault. Right click over the server name in the ‘Administrator’ program, select ‘Create New Vault…’
- This will open a wizard to create the new vault. If prompted for the ‘Type of Vault’ select ‘Professional Vault’ (formally called Enterprise PDM) or ‘Standard Vault’
- Type in a name and description that clearly indicates that this is not the production vault. i.e. ‘Test Vault’, ‘For testing workflow changes’, etc…
- On the ‘Select vault root’ in most cases the default selection is fine.
- When presented with the ‘Choose database’ screen, please choose or type in the Database Server that was collected back in step 2. I recommend not changing the database name.
- No changes are needed on the ‘License Server for Vault’ screen
- Set the data format that was collected back in step 2 to be the same on this new test vault.
- On the ‘create the admin user’ screen I recommend unchecking ‘using server default’ and typing a different ‘admin’ password. This way users that may have the ‘admin’ password for the production vault don’t accidentally go into the wrong vault. Be sure to write this down or share with only the users that will be testing in the new vault.
- ‘Configure vault’ screen we will set the ‘Use a predefined configuration’ to ‘Empty”. We will go into why we did this a little later.
- Click Finish for the test vault be created.
- Create a vault view. This can be done by either logging into the vault in the ‘Administration’ program or using the ‘View setup’ program.
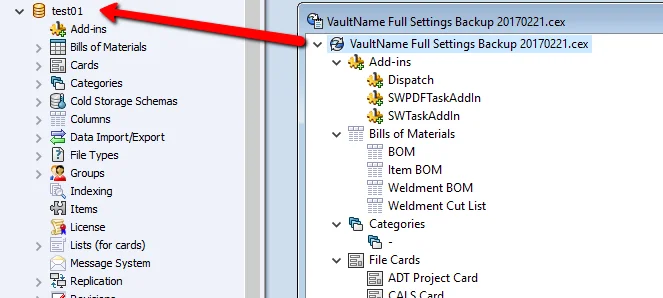
- Now we can import the .cex setting file that was created back in step 1. The reason that we selected empty in step 4-h. and then created the vault view in step 5 is so that when we import the .cex settings file, it brings along the data cards and even possibly files that are part of PDM template(s).
There are 2 ways of importing setting files into a new vault. The first is to right click over the vault name in the ‘Administrator’ program, select import. The second method is file, open, then when the settings file window is open, drag and drop the top of the tree in the settings window to the new test vault that was created.

At this point you can now start doing your testing without effecting the production vault. Make a copy of a project assembly to your desktop and then copy it into the new vault for testing, if needed. Some permissions may need a backup in the copied testing vault.
Note: If Dispatch scripts are used in the production vault and are needed for testing, they will need to be exported separately. To check to see if the production vault is using any dispatch scripts: Open the ‘Administration’ program, log into the production vault, expand, Add-ins, right click over Dispatch, select ‘Administrative Actions’. If the ‘Administrative Actions’ is empty or Dispatch isn’t listed, then you don’t have any Dispatch scripts.