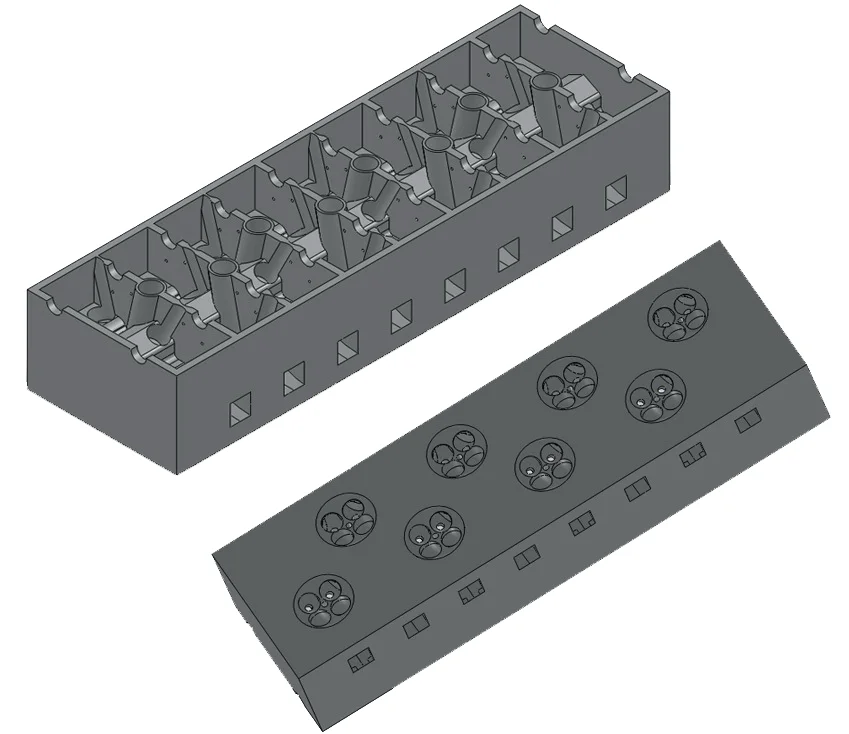
In this post about the W16 Engine I will start describing the cylinder head and how it works. Then I’ll start detailing the build as usually.
The file: Download Camcase Left.
See detailed explanations in the extended entry at the end of the post.
Thank you for reading about this build and stay tuned for the next post which will continue the build of the cylinder head.
George Bucsan
Worcester Polytechnic Institute
Aerospace Engineering, 2014
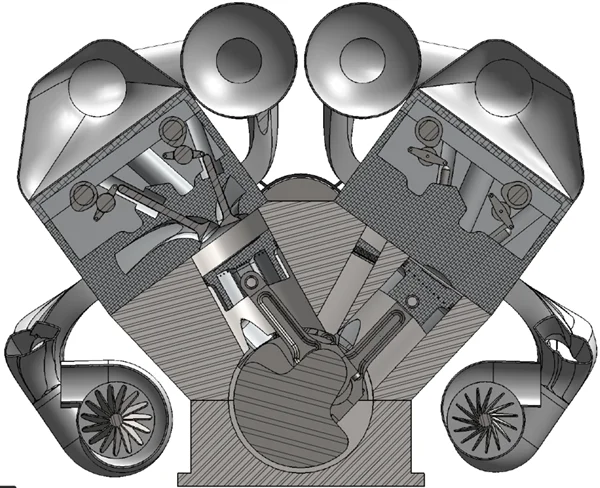
Before starting the build we need to understand this particular type of engine and its cylinder head. Because the cylinders are so tightly packed, two camshafts are enough for two rows of cylinders. The following is a section view of the cylinder heads on the block:

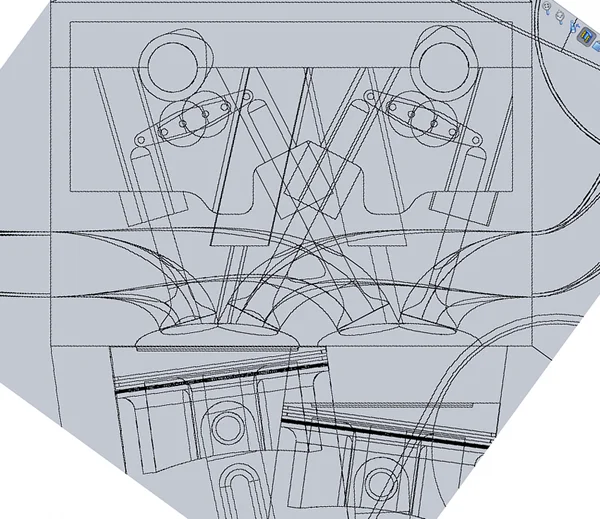
As it can be seen, each camshaft opens the intake valves on one of the rows and the exhaust valves on the adjacent row (the engine is split into the left V and the right V). In the following wireframe screen capture this can be seen:

Now that we know how it works, we need to figure out how to make a geometric construction in Solidworks to build it.
When I first made the part I did not have enough experience with copying sketches from a part to another, and I made a mistake – the sketch flipped, therefore I had to fix my part once I saw that it is upside down. I will detail here exactly how I fixed it because making it all over again is painstaking and at the time I did not consider it an option.
Because the top of the block is not perpendicular to the cylinders, the resulting holes on the top are elliptical. It is very difficult to find the dimensions and locations of those ellipses and duplicate them on the cylinder head bottom, therefore I chose to make a sketch out of the top of the block (Convert entities) and copy it onto the new part. I called the part Camcase but I think the best word for it is Cylinder head.
I first took the rectangular outline of the sketch and extruded it vertically.
Now that I have the solid block and the outline of the cylinders, I need to find a way to make the combustion chambers (a dome-shaped cut into the bottom part of the cylinder head). The combustion chambers need to be the same size as the “notches” in the heads of the pistons. When I created the pistons I converted the top sketch and created an offset entity at a distance of .39’’, therefore this is what I did here also. Just for further reference I drew some widthwise lines through the centers of the ellipses.
It is time to make the first combustion chamber. I created a plane, parallel to the right plane, through the centers of the right row of ellipses: Plane1. Because I cannot find out the exact shape of the combustion chambers, I just made a sketch on Plane1, shaped as an ellipsis, the same width as the previous sketch’s ellipses and with a height of .35’’ (measured on the real engine reference but still approximation) and then trimmed it to a quarter. I revolved it on a vertical axis through Revolved Cut. The shape is not ideal but it is good enough for this model as it matches the small ellipses almost perfectly.
For the rest of the right side combustion chambers I used a linear pattern with the now classical spacing of 5.3’’. I then used the same algorithm for the left side combustion chambers.
After the combustion chambers, we need to start working on the holes for the valves. From measurements on the reference file, I approximately found the angles of the cuts. Based on that, I returned to the copied sketch and worked on the left cylinder row. I created a line through the center of all four ellipses and one parallel to that at a distance of .5’’. Starting from those lines I created planes 4 and 5, at angles of 27 and 16 degrees from the right plane. On the front face of the part I created a sketch and projected (convert entities) planes 4, 5, and one of the combustion chambers. At this time the sketch had half of an ellipsis and two lines. I created two more lines, tangent to the ellipsis and perpendicular to the initial lines. From these I created the planes for the cuts: Plane7 & 8 (perpendicular to the front plane and through those lines).
The position of the holes for the heads of the valves were again slightly guessed and measured from the reference files. On Plane7 I created two circles, symmetrical about the widthwise axis of the first ellipsis and .89’’ in diameter. I did the same for Plane8. I fitted them so that they would create approximately symmetrical holes about the lengthwise axis; four holes in total for the first combustion chamber. For each I made an extruded cut from the plane it was made, through all towards the bottom of the part. You can find the exact dimension in the part file
By this time, the first left cylinder has holes for the top of the valves. Through a linear pattern along a lengthwise axis I created the holes for the other three cylinders in that row. I then made an axis, perpendicular to the bottom of the part and through the midpoint between the first left ellipsis and the first right ellipsis. I used that to make a circular pattern with the first set of holes (180 degrees) and I got the holes for the first right cylinder. Through another linear pattern I got the rest of the holes for the right side cylinders.
