
Designers are often required to create shapes that mimic organic objects. Creating these shapes requires a different approach than using predetermined parametric models. While parametric models have their place, their rigid designs are unsuitable for depicting an object such as the hull of a boat, the fender of a car, or an ergonomic chair. To create a detailed, lifelike representation of these types of objects, many designers choose to use subdivision modeling.
Subdivision (also known as SubD) modeling is a technique that helps designers create organic-looking, realistic 3D models in less time and with more detail than other modeling methods.
The 3D Sculptor role and its xShape app is a must for those who need to create complex shapes quickly. This powerful browser-based solution allows you to push and pull a simple mesh model into any shape. With 3D Sculptor, you can create complex organic designs in an intuitive way. Oh, and did I mention it’s fun? Aside from all the benefits above, here are some of my favorite tools that I wanted to share with you so you can get the most out of 3D Sculptor.
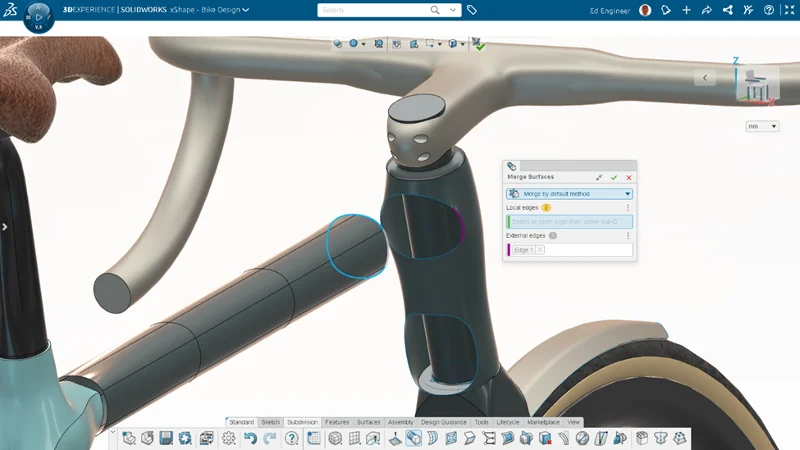
- Merge Two Subdivision Surfaces with the Merge Surfaces Command
When you have two subdivision bodies in one model, you can select two open faces and easily merge them together using the Merge Surfaces command. Spend more time perfecting your shape and then put it altogether later. This allows you to focus on the important design areas upfront, giving you more control of your design process.
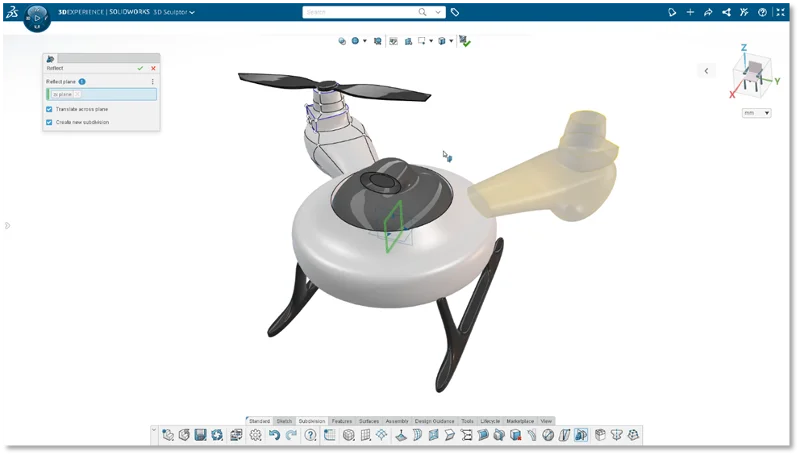
- Mirror a Subdivision body with the Reflect Command
Create a new subdivision body with the Reflect command. Easily create a mirrored instance from an existing subdivision body so that you can modify it without the changes reflecting the original body. Simply select the mirror plane and hit the Reflect command then hit the “Create new subdivision option” in that menu and a new body will be automatically created.
This is a great tool when you have two similarly shaped parts, but one has slightly different features.

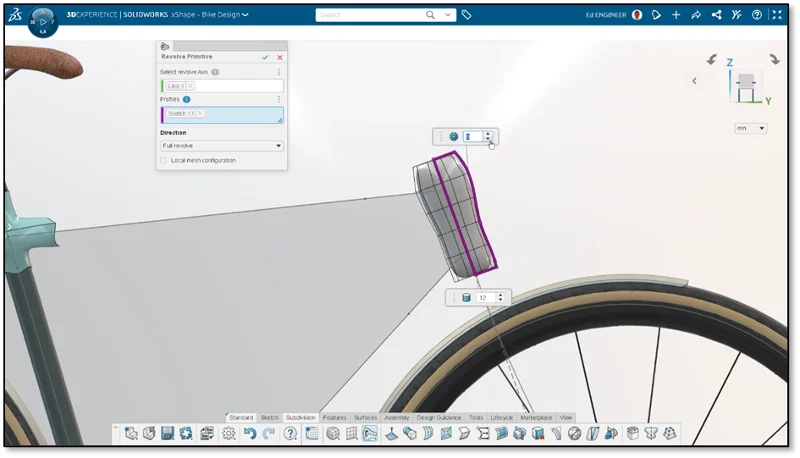
- Create a Custom Subdivision Primitive with the Extrude and Revolve Commands
Create custom and complicated subdivision primitives from a sketch with the Extrude Primitive and Revolve Primitive commands. Let’s say you have a weird shape that doesn’t reflect any of the options on the Primitive menu you can easily get closer to the shape you want by extruding or revolving it from a sketch. This means less push and pull maneuvering and faster turn out of the shape you want.
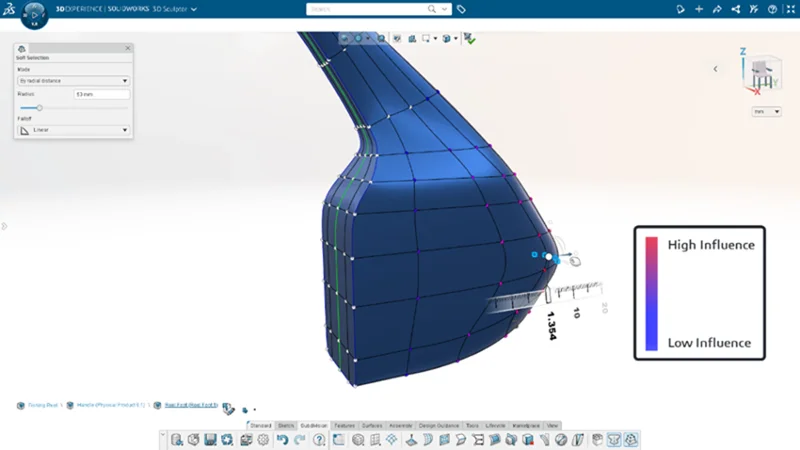
- Control How Much of Your Design is Impacted with the Soft Selection Command
Control the influence of a push-pull operation when editing a subdivision mesh. Turn up the influence to move large portions of the mesh with evenly distributed displacement. Turn down the influence to make localized changes to some entities while keeping the rest of the mesh.
This is a great tool when you want to make changes to particular parts of the design, but don’t want it to affect all of it.
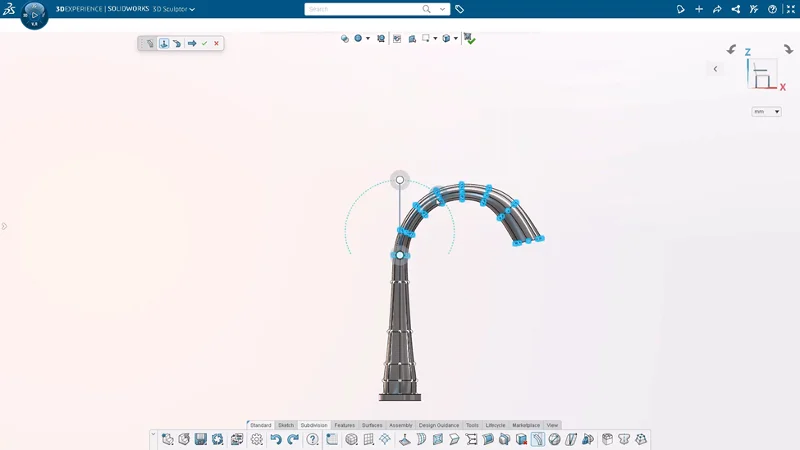
- Bend Entities with More Control with the Arc Bend Command
The Arc Bend command is all about control and accuracy. Trying to do this manually by pushing and pulling geometry would be very difficult and time consuming. Arc Bend lets you be both fast and accurate when making these types of shapes.
The Arc Bend function lets you bend the end mesh points on a subdivision object in an arc. You do this by first selecting Arc Bend from the action bar and then selecting a plane in which the bend will occur—sort of like selecting a plane for sketching.
Then select one or more points in the subdivision mesh to set up the extent for the bend. Finally, drag the arc handles to create an arc bend in the subdivision surface. The handle controls the amount of bend and the distance over which the bend acts.
That’s my top five. What are yours? If there’s a feature on your wish list, we’d like to hear about it. Submit your ideas for the Top Ten List for 3D Sculptor until January 5th here. If you’d like to learn more about 3D Sculptor and how to leverage the rest of the SOLIDWORKS Cloud Offer, join me for my session “Take Your Designs to the Cloud (and Beyond)” at 3DEXPERIENCE World in Dallas next year.
Also, if you’re ready to master subdivision modeling these xShape Master Class tutorials will help you step up your design game.
Until next year, I want to wish everyone a happy holiday! Now off to ski!!